
 by
Tom Gurney
Tom Gurney BSc (Hons) is an art history expert with over 20 years experience
Email:
tomgurney1@gmail.com
/ Phone:
+44 7429 011000
Thomas Sully’s Style and Technique: Introduction
Thomas Sully’s portrait technique combined preparation with a selective, often fluid finish. His published advice describes observing a sitter, making drawings, establishing the arrangement and developing colour across successive sessions. The apparent ease of a finished likeness could therefore rest on several distinct kinds of work. His Hints to Young Painters , prepared in 1851, revised in 1871 and published after his death in 1873, is the principal statement of that approach. [1]
The manual is most useful when read beside particular paintings. Technical examination can identify layers, alterations and support histories that a written recommendation alone cannot prove. The National Gallery of Art’s catalogue records such findings for several Sully portraits, allowing the artist’s stated methods to be compared with evidence from individual objects. [2]
At a Glance
- Main field Portrait painting, with historical and literary subjects
- Primary written source Hints to Young Painters, published 1873
- Preparation Observation, drawing, studies and the placement of the figure
- Characteristic effect Concentrated likeness within selectively developed costume and setting
- Material evidence Object-specific examination, rather than assumptions from appearance alone
- Useful comparisons Adams studies, Victoria life study, Vanderkemp background and David arm revision
Contents
- Likeness and the limits of improvement
- Planning the encounter with a sitter
- Studies that solve different problems
- The palette diagram and the working stand
- Support, ground and the first painted effect
- Glazing, scumbling and thicker highlights
- Selective finish in the Victoria study
- Changes beneath the visible surface
- Experiments, later notes and the history of treatment
- Annotated details
Likeness and the limits of improvement
Sully allowed a portrait to improve the sitter’s appearance, but he also warned that excessive refinement could defeat its purpose. In the manual he wrote, “if the refinement of a portrait is carried too far, the identity of the sitter may be lost.” The warning makes resemblance a continuing constraint on the painter’s choices. [1]
That balance helps explain why elegance and individuality should be considered together in his portraits. A long contour, carefully arranged costume or softened transition can contribute to a pleasing picture. The particular relationship of features must still identify the person. A portrait that became too general would lose something essential, however attractive its surface remained.
Sully’s notes also question the idea that one feature universally controls likeness. He records an opinion associated with Gilbert Stuart about the importance of the nose, then gives greater emphasis to the mouth in his own experience. The disagreement is instructive because it presents portrait making as a practice of judgement, rather than a rule that every face must obey. [1]
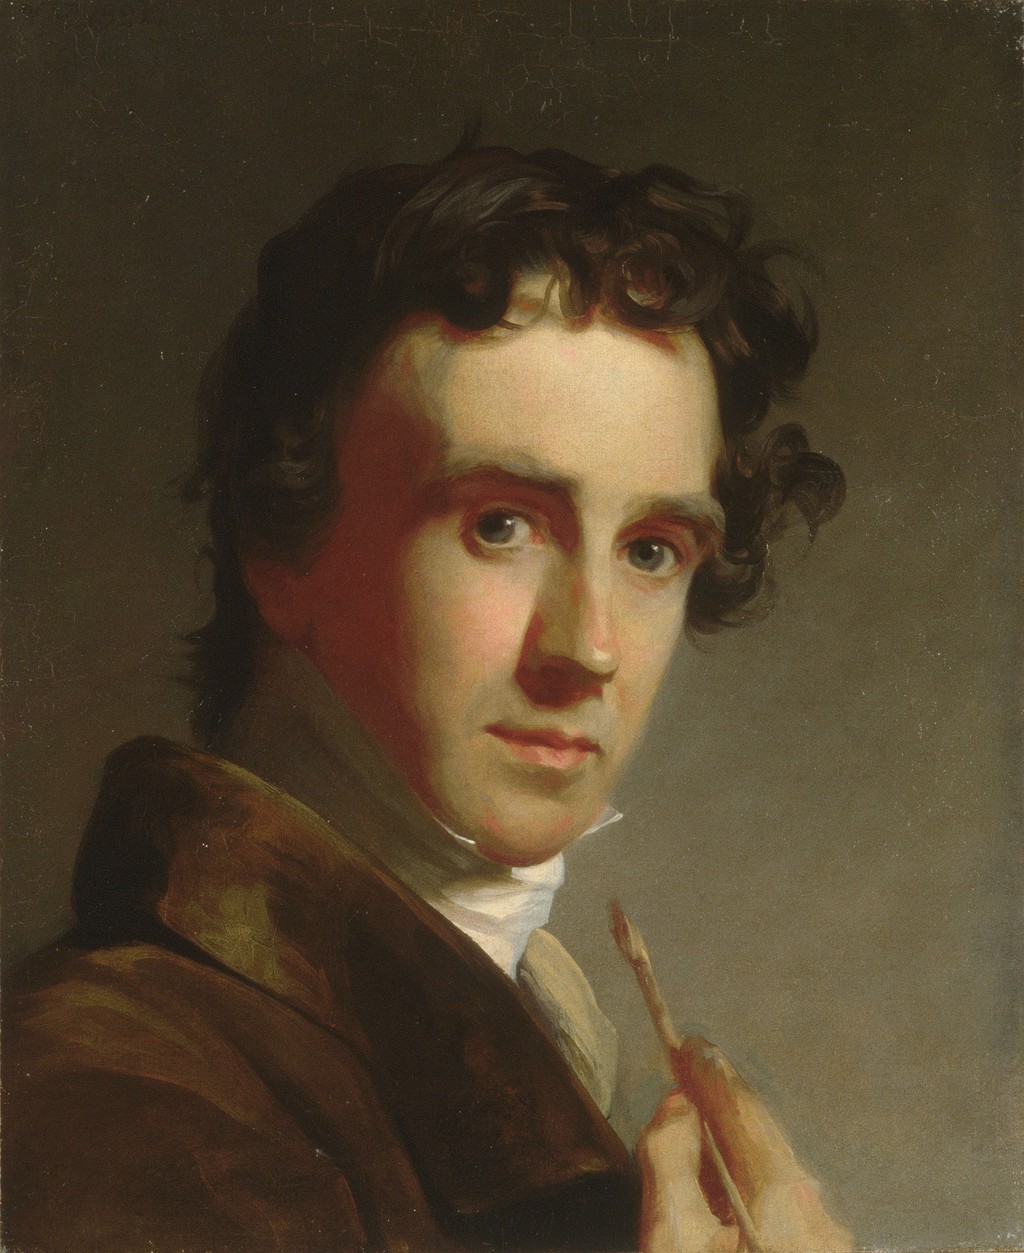
The 1821 self-portrait provides a useful place to test those priorities. Its broad coat and plain background support a relatively concentrated head. The effect depends on the relation between eyes, nose and mouth, but also on the lighting and the angle through which those features are presented.
Annotated Details from Thomas Sully’s Style and Technique
The numbered points identify visible features discussed in this article. Return from each detail to the whole composition. The captions keep each work’s identity, date and medium separate.
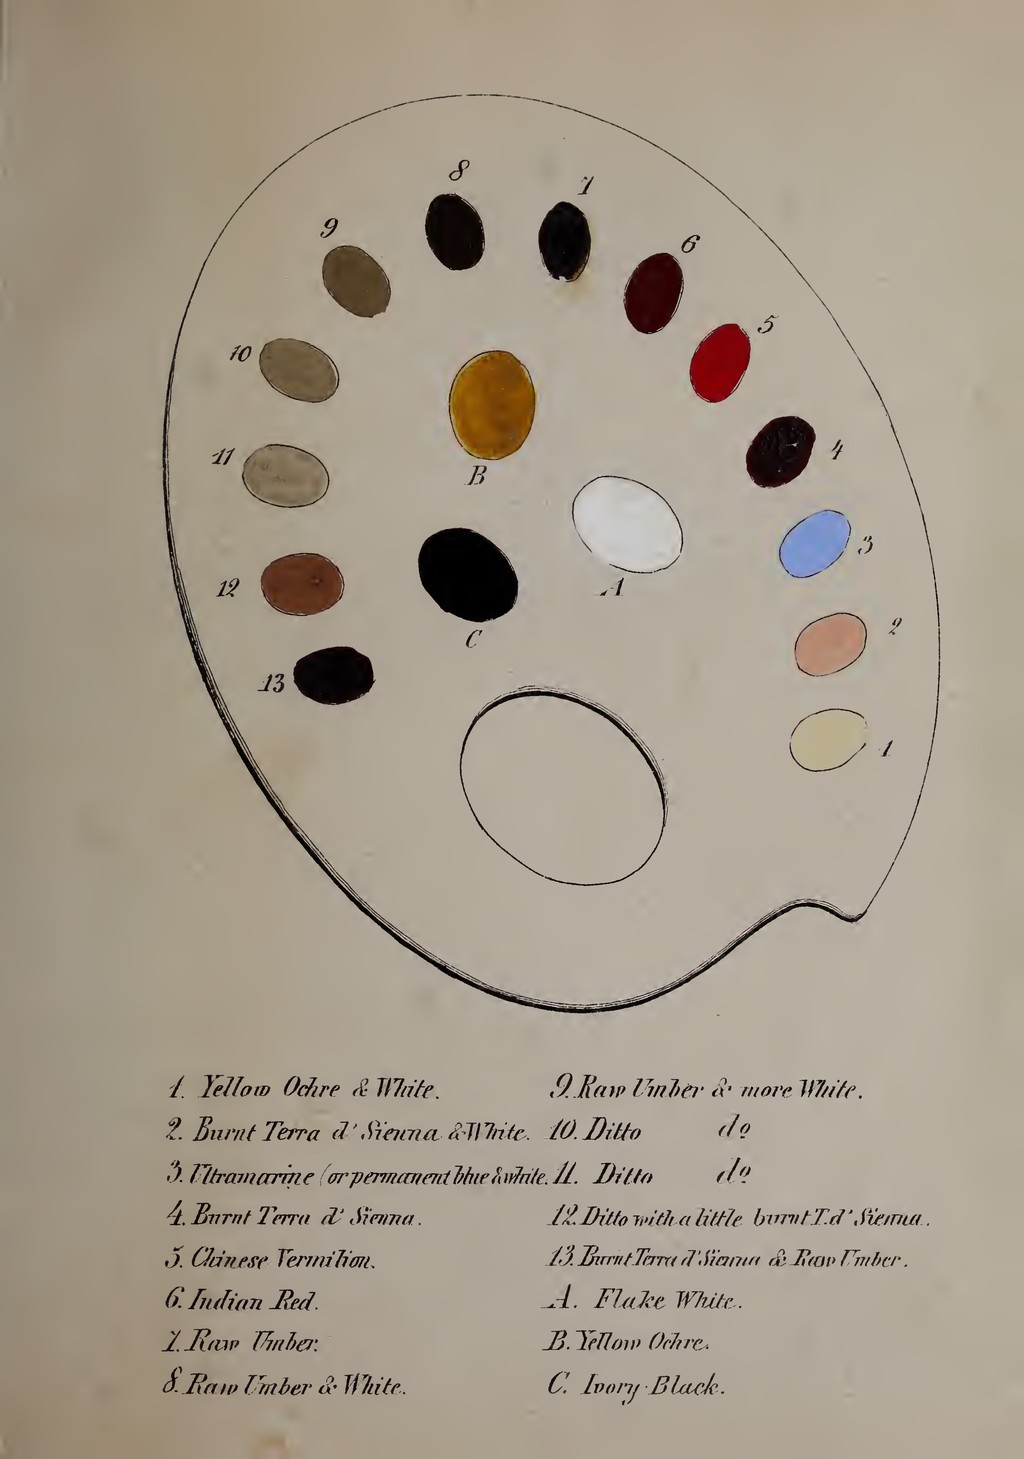
Sully Palette Illustration
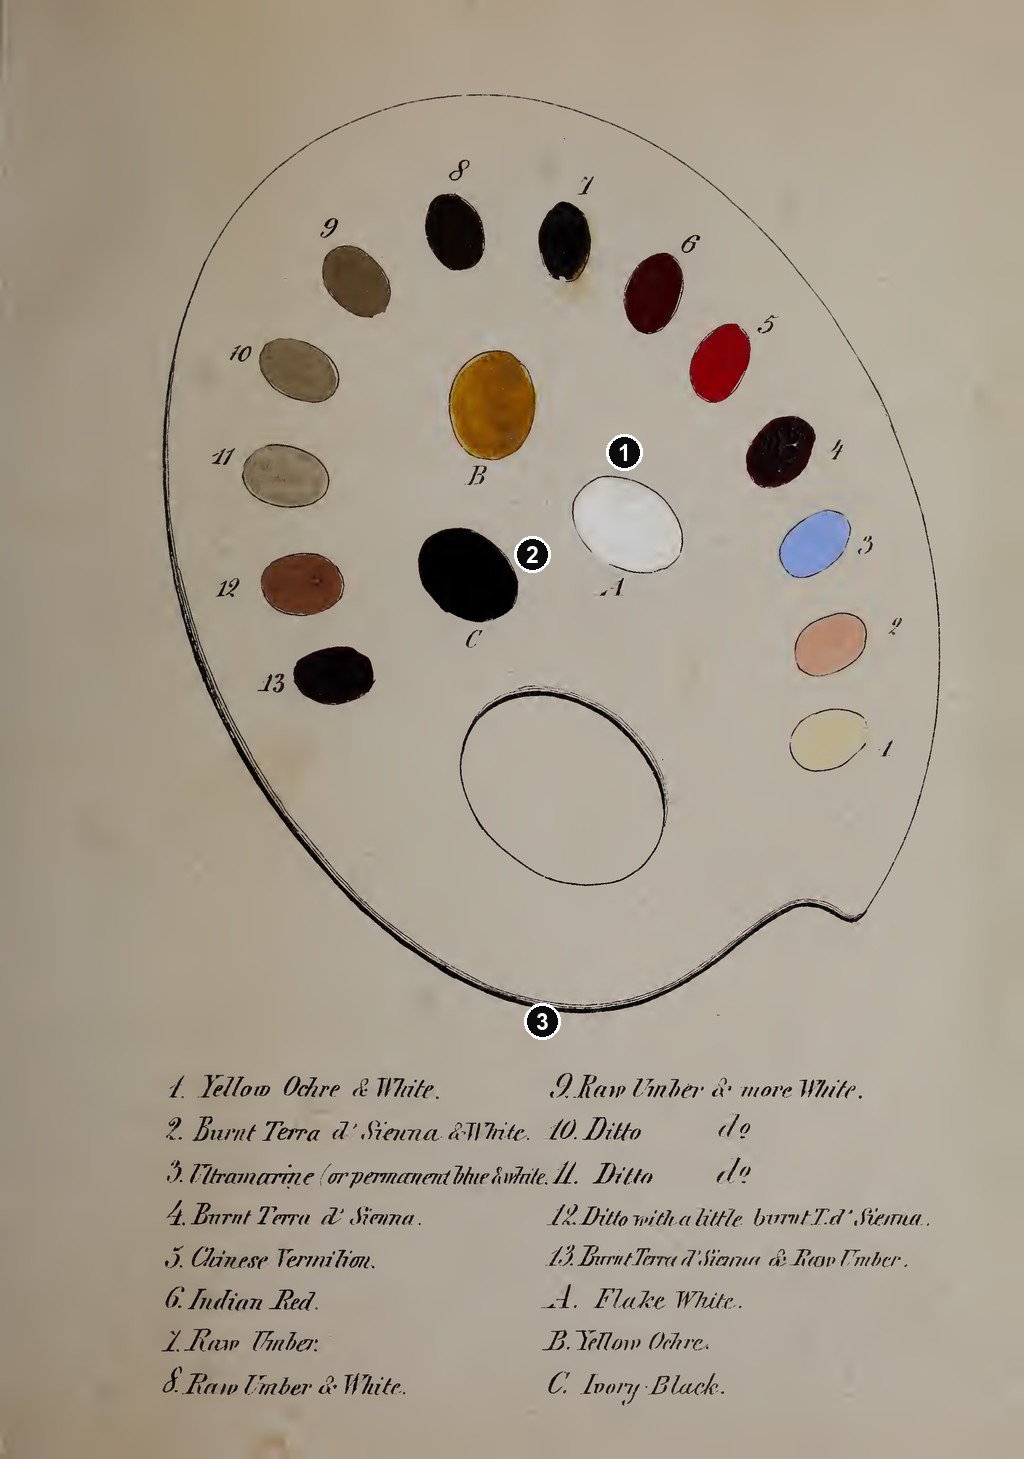
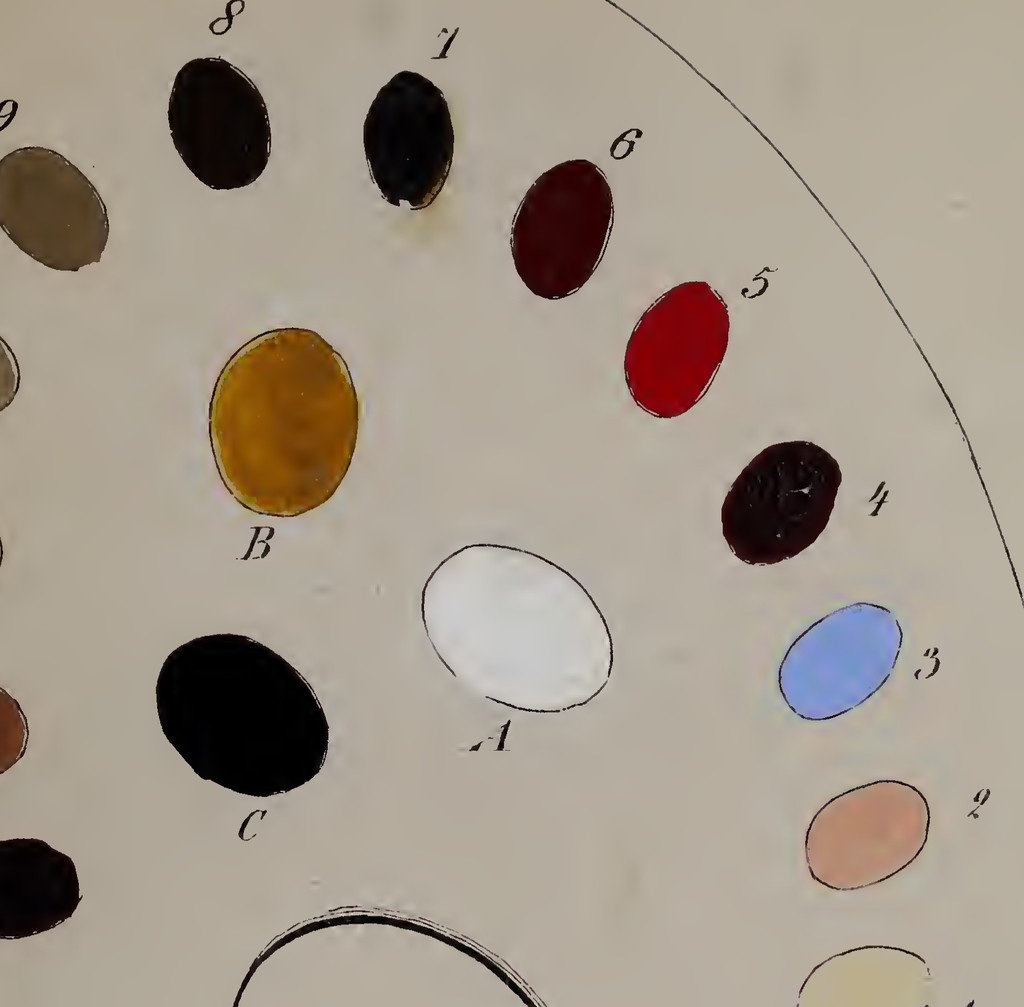
Palette diagram and colour key in Thomas Sully’s Hints to Young Painters, 1873. Faithful reproduction of the complete assembled book page; public domain. This is a published diagram, not a photograph of a surviving palette. Image source. Public domain. Numbers added to a separate overview; detail images cropped from the source. The complete unnumbered image is retained in this article.
Sully Pencil Stand Illustration
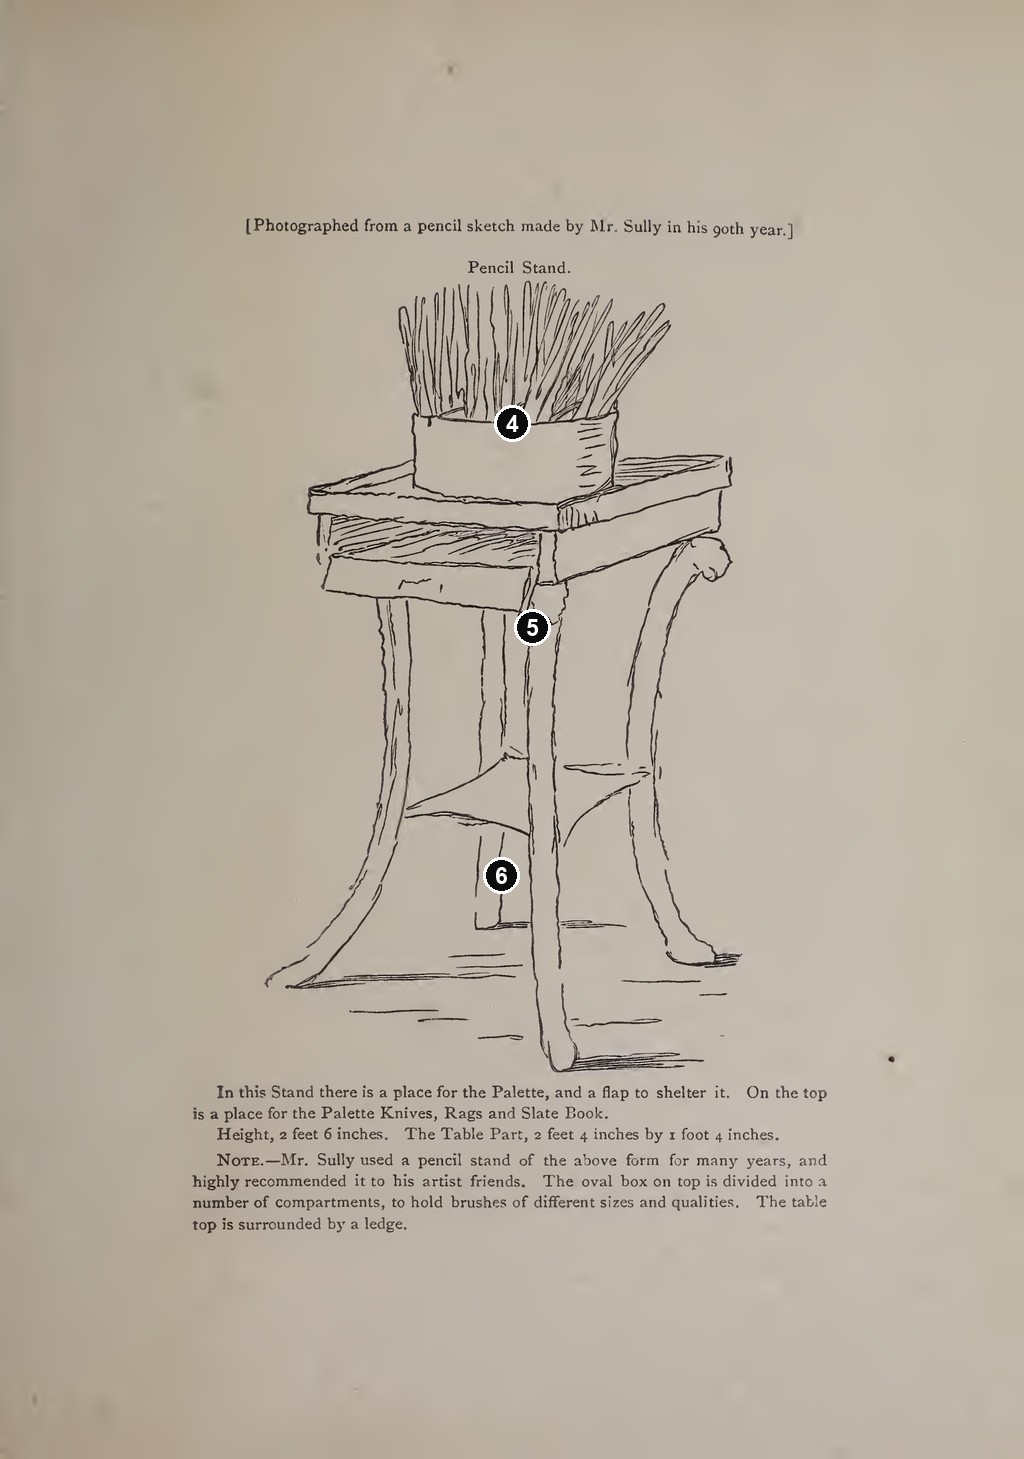
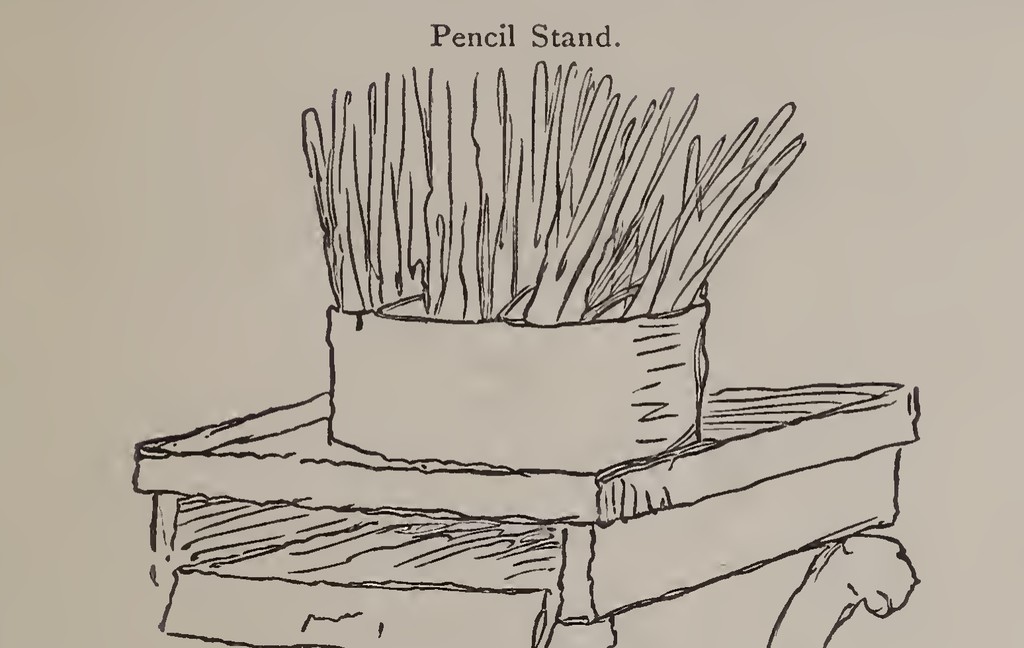
Pencil stand in Hints to Young Painters, 1873. The original caption identifies a photograph of Sully’s pencil sketch, made in his ninetieth year. Complete published page; public domain. Image source. Public domain. Numbers added to a separate overview; detail images cropped from the source. The complete unnumbered image is retained in this article.
Details from THOMAS SULLY’S STYLE AND TECHNIQUE
Compare the cropped details with the complete images above. Notice how their colours, shapes and positions contribute to the larger compositions.
Sully Palette Illustration
Numbered outer colours
Numbered patches follow the outside of the illustrated palette. The diagram presents an arrangement of colours in a printed manual; its scanned appearance is not laboratory evidence for pigments in a particular painting.
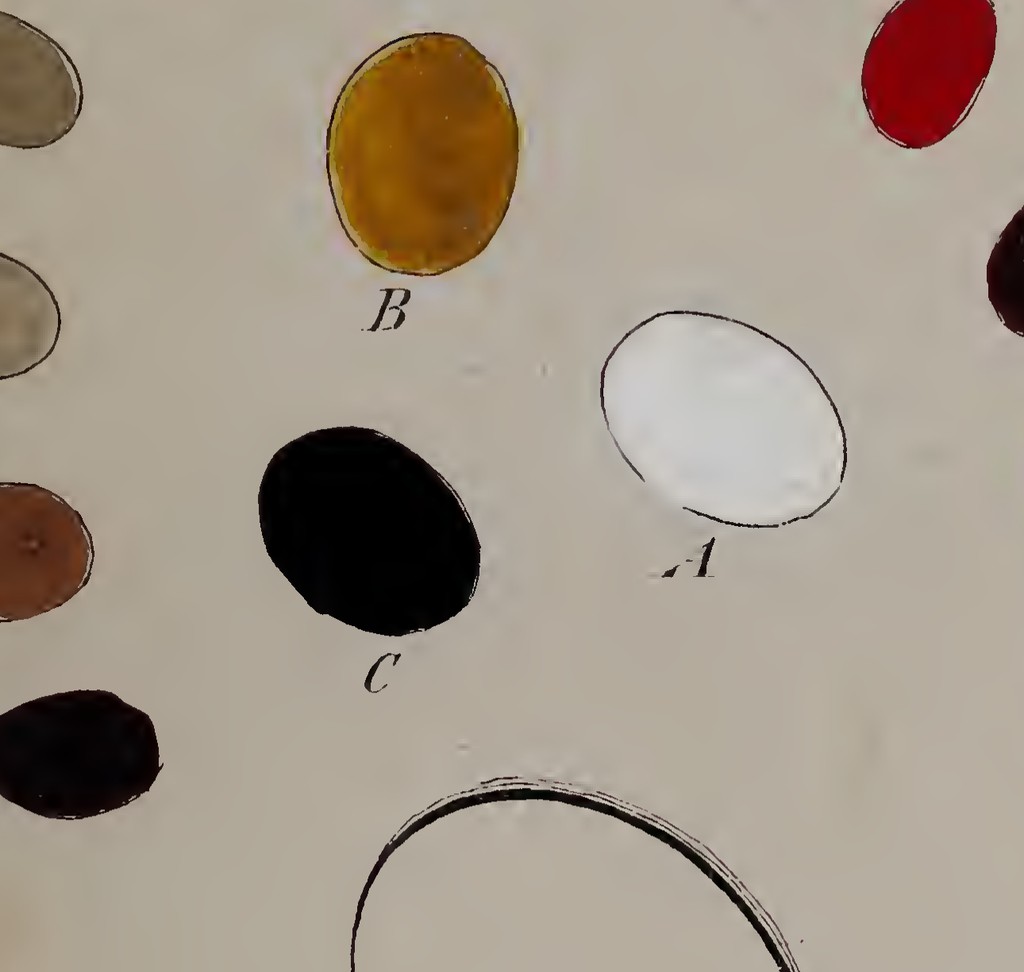
Lettered inner patches
Three larger patches carry letter labels inside the outer sequence. Their separate position makes the diagram’s organisation visible without treating these printed colours as exact matches for original paint.
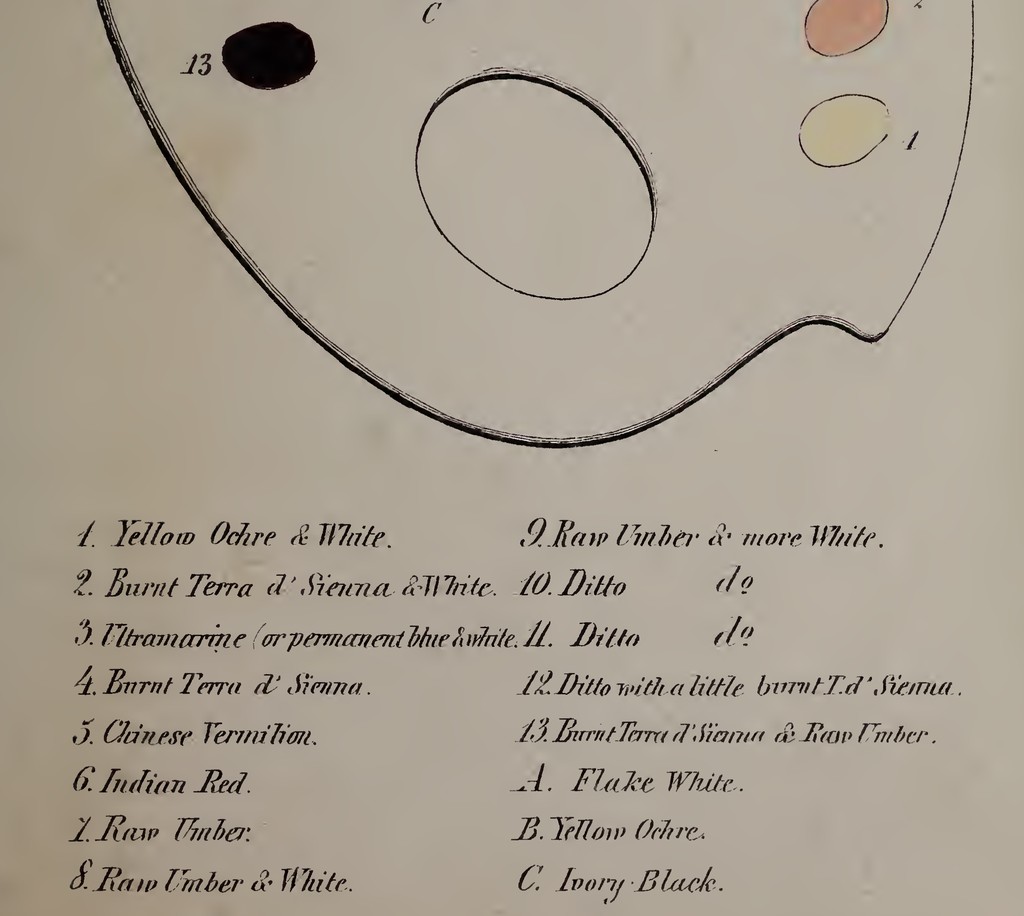
Palette and printed key
The lower outline and thumb opening sit above a two-column printed key. Read the illustration as a historical document accompanying the manual, with its paper, labels and margins retained.
Sully Pencil Stand Illustration
Brushes above the stand
The published illustration places a container of brushes on the stand. It reproduces a drawing associated with Sully, rather than documenting a surviving piece of furniture in a modern photograph.
Top and shallow shelf
The upper surface and shallow shelf are drawn as separate levels. Their clear arrangement makes the illustration useful alongside the article’s account of practical studio organisation.
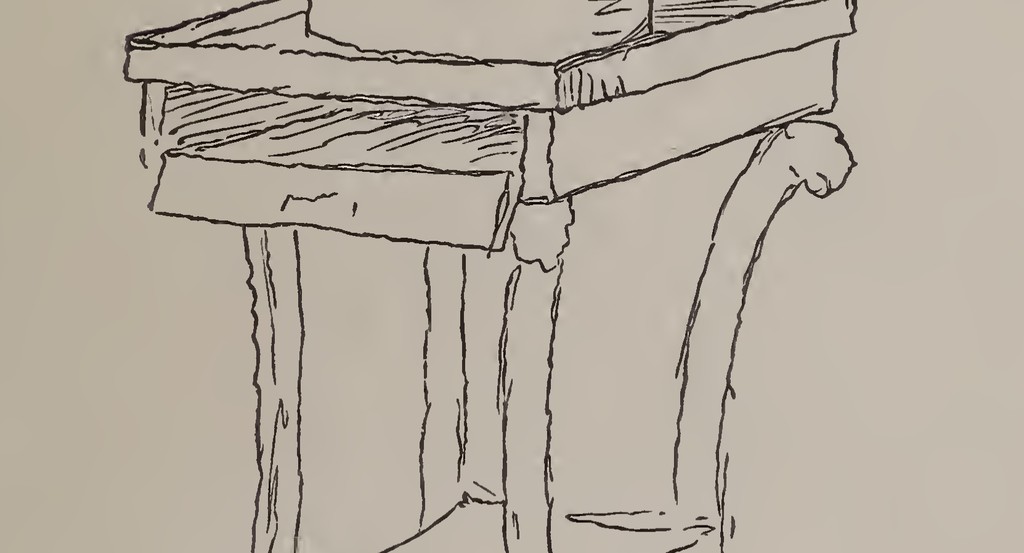
Legs and lower support
Long curved supports descend to the floor and connect through a lower brace. The sketch records the form with economical outlines and hatching rather than a measured construction plan.
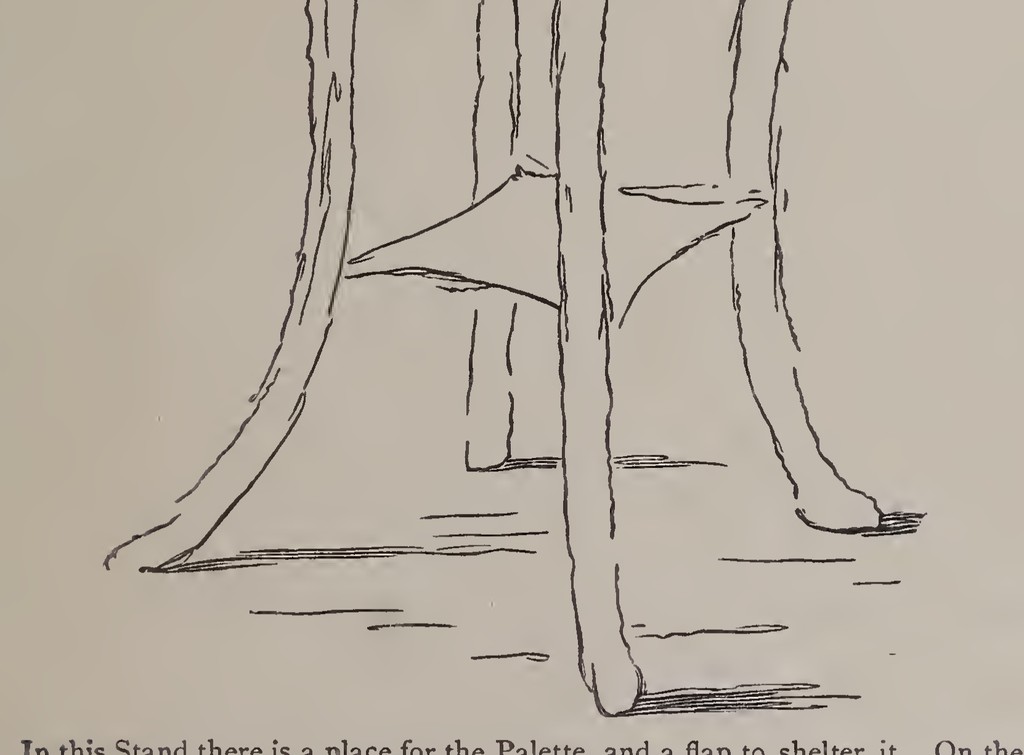
Planning the encounter with a sitter
The manual begins portrait preparation before a long painting session. Sully recommends observing the person when arrangements are first discussed, considering their manner and a suitable attitude. He then describes a short initial sitting in which paper sketches help determine the position. [1]
This gives the opening encounter a practical role. The artist must decide what kind of image is possible before committing the figure to its final place. A sitter’s head can be considered from several views; an arm or shoulder can change the overall direction. The arrangement is selected from possibilities rather than simply copied from the first available posture.
Sully next describes a more careful drawing on a grey canvas kept for that purpose, with charcoal and white chalk establishing light and shade. This preparatory canvas should not automatically be confused with the support of the final oil painting. His instructions distinguish a study from the work subsequently developed from it. [1]
He gives six sittings of two hours as his stated routine. That is evidence of his recommended working pattern, not a session count for every surviving picture. A complicated royal commission, a study or a family portrait could have a different recorded history. The dates and documents of each work remain necessary.
Studies that solve different problems
The John Quincy Adams project makes the distinction between studies especially clear. The Met’s small sheet shows a seated figure and surrounding room, with a subsidiary pose below. The NGA oil concentrates on the head and bust. A later full-length arrangement and Durand’s engraving develop that information for a more extensive public image. [3] [2]
The sheet and oil need not be ranked as weaker and stronger versions of the same task. One explores the figure in space; the other supplies a developed likeness. Their different degrees of finish make sense when their purposes are recognised.
The subsidiary sketch is particularly revealing. It preserves an alternative rather than concealing every rejected idea. Looking at the whole sheet allows the viewer to follow preparation as a sequence of choices. Cropping it down to the main seated figure would make the object seem more final than it is.
Sully’s manual likewise allows work to continue when the sitter is absent. The drawing and earlier observations can guide the establishment of the portrait’s broad effect. A finished canvas may therefore combine information gathered at different moments rather than record one uninterrupted view of the person. [1]
The palette diagram and the working stand
The 1873 book includes a numbered palette diagram, with a key to colours and prepared tints. It is a visual aid to the sequence described in the text. The diagram groups light, warm, cool and darker passages around an oval palette, while its lettering distinguishes several principal colours from the numbered mixtures. [1]
The illustration should be understood as a published explanation of an arrangement. It is not a photograph of a surviving palette, and it does not establish the exact pigments present in every Sully canvas. Its value is in showing how he organised a description of colour for another painter to follow.
A second page depicts a “Pencil Stand.” Its original caption identifies the image as photographed from a drawing made by Sully in his ninetieth year. The accompanying text describes a place for the palette, an upper surface for tools and a compartmented container for brushes. The image is consequently a reproduction of a sketch, rather than a photograph of the furniture itself. [1]
Together, the pages make the working environment more concrete. Portrait making required places to keep tools, arrange colours and preserve observations. Sully also mentions a small slate book for daily memoranda worth transferring into more permanent records. His practice included this organisational work as well as the visible application of paint.
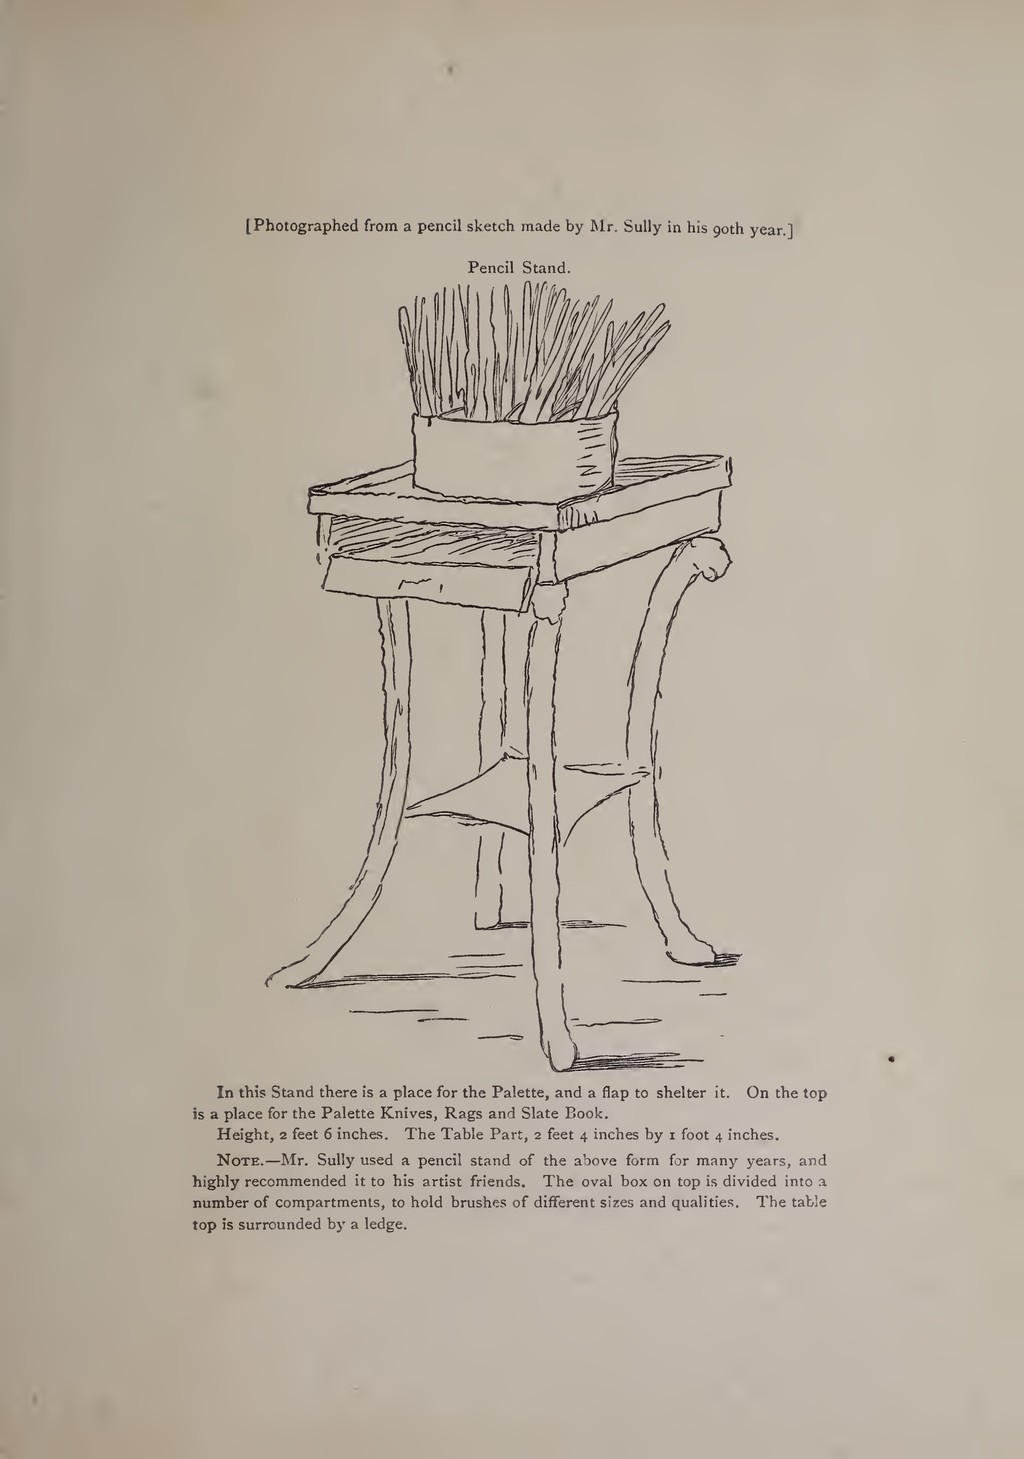
Pencil stand in Hints to Young Painters, 1873. The original caption identifies a photograph of Sully’s pencil sketch, made in his ninetieth year. Complete published page; public domain.
Image source
.
Public domain
.
Support, ground and the first painted effect
A painting’s support is the fabric or panel carrying the work; its ground prepares that surface to receive paint. A coloured preparatory layer can also help establish the overall tonality. These terms describe different parts of an object rather than interchangeable names for its background. [4]
Sully’s manual distinguishes the preliminary grey study from a first painted effect developed on the intended portrait surface. He describes establishing the arrangement broadly before correcting inaccuracies and developing the likeness in colour. The sequence gives the painter an opportunity to see how the head, costume and setting function together. [1]
The examined paintings show why the written sequence should not become a universal layer diagram. The NGA’s Adams has a white ground and coloured preparatory layers. Its Jackson has a separately recorded sequence, including a red underlayer followed by a grey one. An individual object may preserve a variation on the procedure, a reused surface or evidence of later treatment. [2]
The first broad effect also matters visually. In a small bust, an extensive setting may be unnecessary; in a full-length picture, the lower figure and surrounding room must support the head across a much larger area. Preparation establishes those relationships before every detail is equally developed.
Glazing, scumbling and thicker highlights
Glazing modifies a colour through a transparent paint layer. Scumbling uses a relatively opaque or semi-opaque application that only partly covers what lies beneath. The techniques can change the effect of an existing passage without replacing its whole structure. [4]
Sully’s notes discuss both kinds of adjustment. His stated procedure moves from establishing the likeness and principal colours toward later changes in shadows, hair and drapery. The palette remains a resource for judgement, not a guarantee that one numbered mixture will solve every part of a face. [1]
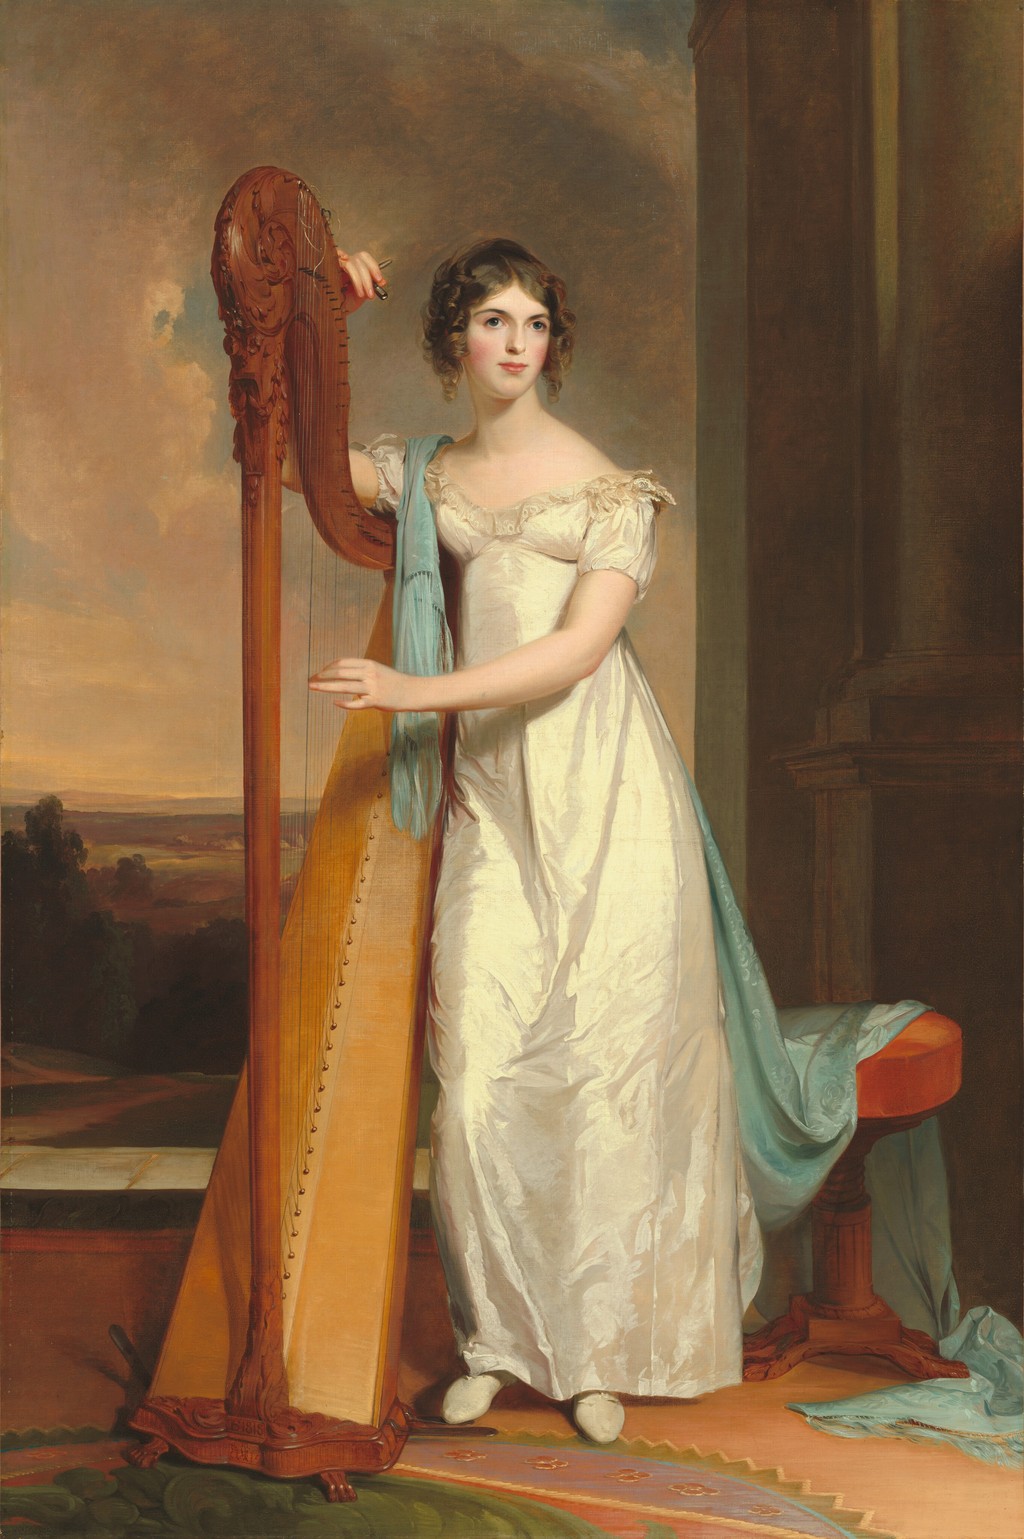
The technical account of Lady with a Harp reports a more developed figure against a more loosely painted background, with glazes in facial passages and thicker paint in some lighter areas. That provides object-specific support for discussing varied handling within one picture. [2]
The visible result is an uneven distribution of emphasis. A face, collar or satin fold can receive a concentrated light, while a landscape or dark garment is stated more broadly. This difference can make the painting appear fluent without meaning that it was produced rapidly from beginning to end.
Watch: Thomas Sully
Choose a film to explore the artist’s work, its interpretation and its wider setting.
Thomas Sully: A Lesson in Conservation
The Columbus Museum explores the conservation of a painting by Thomas Sully.
Watch on YouTubeSelective finish in the Victoria study
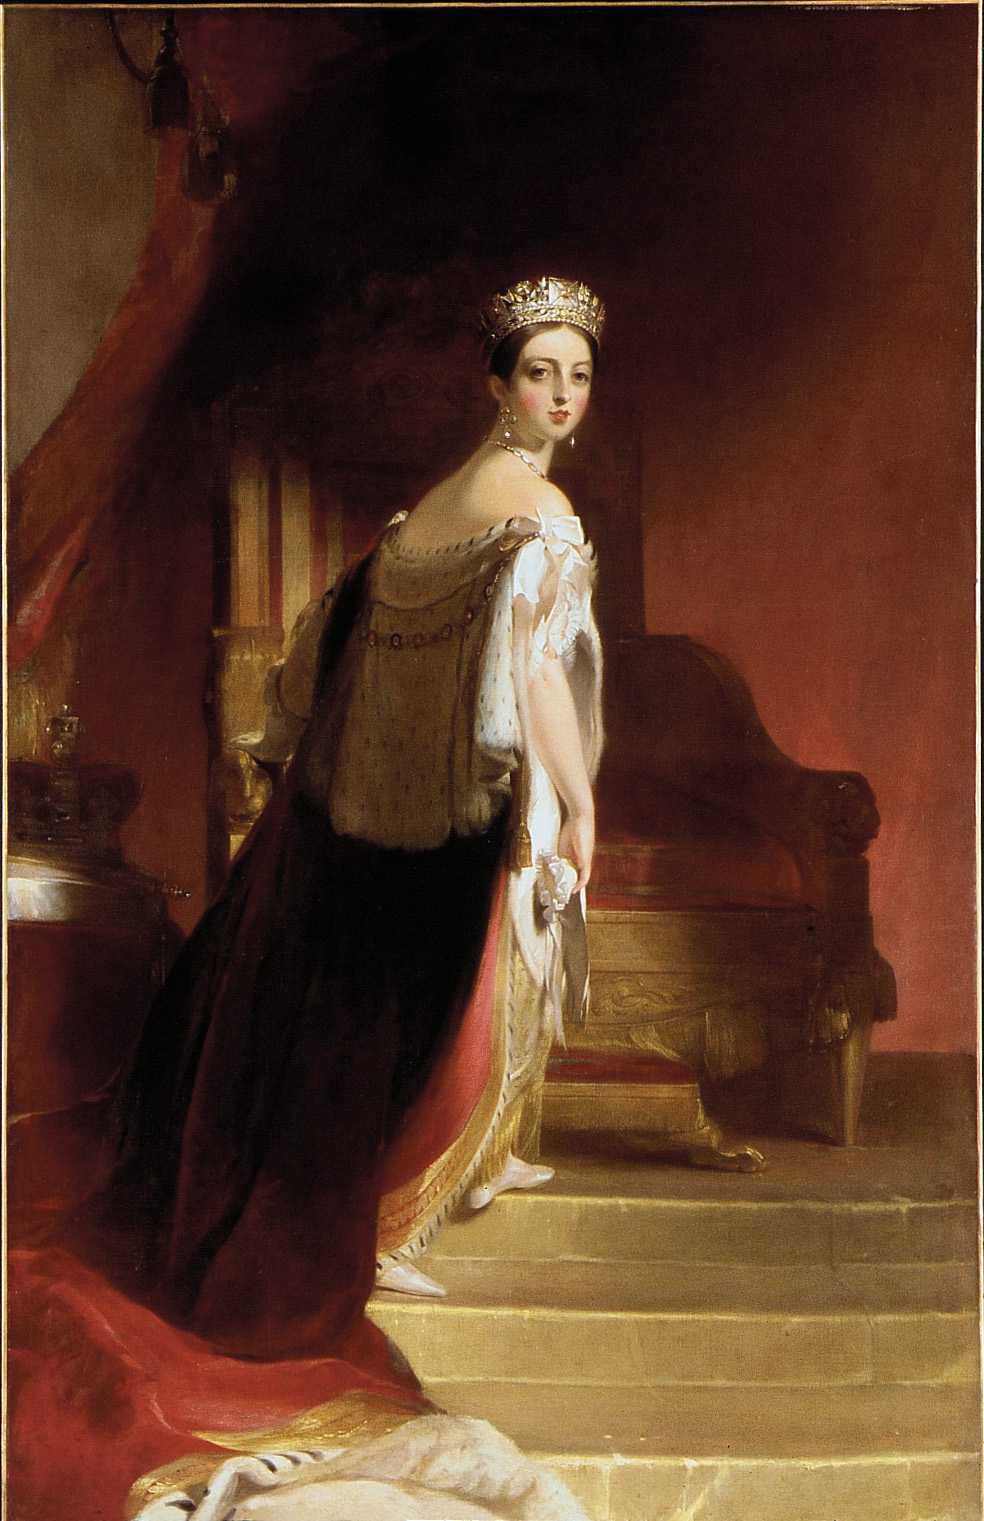
The Met’s life study of Queen Victoria develops the face and surrounding shadow more fully than the lower costume. Separate insignia studies and the dated inscription remain on the same canvas. These different kinds of information are visible together rather than resolved into one continuous finished scene. [5]
The study demonstrates the usefulness of selective finish. Sully needed a reliable likeness, but not every square inch had to perform the same task. The abbreviated lower passages could preserve an indication of costume while leaving time and attention for the head.
In the full-length portrait , the problem changed. The robe, arm and surrounding furnishings had to carry the likeness through a much larger arrangement. A successful study and a successful full-length canvas therefore demand different balances of detail. Their relationship makes preparation visible without reducing the larger work to a mechanical enlargement.
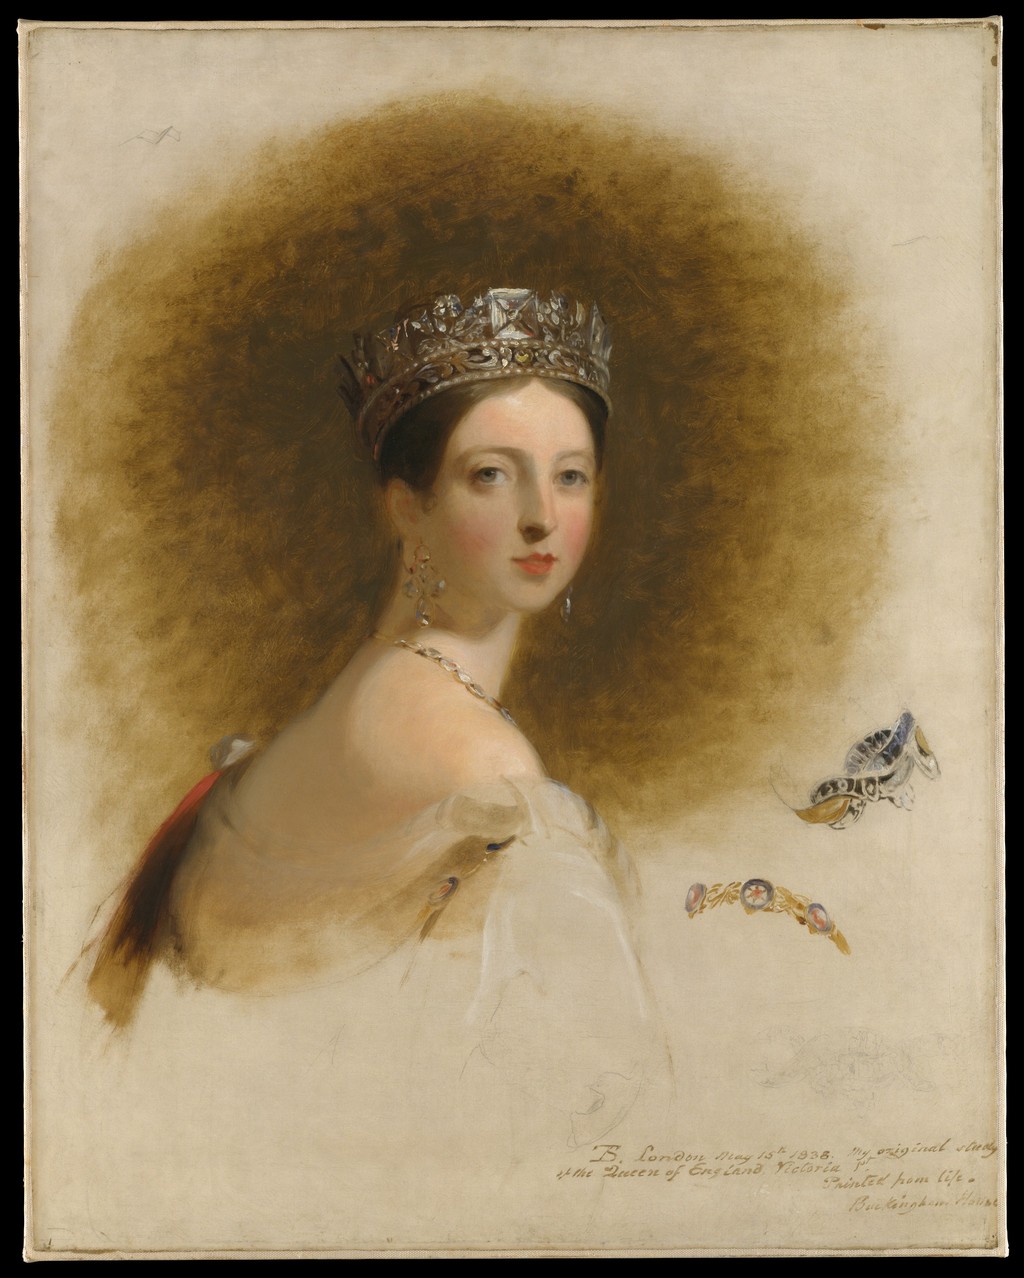
Thomas Sully, Queen Victoria, 1838, life study. Oil on canvas, 91.4 × 71.5 cm (museum display dimensions). The Metropolitan Museum of Art, Bequest of Francis T. S. Darley, 1914, 14.126.1. Public domain.
Image source
.
Public domain
.
Changes beneath the visible surface
The NGA catalogue reports an earlier exterior setting beneath The Vanderkemp Children . Infrared examination revealed trees and foliage that Sully later replaced with the more neutral background. The present simplicity was therefore reached through revision rather than assumed from the outset. [2]
In The David Children , X-radiography revealed a change to Julia’s arm. The alteration concerns the relationship of limbs within a closely connected group. It gives material evidence of the painter adjusting a compositional problem rather than merely a critic imagining that an alternative might once have existed. [2]
These methods answer different questions from ordinary photography. Infrared imaging and X-radiography can distinguish features according to the behaviour of materials at different wavelengths. A colour reproduction may show the final surface clearly while leaving the earlier arrangement invisible. [4] The reported changes should therefore be explained through the examination record, not presented as details any reader can discover by enlarging the usual image.
Experiments, later notes and the history of treatment
The manual records experiments as well as settled preferences. An editorial footnote to Sully’s discussion of a wax-containing method reports later flaking in another family picture. The comment complicates an otherwise confident description of the process and shows why a historical recommendation cannot be treated as proof of long-term success. [1]
The book also includes observations about other artists’ procedures. These passages are valuable evidence of what Sully heard, saw and considered worth recording. They are not all statements that he used the same method himself, nor are they modern analyses of the older paintings he discussed.
The surviving canvases have continued to change after their completion. Lining can add reinforcing fabric to an original canvas; inpainting can integrate areas of loss. Such interventions form part of an object’s material history and need to be distinguished from the artist’s own initial work. [4]
For this reason, a dated technical report should remain dated. Its observations may explain aspects of a picture’s construction and earlier treatment without guaranteeing that varnish, surface colour or condition remain exactly as described decades later. Looking at a reproduction and reading an examination report are complementary activities, with different practical limits.
Learning through copies and criticism
Biddle and Fielding recount Sully teaching Charles Robert Leslie by making a copy in stages while the younger painter worked alongside him. The account connects instruction with watching a procedure develop, rather than merely receiving a list of finished rules. [6]
Copying could make decisions about shadow, colour and handling more visible. It also allowed a painter to study the arrangement of a picture whose original subject or sitter was unavailable. Sully’s own work ranged from copies made for patrons to later versions developed from earlier likenesses, so repetition belonged to several parts of his practice.
His manual advises studying why an effect succeeds or fails, rather than becoming absorbed only in small particulars. That is a useful principle for looking across his paintings . The strongest question is often how the whole image is organised: where light is concentrated, how an accessory directs attention, and which parts are allowed to remain broad. [1]
The combination of those questions with object-specific evidence gives the fullest account of Sully’s technique. His writings describe priorities and procedures; his pictures show their visible effects; examination records preserve material findings that neither a polished surface nor a remembered anecdote can establish alone.
Artworks directory
A selection documented in the linked articles, with related studies and a print after Sully listed separately. Dates identify individual objects; Musidora’s date range does not imply continuous work. This is not a catalogue raisonné. The Drawing filter includes watercolour and reproductive printmaking.
| Name | Date | Medium |
|---|---|---|
| Captain Charles Stewart | 1811–1812 | Painting — oil on canvas |
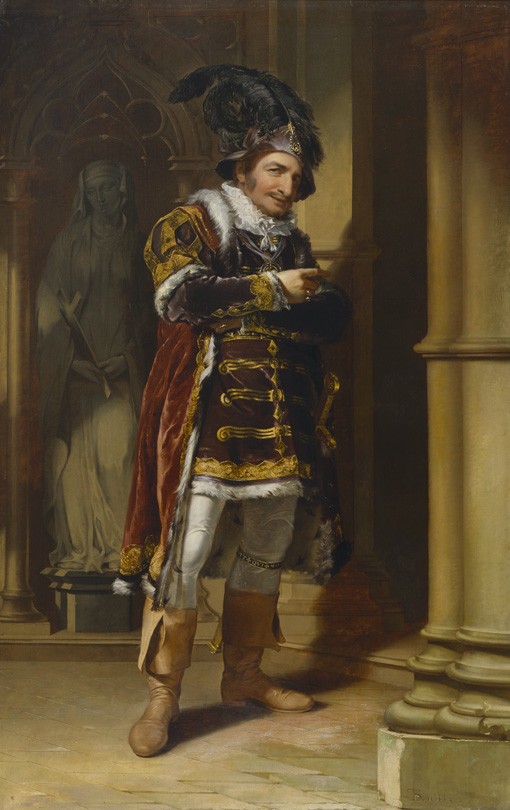
| George Frederick Cooke as Richard III | 1811–1812 | Painting — oil on canvas |
| Musidora | 1813–35; Met panel | Painting — oil on wood |
| Lady with a Harp: Eliza Ridgely | 1818 | Painting — oil on canvas |
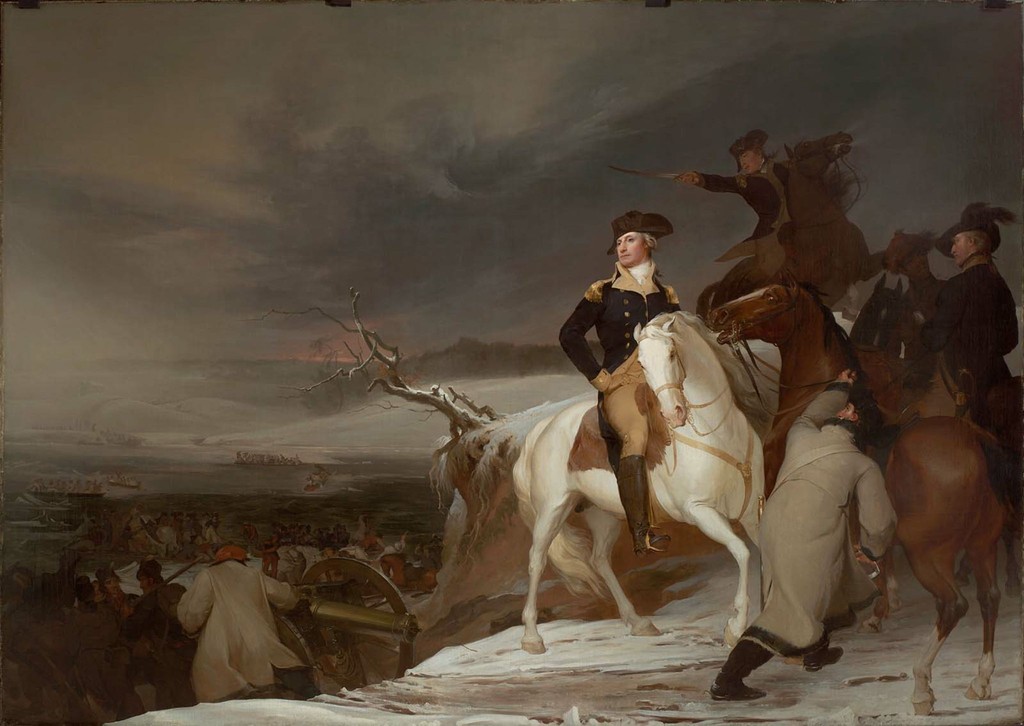
| The Passage of the Delaware | 1819 | Painting — oil on canvas |
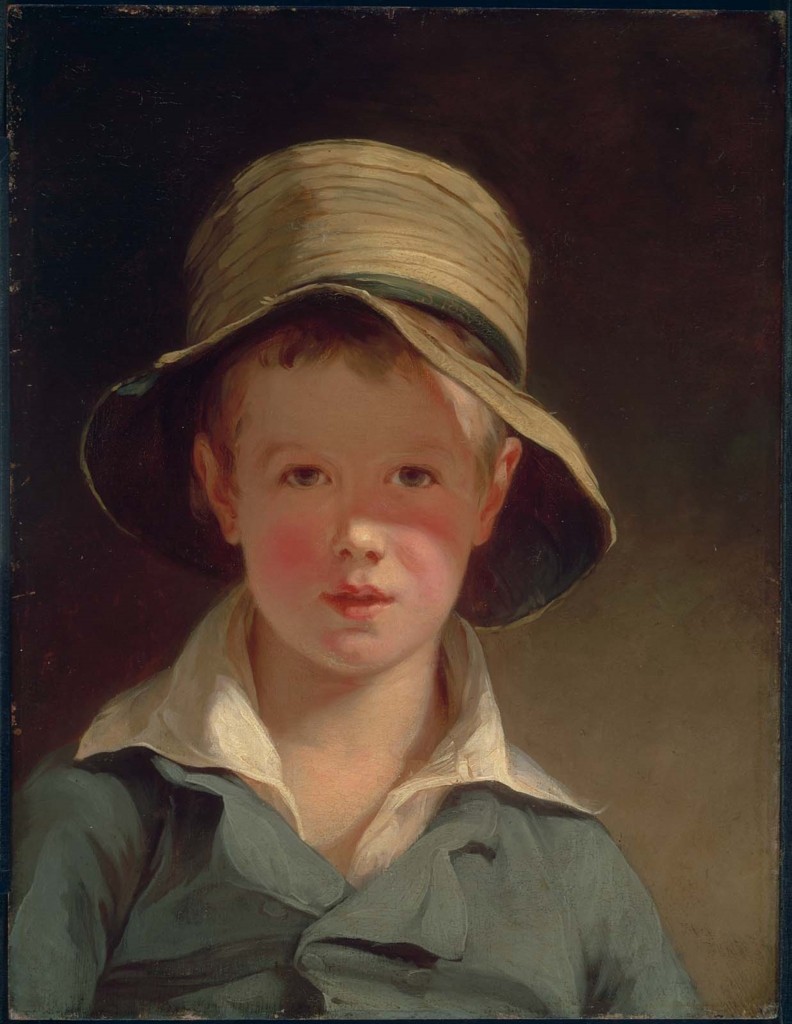
| The Torn Hat | 1820 | Painting — oil on panel |
| Portrait of the Artist | 1821; Met canvas | Painting — oil on canvas |
| John Quincy Adams | 1824; NGA oil study | Painting — oil on canvas |
| John Quincy Adams (watercolour study) | 1824; Met 38.146.1 | Drawing — watercolour, black chalk and graphite on paper |
| John Quincy Adams (Durand after Sully) | 1826; PAFA 1876.9.184a | Drawing — etching and engraving on paper |
| The David Children | 1826 | Painting — oil on canvas |
| The Vanderkemp Children | 1832 | Painting — oil on canvas |
| Queen Victoria | 1838; full-length Met canvas | Painting — oil on canvas |
| Queen Victoria (life study) | 1838; Met 14.126.1 | Painting — oil on canvas |
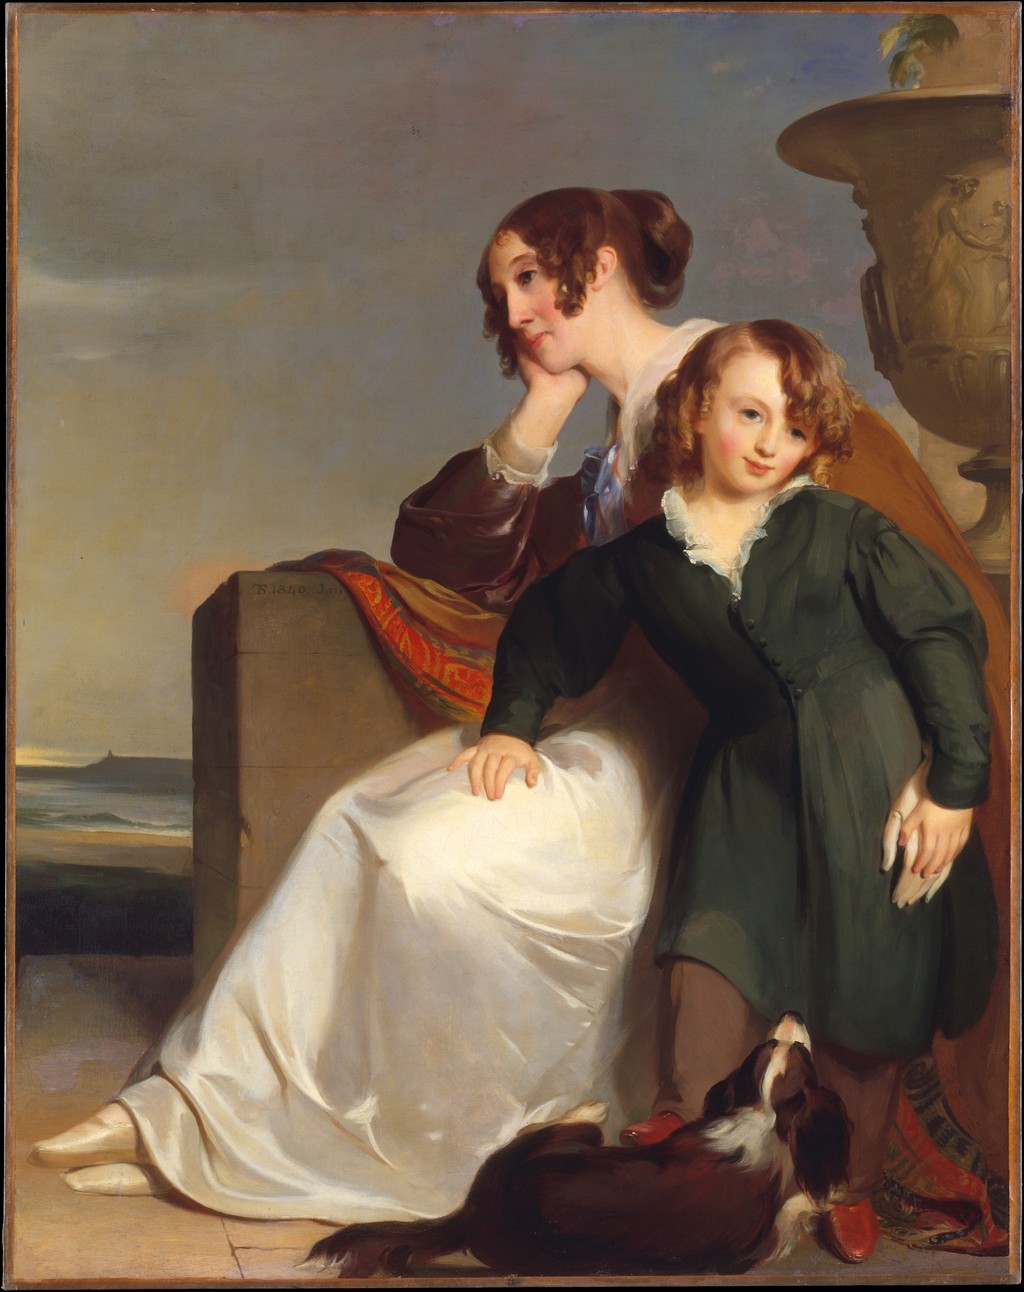
| Mother and Son | 1840; inscription date | Painting — oil on canvas |
| The Coleman Sisters | 1844 | Painting — oil on canvas |
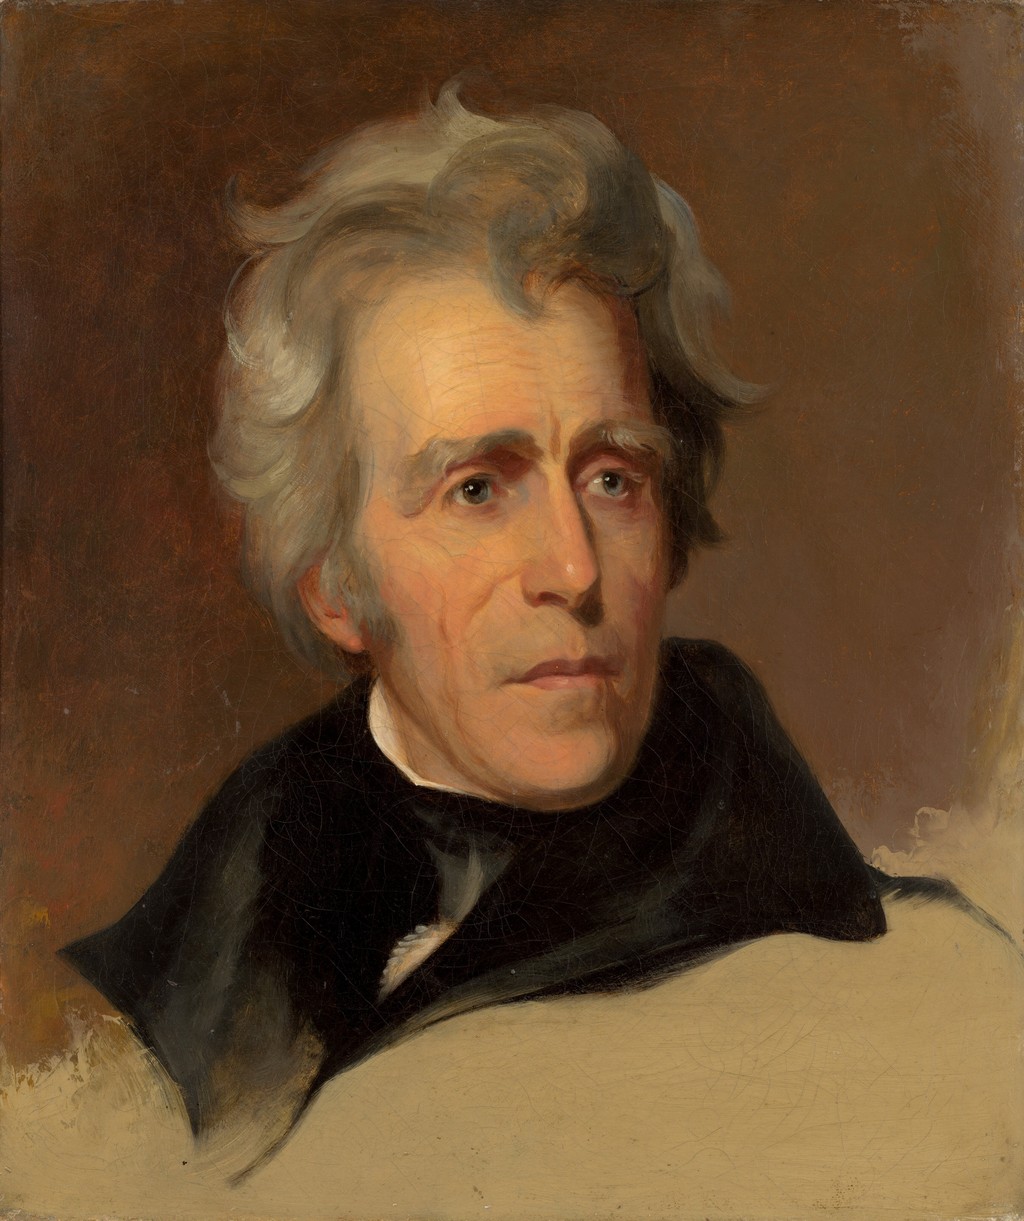
| Andrew Jackson | 1845; after the 1824 life portrait | Painting — oil on canvas |
Frequently Asked Questions
Hints to Young Painters and the Process of Portrait-Painting, prepared in 1851, revised in 1871 and published in 1873 after his death. [1]
The manual gives that as Sully’s stated routine. It is not a session record for every individual painting. [1]
The image reproduced here is a diagram in the published manual. It does not document a surviving physical palette. [1]
A photograph can suggest an effect, but work-specific examination provides stronger evidence about the paint structure. The NGA catalogue records such findings for particular Sully paintings. [2]
Discussion
Look again at the images and ideas explored in Thomas Sully’s Style and Technique. These editorial prompts invite your observations.
Reader Insights
Compare the developed head and open lower passages in the Victoria study. Which tasks required the greatest concentration of detail?
Follow a bright collar, hand or dress fold into the broader surrounding paint. How does the change of finish direct attention?
What does the revised Vanderkemp background add to your understanding of the apparently simple finished arrangement?
Join the Conversation
Share a detail, comparison or question about Thomas Sully’s Style and Technique below.
References
- Thomas Sully: Hints to Young Painters and the Process of Portrait-Painting , 1873, selected instructions, illustrations and notes. View source
- National Gallery of Art: American Paintings of the Nineteenth Century , Part II, 1998, selected Sully technical entries. View source
- The Metropolitan Museum of Art: John Quincy Adams , 1824, 38.146.1. View source
- National Gallery of Art: Technical Glossary . View source
- The Metropolitan Museum of Art: Queen Victoria , 1838, life study, 14.126.1. View source
- Edward Biddle and Mantle Fielding: The Life and Works of Thomas Sully , 1921, chapter IV, pp. 26–27. View source
- Splash image source.
Palette diagram and colour key in Thomas Sully’s Hints to Young Painters, 1873. Faithful reproduction of the complete assembled book page; public domain. This is a published diagram, not a photograph of a surviving palette. Public domain .
View source