



Draw one complete butterfly
Draw a complete butterfly from above in eight permanent line stages. You will place the body, balance two different wing pairs, add a small vein structure and finish with open spots and a few directional hatches. The result is a clear pencil drawing with four believable wing attachments and enough natural variation to avoid a rigid mirrored symbol.
Difficulty: Beginner; balancing the two sides is the main challenge
Time: Allow about 40–55 minutes. This is an untested estimate, so pause whenever you need to compare two wing landmarks.
Medium: HB or No. 2 pencil, with sparse line hatching at the finish
This is a generic open-wing butterfly rather than a named species. The wider thorax is the useful centre of the drawing: the two forewings attach high on it, the two hindwings attach lower and the long abdomen continues beneath it. Butterfly Conservation describes the same head, thorax and abdomen arrangement and confirms that both wing pairs attach to the thorax.[1]
The drawing is not meant to be perfectly symmetrical. The viewer-right forewing reaches a little higher, the lower wings differ in fullness and the spot groups do not match exactly. Compare the two sides by height and reach, but let small differences remain.
Every line shown in the stage images stays in the final butterfly. There is no hidden centreline, folded-paper trick, tracing pass or scheduled cleanup. If a new curve misses its target, replace that local curve while the earlier structure remains untouched.
Materials
- A pointed HB or No. 2 pencil. A mechanical pencil with 0.5 or 0.7 mm lead also works.
- Smooth unlined white or warm-white paper in portrait orientation. Printer paper is suitable for practice.
- A clean eraser for replacing only the newest misplaced curve.
- A sharpener if you are using a wooden pencil.
- Optional: a ruler or straight scrap-paper edge for comparing the heights and reaches of paired wing tips. Use it as a measuring aid, not to draw a rigid box.
You do not need tracing paper, coloured pencils, ink, a blending stump, specialist graphite, a tablet or paint.
Before you draw
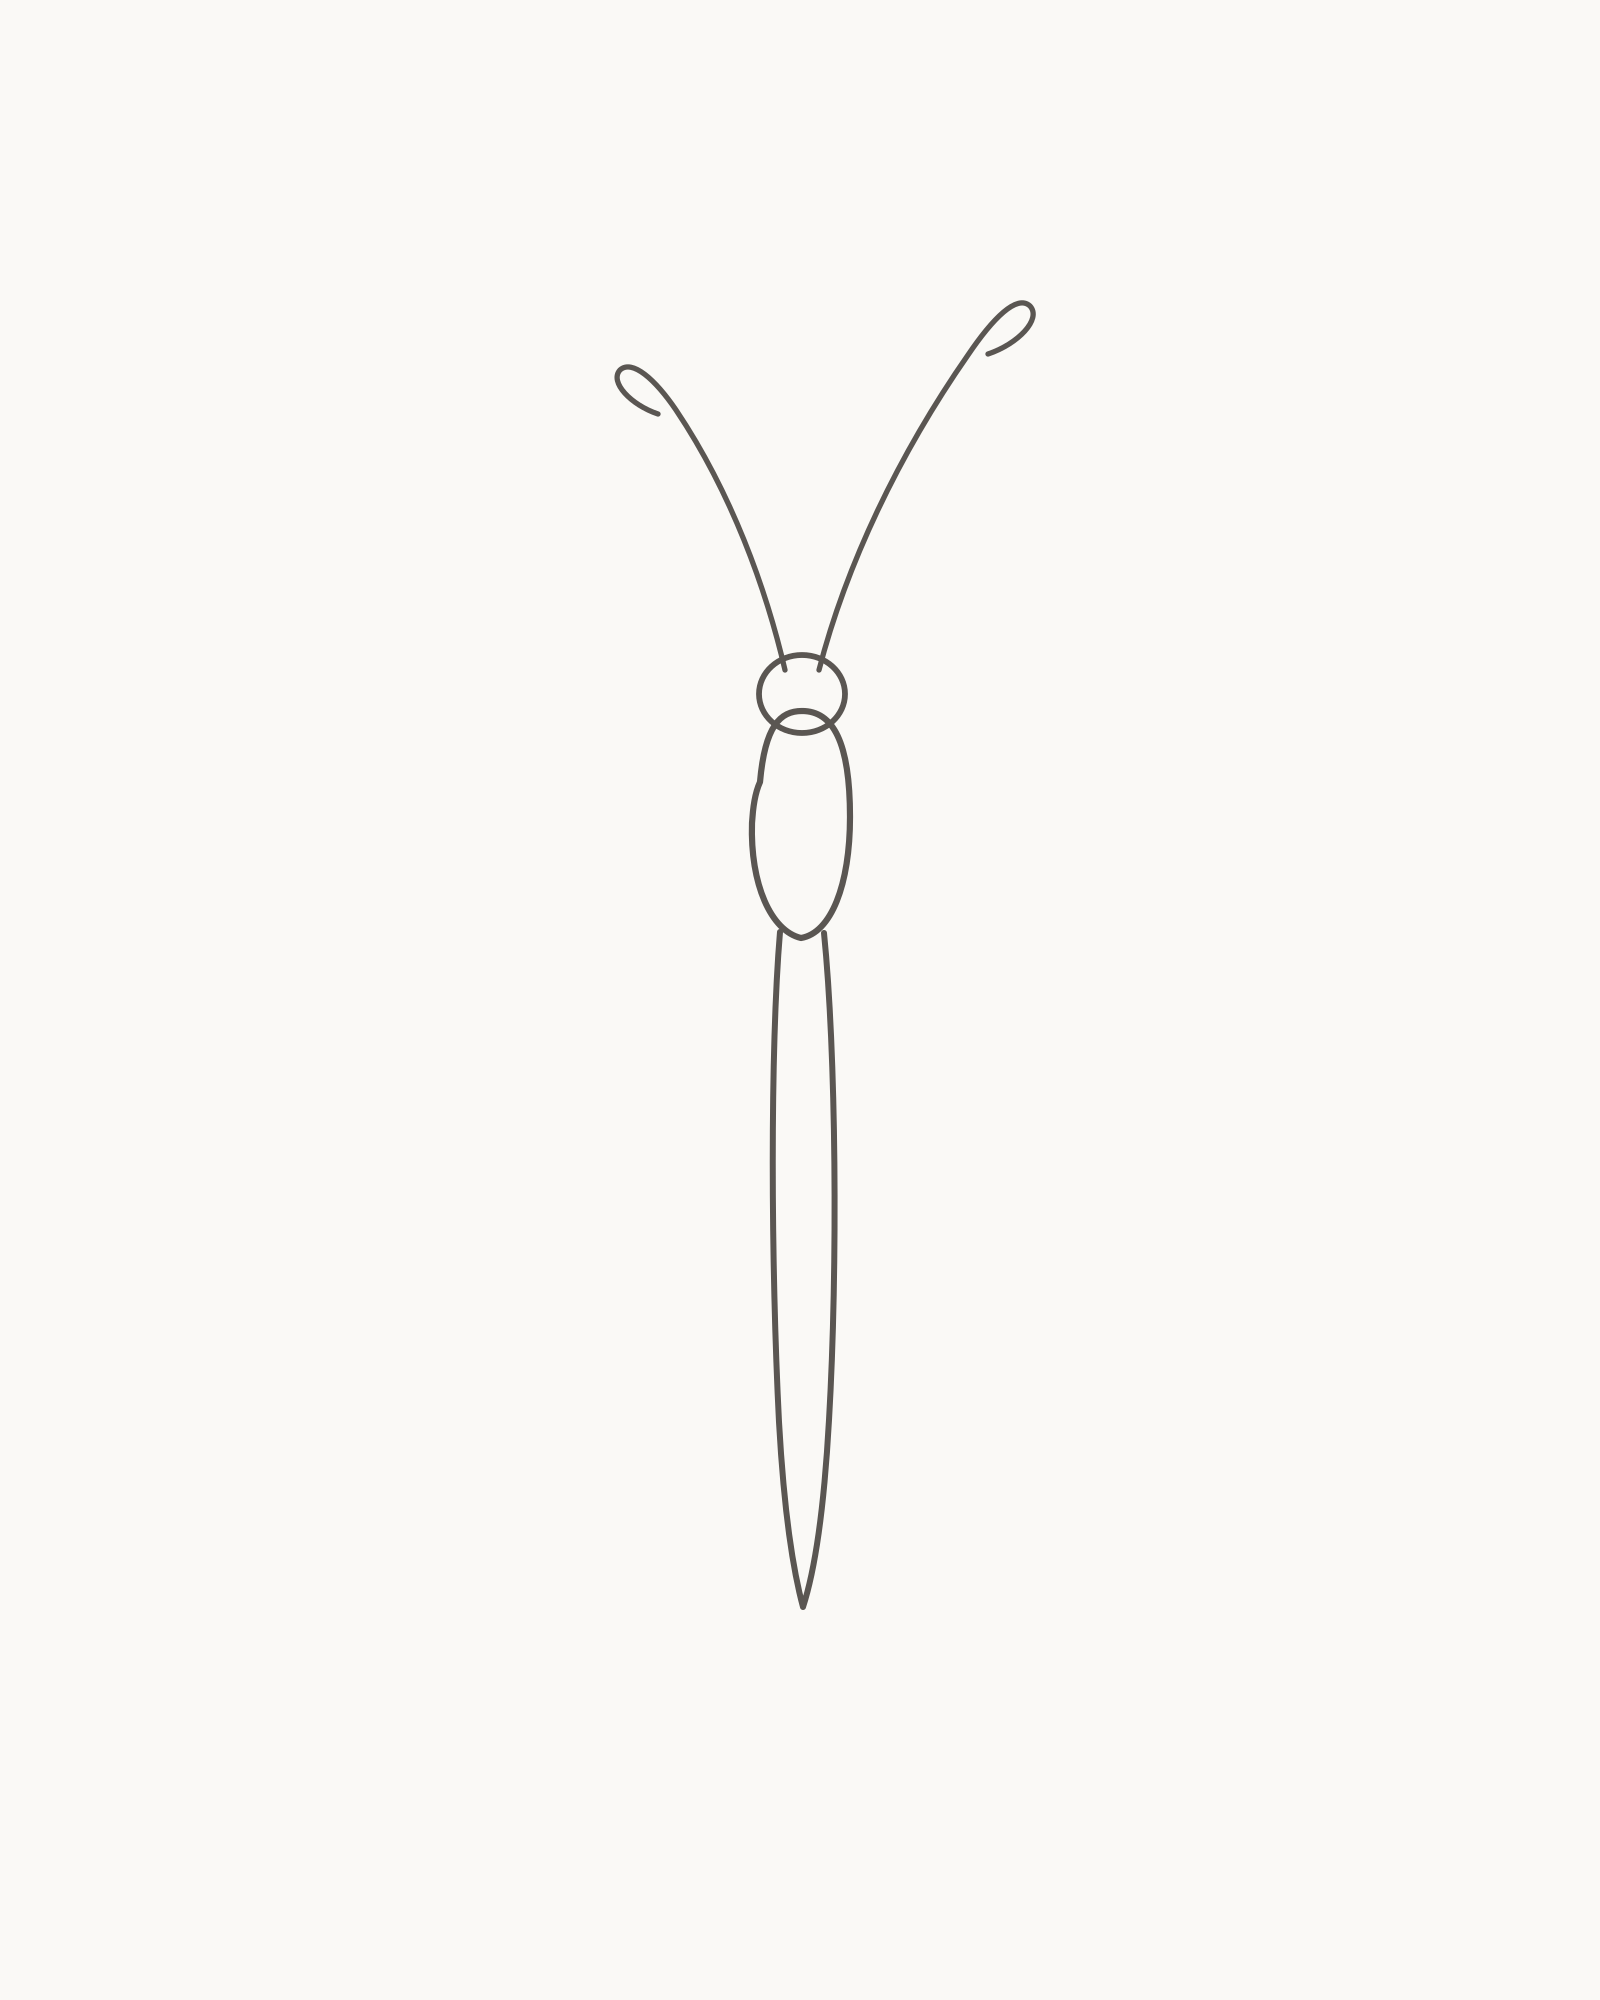
Imagine a 4:5 portrait frame on the page. The butterfly will be wide, so leave generous air at both side edges as well as above the antennae and below the abdomen. Place the thorax at roughly half the page width and 39% of its height. The separate Stage 1 cue marks that central hub; it is outside the drawing and never needs to be copied or erased.
The optional on-page grid can help you compare the left and right wing tips. Check two things separately: which tip is higher, then which tip reaches farther sideways. Do not finish one wing and trace it to make the other. The finished drawing needs shared landmarks, not a perfect mirror.
Keep the body and outer silhouette clear but restrained. Veins, inset bands, spots and body divisions are finer. The light direction is fixed from the upper left, although it becomes visible only in the eight short hatches added at the end.
1. Place the body and antennae
Stage 1 of 8. The permanent body fixes the attachment hub and vertical axis. 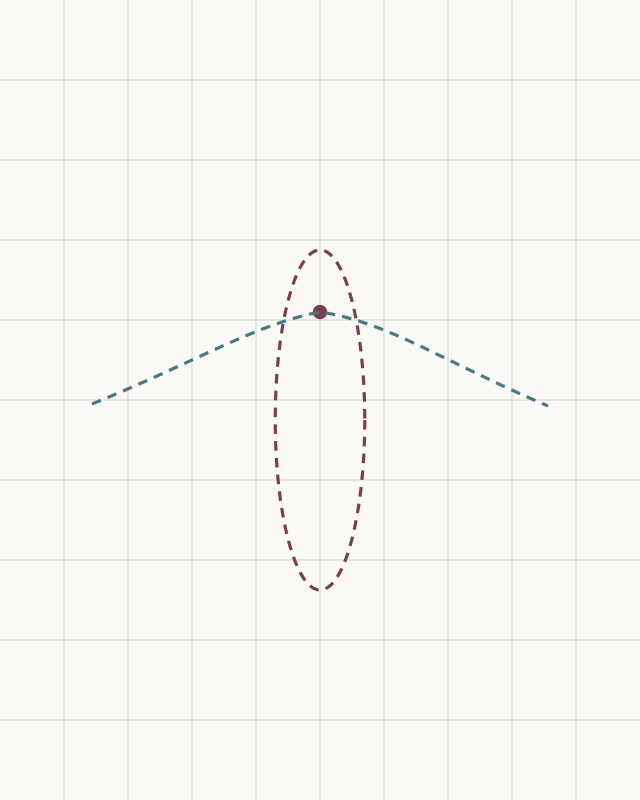
Placement cue: locate the thorax near x50% and y39%. Reserve wide space on both sides for the forewings and rounder lower corridors for the hindwings. Leave every cue mark off the drawing. - Small head
- Wider thorax
- Tapered abdomen
- Shorter left antenna
- Longer right antenna
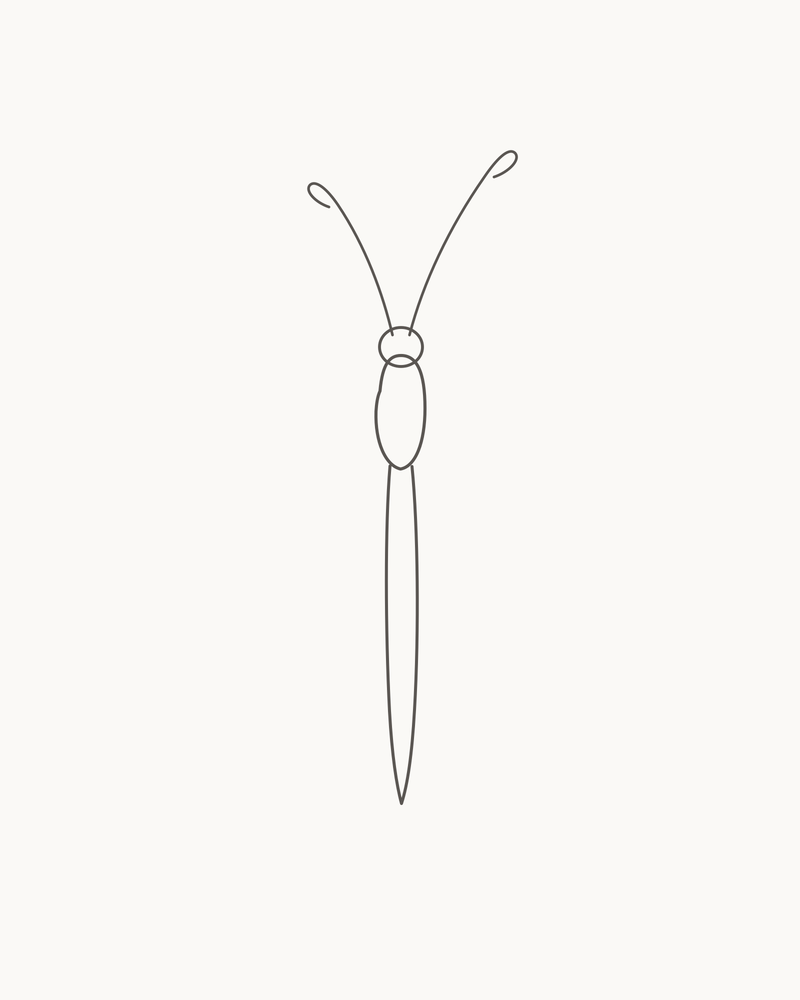
Use the placement cue to find the thorax at x50% and y39% of the drawing area. Begin with the small rounded head. Directly below it, draw the wider oval thorax, then continue into the long abdomen. Let the abdomen narrow gradually to a pointed lower end rather than finishing as a second oval.
Add the antennae from the head. Curve the viewer-left antenna out sooner and keep it shorter. Let the viewer-right antenna rise higher before it bends. Finish each one with a small open club tip; do not fill the tips.
Look for this before moving on: the head, thorax and abdomen are three countable masses; the thorax is widest; the abdomen narrows continuously; both antennae begin at the head; and the right antenna is visibly longer.
If it goes wrong: keep the sound body mass or antenna. Replace only the newest outline interval relative to the fixed thorax hub; do not widen the abdomen to absorb a misplaced curve.
2. Add the forewing pair
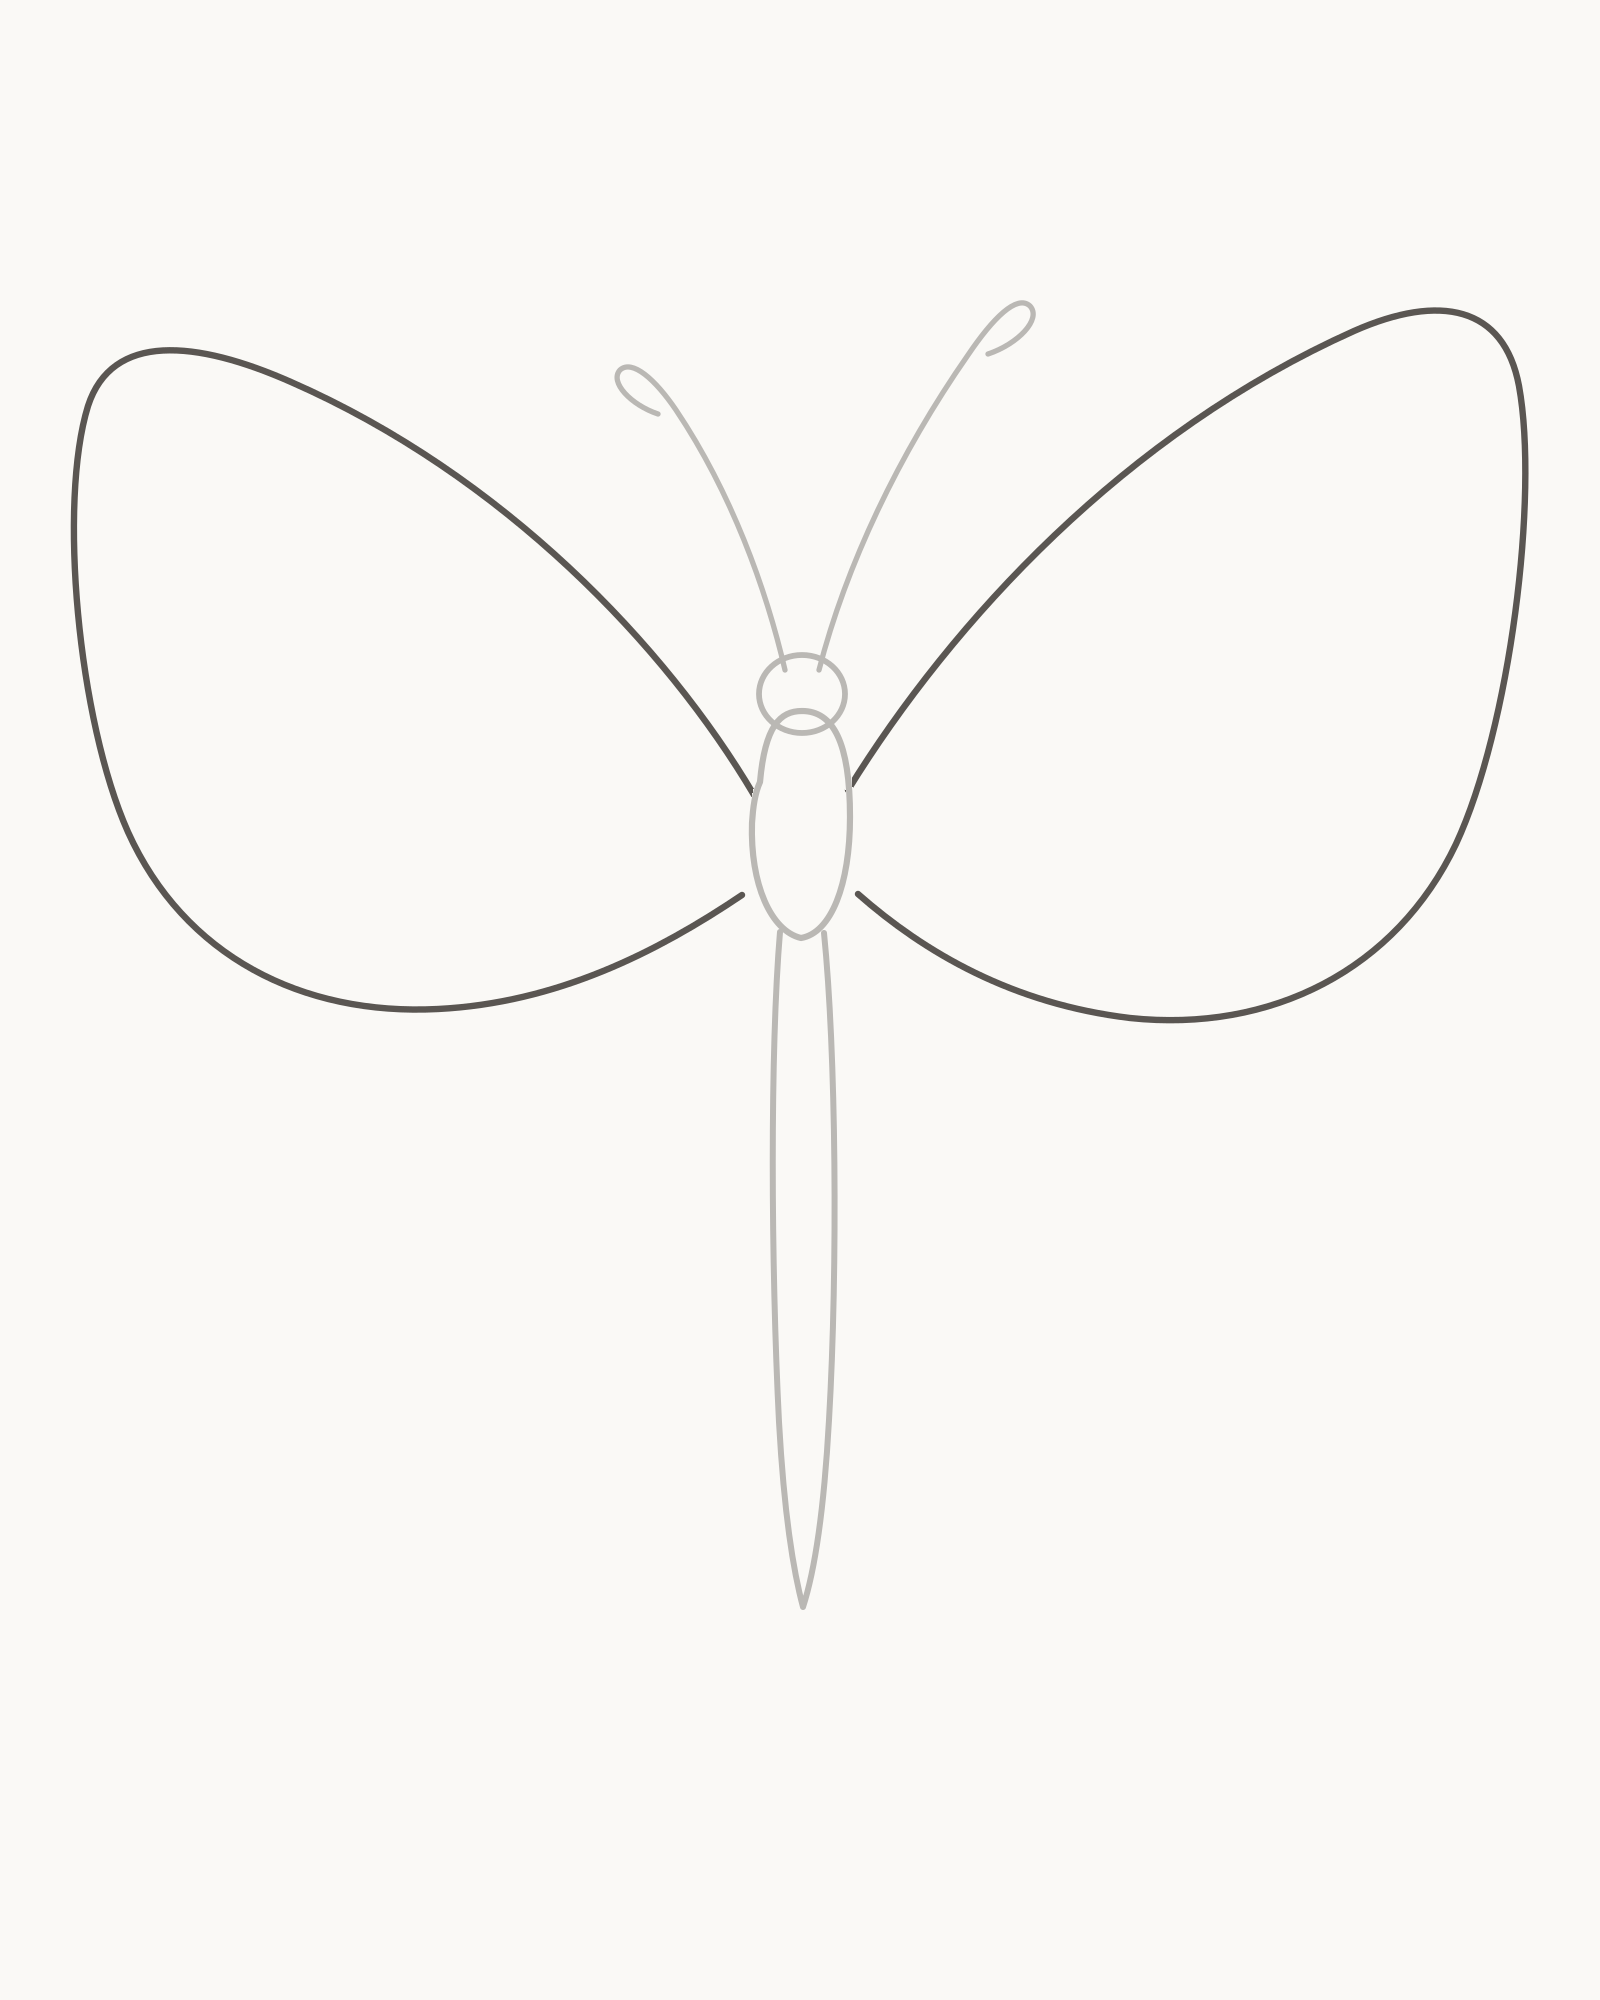
Stage 2 of 8. Two broad forewings establish the height and reach of the upper silhouette. - Left upper base
- Left high point and return
- Right upper base
- Right high point and return
- Compare height and reach
Draw the viewer-left forewing first. Start high on the thorax, travel up and out towards its rounded outer shoulder, then sweep around the far edge and return to the lower side of the thorax. Use broad changes of direction rather than a row of little scallops.
Now build the viewer-right forewing in the same order: upper base, high point, farthest reach and lower return. Make this wing slightly taller and more sharply turned near the upper tip. Compare the two highest points before you close the second wing, then compare how far each side reaches.
Look for this before moving on: both forewings attach high on the thorax, span most of the page and return cleanly to the body; the right wing sits a little higher; and neither outer edge is clipped or mechanically copied.
If it goes wrong: preserve the complete body and the more convincing wing. Replace only the newest forewing segment between its thorax base and the nearest sound direction change.
3. Attach the hindwing pair
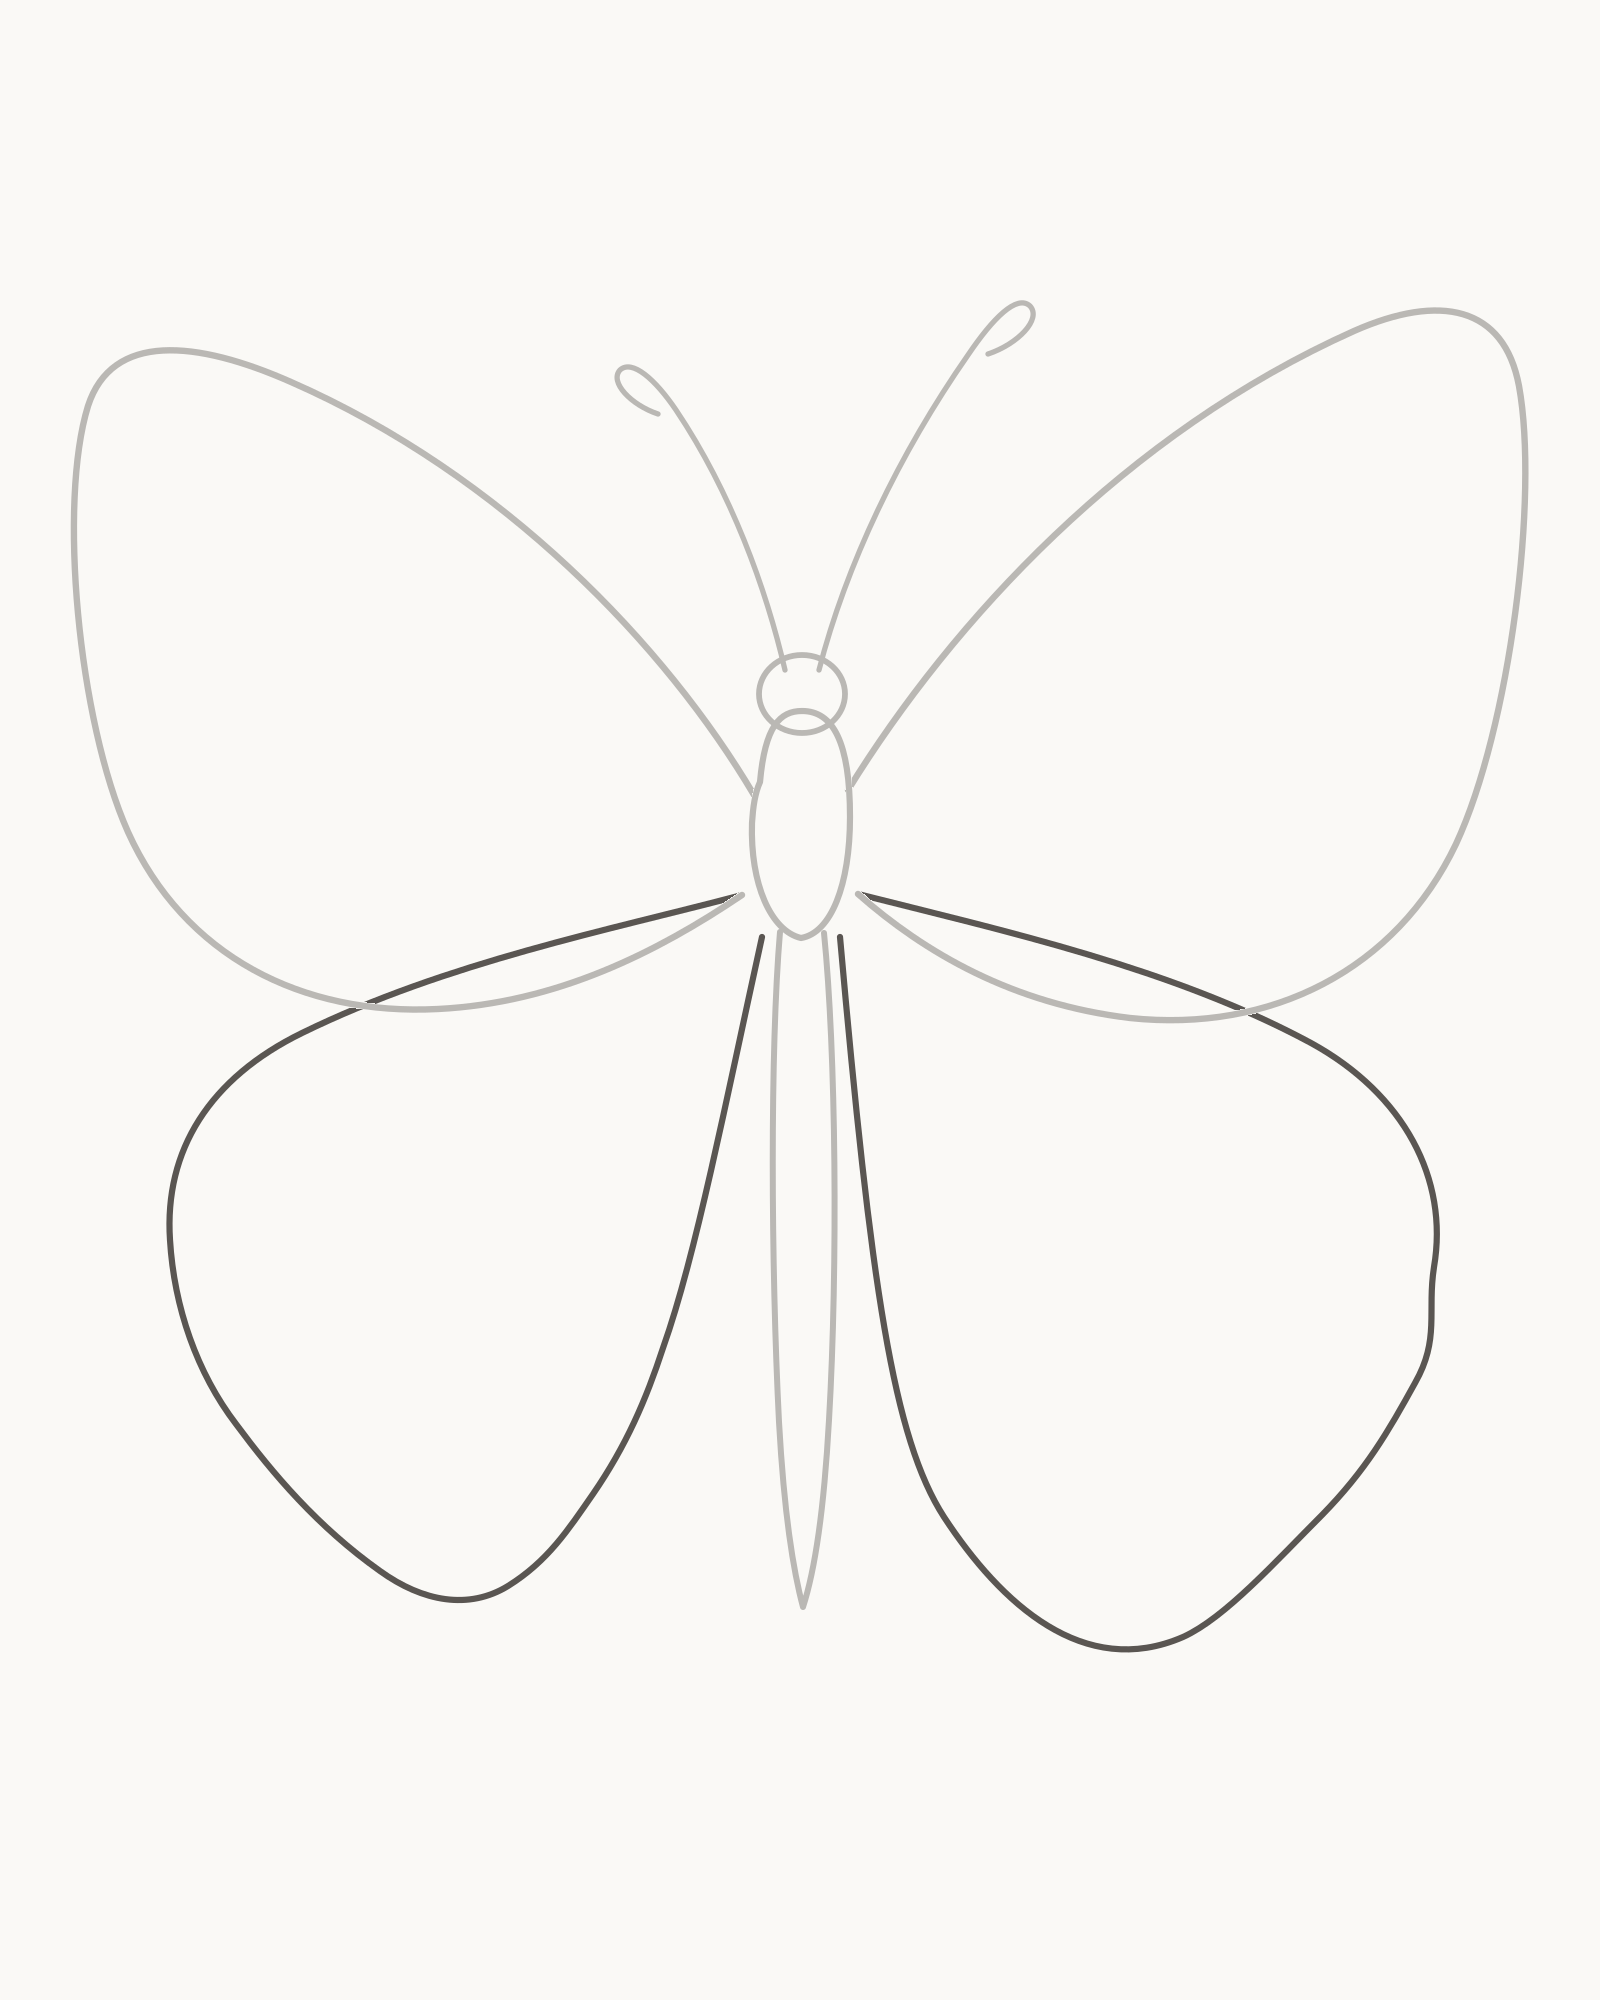
Stage 3 of 8. The rounder lower pair completes four attached wings with clear overlap. - Left lower base
- Left rounded lobe
- Right lower base
- Deeper right lobe
- Check both overlap stops
Begin the rounder viewer-left hindwing at the lower thorax, just behind the retained forewing edge. Carry it down and out through a broad lower lobe, then turn the contour back towards the body. Stop its upper inner return beneath the forewing so the overlap remains clear.
Repeat on the viewer-right, making this hindwing slightly narrower and letting its bottom hang a little lower. Its attachment also begins low on the thorax and passes behind the forewing. Keep the lower pair smaller and rounder than the upper pair.
Look for this before moving on: four wings are easy to count; both hindwings begin at the lower thorax; their upper returns stop beneath the forewings; and the right lower wing finishes slightly deeper than the left.
If it goes wrong: leave both forewings untouched. Replace only the newest hindwing interval or its short overlap stop; do not redraw the upper wing to hide a crossing.
4. Build the forewing veins
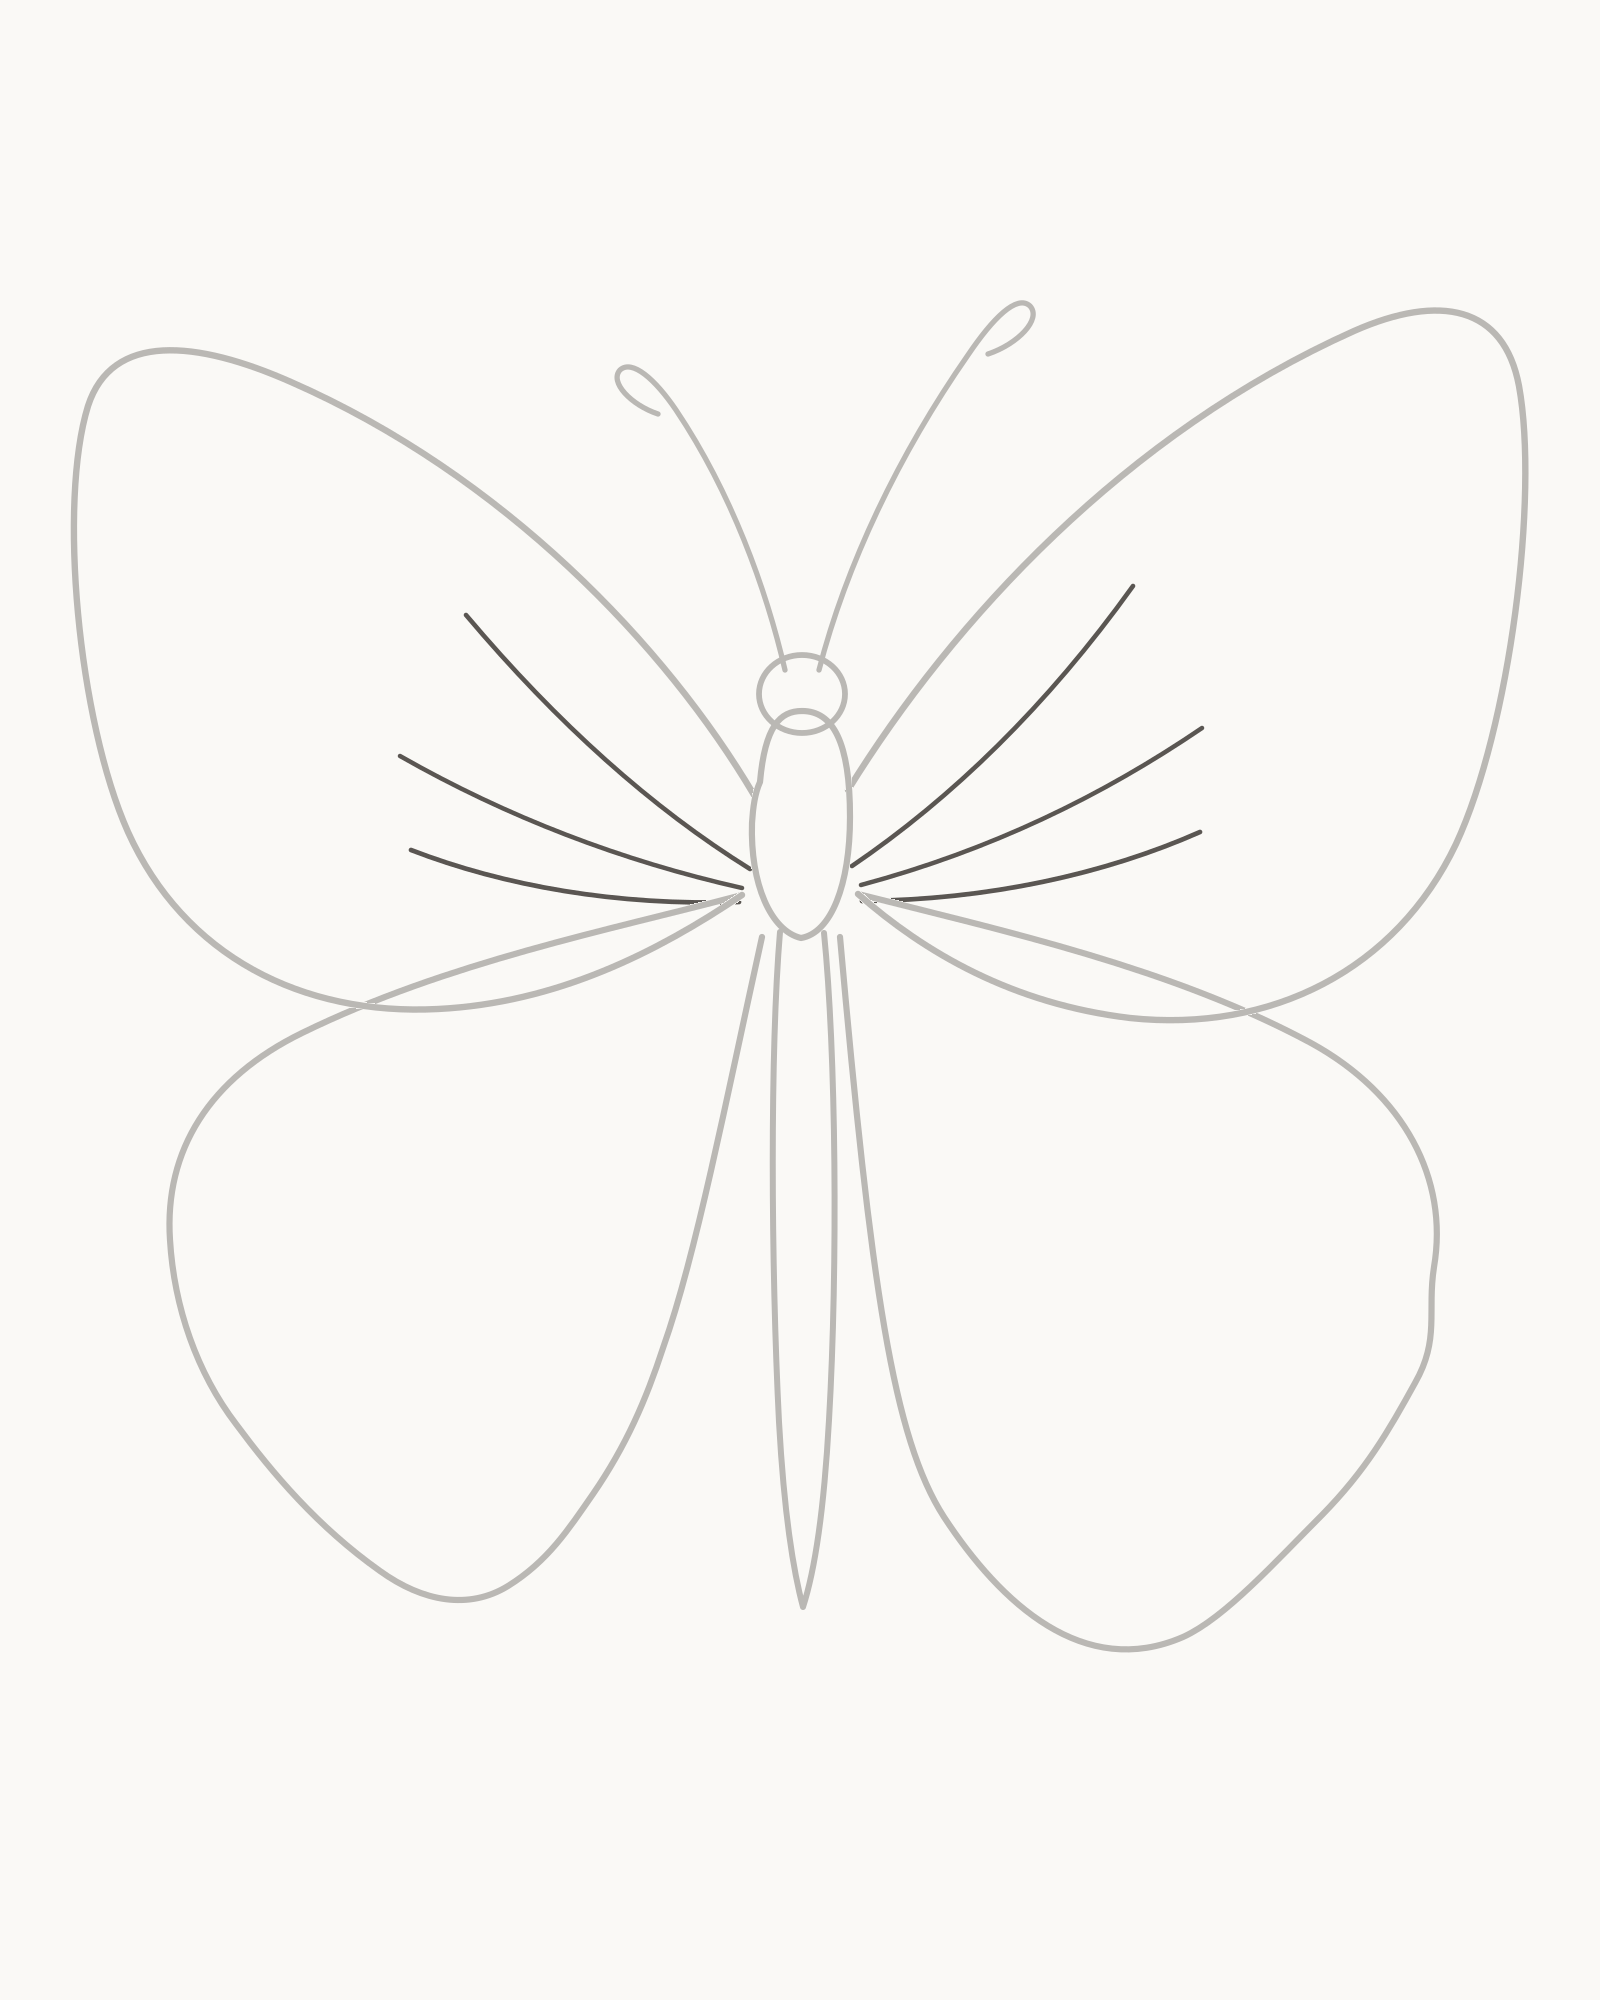
Stage 4 of 8. Three veins per upper wing reveal structure without crowding the silhouette. - Left upper vein
- Left middle and lower veins
- Right upper vein
- Right middle and lower veins
Work from the body outwards. On the viewer-left forewing, draw the longest upper vein first, then add the middle and lower paths so three lines fan away from one visible root area. Their ends should stop well inside the outer contour.
Add the three viewer-right veins in the same root-to-edge order. Let their lengths and curves differ slightly from the left. Keep the roots close without piling the lines into a dark knot at the thorax.
Look for this before moving on: exactly three veins are separately traceable inside each forewing; every line belongs to the body-side wing base; the fan opens gradually; and no vein crosses an outer edge.
If it goes wrong: preserve the silhouette and the two sound veins. Remove or replace only the newest vein from its root to its endpoint; do not thicken the base to disguise a poor start.
5. Build the hindwing veins and folds
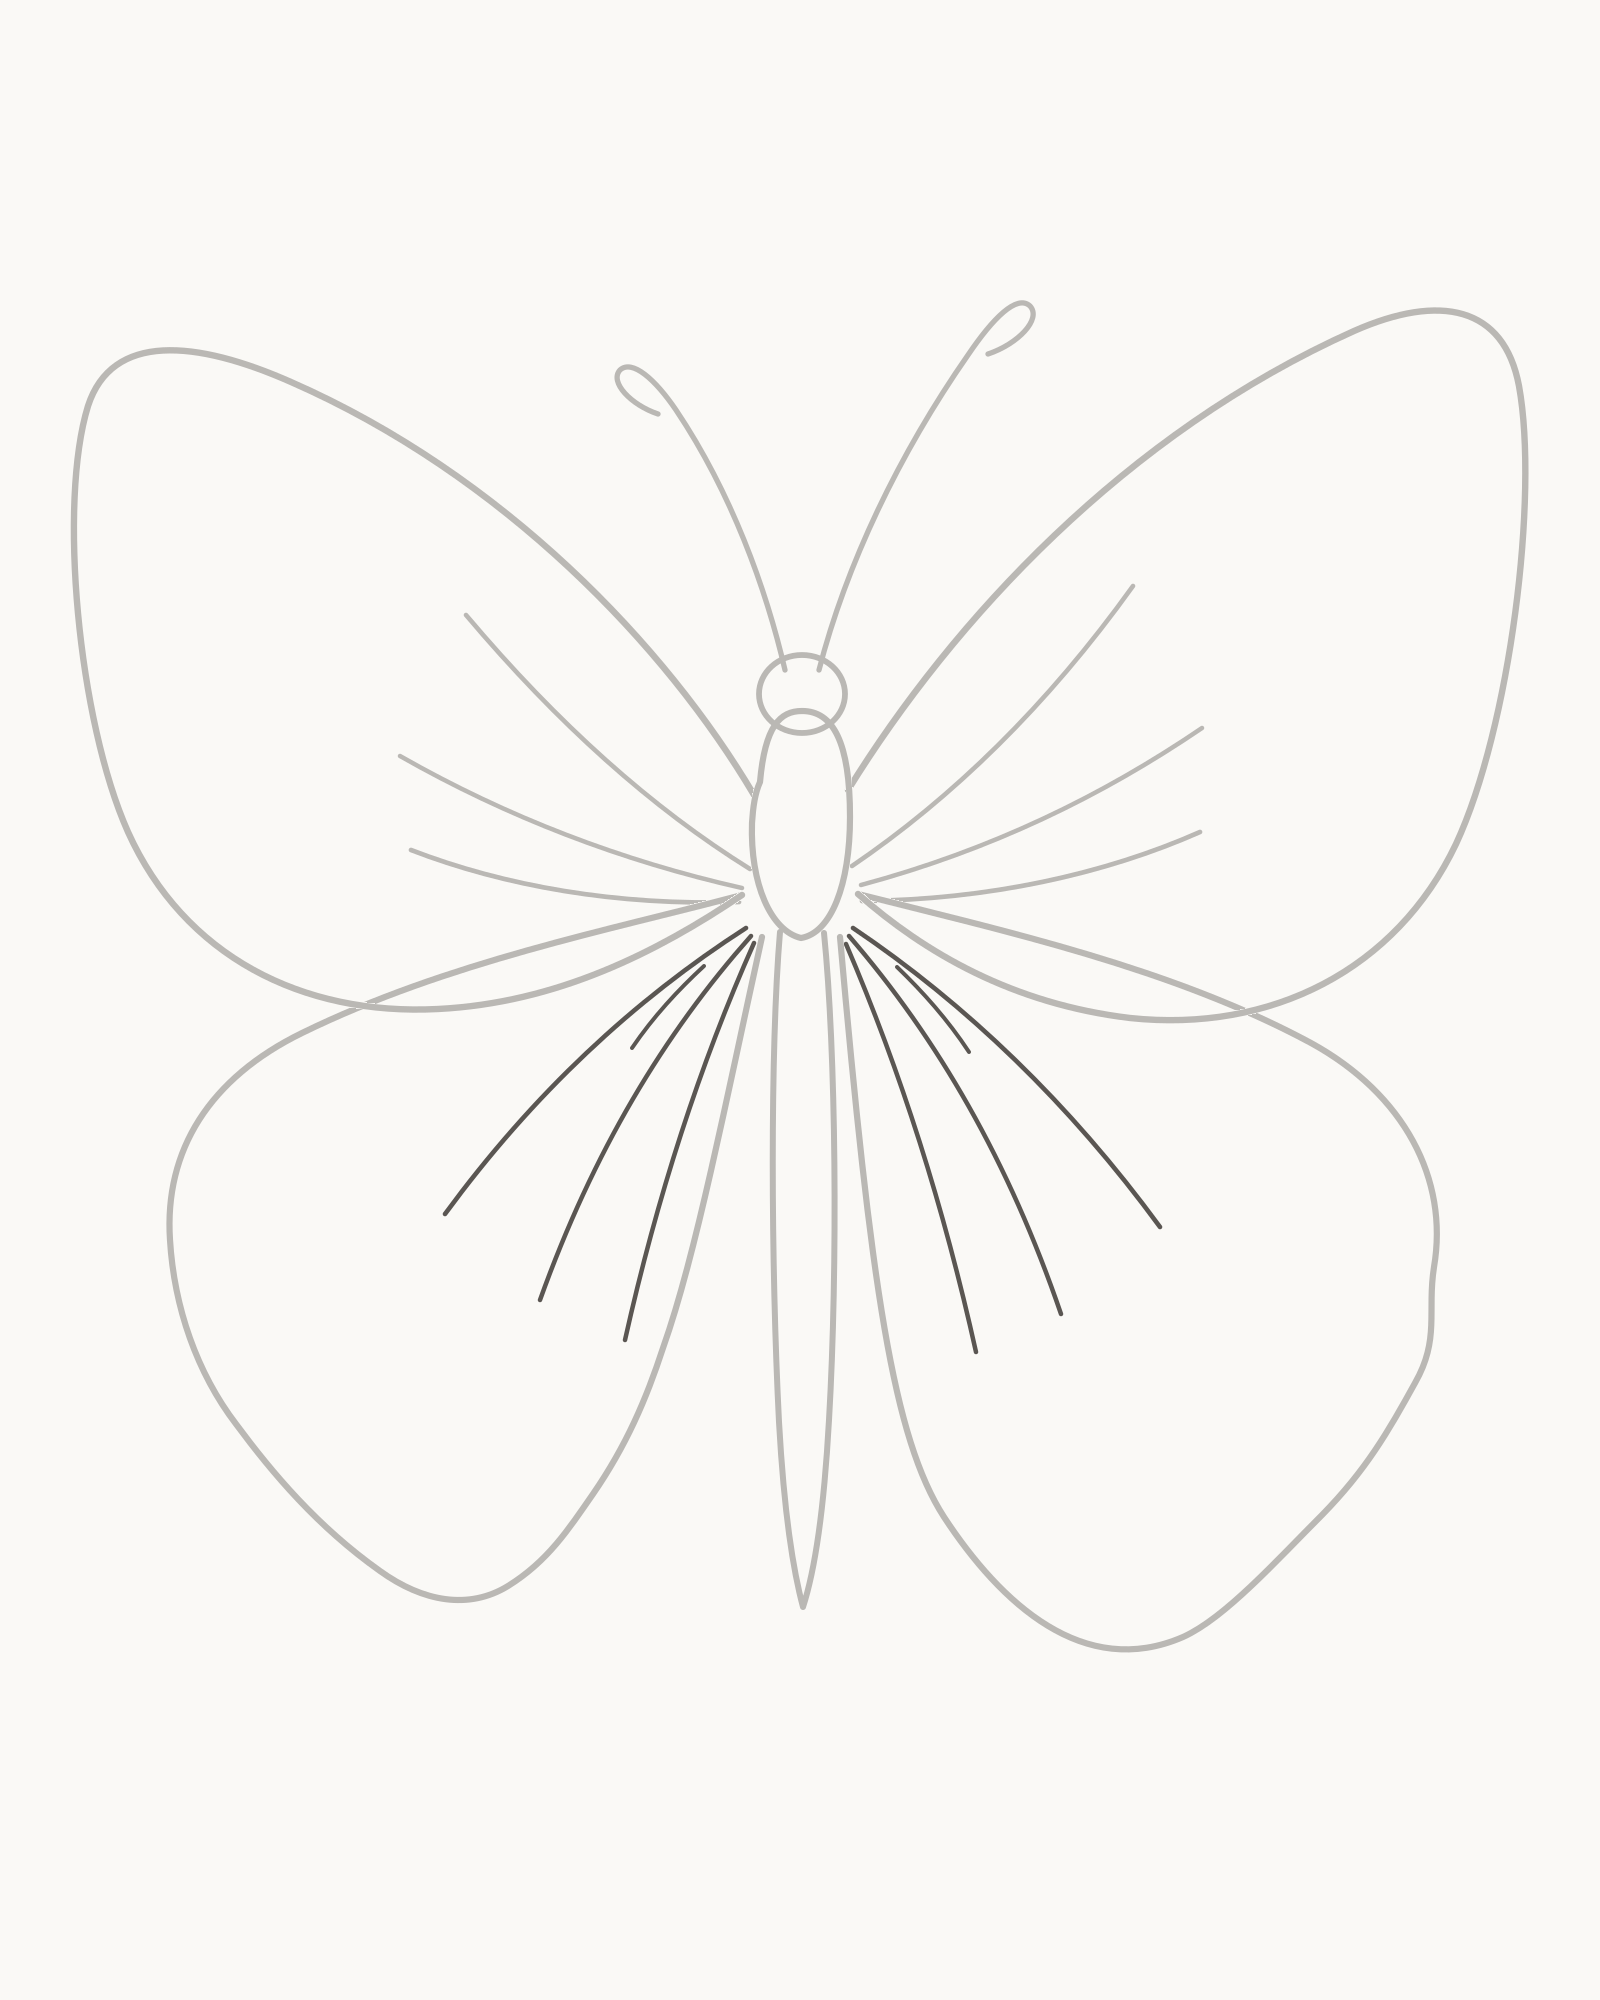
Stage 5 of 8. Three shorter veins and one fold per lower wing reinforce the low attachments. - Left three-vein fan
- Left short fold
- Right three-vein fan
- Right short fold
Move to the lower wings. From the low viewer-left attachment, add three shorter veins. Draw the upper path first, then the middle and lower paths, allowing more space between them as they fan outward. Add one small fold close to the base; it is the shortest line in that wing.
Repeat on the viewer-right with three veins and one short fold. Keep all eight new lines behind the visual edge of the forewings. Their different lengths should describe the lower wing shape without turning the butterfly into a wheel of equal spokes.
Look for this before moving on: each hindwing contains exactly three radiating veins and one smaller inner fold; the roots sit at the lower attachment; all lines stop inside the wing; and the forewing overlap remains dominant.
If it goes wrong: keep the complete silhouette and upper veins. Replace only the newest lower vein or fold, starting again from the attachment area instead of shifting the body.
6. Add the inset edge bands
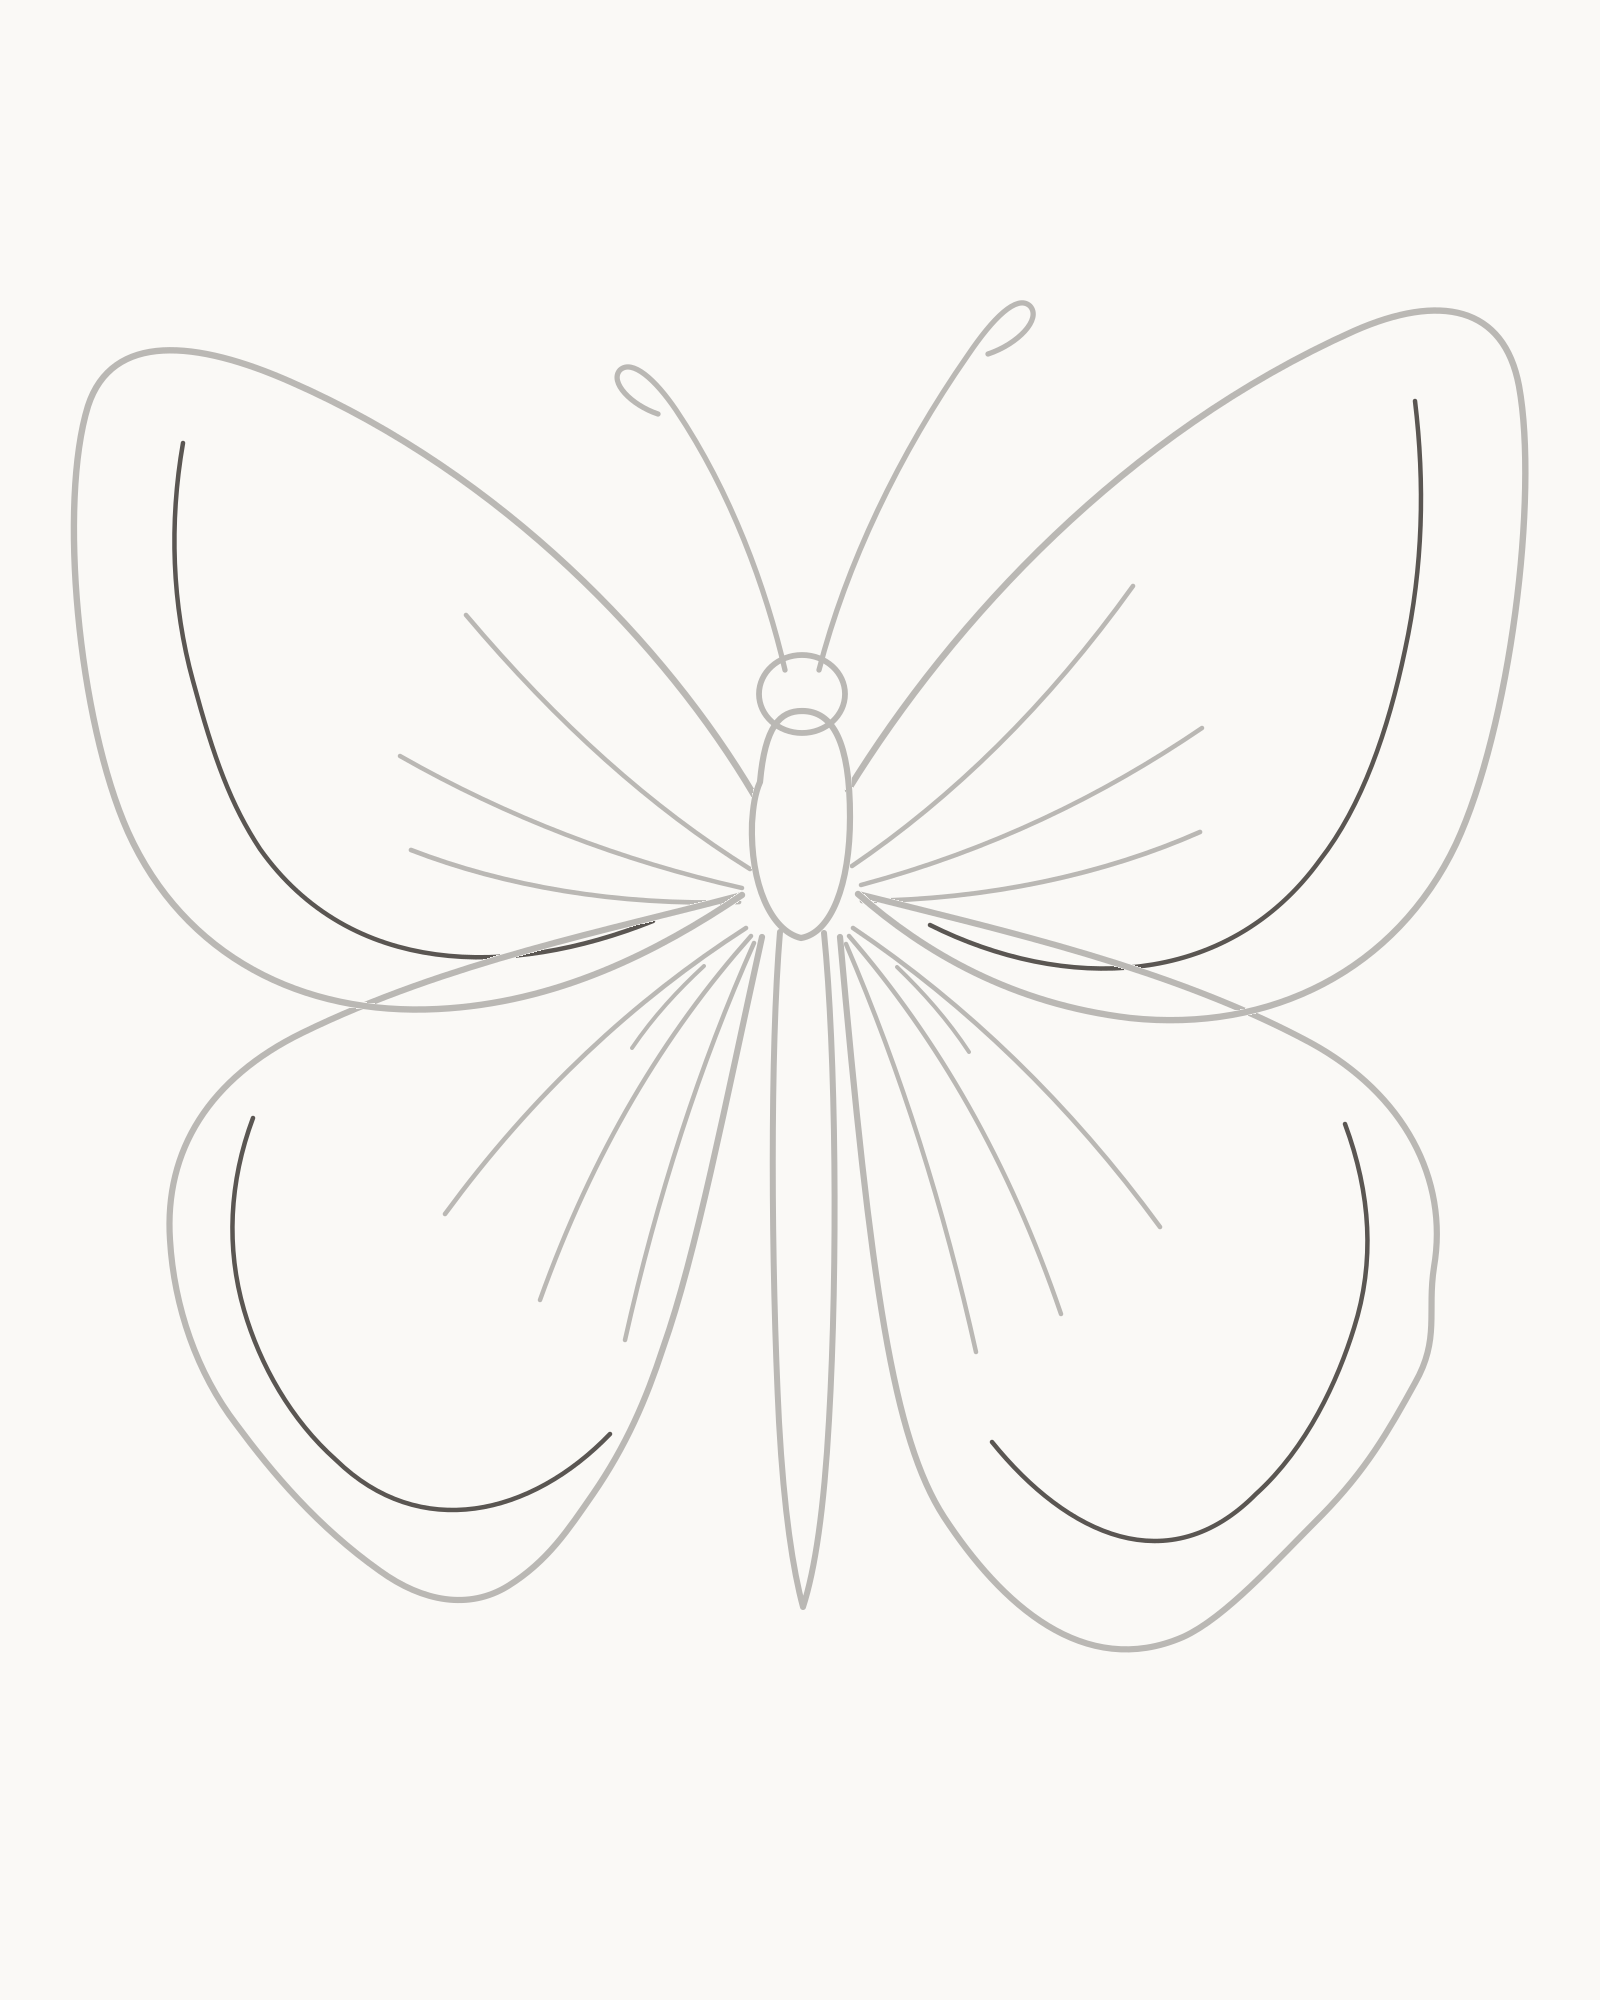
Stage 6 of 8. Four unequal open bands organise the pattern while preserving overlap. - Left forewing band
- Right forewing band
- Left hindwing band
- Right hindwing band
Inside the viewer-left forewing, draw one long line that follows the outer edge at a changing distance. Keep it open near the root. Add the viewer-right forewing band next, allowing its upper turn and lower spacing to differ.
Place a shorter open band inside each hindwing. These lower bands follow the rounded lobes but stop before the overlap pockets. Avoid making the four bands equally spaced sticker borders; a little variation keeps the wing shapes alive.
Look for this before moving on: all four inset bands stay inside their outer edges, remain open near the roots and differ in curvature; no band touches a vein to create an accidental dark knot.
If it goes wrong: preserve the outer wing and veins. Replace only the newest band interval between two sound points, keeping the repair inside the silhouette and away from the attachment.
7. Add spots and body segments
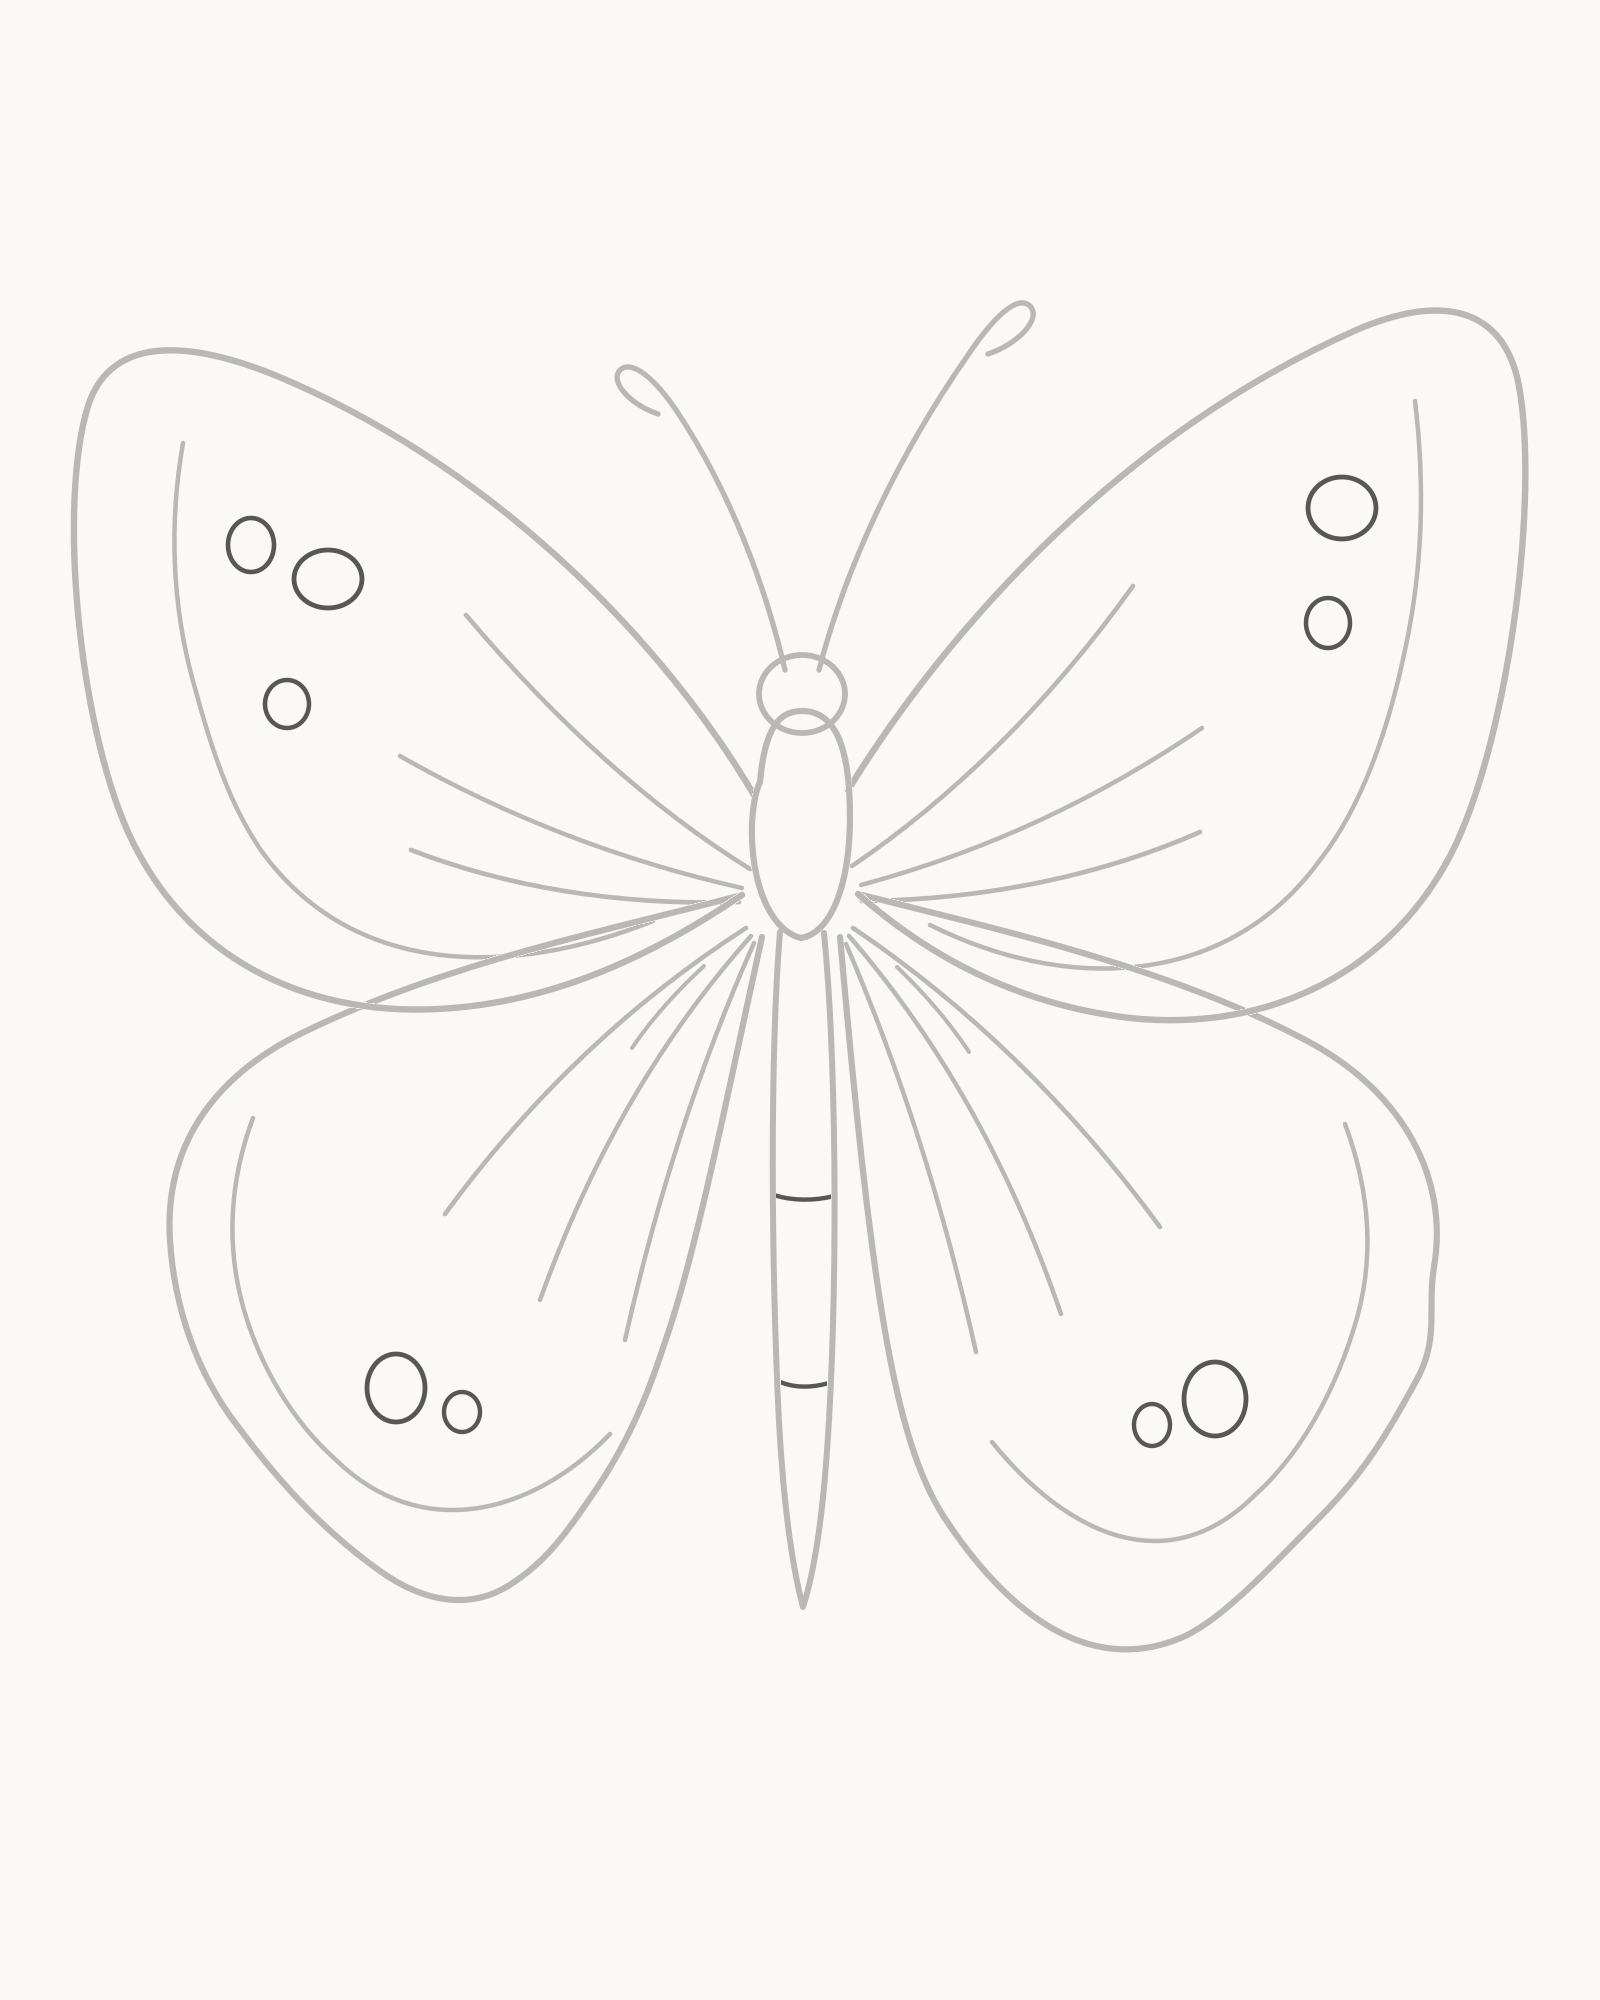
Stage 7 of 8. Open unequal spots and two body marks add identity without imitating a named species. - Three left upper spots
- Two right upper spots
- Two lower spots per wing
- Two abdomen divisions
Begin with the upper spots. Place three open ovals inside the viewer-left forewing band, varying their size and spacing. Add two larger-spaced ovals to the viewer-right forewing. Keep every spot clear of the veins and leave its centre unfilled.
Add two open spots near the lower outer area of each hindwing. The pairs correspond by location but not by exact diameter. Finish this stage with two short curved divisions across the abdomen, following its taper without turning it into a striped ladder.
Look for this before moving on: the left forewing has three open spots and the right has two; each hindwing has a pair; no spot touches a vein or band; and exactly two small abdomen divisions remain separate from the outline.
If it goes wrong: keep the complete wing structure. Remove or replace only the newest spot or body division; do not enlarge neighbouring marks to make a crowded shape appear intentional.
8. Add sparse lower-right hatching
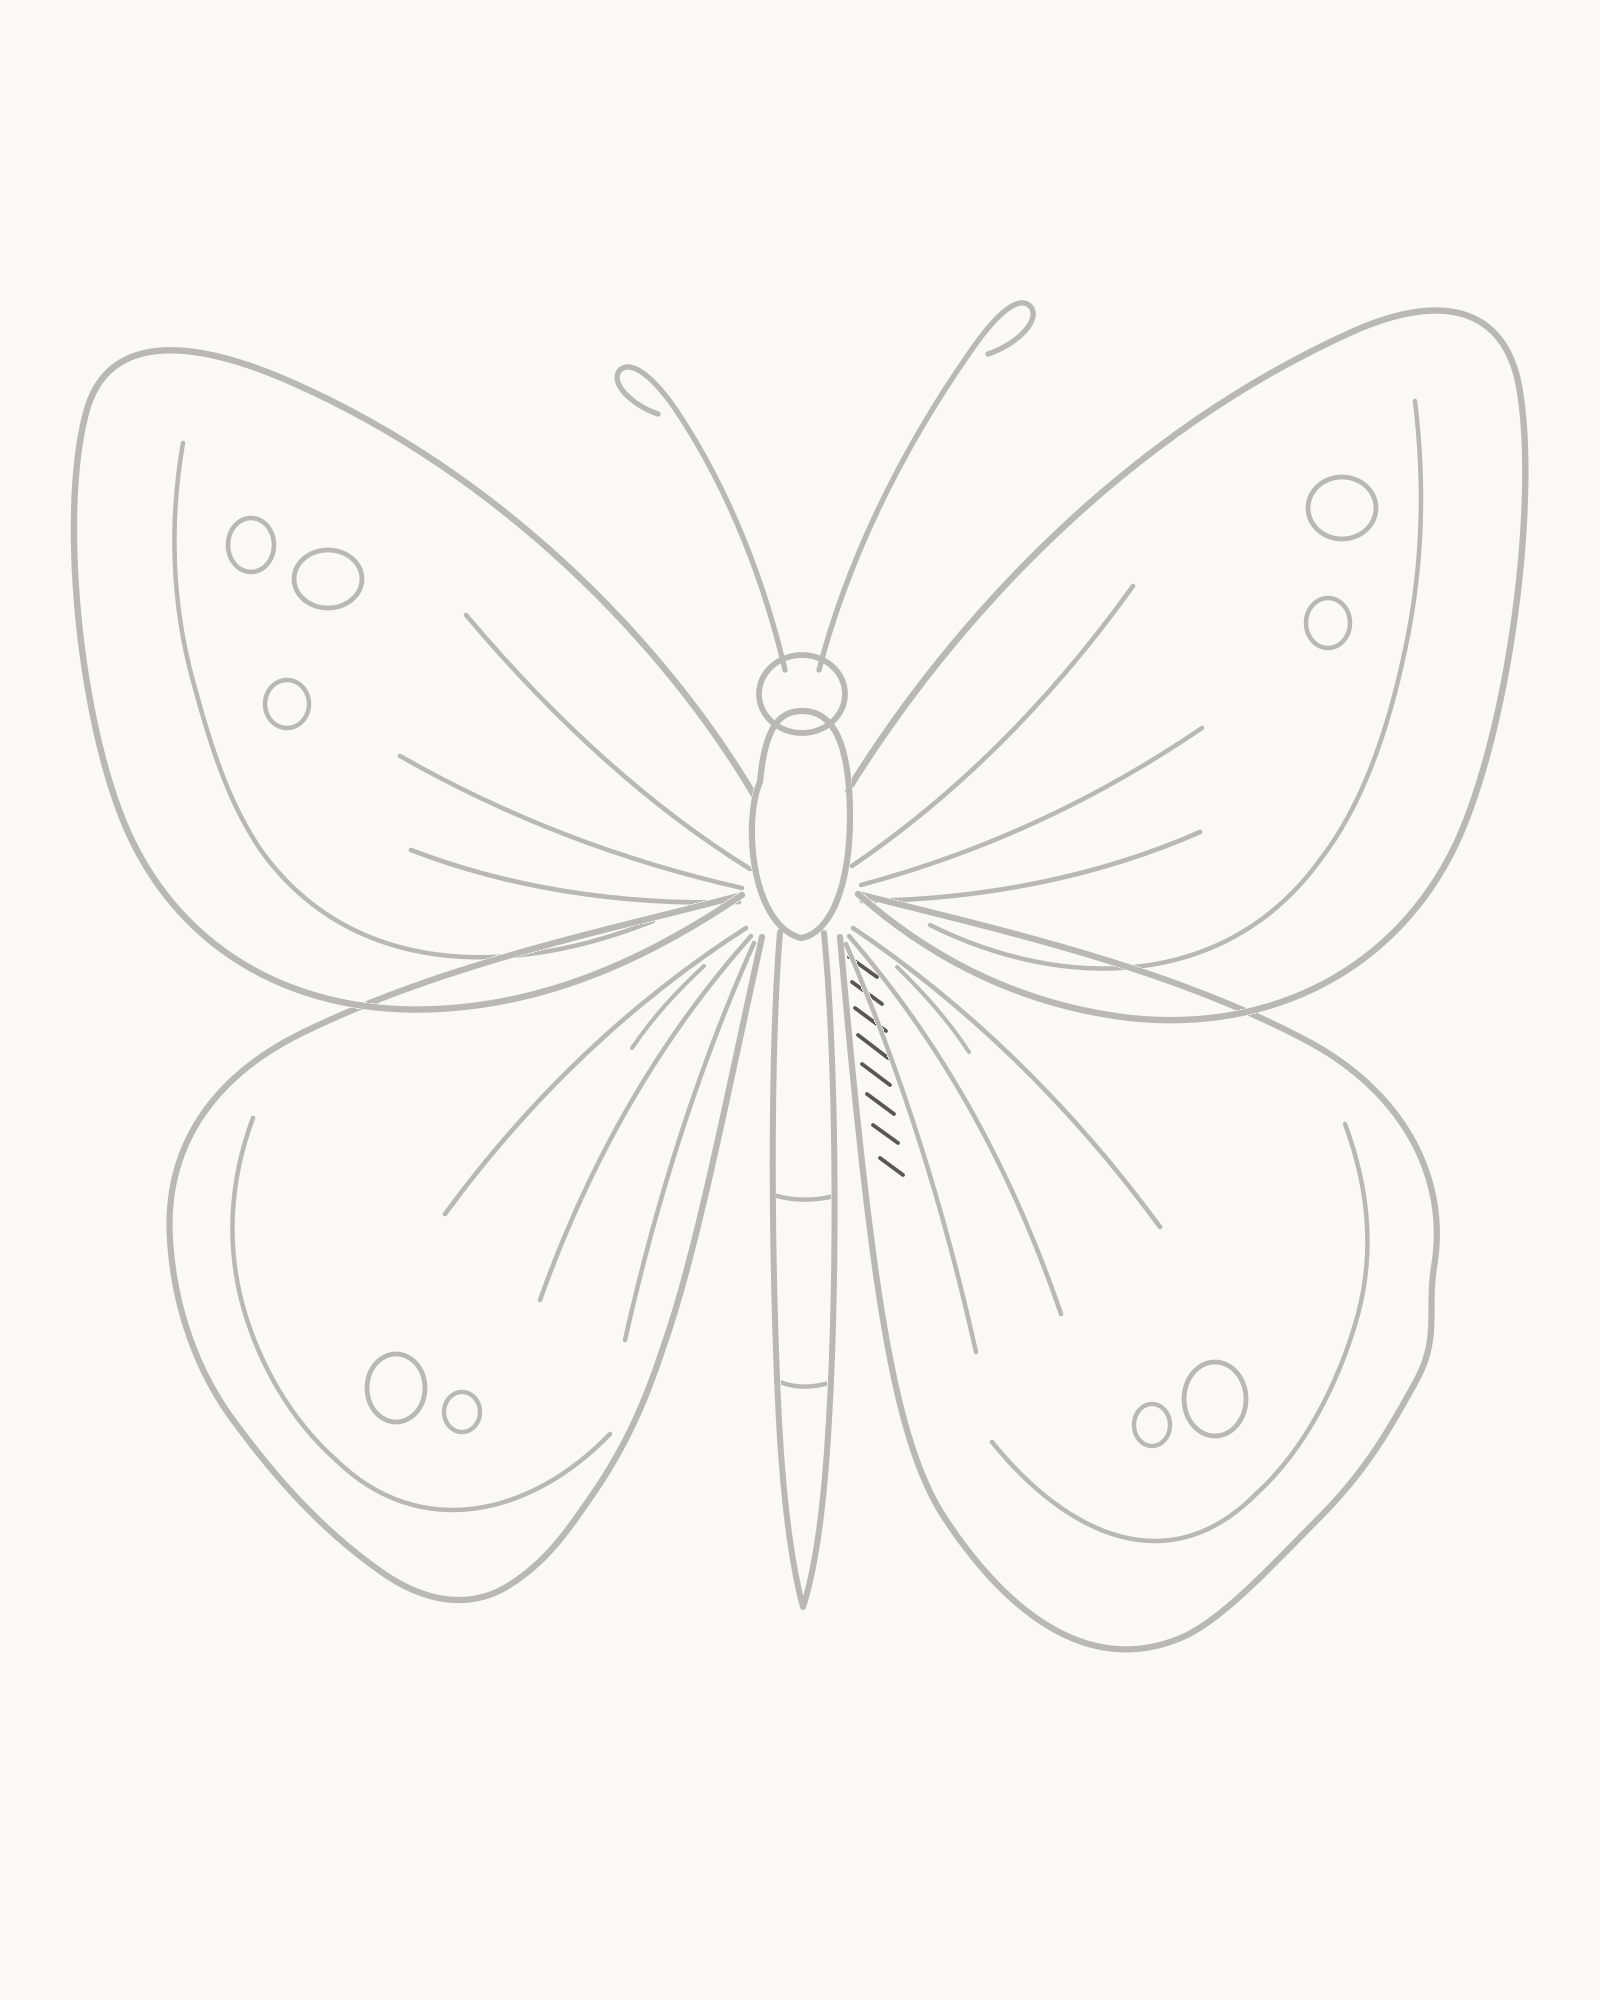
Stage 8 of 8. Eight small hatches establish upper-left light without changing earlier geometry. - Keep upper-left side open
- Add eight short hatches
- Leave paper between strokes
- Check every prior line
The notional light comes from the upper left, so keep that side open. Add the eight short diagonal hatches shown beside the lower-right side of the body, within the narrow overlap area. Work from top to bottom and leave clear paper between every stroke.
These marks are the only value in the drawing. They should suggest a little depth where body and wing meet, not become another vein, a dark strip or a general graphite texture. Nothing else changes in this stage.
Look for this before moving on: eight short hatches remain confined to one lower-right area; the upper-left side stays open; every spot remains unfilled; and no earlier contour, vein or band has been retraced.
If it goes wrong: remove or replace only the newest hatch. Stop as soon as the overlap reads; never extend the marks across the abdomen or use them to conceal a weak attachment.


Common mistakes and small fixes
The butterfly looks like a logo. Compare the unequal antenna lengths, wing tip heights and lower-wing fullness. On a new attempt, change one paired landmark rather than adding decorative curls.
The wings float around the abdomen. Check the thorax, not the abdomen. Forewings meet its upper sides and hindwings meet lower, with their returns passing behind the upper pair.
One forewing dominates. Compare highest point and sideways reach as separate measurements. Correct only the newer outer interval instead of redrawing both wings.
The hindwings look pasted on. Keep their first curves close to the lower thorax and stop the upper return beneath the forewing edge. Repair the local overlap stop rather than darkening it.
The veins resemble equal spokes. Vary their length and spread, and keep the forewing and hindwing fans distinct. Remove the newest repetitive line.
The bands look like sticker borders. Change their distance from the edge gradually and leave them open at the roots. Replace one uniform interval rather than adding scallops.
The pattern becomes polka dots. Use the visible unequal counts and keep generous open areas between spots. Remove the last crowded oval.
The final shading becomes a stripe. Count eight separate hatches and preserve paper between them. Erase only the extra stroke.
Practise a different wing shape
On a new part of the paper, repeat Stages 1–3 with the same central body but change two outer landmarks: make the viewer-left forewing shorter and the viewer-right hindwing fuller. Compare those points from a clear rights-safe butterfly reference, then stop before adding veins or pattern. This isolates the useful skill—balancing four attached shapes without tracing or perfect mirroring.
The How to Draw page returns to the complete practical guide index. For butterflies as subjects and motifs in existing art rather than a construction lesson, visit the separate Butterfly Drawings gallery.
Frequently Asked Questions
What is the easiest way to start a butterfly drawing?
Place the head, wider thorax and tapered abdomen first. The thorax then gives all four wings a fixed attachment hub, so you are balancing visible curves rather than guessing around empty space.
Do butterfly wings need to be perfectly symmetrical?
No. Compare the paired tips by height and reach, but allow small differences in contour, fullness and pattern. Approximate balance is more useful than tracing one side into an exact mirror.
How many wings should a butterfly drawing show?
From this open view, show two forewings and two hindwings. Attach the forewings high on the thorax and the hindwings lower, with the lower pair reading behind the upper pair.[1]
How do you draw butterfly wing veins simply?
Use small fans rather than filling the wings. This drawing has three veins in each forewing, then three shorter veins and one small fold in each hindwing. Start every line at its wing base and stop before the outer edge.
Can I draw this butterfly without a grid?
Yes. The grid is optional. You can compare the two highest wing points and the two farthest reaches with a ruler or scrap-paper edge held above the drawing, without adding guide lines to the page.
Should I shade a beginner butterfly drawing?
Only after the silhouette, attachments and pattern already work. Here the finish is limited to eight short lower-right hatches; leave the rest as open linework.
References
- Butterfly Conservation, Butterfly body parts. View source
More DRAWING Guides

How to Draw a Rose: A Step by Step Guide

How to Draw a Tree: A Step by Step Guide

How to Draw Eyes: A Step by Step Guide

How to Draw Leaves: A Step by Step Guide

How to Draw Autumn Leaves: A Step by Step Guide

How to Draw Flowers: A Step by Step Guide

How to Draw a Lily: A Step by Step Guide

How to Draw a Sunflower: A Step by Step Guide

How to Draw a Tulip: A Step by Step Guide

How to Draw a Hibiscus: A Step by Step Guide

How to Draw a Daisy: A Step by Step Guide
