



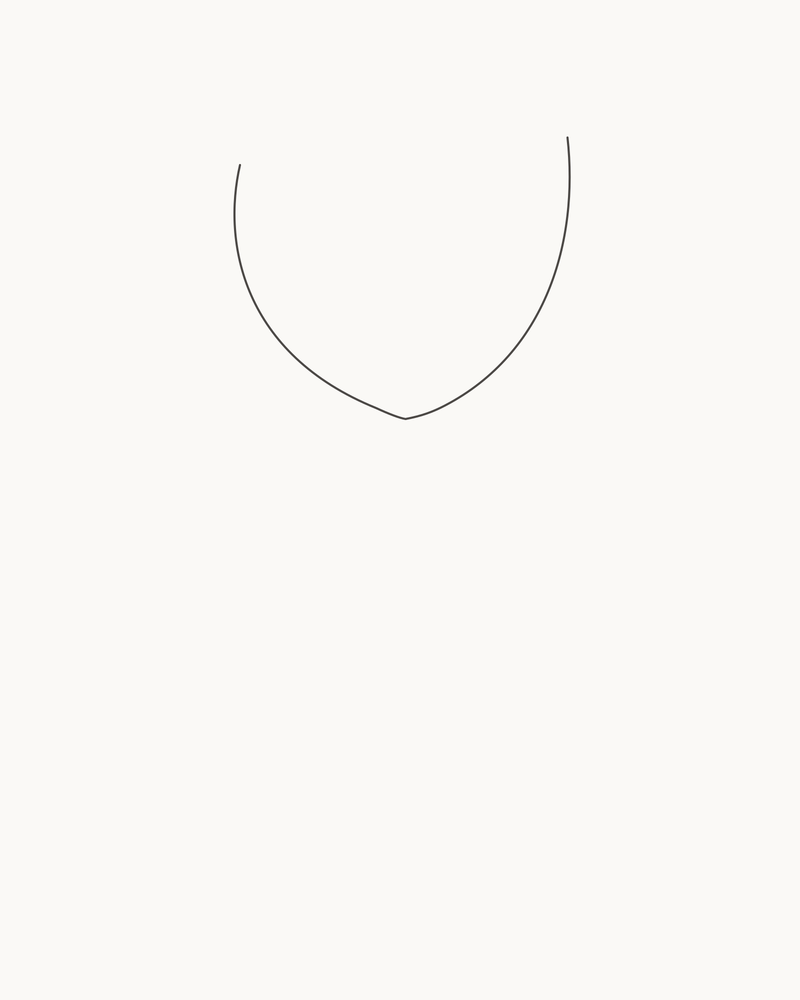
Draw one complete tulip in eight permanent line stages: an uneven open cup, three visible petal overlaps, a gently curved stem and two broad leaves that meet it at different heights. Nothing depends on a later cleanup or shading pass, so each image shows exactly what should remain on the page.
Difficulty: Beginner, with a careful top-rim stage
Time: Allow about 30–45 minutes. This is an untested estimate; pausing after the bloom or stem will not interrupt the construction.
Medium: HB or No. 2 pencil, line only
Begin with the cup, not a flower symbol
Familiar garden tulips often show a cup-shaped flower on an upright stem, with broad strap-like leaves below it.[1][2] Those simple observations determine the order here. First establish one uneven cup, then explain its upper edge with overlaps, and only then connect the stem and leaves.
This is a general observation exercise rather than a botanical plate. Real tulips vary greatly in flower shape, openness and leaf arrangement, so the four rim points and two leaves belong to this drawing only. Their unequal spacing keeps the result from becoming a repeated U-and-W icon.
Materials
- One pointed HB pencil. A No. 2 classroom pencil gives a similar mid-grey line.
- One upright sheet of smooth white or warm-white paper. An unlined sketchbook or ordinary printer sheet is suitable for a first attempt.
- A clean eraser, used only on the newest misplaced segment.
- A sharpener if you are using a wooden pencil.
- Optional: a clear photograph of one near-front or slightly turned tulip that includes its bloom, stem and leaves.
You do not need a ruler, compass, ink pen, blending stump, coloured pencils or a graded pencil set. If you prefer a consistently narrow edge, substitute a 0.5–0.7 mm mechanical pencil.
Before you draw
Imagine a tall 4:5 frame. Place the bloom centre around 52% of the page width and 24% of its height. Its finished envelope occupies a little under half the width, while the lower half stays available for the long stem and two leaves.
The separate Stage 1 placement cue shows that envelope and the open lower space. It is a measuring aid, not part of the tulip. The optional page grid works in the same way: compare the cup and leaf tips with the cells, but leave every grid line off your paper.
Keep the main contours light but unambiguous. The leaf midribs may be a touch firmer because they are attachment landmarks, not shadows. There is no scheduled erasure or dark retracing. Although the reference logic assumes light from the upper left, this finished result contains no tonal shading.
1. Place the open cup
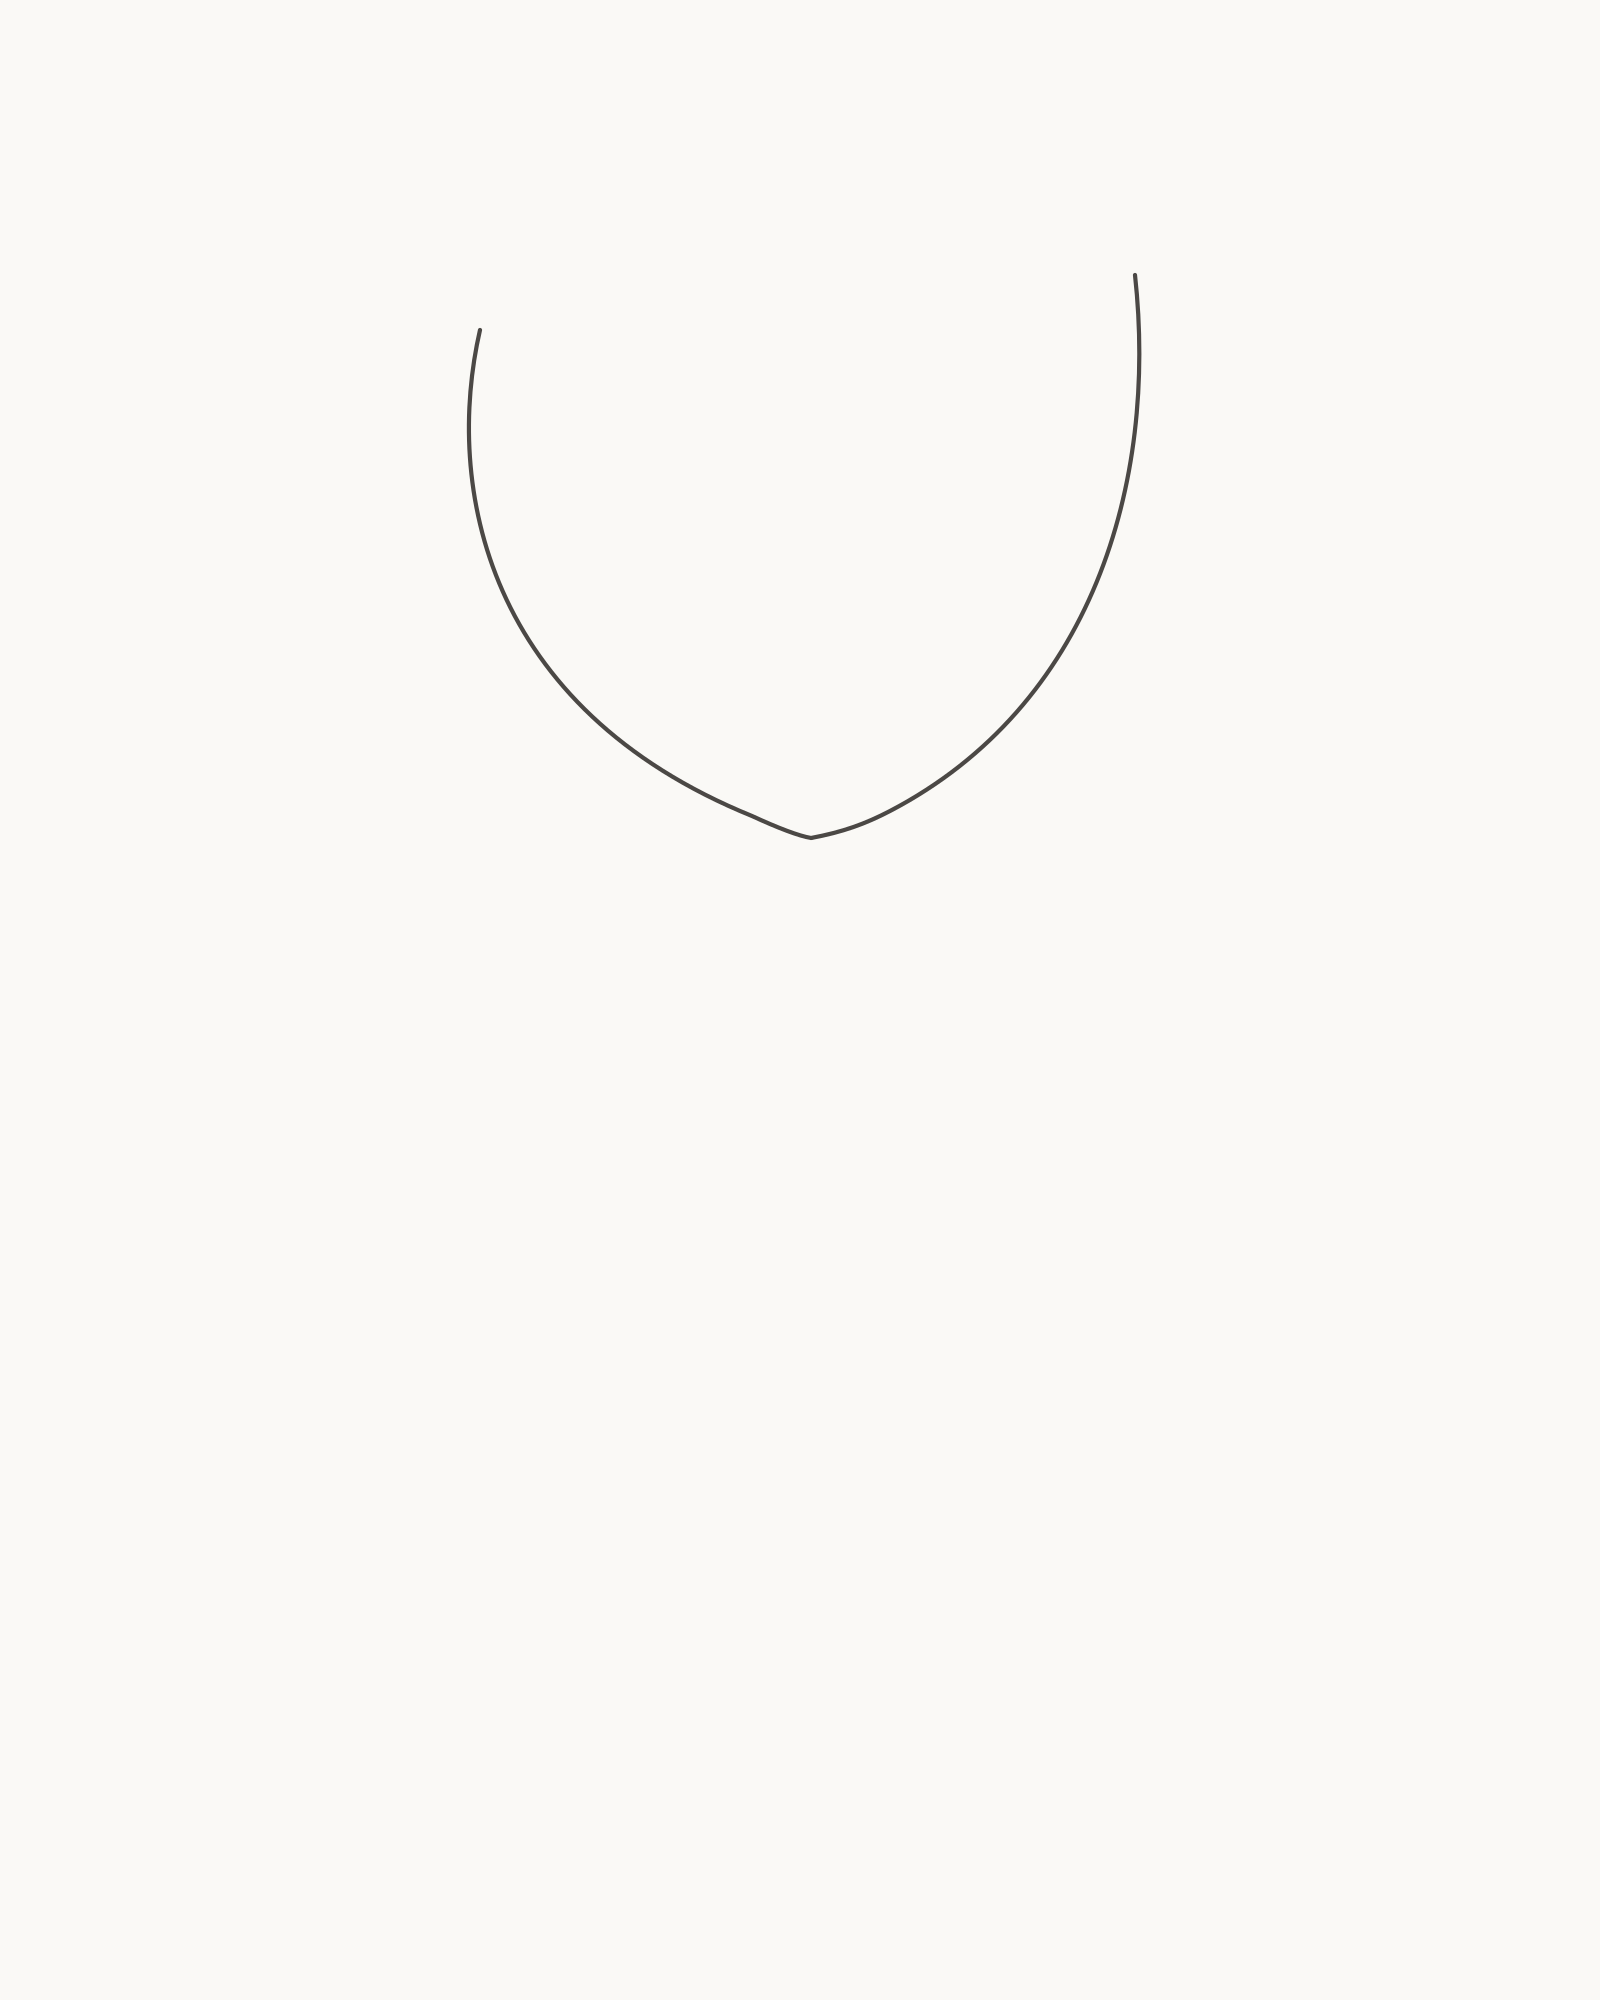
Stage 1 of 8. One asymmetric open cup establishes the flower base. 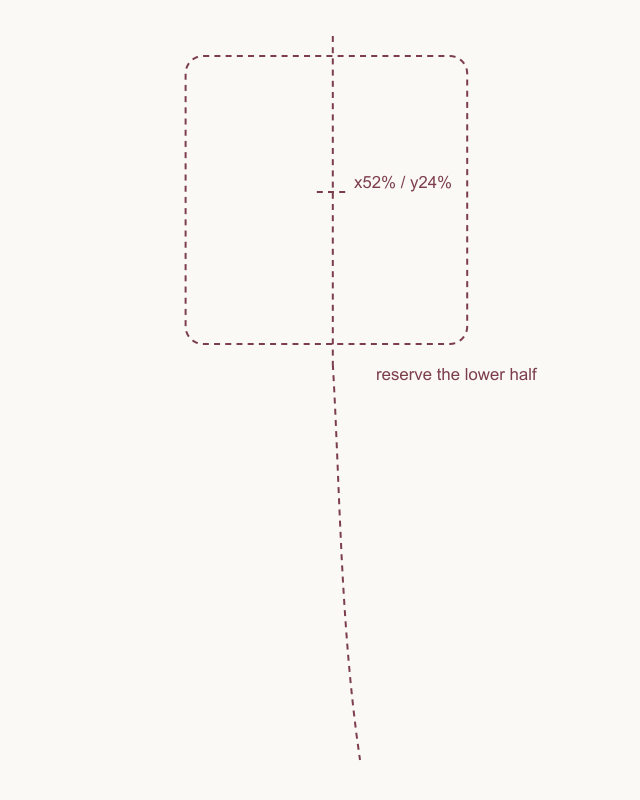
Placement cue: locate the bloom centre around x52% and y24%. Keep the lower half for the stem and leaves, and leave every cue mark off the drawing. Begin at the upper-left shoulder of the bloom. Draw one calm line down around the lower bowl, then carry it back up to a right shoulder that sits slightly higher. Let the left wall feel a little fuller and the right wall a little straighter. Keep the entire top open.
The lowest turn should be rounded, with a small natural change in curvature instead of a sharp point or perfect semicircle. This contour remains part of the finished tulip, so draw at the strength you intend to keep.
Look for this before moving on: one connected open cup sits near the x52%/y24% cue, the shoulders are not level, and more than half the sheet remains clear underneath it.
If it goes wrong: retain the sound side and base. Remove only the newest flattened, pointed or over-wide section, then reconnect it between the same stable endpoints rather than starting the whole cup again.
2. Close the irregular top rim
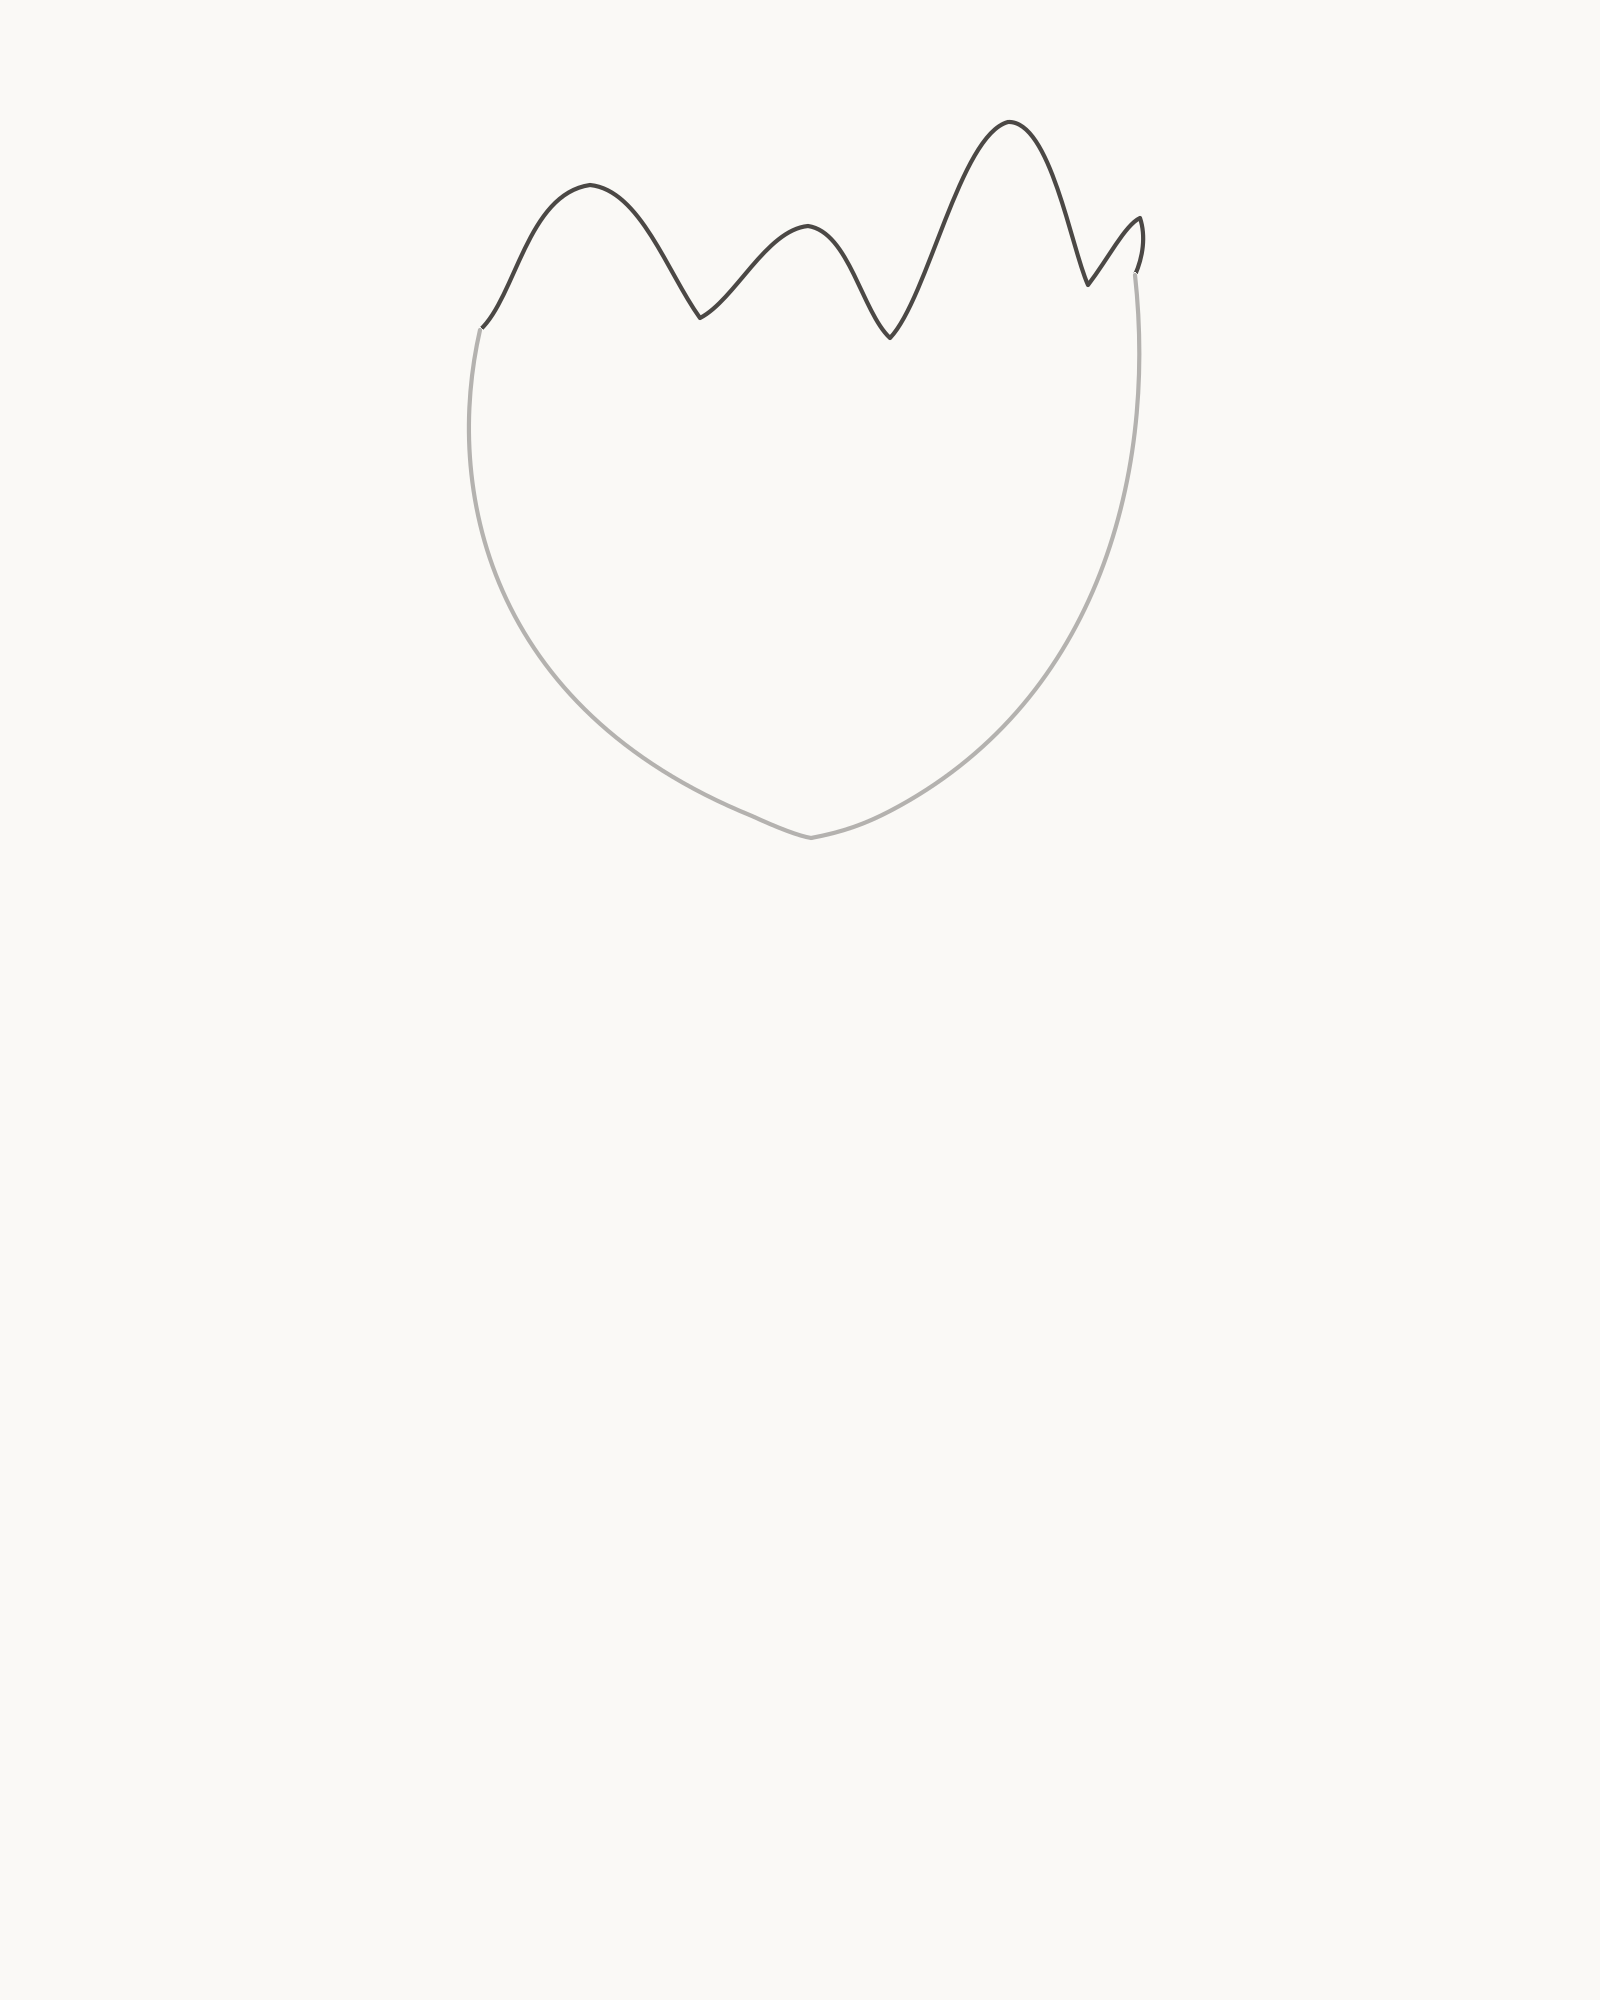
Stage 2 of 8. Four varied peaks and three notches close the bloom. - Broad left peak
- Short inner peak
- Tallest peak
- Small final point
Work from left to right without lifting the order. Rise from the left shoulder to a broad left peak, then fall into the first notch. Climb to a shorter inner peak and drop into the deeper middle notch. From there, rise to the tallest point just right of centre, dip into one shallow notch, form the small final point and return to the right shoulder.
Think of that as one changing edge, not four identical teeth. Widen one rise, shorten another and let the notches have different depths. The tallest point belongs right of centre; copying the first curve repeatedly will turn the bloom into a crown.
Look for this before moving on: the rim joins both shoulders, four unequal high points and three unequal notches are visible, and no neighbouring pair repeats the same width, height and lean.
If it goes wrong: keep every completed turn to the left. Lift only the newest repetitive arc back to its preceding notch, vary its reach or roundness, and rejoin the next stable point without altering the Stage 1 cup.
3. Show the petal overlaps
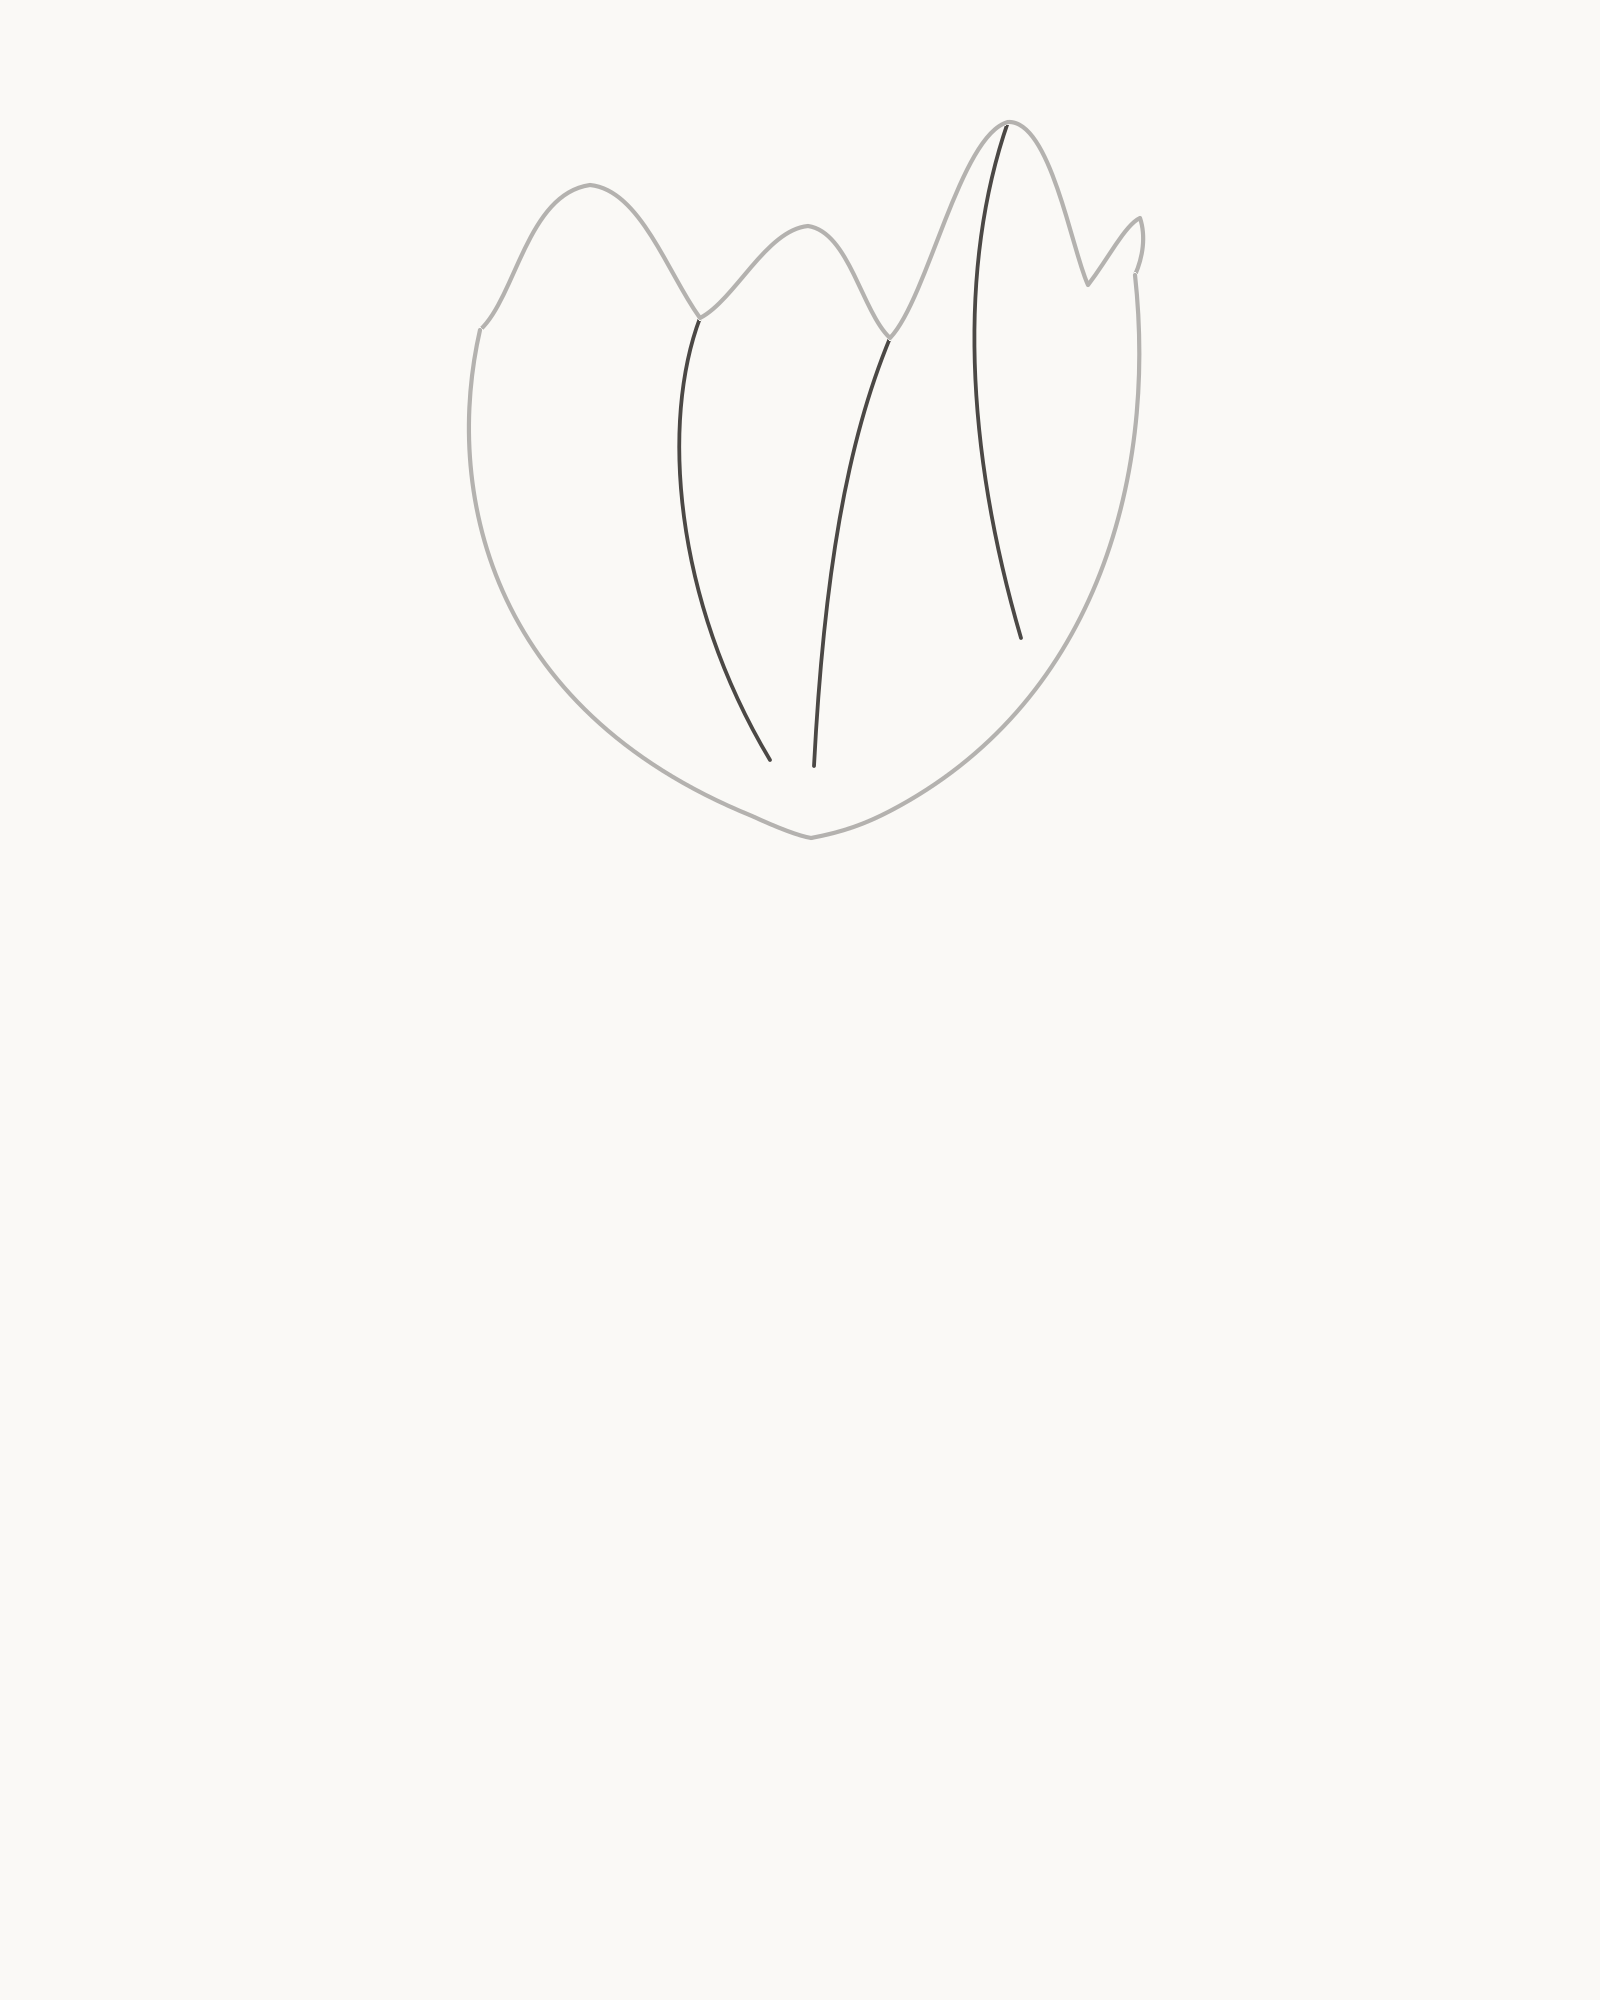
Stage 3 of 8. Three traceable seams establish the visible petal order. Add three seams in a fixed order. From the first notch, take a long curve down and slightly right, stopping well above the cup base. From the middle notch, draw a second curve that leans back left and ends at a similar height. Finally, start at the tallest peak and bring a longer seam down through the right side, finishing before it reaches the outer wall.
Each line begins where two visible edges meet and ends deliberately in open petal space. Their different lengths make one part of the cup appear to pass in front of another. Do not connect the lower ends or close three separate leaf shapes inside the bloom.
Look for this before moving on: three seams can each be traced from a named rim contact to a clean free endpoint, none crosses another line, and the original cup is still completely visible.
If it goes wrong: preserve the rim and the two secure seams. Erase only the newest seam from its contact to its endpoint, then redraw a shorter curve that follows the bowl instead of cutting across it.
4. Attach the curved stem
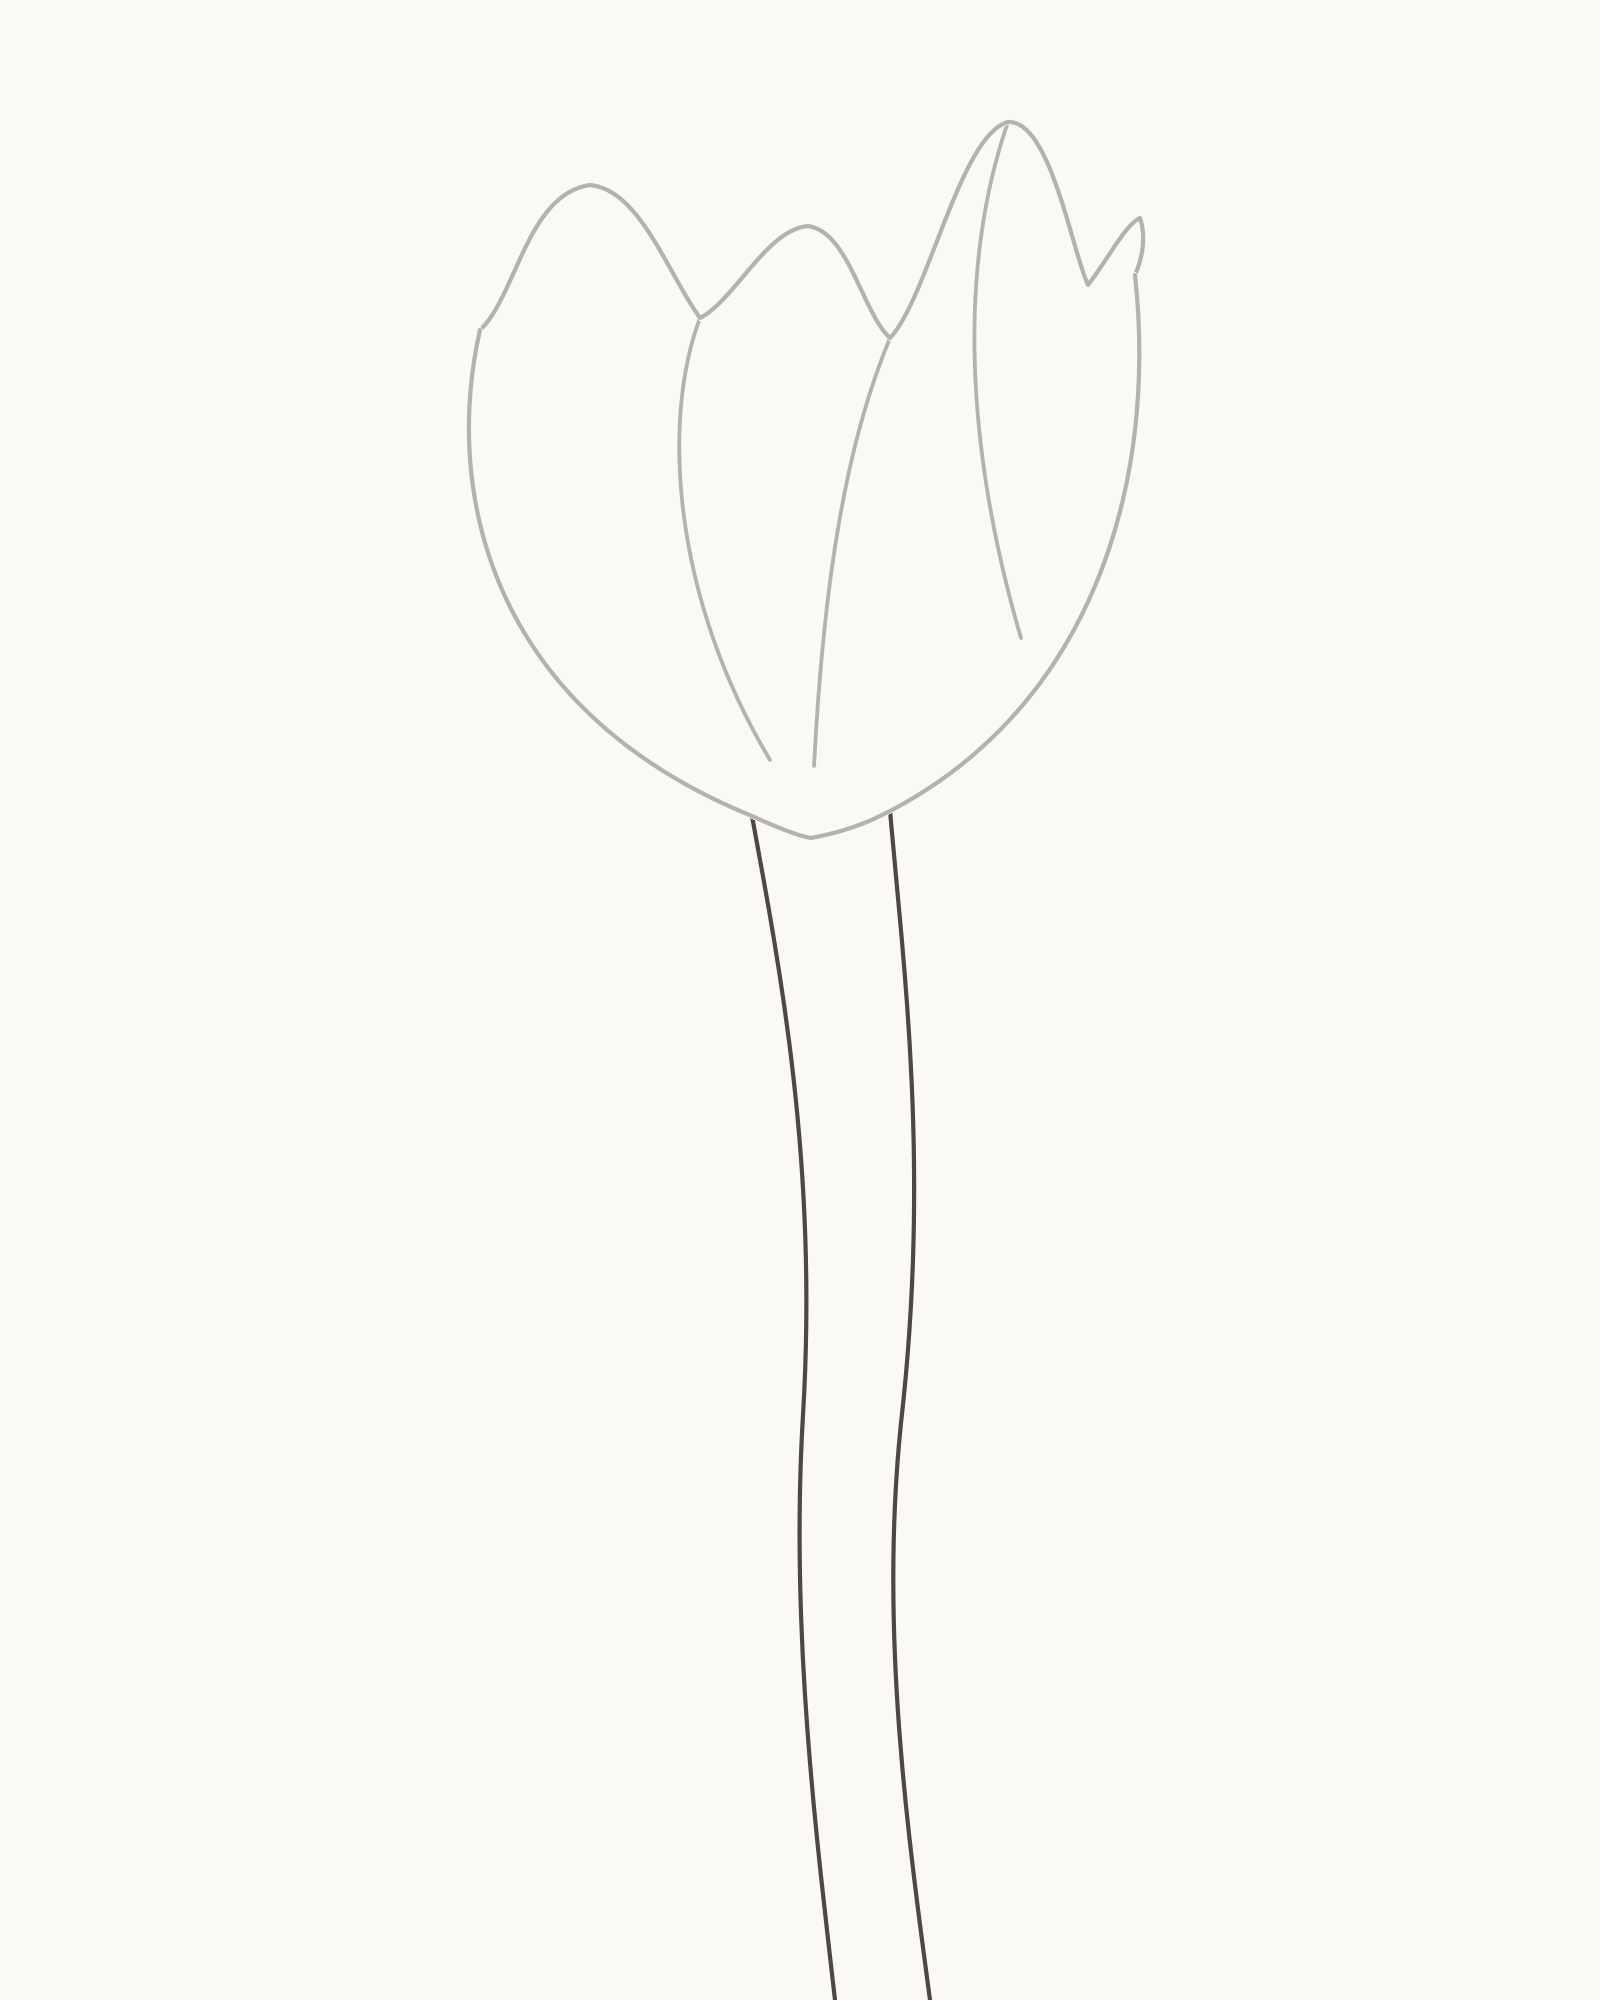
Stage 4 of 8. Two connected S-curves support the cup. Start the left stem edge at the lower-left side of the bloom base and carry it down in a long gentle S. Begin the right edge at a separate point under the lower-right base, then follow the same overall movement to the bottom crop. Keep a narrow space between the two edges.
Avoid using one rigid parallel offset. The distance changes subtly as the stem bends, but both edges continue without pinching together or widening suddenly. Their top contacts should make the bloom look supported rather than balanced on a loose stalk.
Look for this before moving on: two distinct stem edges meet the flower base, remain apart throughout one smooth S-curve and reach the lower edge of the frame without crossing.
If it goes wrong: leave the better edge and both bloom contacts alone. Remove the newer edge only as far as its last smooth section, then use the first edge as a distance guide while preserving a slight width change.
5. Add the large left leaf
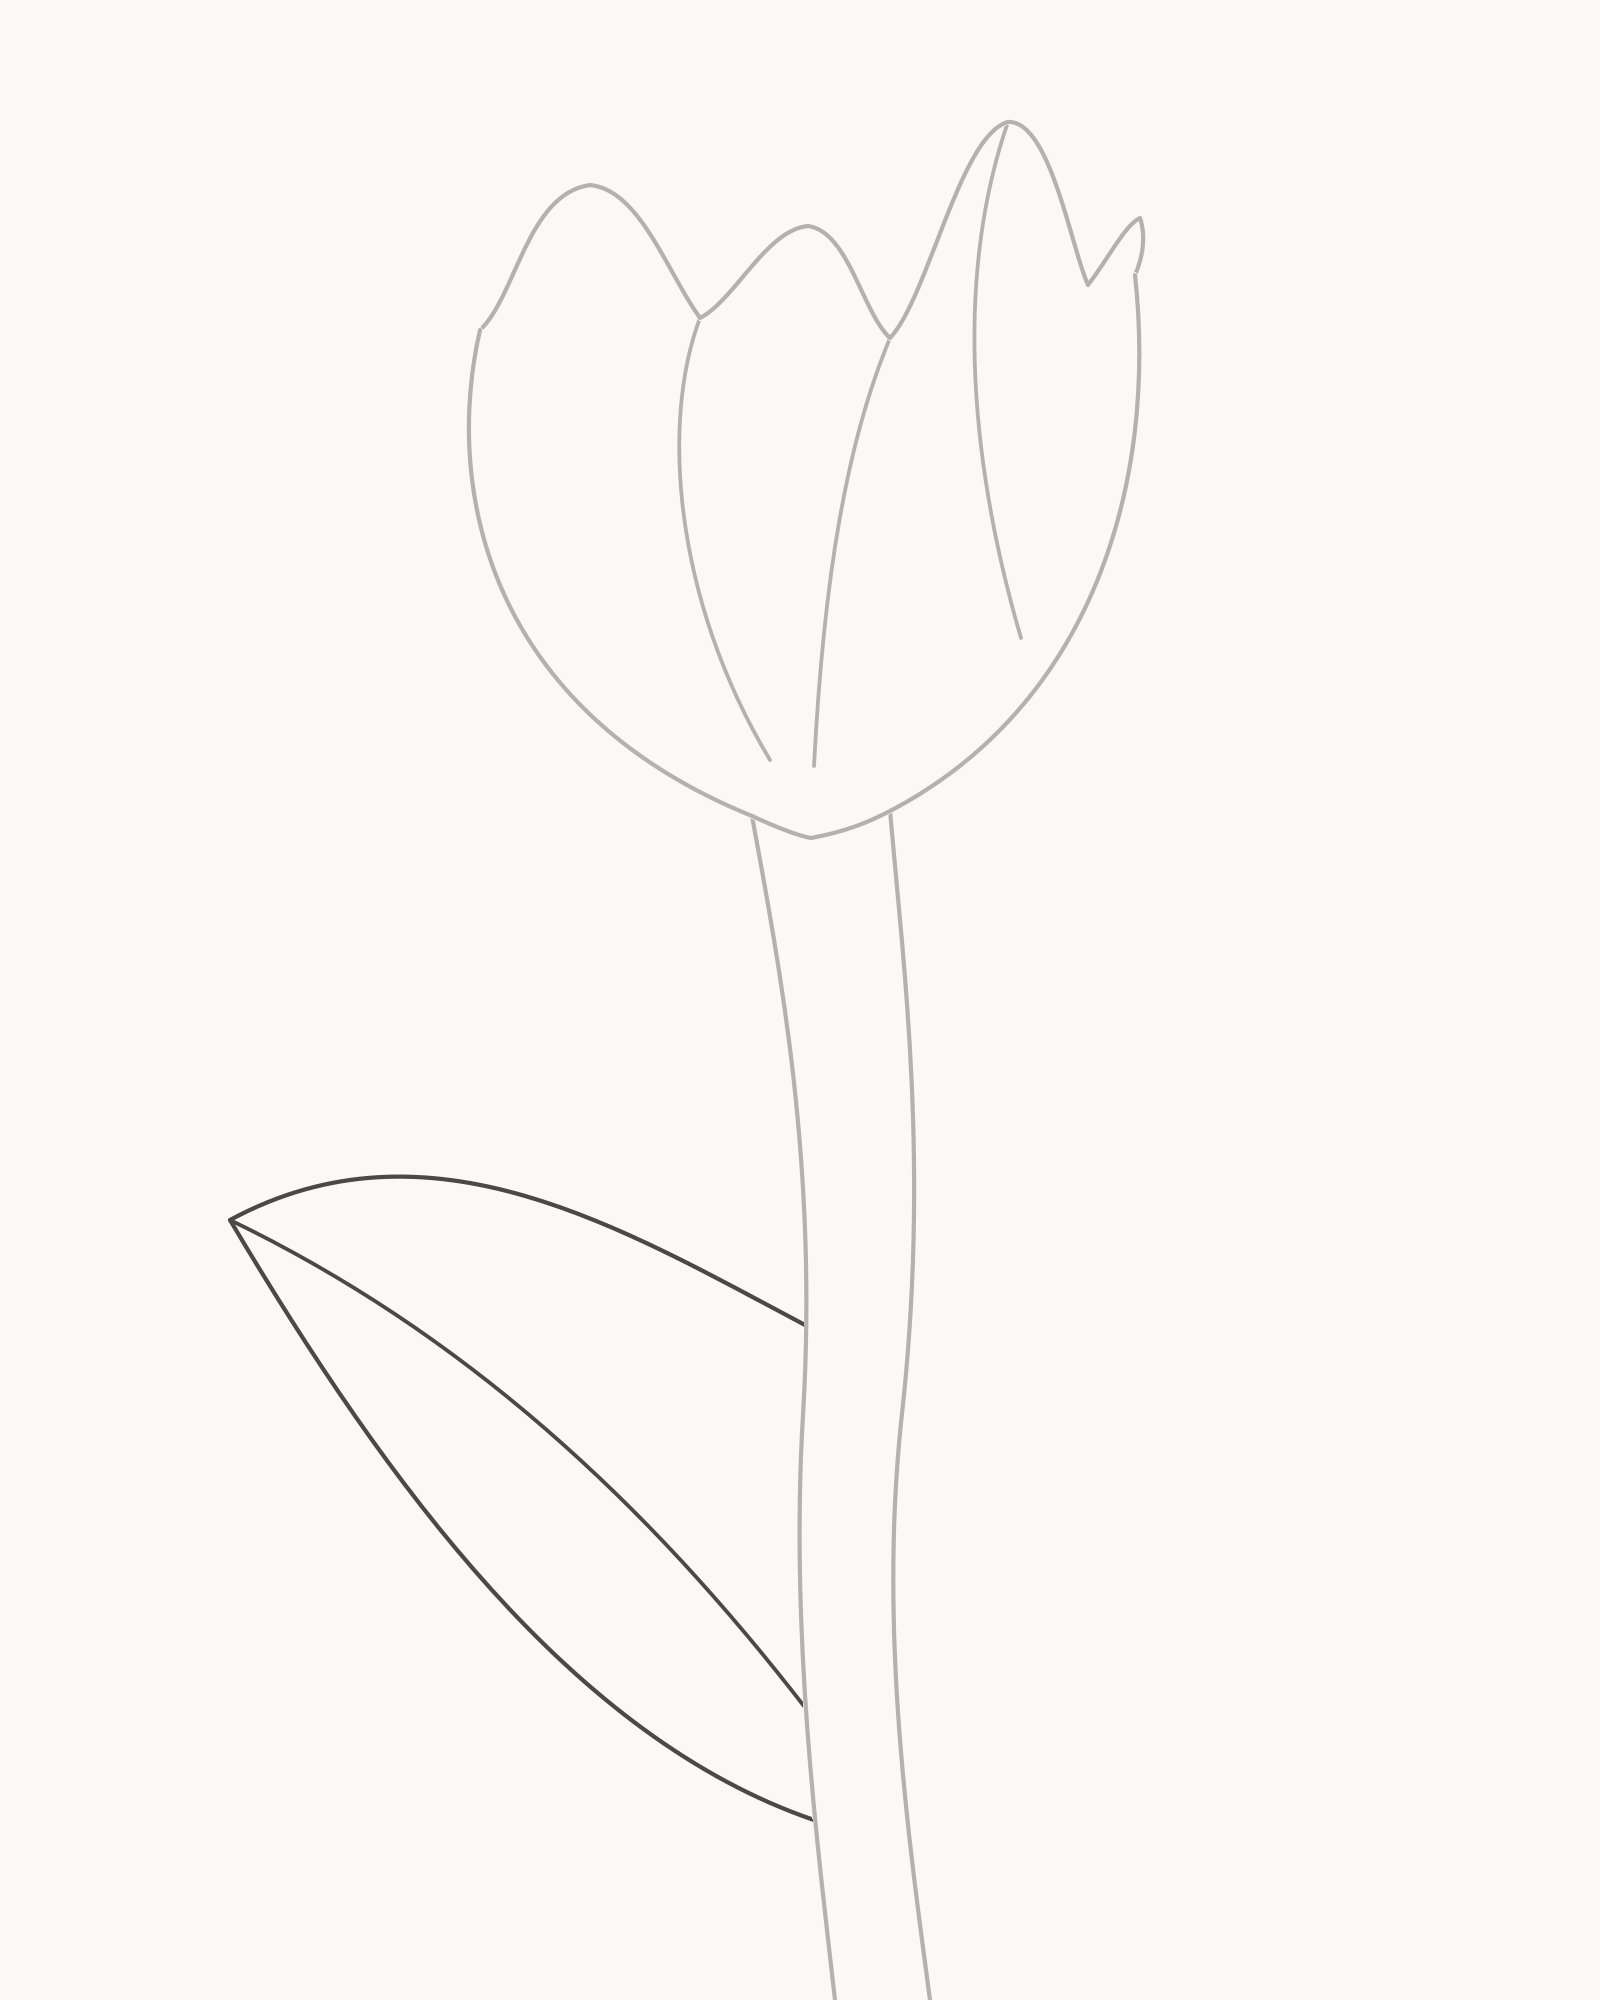
Stage 5 of 8. A broad left leaf attaches directly to the stem. Mark two attachment points along the lower-left stem edge, one above the other. From the lower contact, sweep a permanent midrib towards the left-pointing tip. It may be slightly firmer than the outside line because it shows how the blade grows away from the stem.
Close a broad strap around that guide. Take the upper contour from the higher contact to the tip with a shallow outward bow, then return from the tip to the lower contact on a deeper curve. The broad base meets the stem directly; do not insert a thin petiole between them.
Look for this before moving on: the leaf has two readable stem contacts, one continuous midrib, one pointed tip and two unequal contours that enclose a broad blade without crossing the stalk.
If it goes wrong: keep the stem contacts and midrib. Replace only the newer outside arc between its attachment and the tip, moving its fullest part rather than narrowing the entire leaf into a spear.
6. Add the smaller right leaf
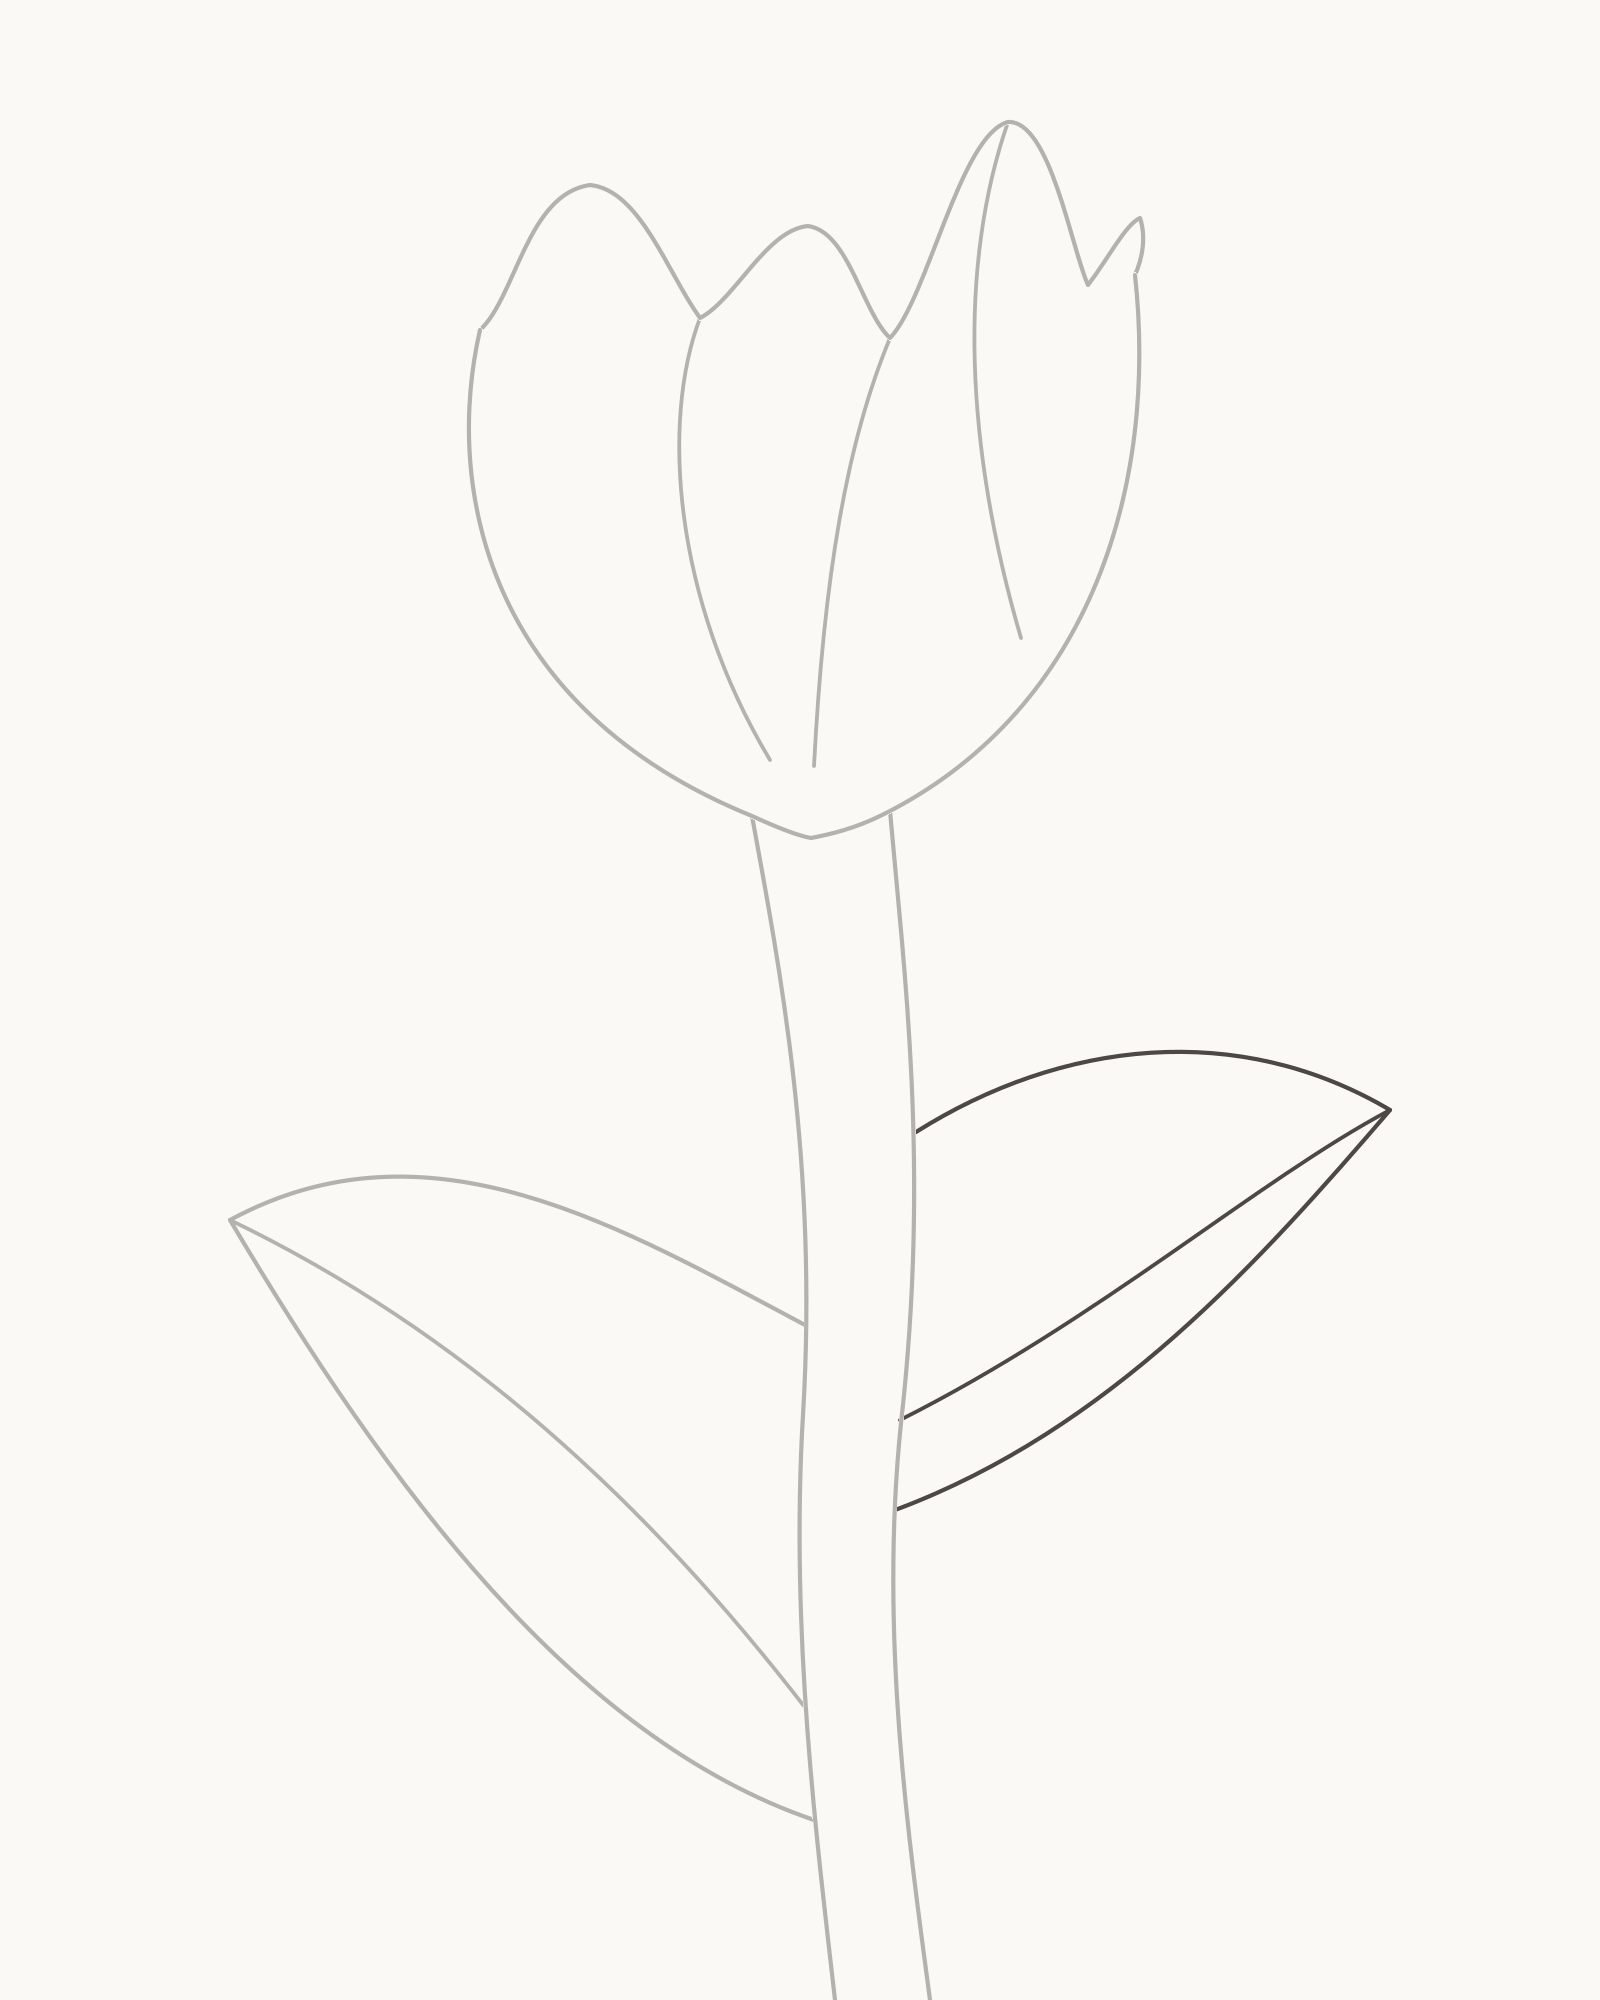
Stage 6 of 8. A smaller higher leaf avoids a mirrored pair. Choose a shorter attachment interval higher on the right stem edge: the right leaf attaches higher than the left one. Send its midrib up and right to a tip above the left leaf. Surround it with two smooth contours, making the blade narrower and less long than the first.
Change more than size: give this leaf a stronger upward lean and a different fullest point. Its broad base still meets the stem at two points. Matching the left leaf's angle in reverse would make the pair look like decorative flags.
Look for this before moving on: the new leaf attaches higher, stays visibly smaller and narrower, points on its own angle and closes against the stem around one retained midrib.
If it goes wrong: preserve the attachment interval and midrib. Redraw only the newest contour with a different bow from the left leaf, keeping both endpoints where they already meet the stem and tip.
7. Add four bloom folds
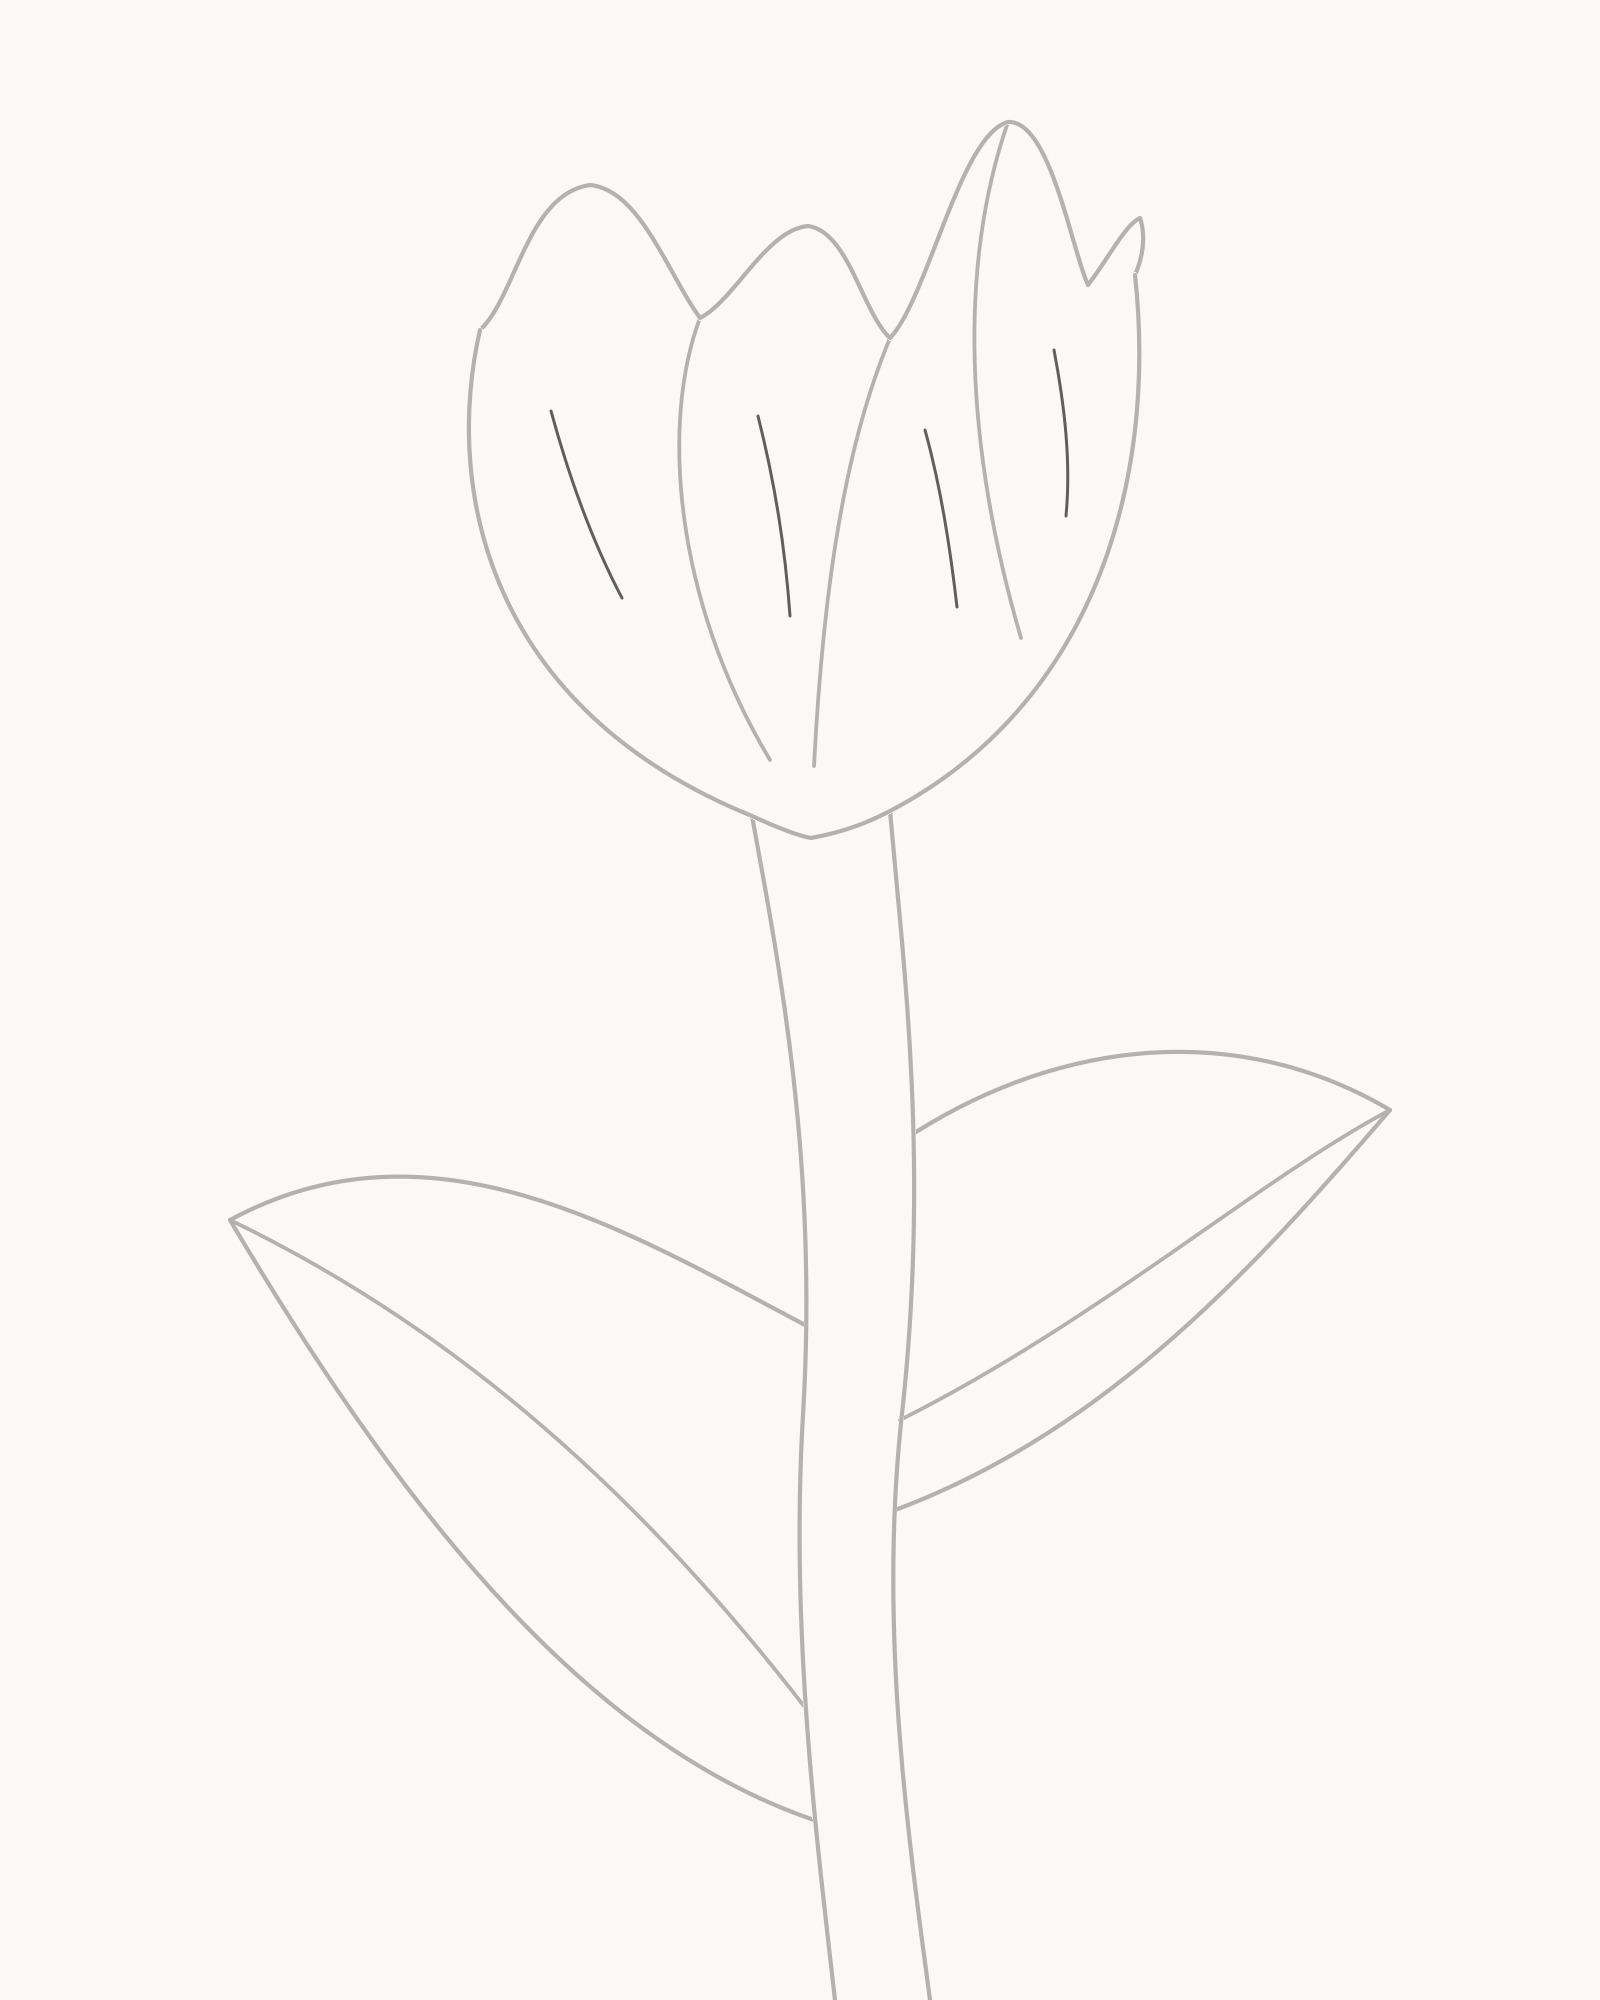
Stage 7 of 8. Four restrained folds turn the broad petal areas. Place four short curves inside the bloom: one low on the left, two through the central areas and one on the right. Let each follow the nearest petal's long direction. Leave clear paper at both ends rather than joining a fold to the rim, base or an overlap seam.
These few lines make the broad areas turn without filling them. Stop at four. More parallel strokes would introduce a shading effect that the promised result does not use.
Look for this before moving on: exactly four new folds are visible, each follows its local petal, and every endpoint sits in open space away from a contour or seam.
If it goes wrong: keep the overlap seams untouched. Shorten or replace only the latest fold if it points across the cup, runs into an edge or starts a dark cluster with its neighbour.
8. Add sparse leaf veins
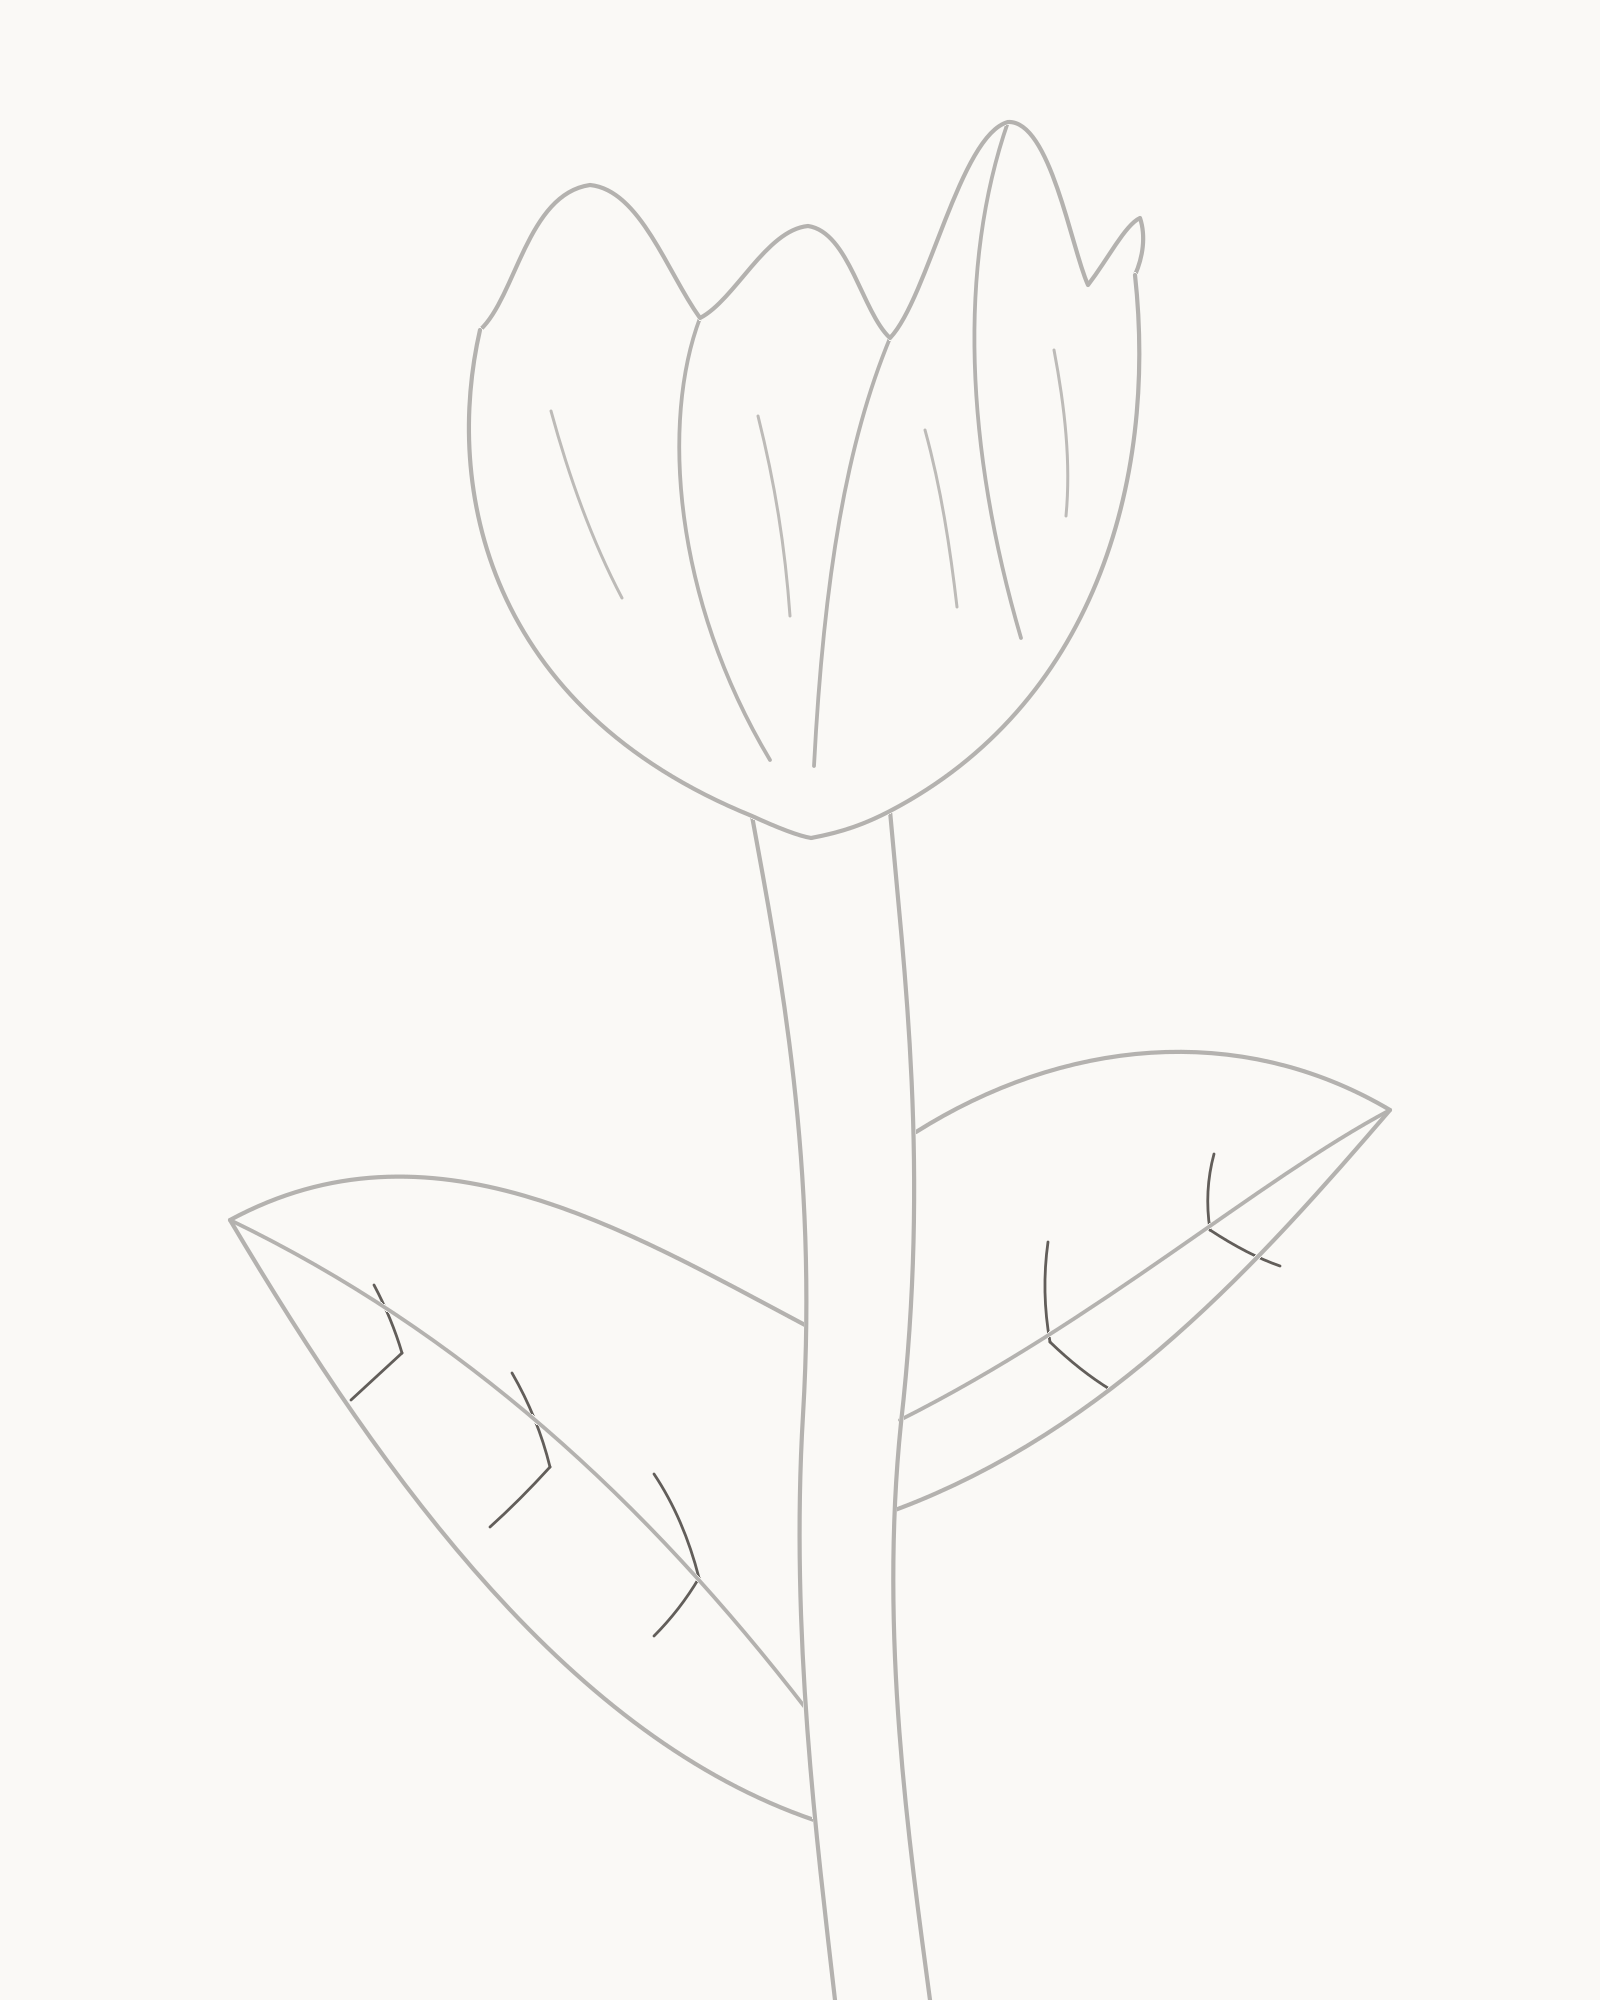
Stage 8 of 8. Ten short secondary veins complete the line-only tulip. Use the large leaf's midrib as the guide for six small branches. Add three on one side and three on the other, changing their spacing and length as they move towards the tip. On the smaller leaf, use two branches per side.
Angle every branch towards its nearby blade edge but stop before touching it. These ten additions describe the direction of the leaves; they are not hatching, a darkening pass or a reason to trace the midribs again.
Look for this before moving on: the large leaf contains six secondary veins, the smaller leaf contains four, and all ten lines end inside their own blades with open paper around them.
If it goes wrong: leave both outlines and midribs in place. Remove or shorten only the newest vein when it hits an edge, repeats its neighbour too closely or begins to form a striped patch.


Common mistakes and small fixes
The top looks like a crown. Compare the four rises rather than retracing the whole rim. Change only the newest repeated arc by widening its base, lowering its peak or softening its notch.
The bloom looks flat. Check where the three internal seams begin. A seam starting at a real rim contact and stopping inside the cup creates overlap; a floating central stripe does not.
The stem looks pasted on. Keep the stronger stem edge and reconnect only the newer one to its own point beneath the bloom. Do not extend it through the flower outline.
A leaf looks like an oval on a stalk. Return its two contours to separate points on the stem. The broad attachment interval matters more than adding extra surface lines.
The leaves mirror one another. Preserve both midribs, then adjust only the newest blade's width, fullest point or lean. The right leaf should remain higher and smaller.
The final marks look like shading. Return to four bloom folds, six large-leaf veins and four small-leaf veins. Remove the most recent repeated stroke instead of darkening the surrounding lines.
Practise a more closed bloom
On a fresh area, repeat only Stages 1–3 with the two shoulders brought slightly closer together. Keep the right-of-centre peak tallest, but make the three notches shallower and shorten the internal seams. This produces a more closed tulip while practising the same cup-and-overlap logic; there is no need to draw another stem or add tone.
For a small arrangement with two different blooms, continue with How to Draw Flowers. For more practice with broad attachments and permanent midribs, use How to Draw Leaves. The How to Draw page returns to the practical guide index. The separate Flower drawings gallery remains the home of historical examples rather than step-by-step instruction.
Frequently Asked Questions
What is the easiest way to start a tulip drawing?
Begin with one open cup placed high on the sheet. Keeping the top unfinished gives you room to vary the rim before the stem and leaves make the composition harder to move.
How do I keep a tulip from looking like a simple symbol?
Make the shoulders, peaks and notches unequal, then use three seams with different lengths. Small changes in width and lean are more convincing than extra detail.
How many petals should I show?
This exercise uses four visible high points and three internal overlap seams. They are drawing decisions for this view, not a universal petal count for every tulip.
How do I draw a tulip stem with leaves?
Use two gently curving stem edges. Give each leaf two separate contacts on the stem, a retained midrib and a broad strap-like outline; avoid attaching an oval blade by a thin petiole.
Should I erase the first cup later?
No. The open cup is the permanent outside boundary of the bloom. Use the eraser only to correct the newest faulty section before accepting that stage.
Does this lesson include shading?
No. The last two stages add countable direction lines, but there is no tone, hatching or shaded version of the finished tulip.
How can I make the leaves look more natural?
Change their height, width, lean and attachment interval. Keep the right leaf higher and smaller, and stop every secondary vein before it touches the blade edge.
Is a tulip difficult for a beginner?
The long cup and stem curves are straightforward; the main challenge is keeping the upper rim varied without turning it into a crown. Following the rim in order and checking each new mark keeps that task manageable. The 30–45 minute range is an untested estimate, not a promise.
References
- Royal Horticultural Society, How to grow tulips. View source
- Royal Horticultural Society, Tulip. View source
- Kew Science, Tulipa L.. View source
More DRAWING Guides

How to Draw a Rose: A Step by Step Guide

How to Draw a Tree: A Step by Step Guide

How to Draw Eyes: A Step by Step Guide

How to Draw Leaves: A Step by Step Guide

How to Draw Autumn Leaves: A Step by Step Guide

How to Draw Flowers: A Step by Step Guide

How to Draw a Lily: A Step by Step Guide

How to Draw a Sunflower: A Step by Step Guide

How to Draw a Tulip: A Step by Step Guide

How to Draw a Hibiscus: A Step by Step Guide

How to Draw a Daisy: A Step by Step Guide
