 by Tom Gurney
Tom Gurney BSc (Hons) is an art history expert with over 20 years experience
Page created on September 2, 2026 / Page updated on September 13, 2026
Email: tomgurney1@gmail.com / Phone: +44 7429 011000
Read the Whole Plant Before Chasing Petal Detail
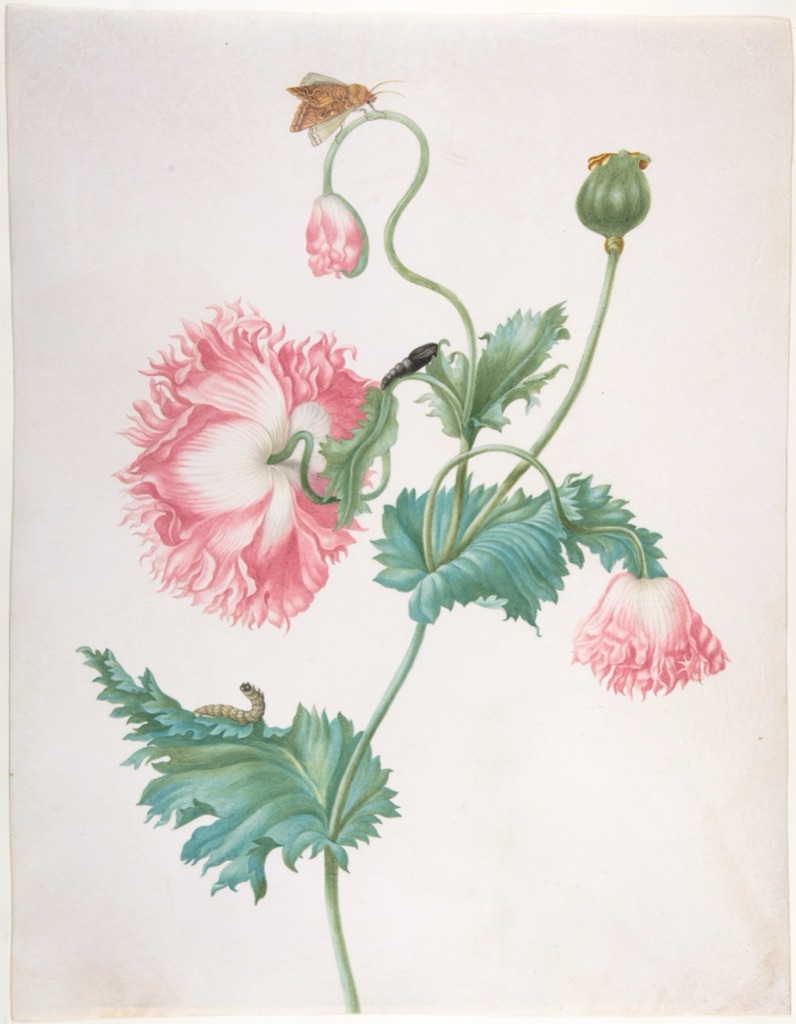
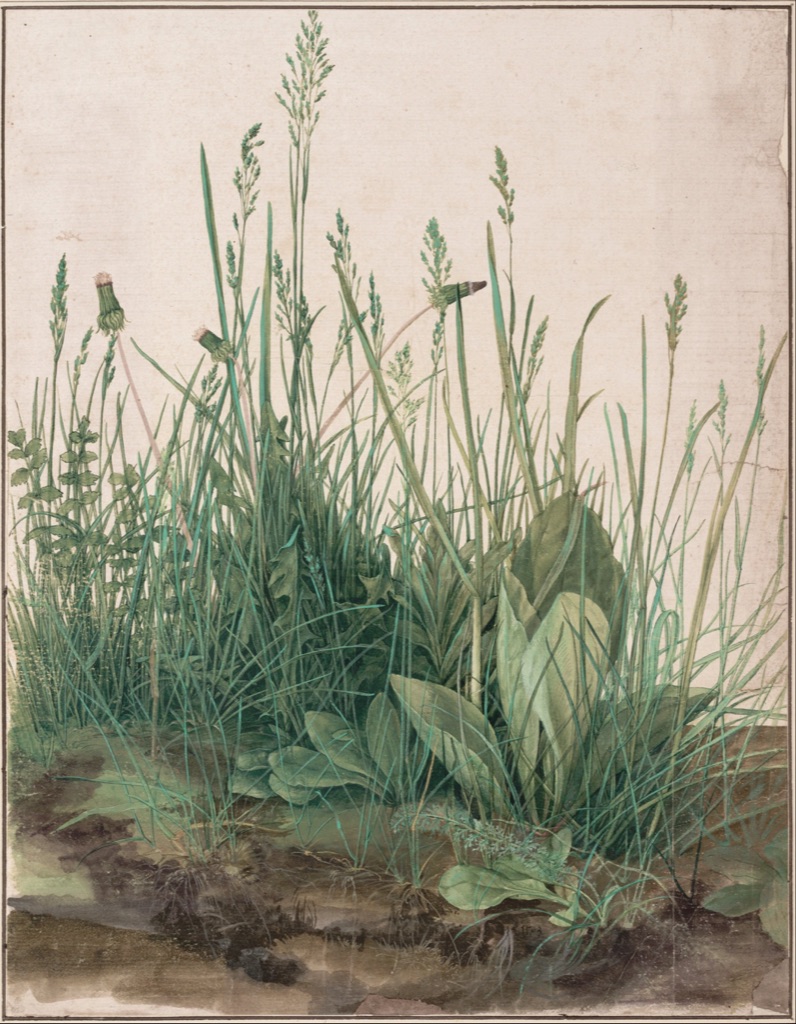
Botanical drawing begins with a living structure, not a generic flower symbol. A useful study records how a stem changes direction, where leaves attach, which parts overlap and how the specimen occupies space. It may be scientific, decorative or exploratory, but its visual claims should remain as exact as its purpose requires.
Beatrix Potter’s nature studies joined close observation, microscopy and several media.[1] This guide develops that attentive habit without promising taxonomic authority. Eight Public Domain works from the Met’s Open Access collection show graphite, ink, transparent colour, gouache and cut paper.[10]
At a Glance
- Begin with structureMap habit, axes, nodes and attachment before outlines, veins or surface pattern.
- Match detail to purposeA useful study selects evidence clearly; maximum density is not automatically greater accuracy.
- Record uncertaintyLabel scale, date, place and tentative identification instead of inventing a species or hidden structure.
- Choose media deliberatelyGraphite, ink, transparent watercolour, gouache and cut paper reveal different structural decisions.
- Protect the subjectObserve plants in place where possible and follow permissions, conservation rules and collection ethics.
Contents
Compare the Evidence Each Botanical View Can Carry
No single view records a whole plant. Choose a view and medium by the structural question it can answer, then label the limits of what was observed.
| View or study | Best evidence | Useful media | Common risk |
|---|---|---|---|
| Whole-plant habit | Growth direction, branching and overall proportion. | Light graphite, ink diagram or restrained wash. | Beginning with individual leaves and losing the larger axis. |
| Stem and node | Attachment, interval, overlap and directional change. | Graphite, pen or pointed brush. | Regularising natural variation into a decorative rhythm. |
| Leaf rotation | Midrib, margin, foreshortening and front/back relationship. | Graphite, watercolour or layered line. | Shortening only the tip instead of turning the whole leaf. |
| Flower front/profile | Radial order, depth, visible count and attachment. | Graphite underdrawing with transparent or opaque colour. | Imposing one generic flower formula. |
| Magnified detail | Venation, hairs, serrations and reproductive structures. | Fine graphite, pen, brush or measured enlargement. | Letting microscopic marks overwhelm identifying structure. |
| Cut-paper analysis | Silhouette, overlap and negative space. | Coloured paper arranged against a contrasting ground. | Confusing analytical simplification with a scientific record. |
Choose and handle a subject responsibly
Draw a plant where it grows whenever possible. If collecting is allowed, take only common material with the landowner’s permission and follow local protections; do not remove a specimen merely to complete an exercise. Kew’s herbarium demonstrates that scientific collections depend on organised records and stewardship, not casual picking.[2]
Select a stem that shows several stages or viewpoints: front and back of a leaf, a bud beside an open flower, or a branching junction. Put its cut end in water if appropriate. Record date, place, approximate scale and any identification supplied by a reliable label. Write “unidentified” rather than inventing a species.
Map the plant’s habit
Habit is the overall growth pattern. Lightly place the highest, lowest, leftmost and rightmost points, then connect the main stem direction. Mark each major branch as an axis before drawing an outline. Compare the empty spaces between branches; those gaps often reveal errors sooner than leaf detail.
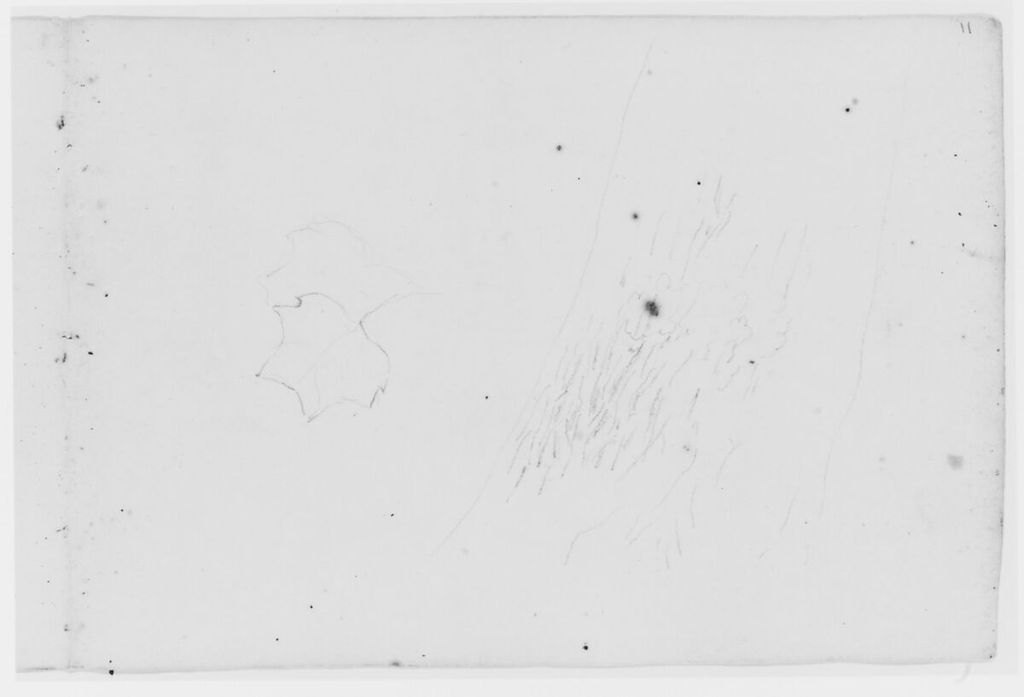
Asher Brown Durand’s small Leaf and Tree Study (from Sketchbook) uses graphite.[3] Its format encourages an economical first pass. Fill a page with four envelopes of the same cutting seen after quarter turns. The aim is to understand branching in space, not finish one view.
Follow stem rhythm and attachment
A stem is not a uniform tube. Observe where it thickens, changes angle or disappears behind a leaf. At a node, determine whether leaves are opposite, alternate, whorled or simply unclear from the chosen view. Do not regularise intervals because plants are expected to be symmetrical.
Draw the central axis continuously, then add attachment points as short cross-marks. Check the distances between them against the total length. Only then widen the stem and describe overlaps. This sequence keeps local curves attached to the growth structure.
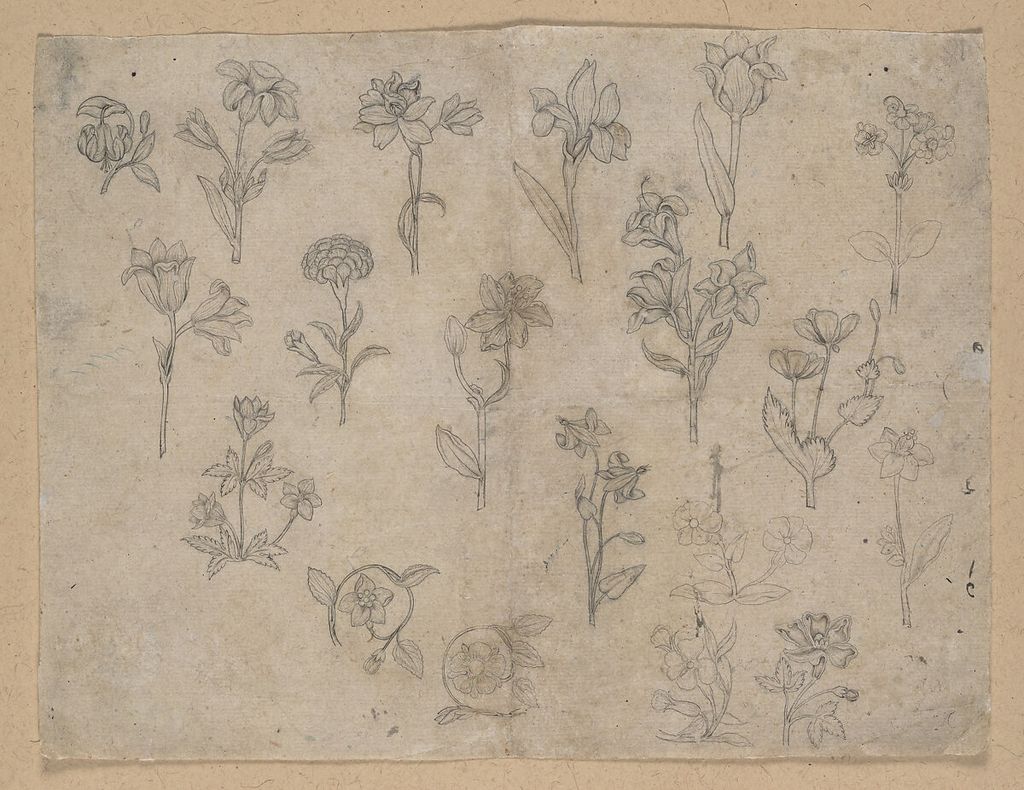
The Mughal Flower Studies, about 1650, presents nineteen flowers in ink and is described by the Met as a practice sheet drawn from nature.[4] Use its multiplicity as a prompt: repeat one junction six times, changing the view, rather than turning repetition into a border pattern.
Construct leaves from axis to margin
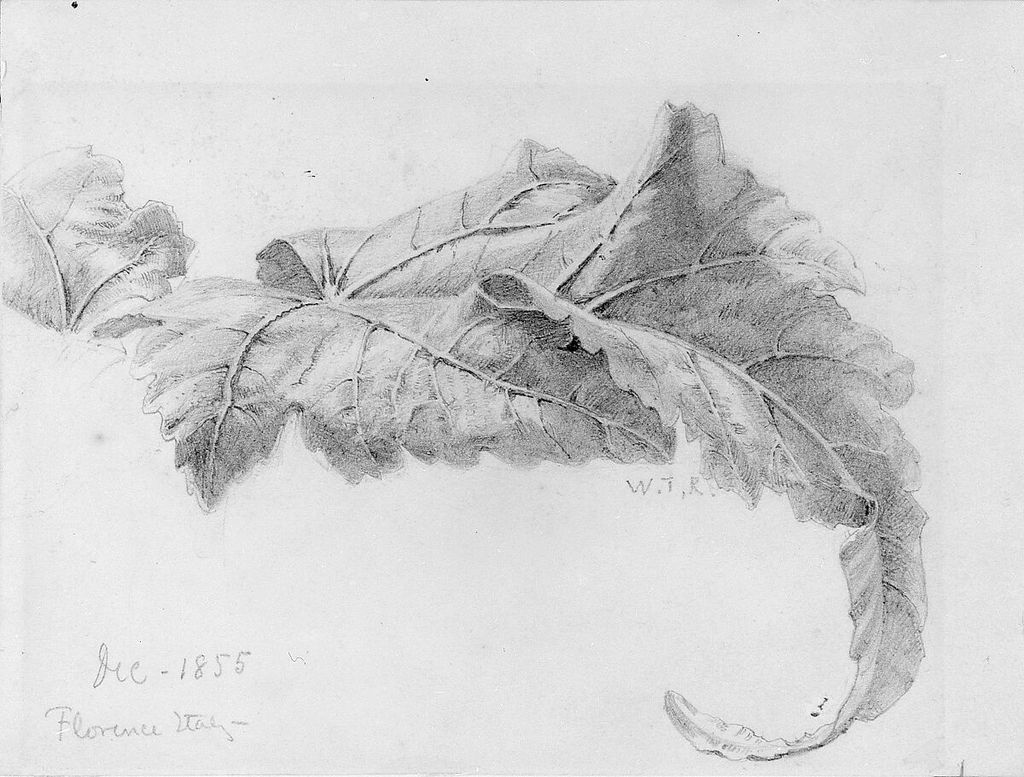
Begin a leaf with its midrib and maximum width. Mark where the margin changes direction, then connect those landmarks. A serrated edge belongs after the main silhouette works. Count or sample serrations only when the drawing’s purpose requires that information.
William Trost Richards’s Leaves, 1855, is graphite on off-white paper and only three by four inches.[5] Make a similarly small monochrome study. Use line weight for overlap, pale hatching for curvature and untouched paper for the lightest planes. Small scale forces selection.
Turn one leaf towards and away from you. Its apparent width shortens, the midrib may curve, and one side can conceal the other. Draw through the hidden ellipse of its orientation lightly. Foreshortening should change the whole leaf, not merely shorten its tip.
Describe venation without a diagram
Veins branch within a surface that bends. Establish the midrib, then draw only the secondary veins necessary to explain direction or identification. Let them taper and disappear. Equally dark veins pasted across a leaf flatten it.
Use a magnifier if needed, but alternate magnified and normal views. The former reveals branching; the latter tells which information remains visible at the drawing’s scale. Record a detail enlargement beside the whole leaf when microstructure matters.
Make three versions: silhouette only, main venation only, and combined. Compare which facts survive. Botanical accuracy is not maximal density; it is clear selection matched to purpose.
Analyse flowers as organised volumes
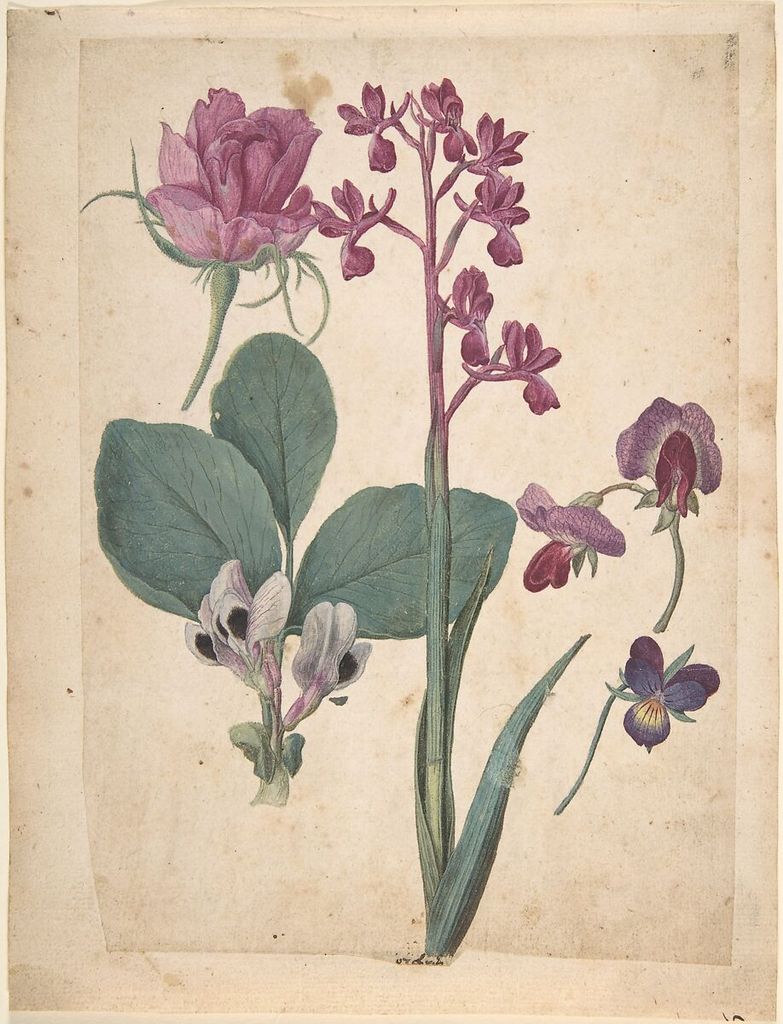
Locate the flower’s central axis, overall diameter and depth. Count petals or lobes when visible, but distinguish actual count from parts hidden by overlap. Mark radial directions before shaping margins. A tilted flower behaves like a shallow bowl or cone in perspective.
Jacques Le Moyne de Morgues’s sixteenth-century sheet brings together a rose, heartsease, sweet pea, garden pea and orchid in watercolour and gouache over black chalk.[6] The Met’s identifications support those names. Study several species side by side, noting how symmetry, profile and attachment differ instead of imposing one flower formula.
For a single bloom, draw a front, profile and three-quarter view. Keep the same scale. Link corresponding landmarks—the base, centre and outermost petal—so the three studies describe one structure in rotation.
Use graphite before transparent colour
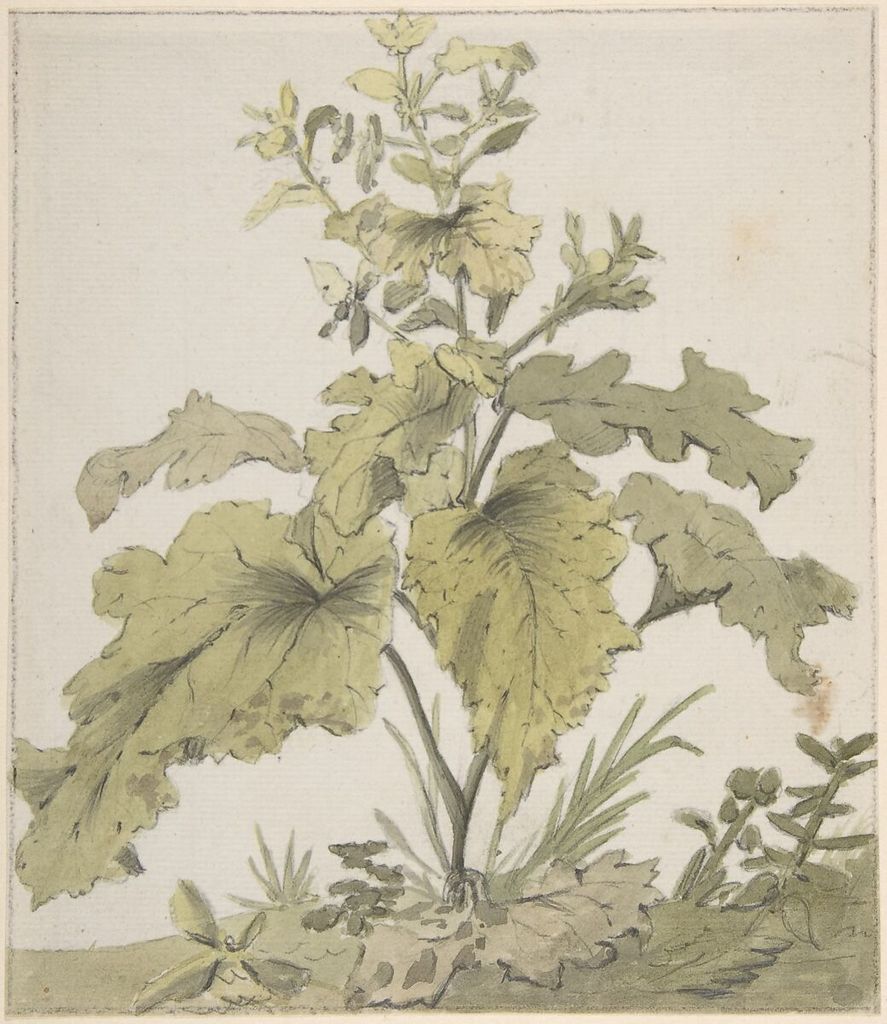
Christian Wilhelm Ernst Dietrich’s Study of a Plant is watercolour over graphite with graphite framing lines.[7] A light underdrawing can settle placement before wet colour. Use pressure low enough that graphite does not groove the paper or dirty pale washes.
Mix three swatches: local colour, a lighter dilution and a neutralised shadow. Let them dry, since watercolour often changes value while drying. Paint broad areas first and reserve paper for the clearest lights. The V&A notes that transparent watercolour artists exploit white paper’s luminosity.[8]
Do not outline every painted edge afterward. Let value or hue carry soft boundaries and use line only where structure requires it. If a wash crosses a reserved vein, decide whether lifting is supported by the paper test rather than scrubbing fibres.
Work with opaque colour deliberately
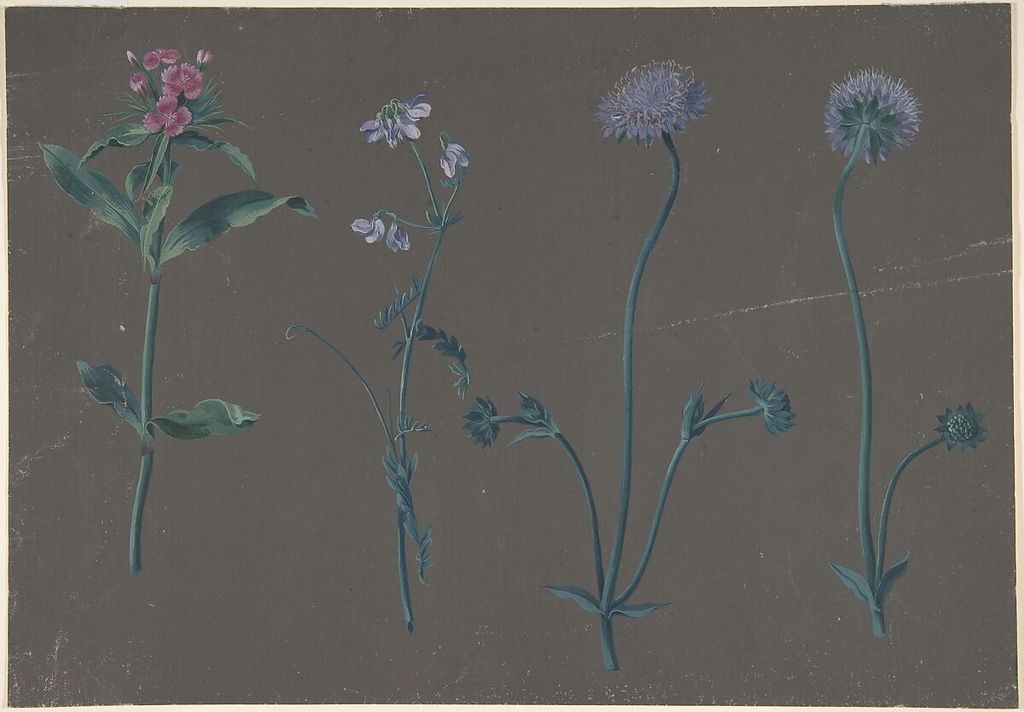
Johann Christian August Birnbaum’s Study of Three Flowers, dated 1781, uses gouache.[9] Opaque colour can place light over a ground and correct shapes, but repeated thick revision may crack or become chalky. Test dilution, layering and dry colour before the finished sheet.
Build a flower with five mixtures prepared in advance. Paint the largest midtone shapes, add shadow, then reserve the lightest mixture for selected turning planes. Avoid adding white to every mix automatically; compare saturation as well as value.
Set three specimens apart so each silhouette remains legible. A botanical sheet can be composed, but decorative balance must not falsify how individual structures join.
Learn from ink and colour traditions
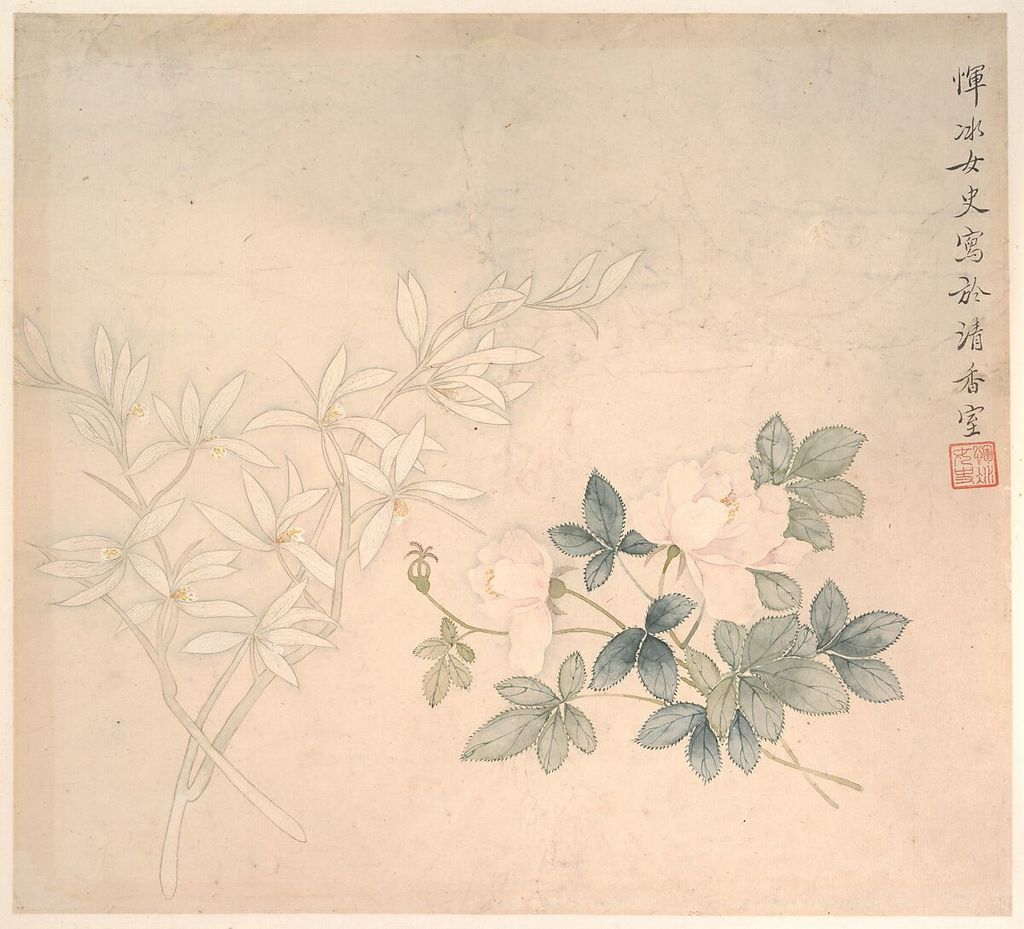
Yun Bing’s seventeenth-century Flower Study is an album leaf in ink and colour on paper.[11] Its Chinese context and album format should remain explicit rather than being absorbed into a generic Western illustration story. Use it to consider how brush line and tonal colour can cooperate within a compact field.
Load a pointed brush, test its taper, and describe one stem in a continuous change of pressure. Add colour only after the directional line reads. Repeat with a broken, drier stroke for a textured leaf. These are material exercises, not attempts to imitate a cultural tradition from one image.
The Met’s diverse records demonstrate that botanical attention appears in multiple artistic systems. Compare purposes and materials carefully; do not rank one by how closely it resembles a modern field guide.
Consider cut paper as analysis
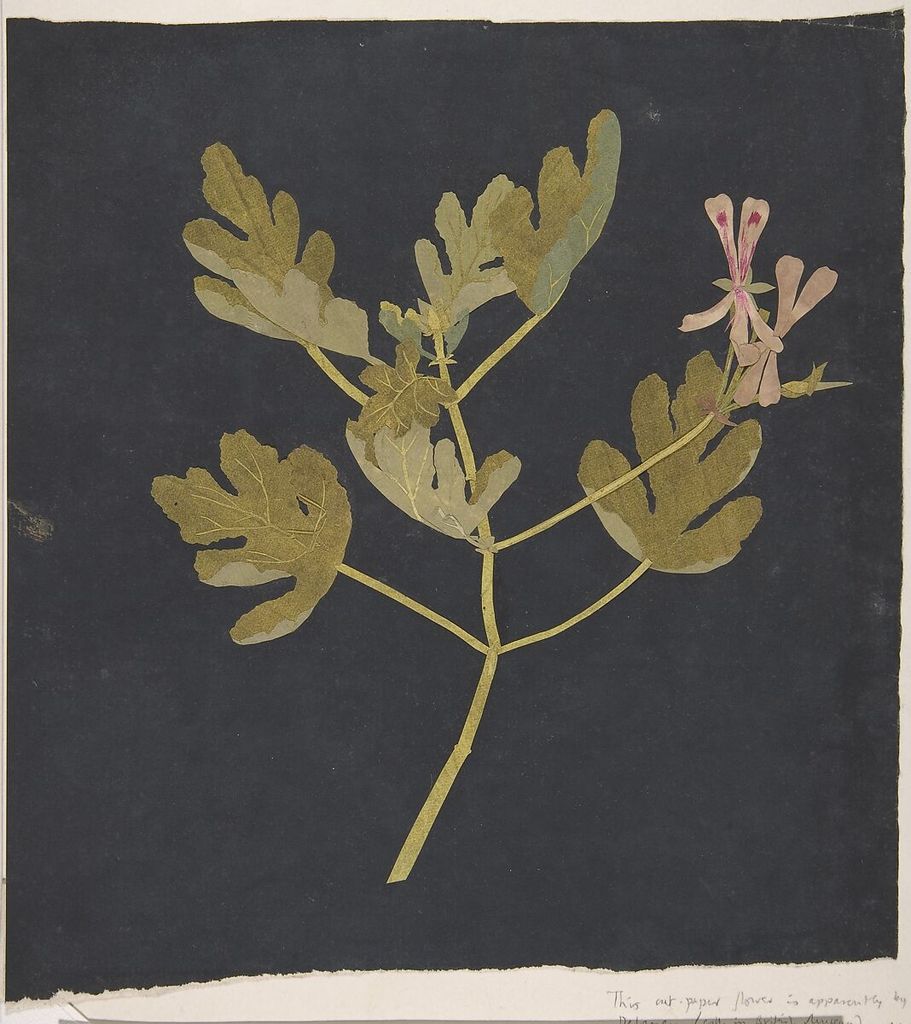
Mary Delany’s Botanical Study, about 1772–82, is paper collage. The Met states that she worked to scale from specimens and assembled many small pieces, while noting that the geranium type in this example is not identified.[12] That unresolved label is important evidence: precision does not license a guessed name.
Try a non-adhesive paper exercise. Cut the main silhouette, then separate overlaps into three additional shapes. Arrange them on a contrasting ground without gluing. The process exposes where a leaf joins a stem and which negative spaces define the plant.
Return to drawing and compare the simplified shapes with the specimen. Restore only details that change structure. Switching media can clarify observation without making collage a substitute for it.
Record scale, notes and change
Add a scale bar when size matters. A written “life size” can become ambiguous after scanning or printing; a drawn bar scales with the image. Note whether dimensions refer to the specimen, drawing or enlargement.
Write colour observations while the plant is fresh. Names such as “green” are broad, so compare relative temperature, saturation and value. A small mixed swatch can be more precise than prose. Date each session because wilting, opening and seed development alter the subject.
Draw the same specimen after one hour and the next day. Align the views but do not correct change back towards the first state. Botanical drawing can document time as well as anatomy.
Separate surface pattern from form
Spots, stripes, hairs and colour breaks sit on a surface whose volume must already read. Map the leaf or petal plane first, then ask how the pattern bends across it. A stripe that keeps constant width while crossing a turning form may flatten the study unless that constancy is genuinely observed.
Make a tracing of the main structure before adding pattern. On the tracing, indicate only the direction in which each surface turns. Lay a second transparent sheet above it and place the markings. Comparing the layers shows whether a decorative feature supports or contradicts the underlying volume.
Hairs and fine serrations need hierarchy. Draw a representative group at normal scale, then an enlarged detail with its own scale bar. Filling the whole plant with equally dark microscopic marks can obscure the branching and silhouette that identify it more efficiently.
Draw roots, bulbs and seed structures
Botanical study need not stop at the flower. If a cultivated specimen can be examined without ecological harm, record the transition from stem to root or bulb. Remove loose soil gently according to horticultural guidance and do not invent concealed structures. For a plant in the ground, note that roots were not observed.
Draw a seed pod first as an outer volume, then add seams, openings and attachment. If it is permissible to open a fallen or cultivated example, place a separate sectional study beside the intact form. Label the cut or broken view so it cannot be mistaken for the plant’s external appearance.
Compare immature and mature structures at the same scale. Measure length and widest diameter, then record texture with a limited mark vocabulary. The exercise makes developmental change visible without relying on colour alone.
Plan a field session
Outdoors, choose a stable working position that does not obstruct a path or damage surrounding growth. Use a board, clips and a small tool set. Begin with weather, light direction and viewpoint notes because wind and moving sun can change the subject faster than a studio still life.
Make several two-minute diagrams before selecting one longer view. A diagram can record branching, leaf orientation and the direction of a flower head without finished contour. If the plant moves, return to the established axes instead of chasing every gust.
Photographs can supplement notes about a transient state, but identify when the drawing switches from direct observation to a photograph. The two viewing conditions are different: a photograph fixes focus, scale and viewpoint, while the living subject permits movement and binocular inspection.
Edit without falsifying
A clear botanical plate may separate overlapping parts or omit accidental damage, but such editing should suit the stated purpose. Decide whether the page is a portrait of this specimen, a structural study or a generalised explanation. Do not quietly combine incompatible stages into what appears to be one observed moment.
Use dotted connectors or captions for detached details. Keep repeated views aligned and give enlargements scale. If a leaf is shown from both sides, label upper and lower surfaces rather than expecting colour alone to distinguish them.
At review, list every inference: hidden attachment, reconstructed margin, uncertain colour or tentative name. Either verify it, qualify it in a note, or remove it. Accuracy includes honest limits as well as fine description.
Build a complete study page
Divide the page into a whole-plant view, one enlarged junction, a front-and-profile flower pair and a small colour chart. Begin every panel with axes and scale. Keep notes outside the image field and connect enlargements clearly.
Review the sheet against the subject. Check overall habit, node intervals, leaf width, visible petal count, overlaps and value grouping. Mark uncertain identification with a question rather than concealing it. Remove decorative marks that imply structures you did not observe.
The eight works offer complementary precedents: Durand and Richards compress leaf study into graphite; the Mughal page uses repetition; Le Moyne compares species; Dietrich stages graphite and watercolour; Birnbaum uses gouache; Yun Bing joins ink and colour; Delany analyses a specimen through cut paper. The shared foundation is attentive structure, not a single look.
Continue with observational drawing for measurement, ink drawing for brush and pen control, or pastel drawing for dry colour.
Watch Botanical Observation Become Illustration
Choose a Smithsonian account of illustration as scientific work or two museum films connecting Beatrix Potter's close study of nature with her wider visual world.
The Art and Science of Botanical Illustration
Smithsonian botanical illustrator Alice Tangerini explains how carefully selected visual detail helps researchers distinguish species.
Watch on YouTubeFrequently Asked Questions
Botanical drawing records plant structure for a stated artistic, observational or scientific purpose. It may use many media, but should make its scale, subject and uncertainties clear.
Botanical illustration normally selects and organises details to communicate identifying or explanatory evidence. Flower painting may prioritise expressive or decorative aims, although the categories can overlap.
Begin with the plant's overall habit and main axes, then locate nodes, branch directions and attachment. Individual contours, veins and surface pattern become easier to judge once that structure is stable.
There is no single best medium. Graphite supports measurement and revision; ink clarifies selected line; transparent watercolour preserves luminous paper; gouache permits opaque layering; cut paper can test silhouette and overlap.
Use a scale bar whenever size matters, especially for enlarged details. Unlike the words “life size,” a drawn scale bar changes with scanning or printing and keeps its relationship to the image.
Discussion
Which botanical study becomes most informative when you compare its whole-plant structure with one carefully chosen detail?
Reader Insights
Habit, axes and attachment carry more identifying information than decorative detail alone.
Distinguish observed, enlarged, reconstructed and uncertain features on the page.
Choose graphite, ink, colour or cut paper for the evidence each can make clearest.
Join the Conversation
Share one plant study whose structure became clearer only after changing view, scale or medium below.
References
- Victoria and Albert Museum, “Beatrix Potter: a life drawing nature”: source.
- Royal Botanic Gardens, Kew, “Herbarium”: source.
- The Metropolitan Museum of Art, Asher Brown Durand, Leaf and Tree Study: source.
- The Metropolitan Museum of Art, Flower Studies: source.
- The Metropolitan Museum of Art, William Trost Richards, Leaves: source.
- The Metropolitan Museum of Art, Jacques Le Moyne de Morgues, A Sheet of Studies of Flowers: source.
- The Metropolitan Museum of Art, Christian Wilhelm Ernst Dietrich, Study of a Plant: source.
- Victoria and Albert Museum, “What is watercolour?”: source.
- The Metropolitan Museum of Art, Johann Christian August Birnbaum, Study of Three Flowers: source.
- The Metropolitan Museum of Art, Open Access: source.
- The Metropolitan Museum of Art, Yun Bing, Flower Study: source.
- The Metropolitan Museum of Art, Mary Delany, Botanical Study: source.