



Draw a front-view pair of eyes in nine permanent line stages. You will place both eyes together, connect the lids, align the gaze and add only enough surrounding detail to make the pair feel part of a face. The finished result is a clean pencil drawing with dark pupils and a few iris lines, not a shaded portrait.
The most useful decision happens before an iris or lash appears: place the four corners of both eyes as one arrangement. This gives you a shared height, a centred gap and two related widths. It is much easier to adjust four small marks than to finish one eye and discover that there is no convincing place for the other.
For this example, the gap between the inner corners is close to the width of one eye opening. Treat that as a comparison for this drawing, not a rule for every face. Real people vary, and a later portrait should be measured from its own reference.
Difficulty: beginner
Time: allow about 35–50 minutes; this is an untested estimate
Medium: HB pencil, with an optional 2B for the pupils
Outcome: Stage 9 is the complete line drawing
Materials
- One sharpened HB or No. 2 pencil for the contours and most details.
- One sheet of smooth white drawing paper or an upright sketchbook page. Plain printer paper is fine for practice.
- A clean eraser for a small local correction.
- A sharpener.
- Optional: a 2B pencil for the dark pupils. An HB can substitute with a second controlled pass.
- Optional: a ruler or straight scrap of card held above the paper to compare the two eye levels. Do not draw a ruler line into the picture.
You do not need charcoal, a blending stump, specialist paper or several grades of graphite. Keep the point sharp enough for the lid edges, lashes and final iris marks.
Before you draw
Use the page upright and imagine a wide, shallow band a little above its centre. Both eyes will sit inside that band, with space above for the brows and space between them for two short bridge lines. The pair should occupy most of the page width without touching either edge.
The viewer-left eye is slightly wider; the viewer-right upper lid peaks a little lower. Keep these differences small. They stop the result becoming a mirrored symbol while allowing the gaze to remain level. The iris is the coloured part of an eye, and the pupil is the opening at its centre. [1] In this line study, the pupils provide the only solid dark areas. Both small catchlights sit at the upper left to preserve one light direction.
Use a medium, steady line for the main lids and a lighter touch for creases, brows, bridge and iris spokes. All marks shown in the stages belong to the finished drawing. There is no hidden sphere, temporary almond, scheduled erasing pass or shading.
Darker lines are new in the current stage. Earlier marks remain visible at reduced strength.
1. Place the four eye corners
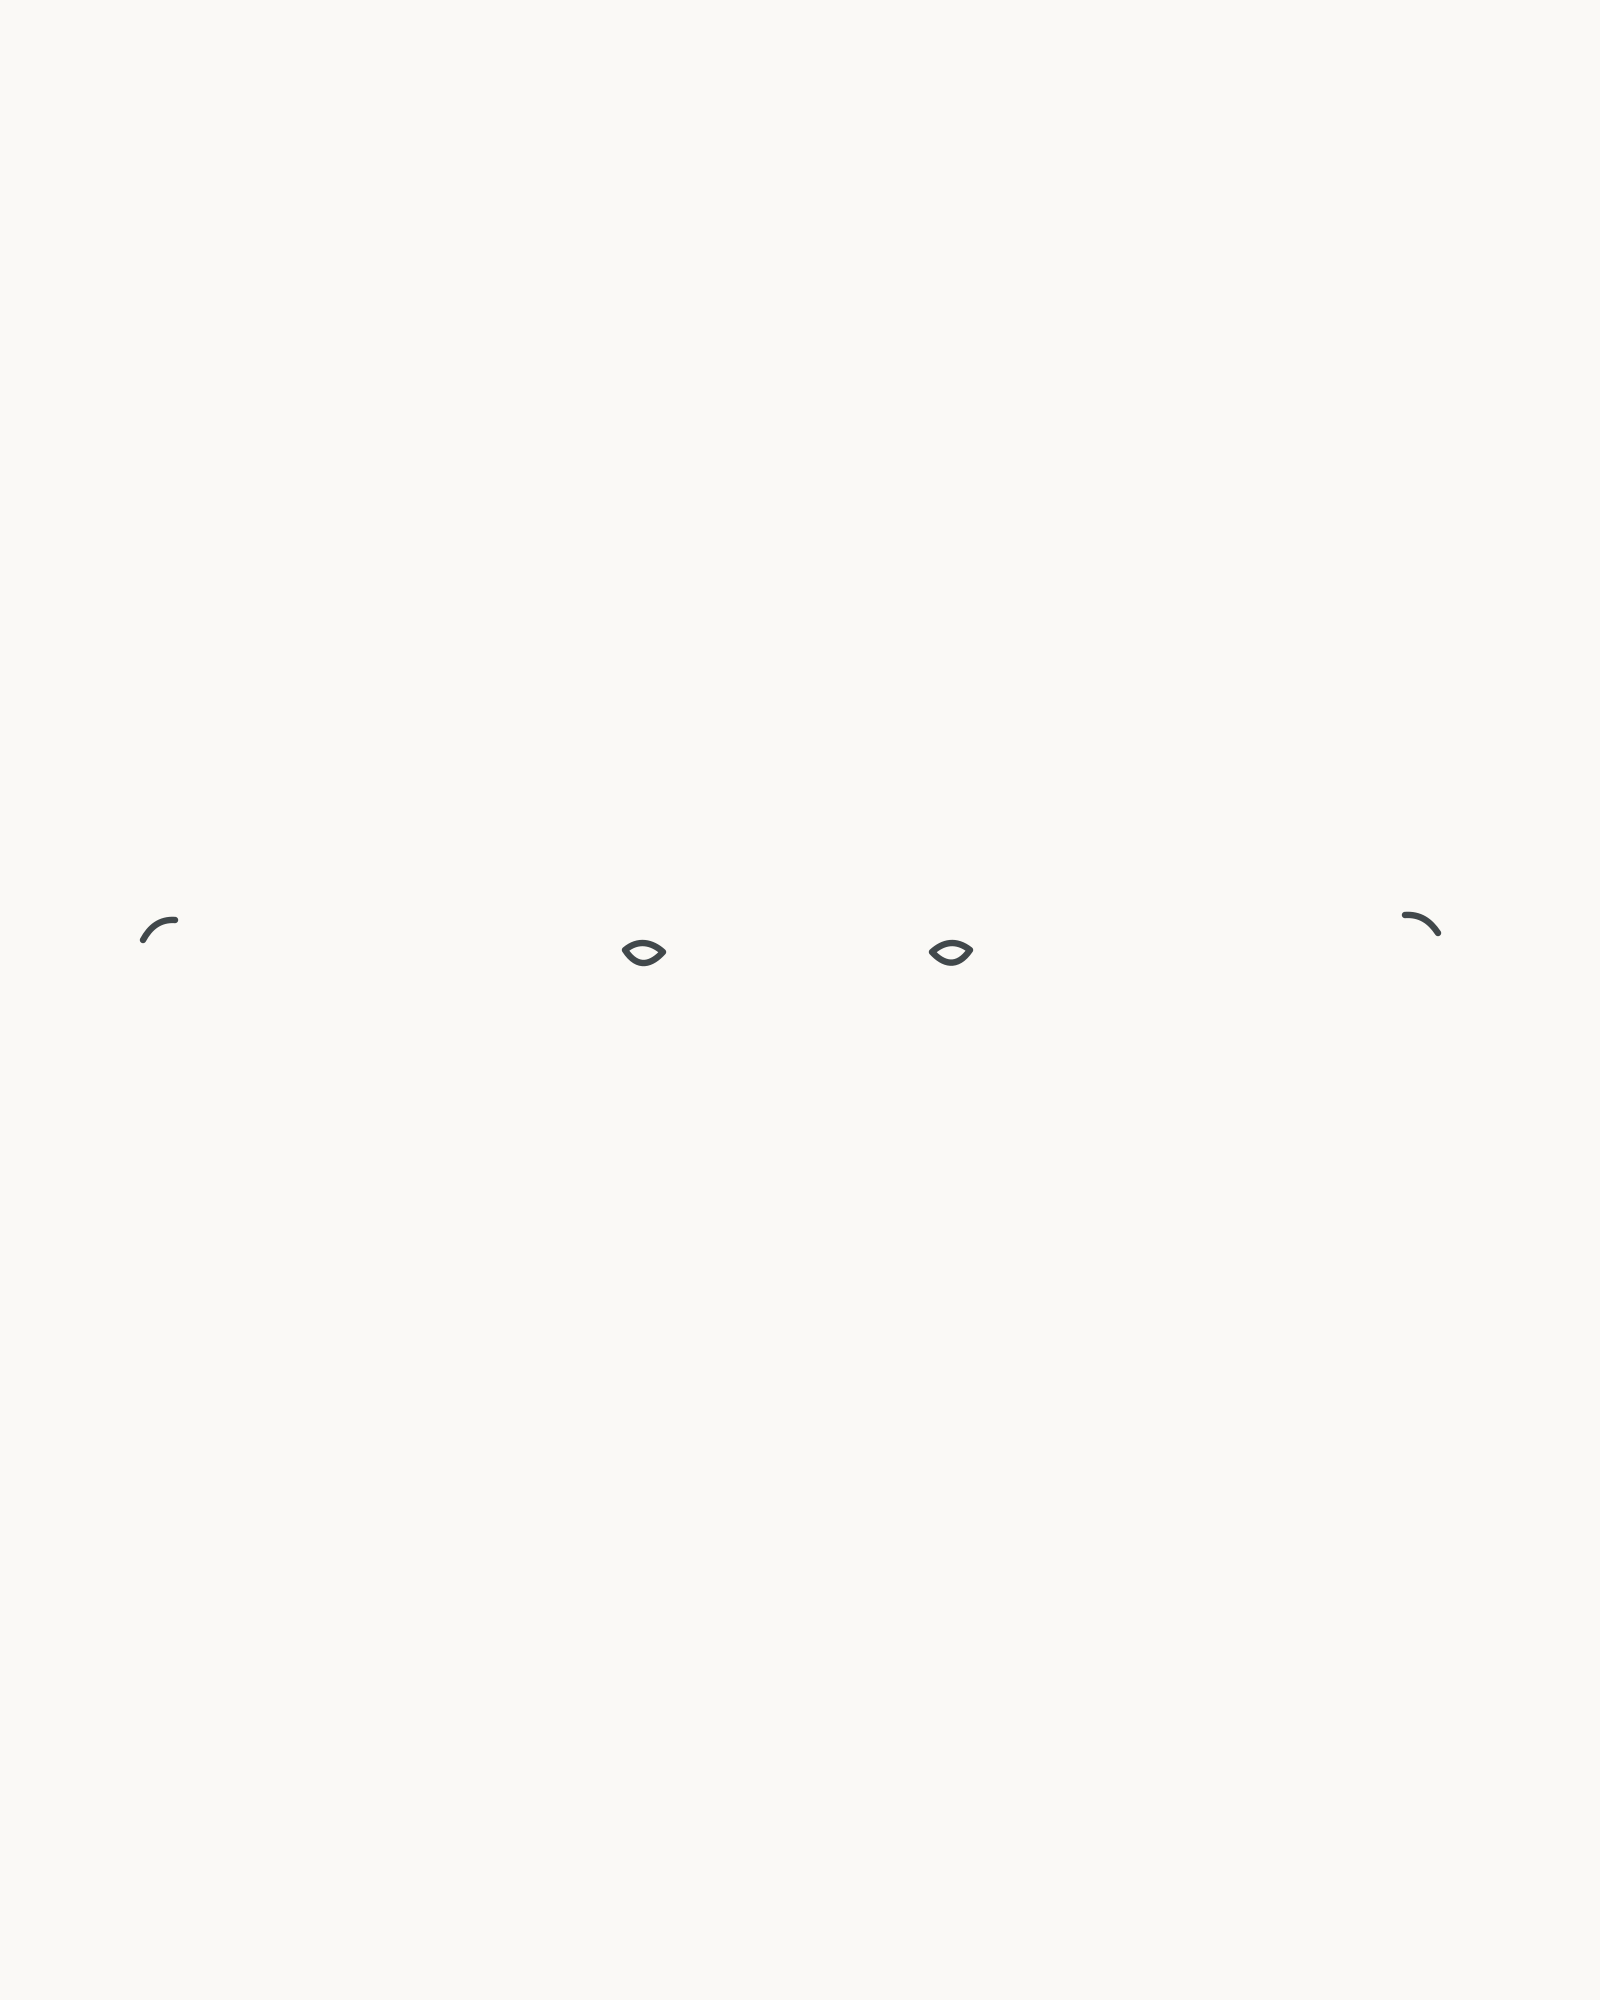
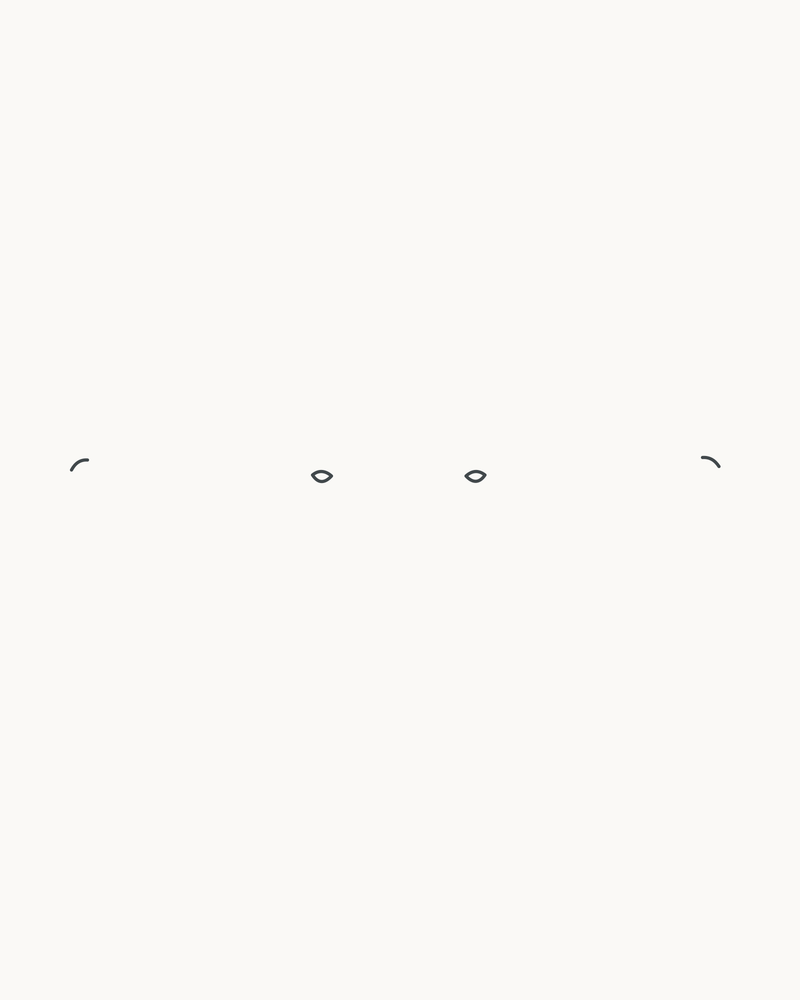
Stage 1 of 9. Four permanent landmarks establish the pair before either eye is completed. 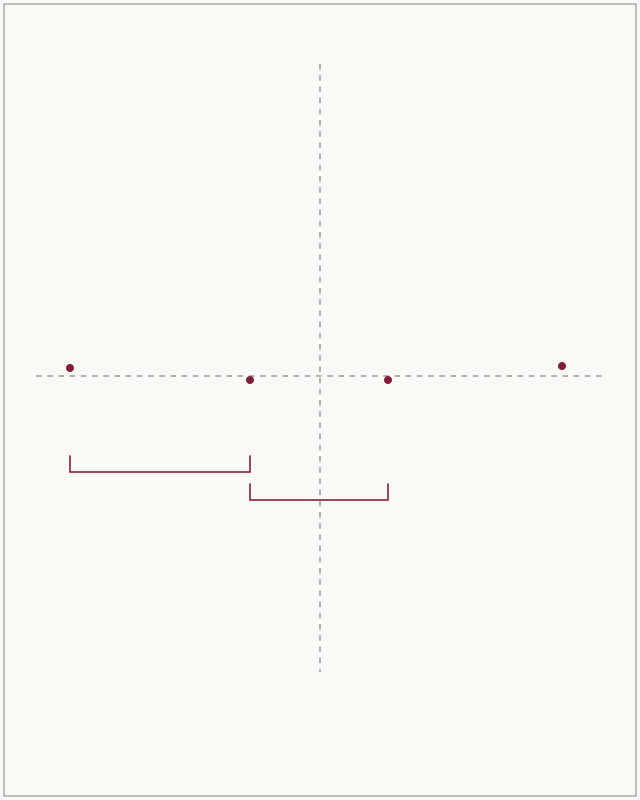
Placement cue: centre the gap, then compare one eye opening with that gap. Copy the relationships, not the frame, lines or brackets. Use the separate placement cue to compare the page centre and eye band. Make a small tear-duct hook on each side of the central gap. Then place one short outer-corner notch farther left and one farther right. Let the outer corners sit only slightly higher than the inner corners.
Judge both eye openings now. In this example, each opening and the gap are similar in width, though they are not mechanically identical. Copy the cue's relationships, not its frame, crosshair or brackets.
Look for this before moving on: The central gap is balanced on the page, all four marks occupy one shallow band, and the viewer-left span is slightly wider than the viewer-right span.
If it goes wrong: Keep the three marks that agree best. Erase and replace only the newest misplaced hook or notch; do not add a permanent measuring line.
2. Connect the upper lids
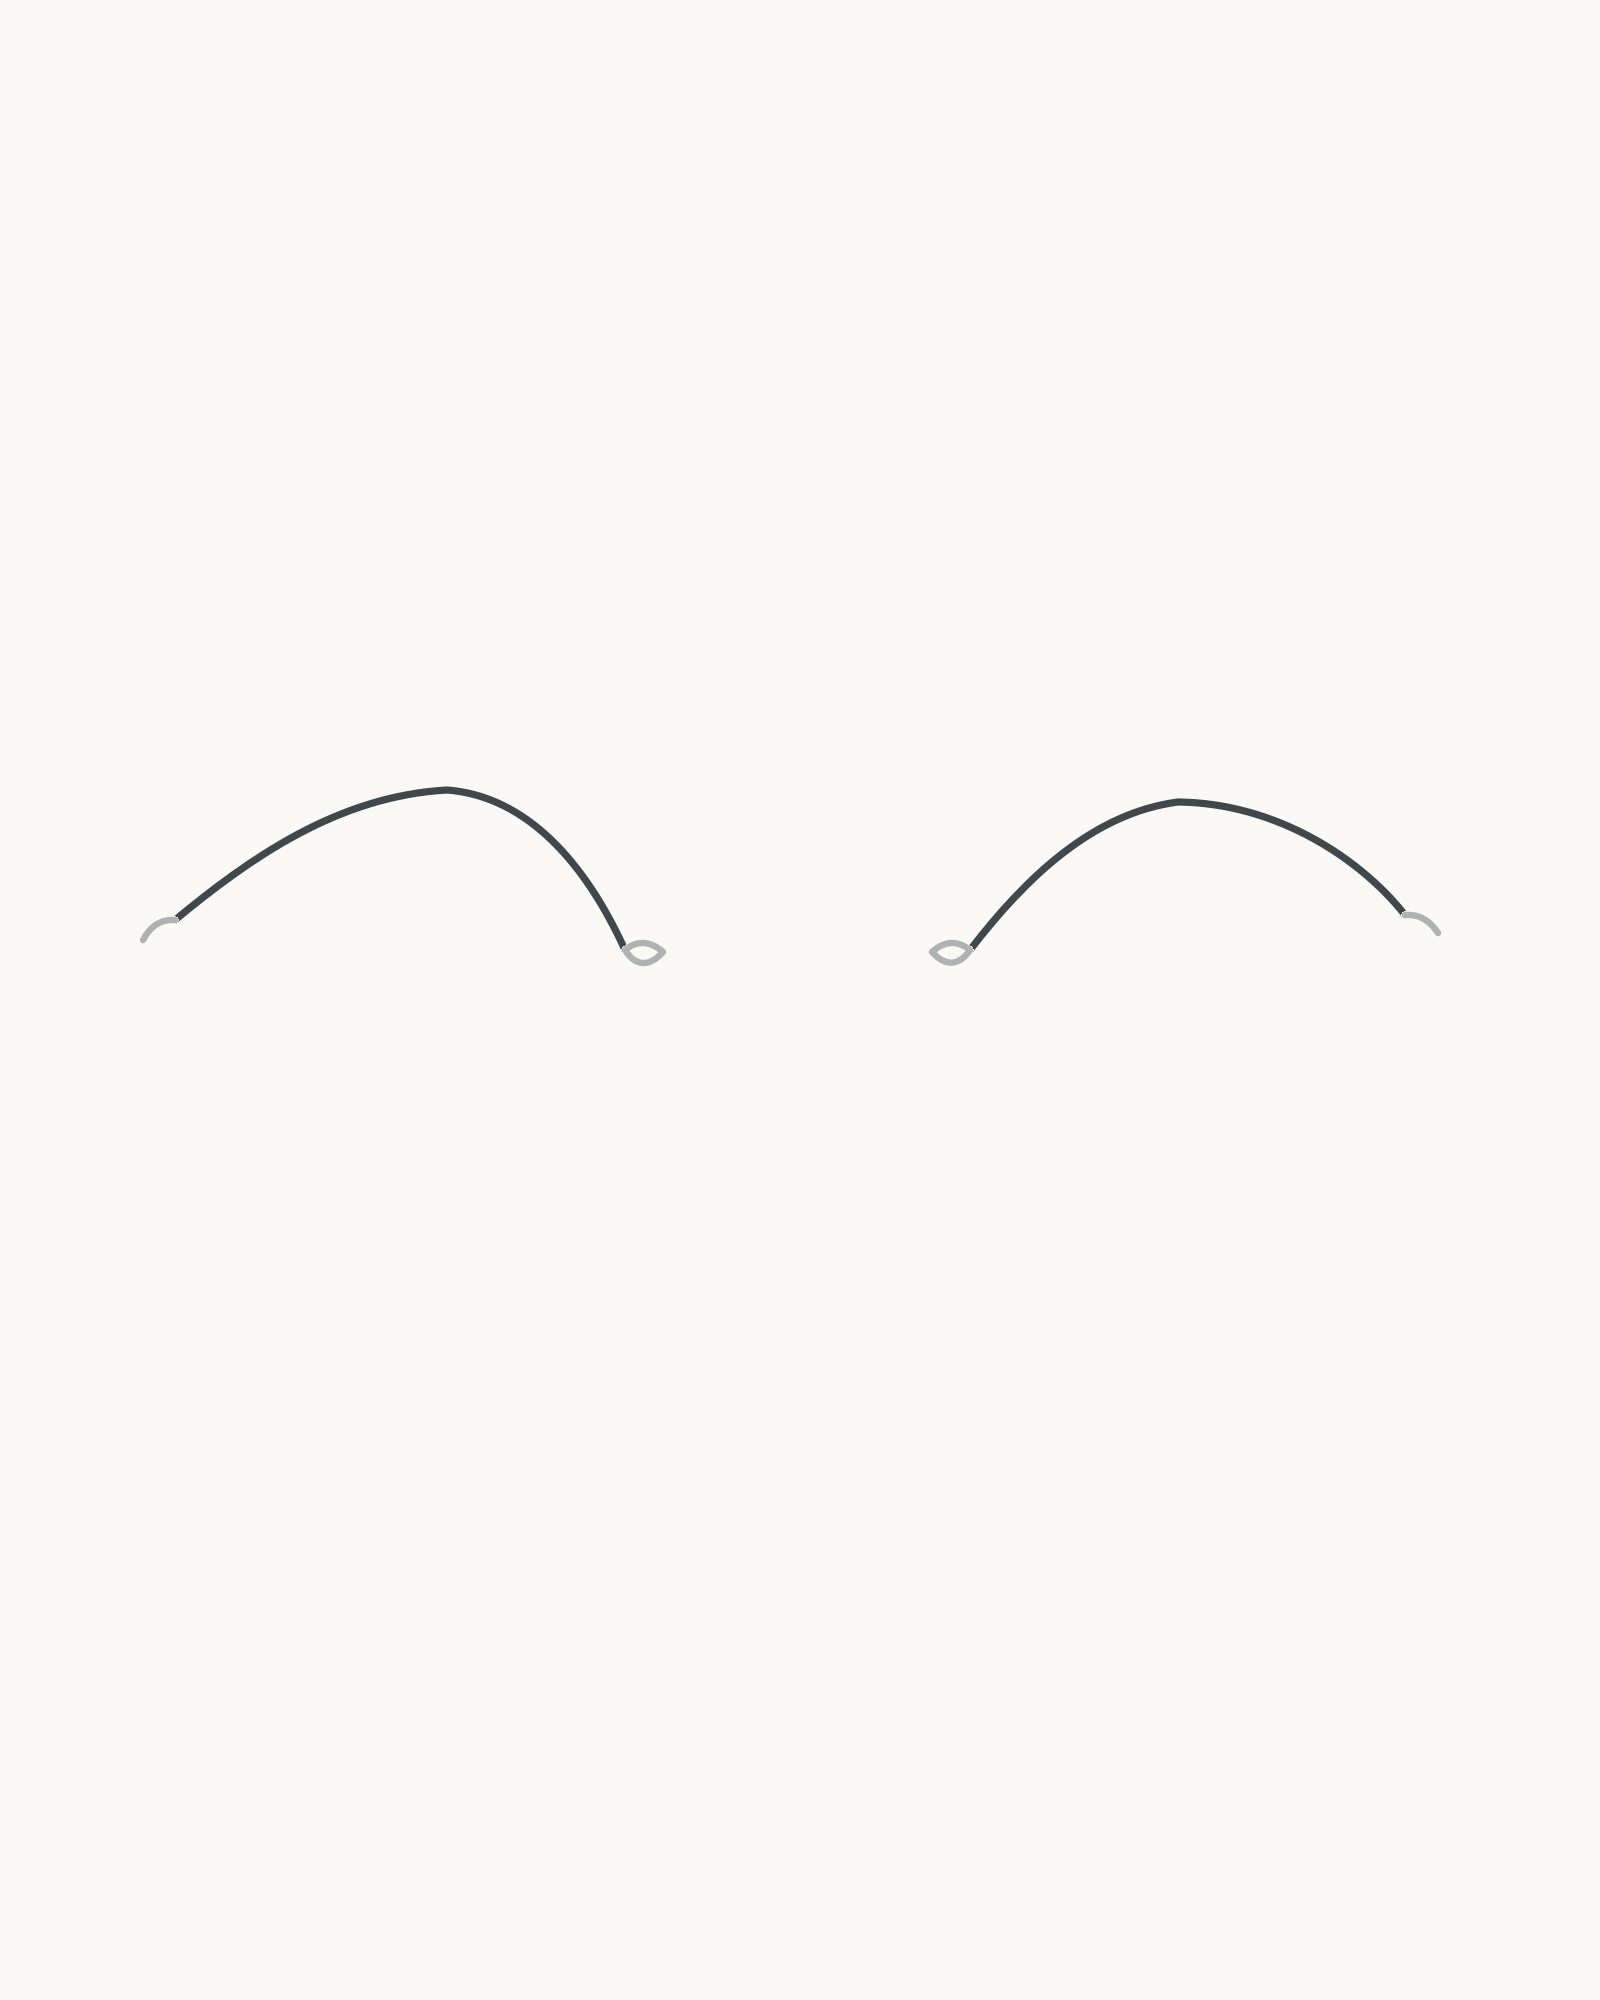
Stage 2 of 9. Two unequal upper curves connect the existing landmarks. - Viewer-left upper lid
- Viewer-right upper lid
Draw the viewer-left upper lid from its outer notch towards the tear duct. Let it climb in a broad curve, peak inside the outer half, then turn down more firmly at the inner end. Repeat on the viewer-right, using a slightly narrower curve with a subtly lower peak.
Meet the existing corner marks cleanly. The two lids should be related, but avoid making one a flipped copy of the other.
Look for this before moving on: Both upper lids connect their own corners, neither endpoint floats, and the peaks differ gently in position and height.
If it goes wrong: Leave both Stage 1 corners in place. Correct only the fresh part of the lid nearest the wrong endpoint or flatten a small section of an overly high peak.
3. Close the lower lids
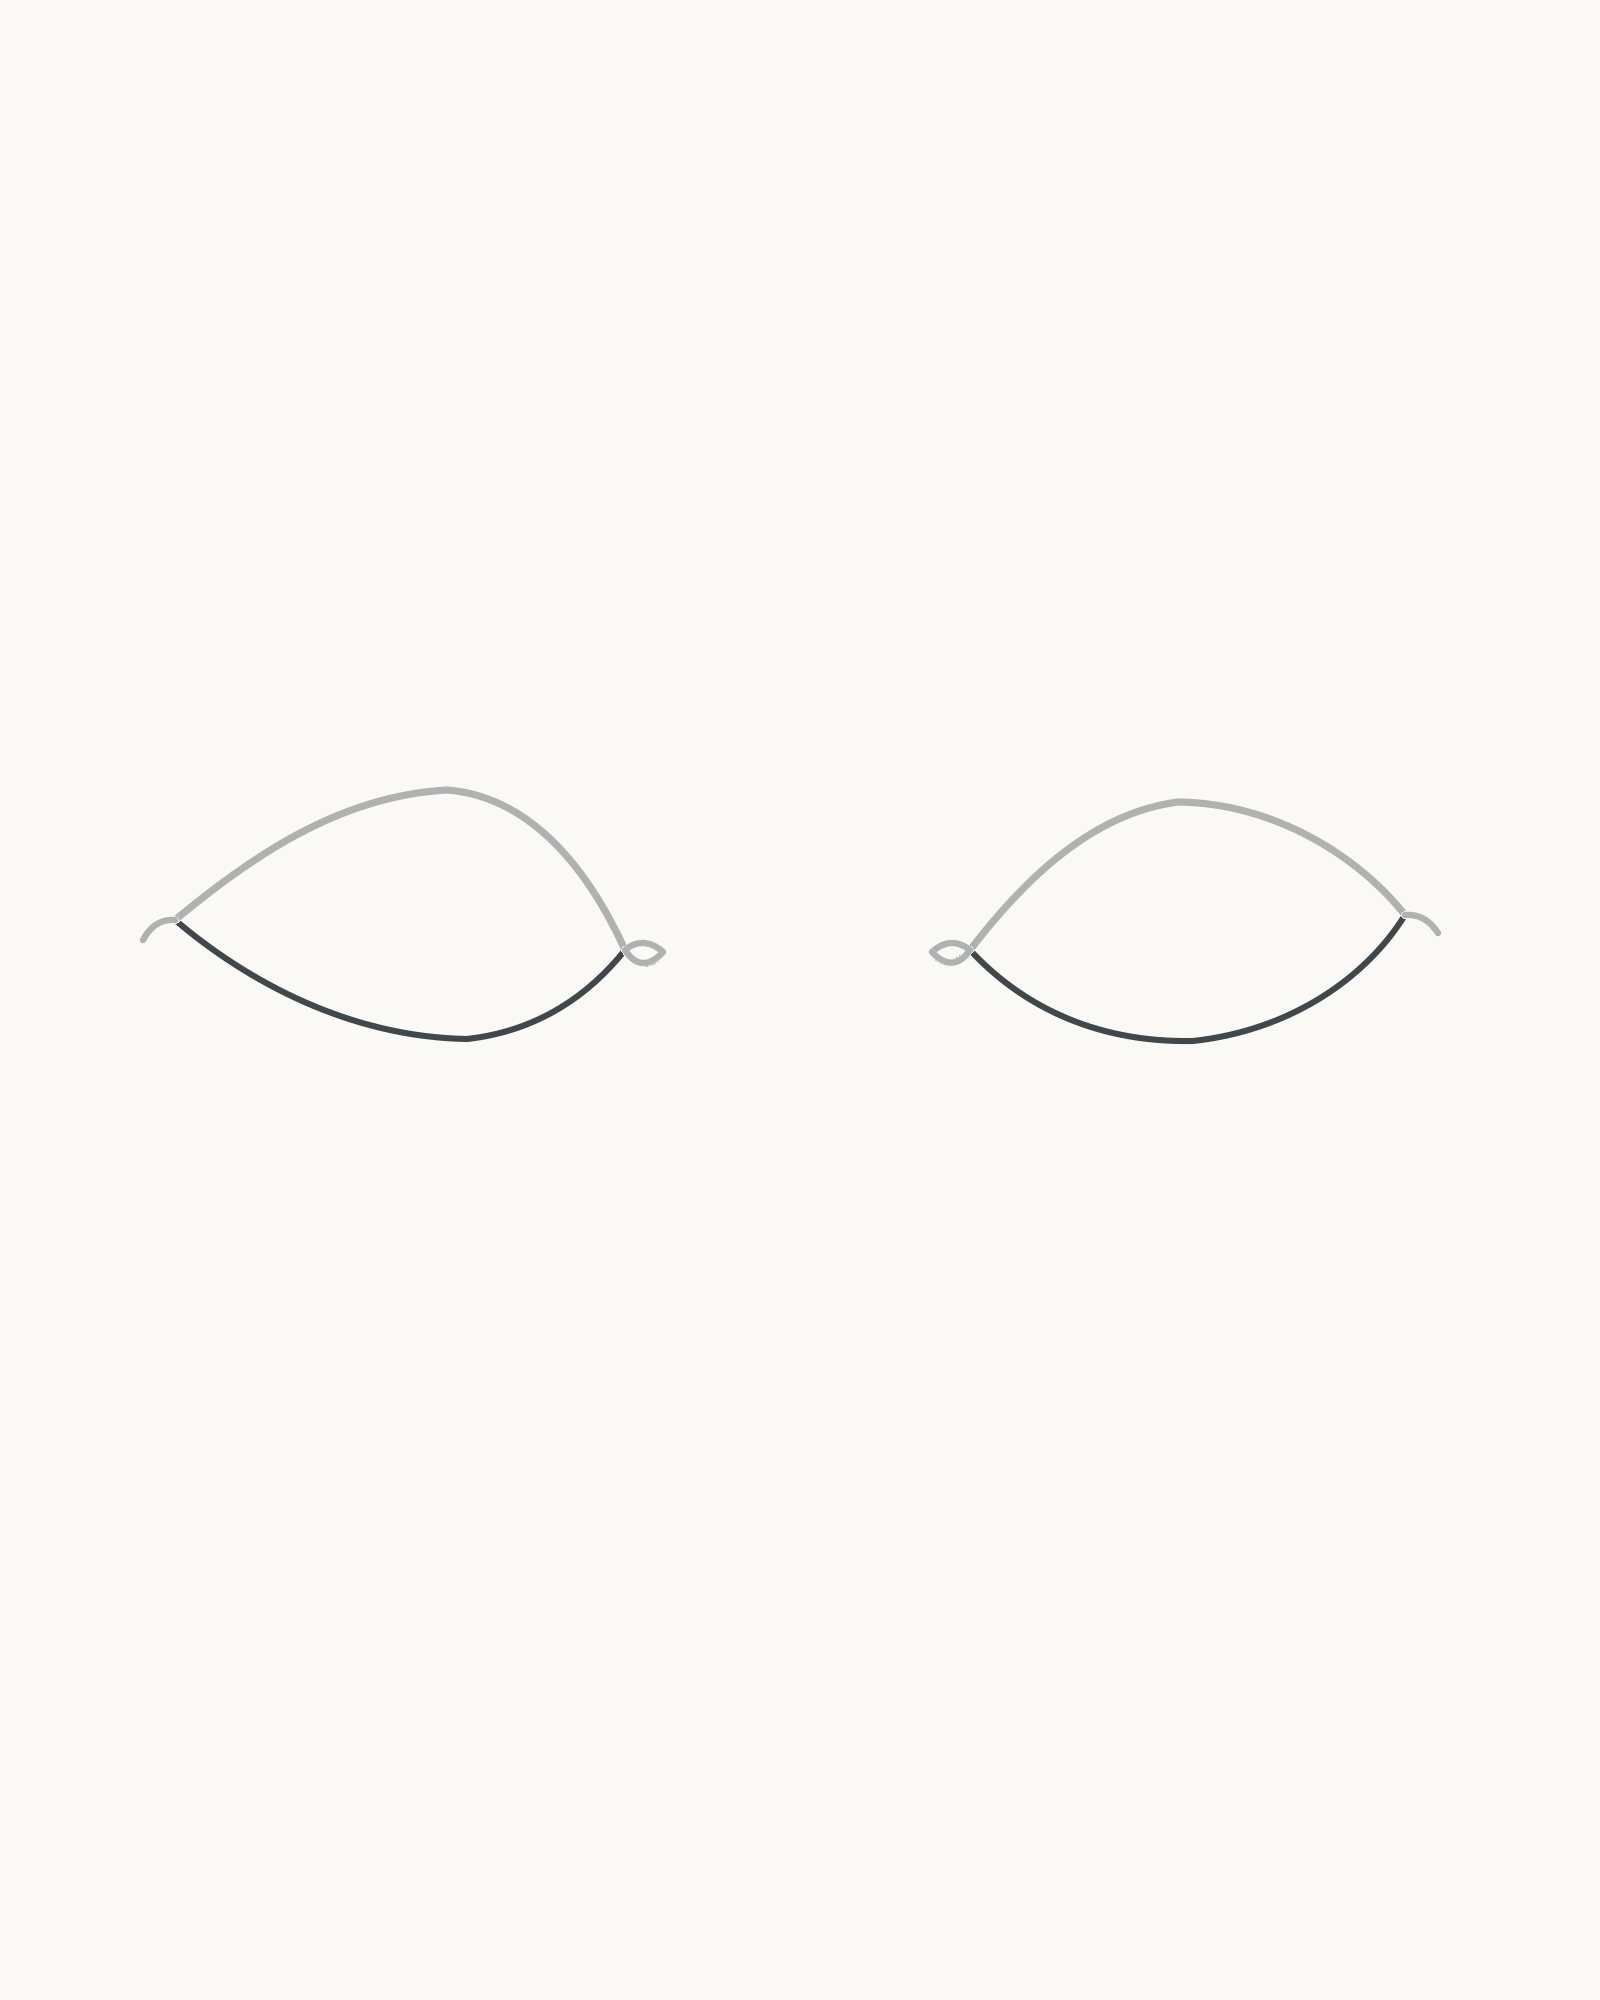
Stage 3 of 9. Shallower lower curves close the openings without creating matching symbols. From each outer corner, draw a shallower curve towards its tear duct. Let the curve dip only enough to complete the opening. At the inner end, use the short closure shown to wrap into the existing hook rather than adding a separate oval or blob.
The lower lids should feel quieter than the upper contours. Their job is to close and support the eye shape, not to make two identical almond symbols.
Look for this before moving on: Both openings are closed, each lower curve is shallower than the upper lid above it, and the tear ducts remain small and readable.
If it goes wrong: Keep the upper lid fixed. Erase only the deepest middle part of the new lower curve or shorten a duct closure that has grown too large.
4. Set the irises behind the lids
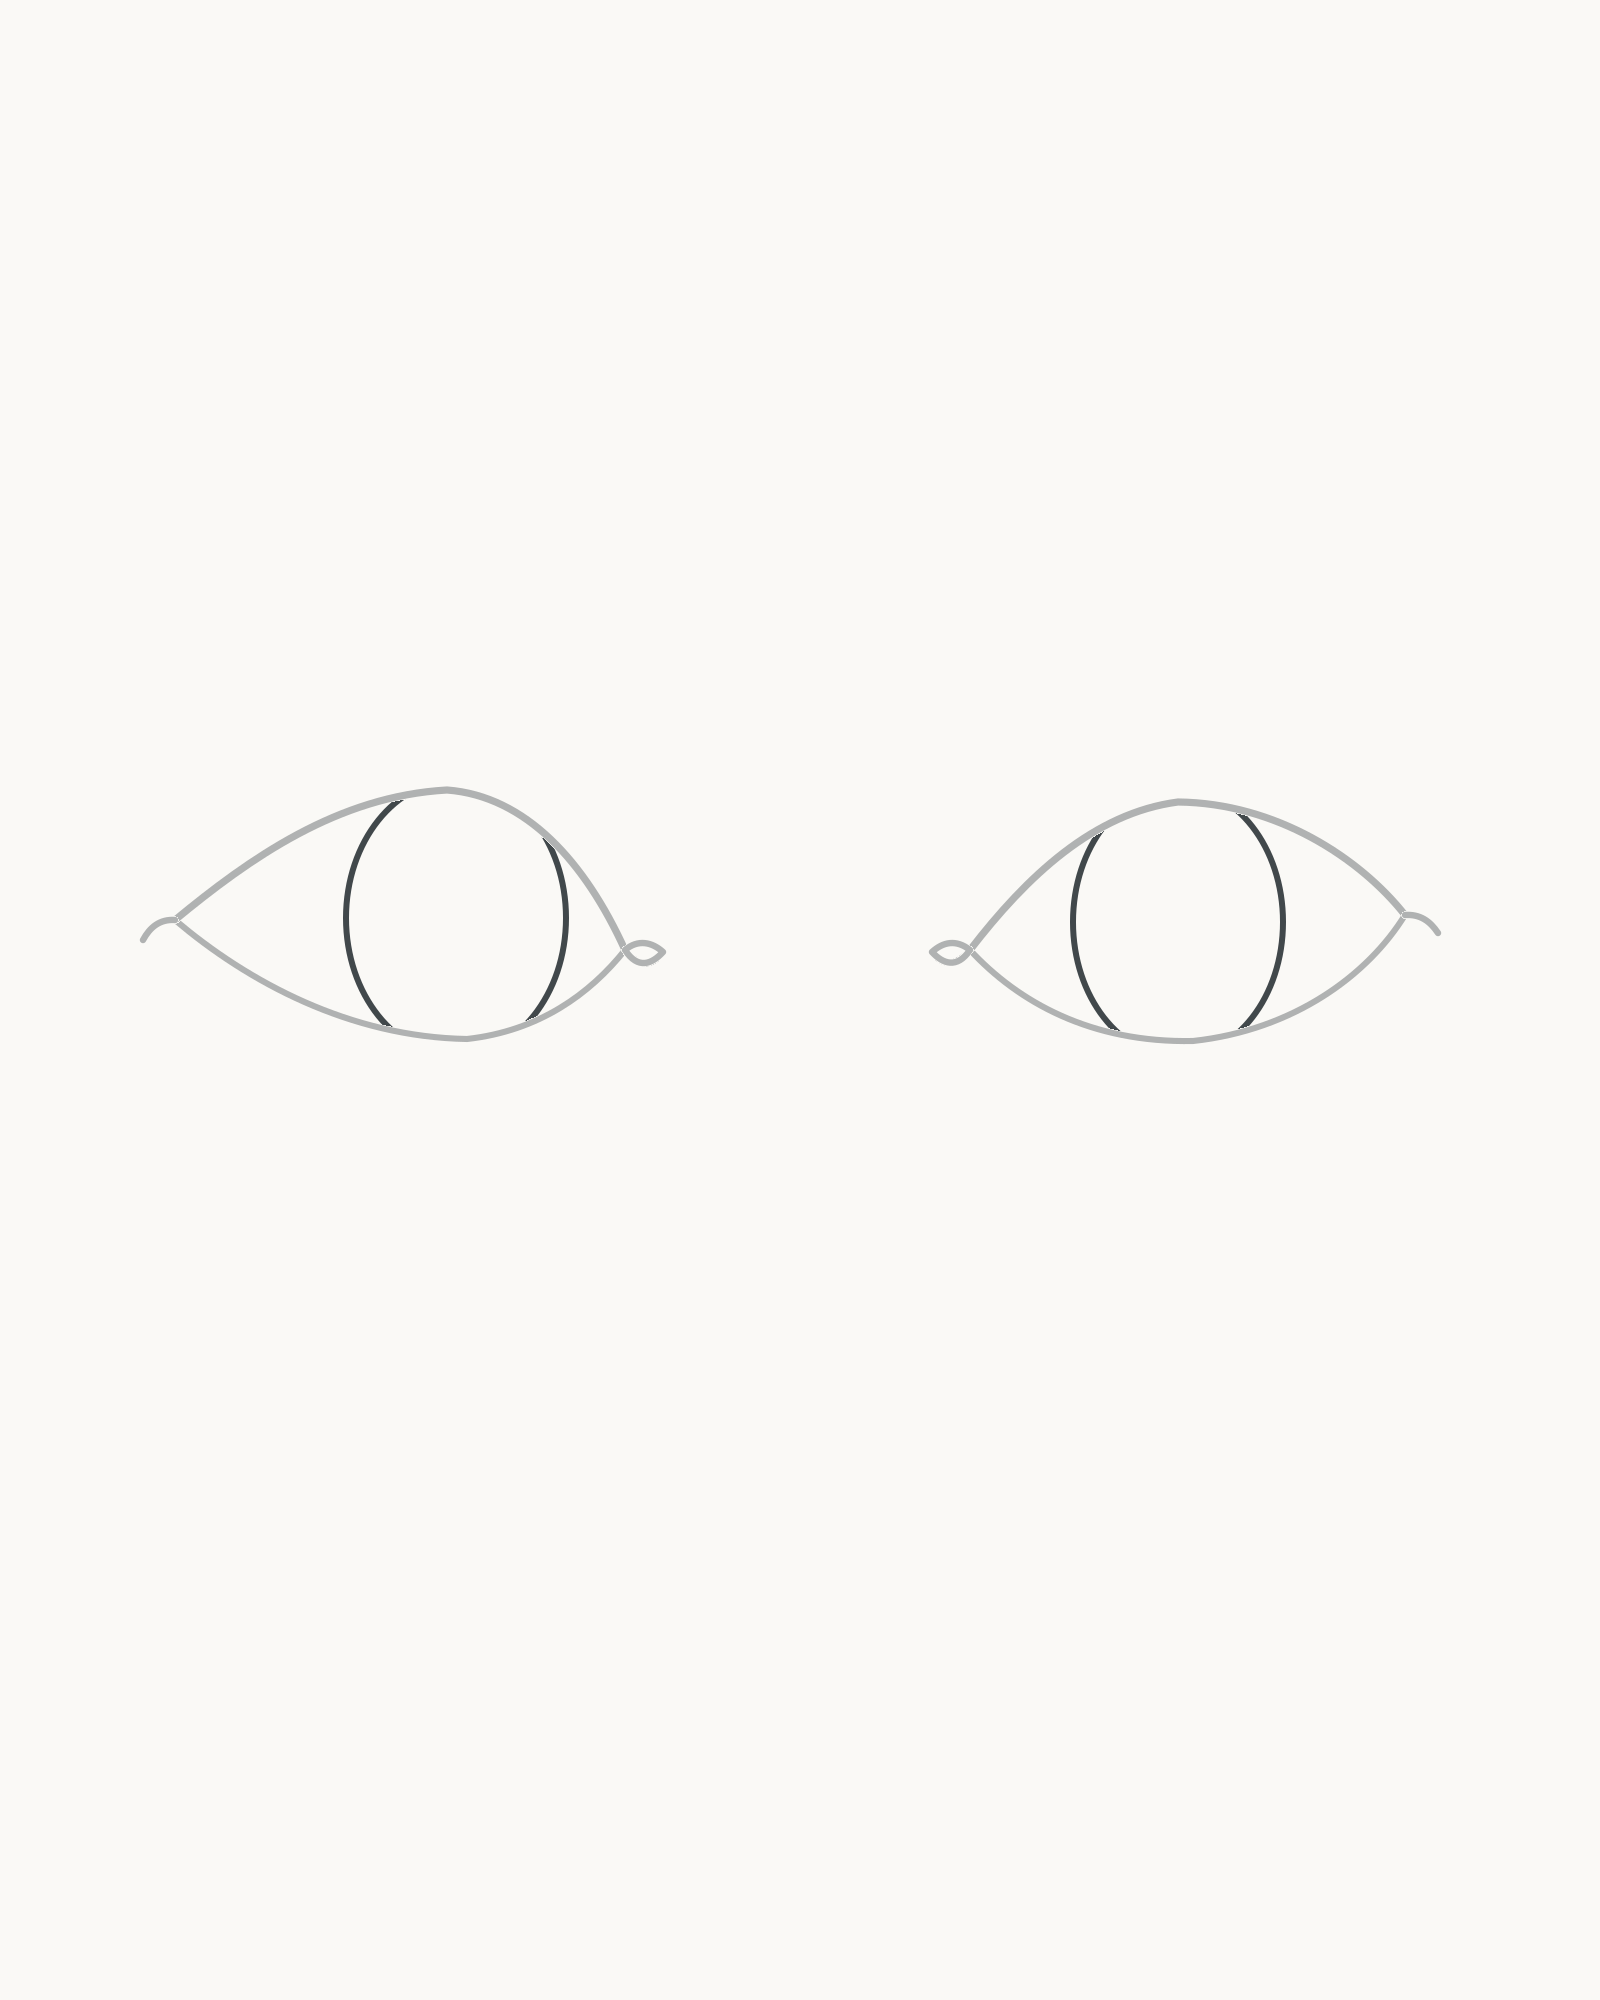
Stage 4 of 9. Partly hidden iris arcs establish one shared forward gaze. Place one tall iris inside each eye. Draw only the visible arcs: allow the upper lid to hide the top of each iris and the lower lid to interrupt it at the bottom. Compare the white space on corresponding sides so both irises point forward.
Keep the viewer-right iris just slightly smaller to suit its narrower opening. Do not force the pair into identical circles.
Look for this before moving on: Both iris centres sit at almost the same level, the gaze points in one direction, and neither iris floats as a complete circle inside the opening.
If it goes wrong: Adjust only the newest iris. Remove the arc on the side with unequal white space and replace that short section while leaving the lids untouched.
5. Add pupils and catchlights
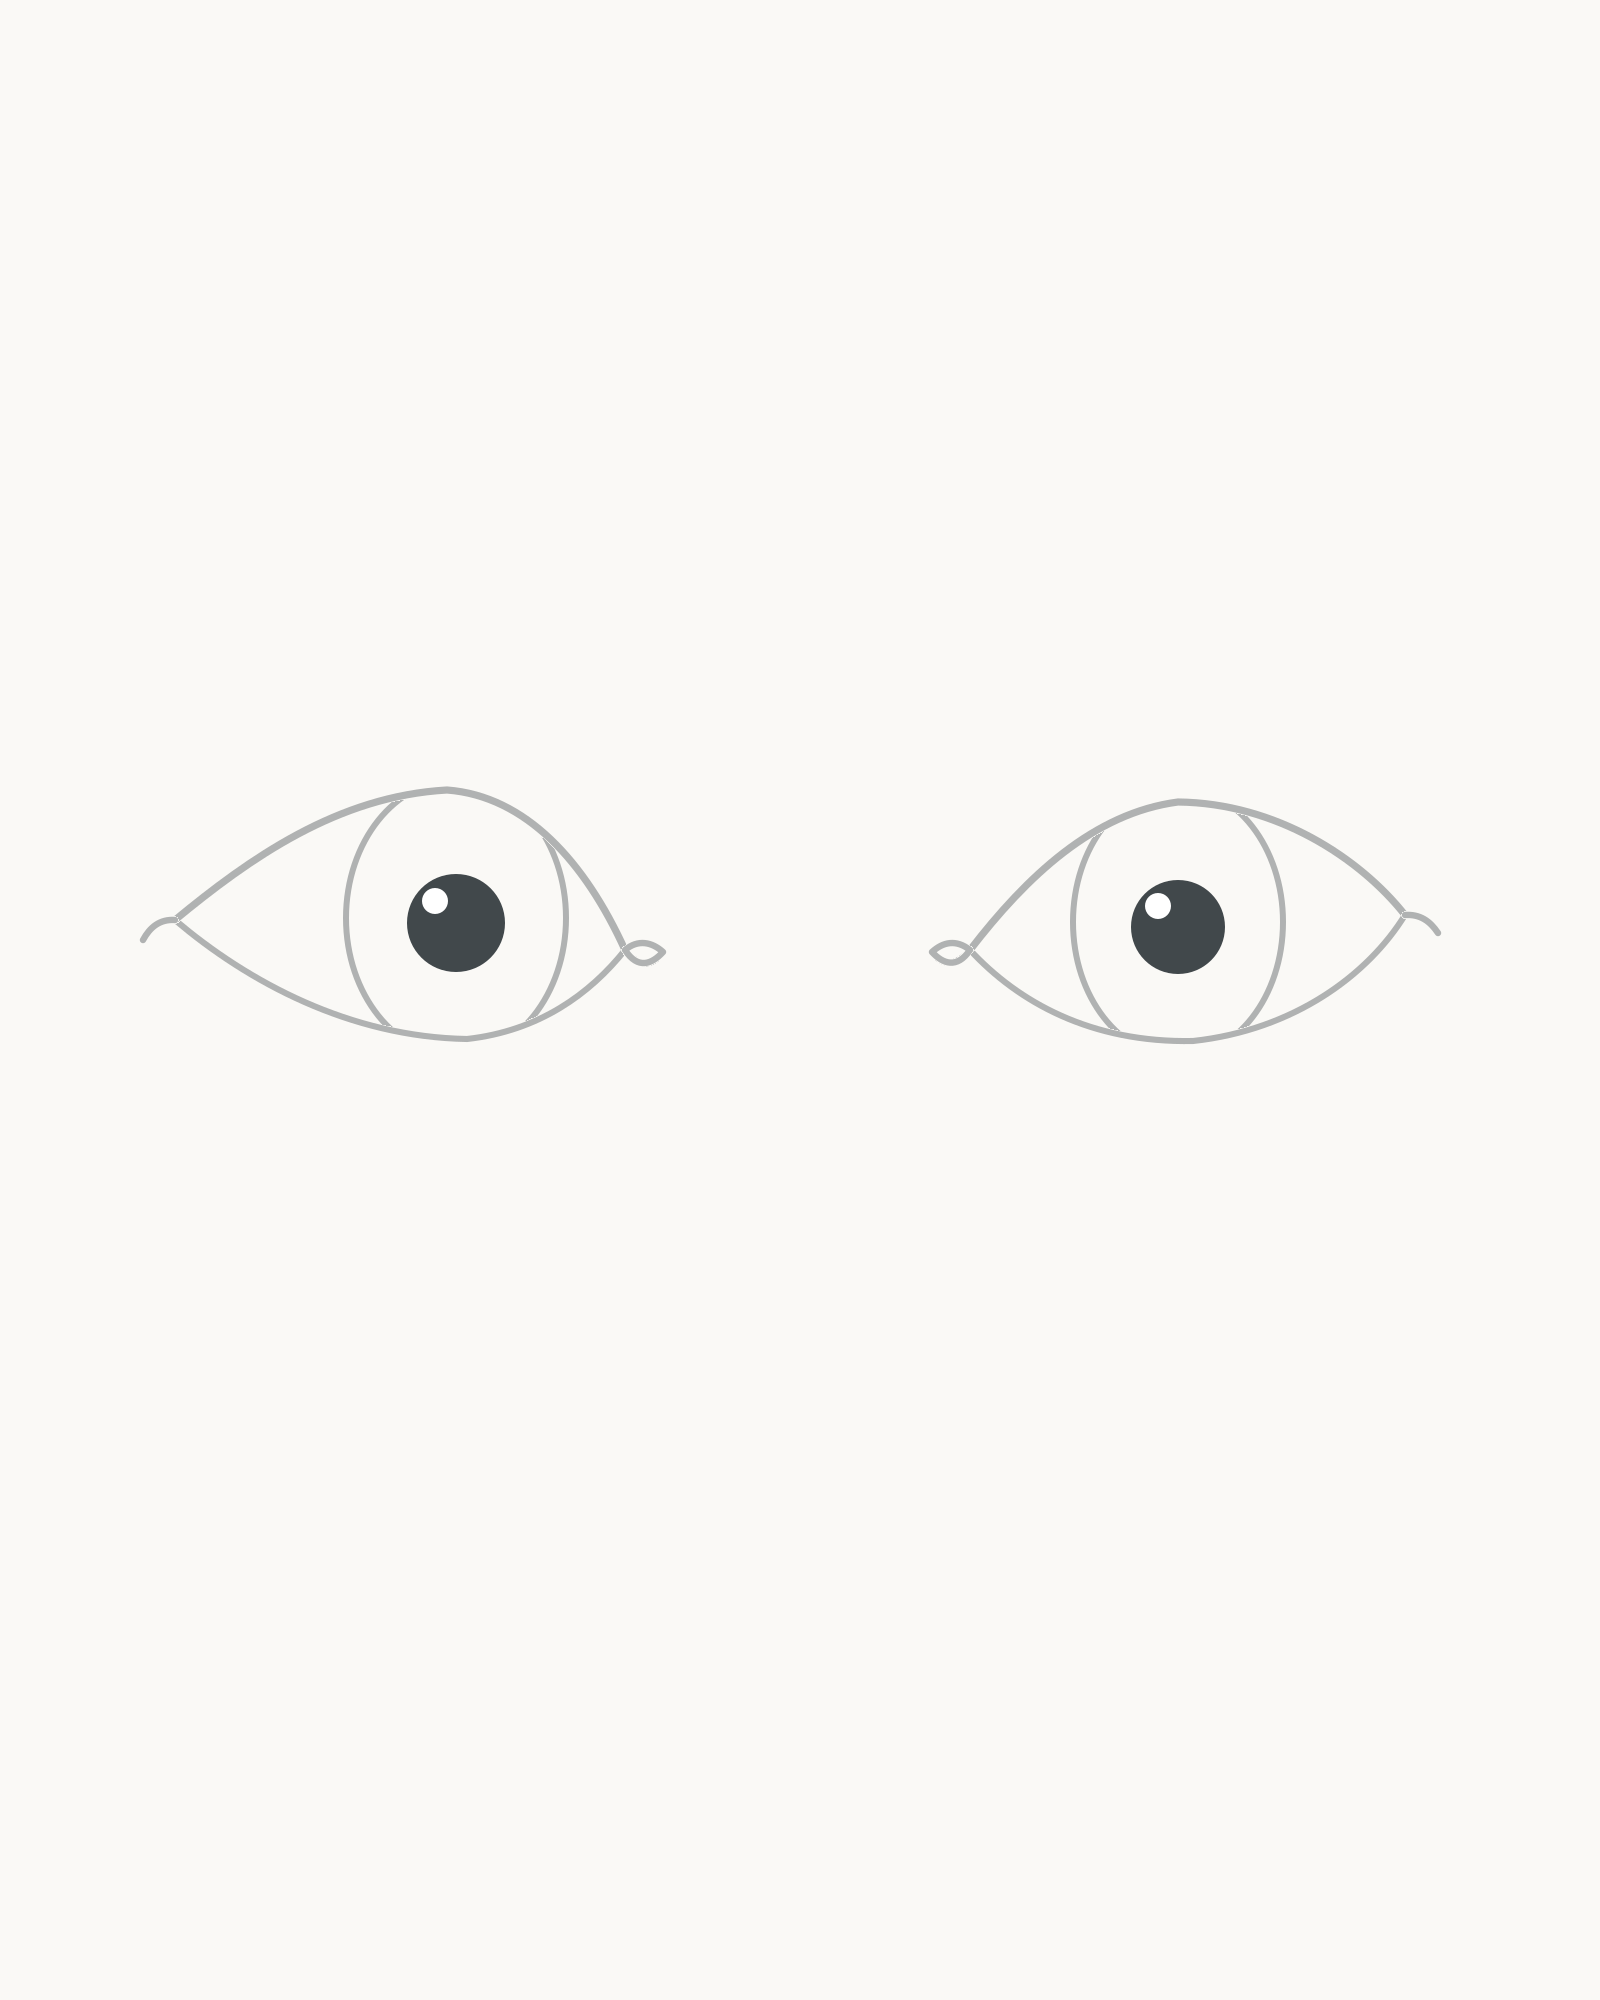
Stage 5 of 9. Dark pupils and matching upper-left catchlights clarify gaze and light direction. Draw a pupil near the centre of each iris and fill it to a clean dark. Reserve one small unfilled catchlight near the upper-left edge of each pupil. Keep the two catchlights on the same side and similar in size.
If you are using only an HB pencil, fill each pupil with short controlled strokes and make a second pass where necessary. Do not widen the pupil while darkening it.
Look for this before moving on: The pupils reinforce the same forward gaze, each has one crisp upper-left catchlight, and the pupil edges remain inside the irises.
If it goes wrong: Repair only the newest pupil before proceeding. Lift a small misplaced dark area with the corner of the eraser, then restore the circular edge without changing the iris.
6. Describe the lid thickness
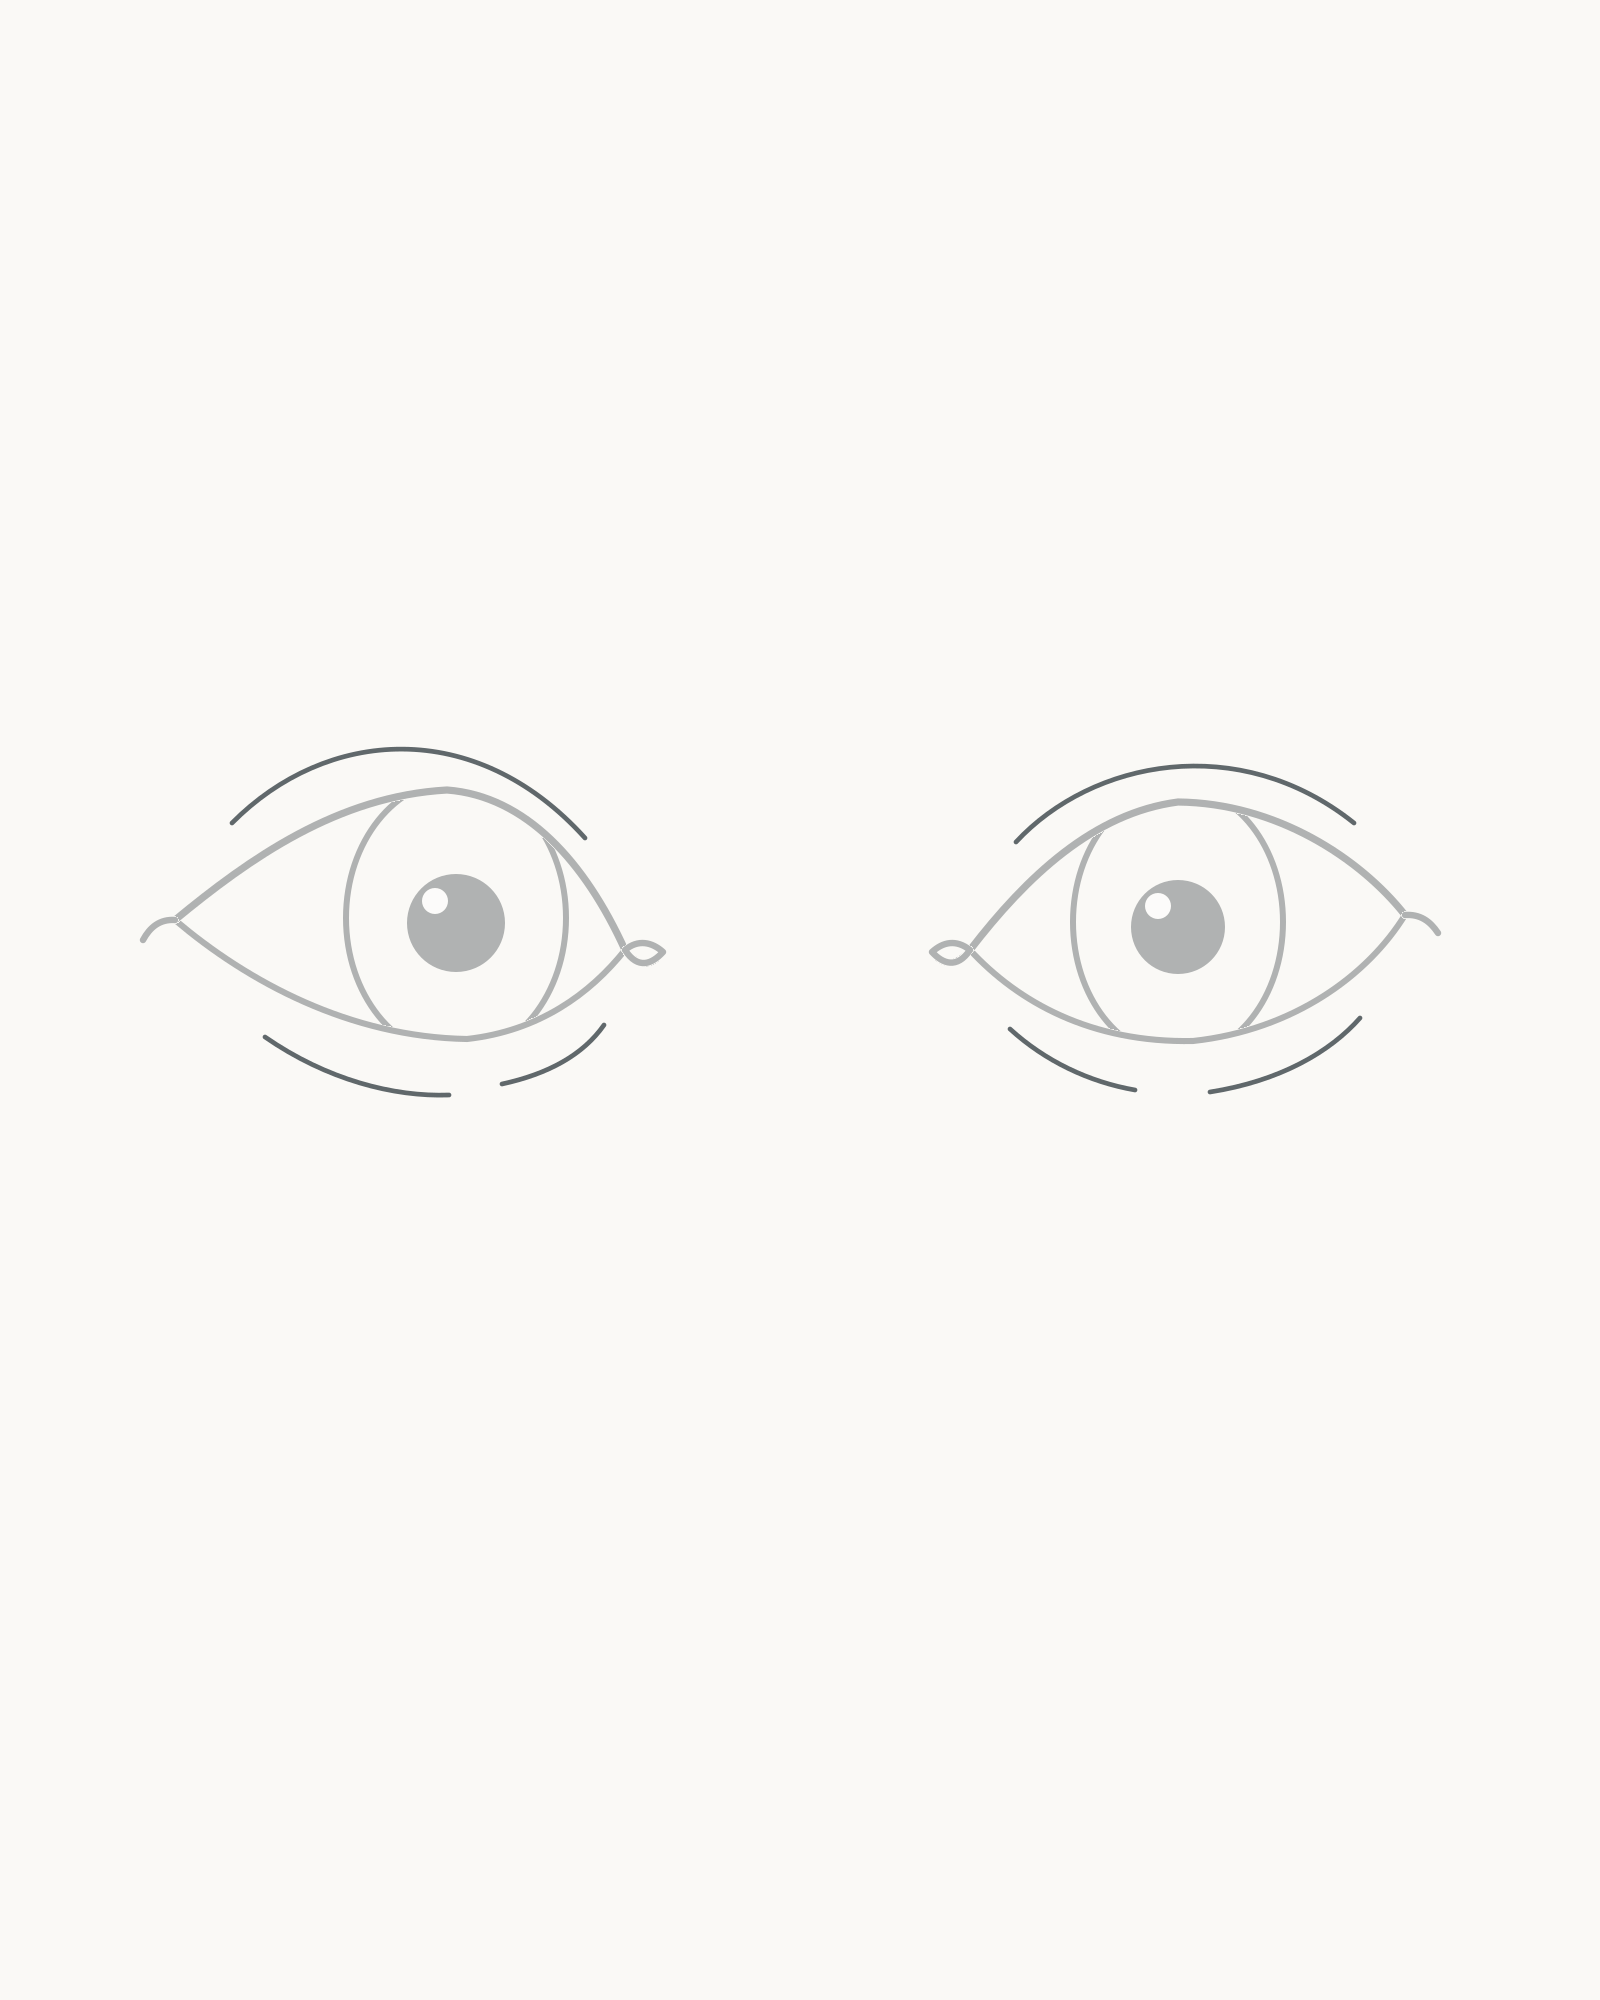
Stage 6 of 9. Light broken secondary contours describe the lids wrapping around the eyes. Add one light crease above each upper lid. Follow the lid's general rise and fall, but vary the distance and length so the creases do not look traced. Below each eye, add the two short broken rim segments shown, leaving a clear gap beneath the central area and stopping well before the corners.
These secondary lines explain how the lids wrap around the eye. They should not become a second pair of eye outlines.
Look for this before moving on: The upper creases echo rather than duplicate the lids, and the four lower-rim segments stay broken and lighter than the main contours.
If it goes wrong: Shorten the newest crease or rim from one end. Keep the main lid and all earlier eye geometry exactly where it is.
7. Frame the eyes with brows and bridge
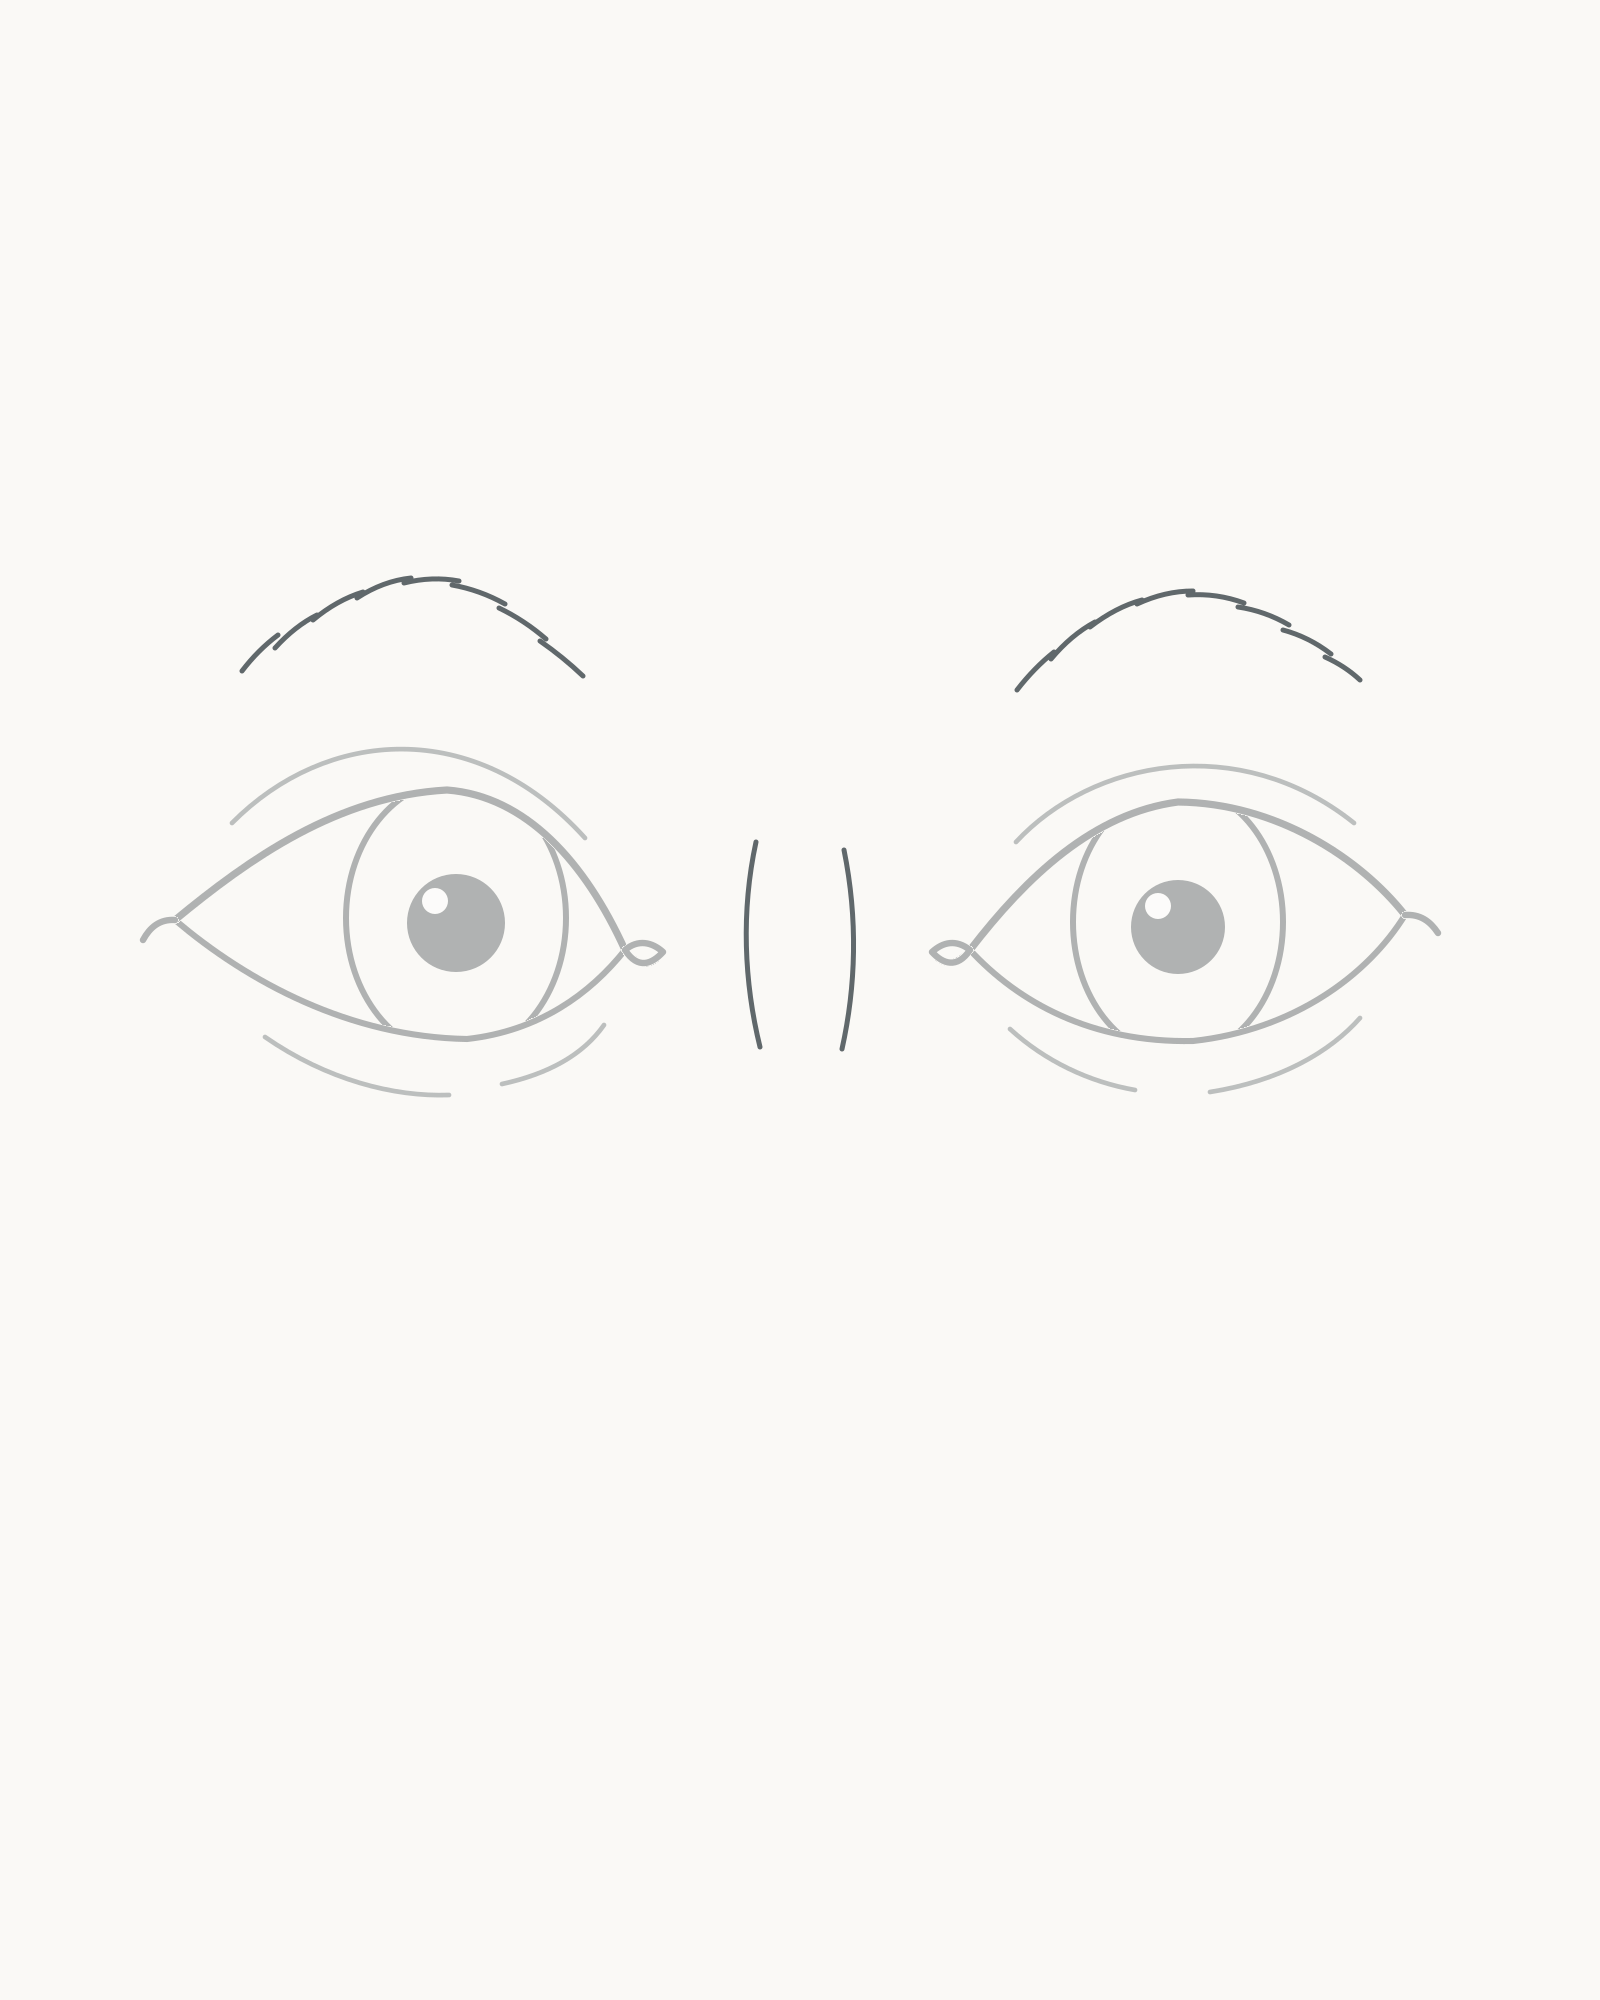
Stage 7 of 9. Restrained brows and bridge strokes place the pair within a face. Build each brow from a small number of short, lightly connected strokes. Let the viewer-left brow rise a little more sharply and the viewer-right brow travel in a gentler sweep. They should sit above and extend slightly beyond the eye openings without running parallel to the lid creases.
Between the inner corners, draw the two short bridge strokes shown. They descend through the open central space but do not touch the tear ducts or continue into a nose tip.
Look for this before moving on: The brows are related but unequal, the bridge remains restrained and central, and no new line touches an eye corner.
If it goes wrong: Remove only a repeated brow stroke or shorten the end of one new bridge line. Do not move a lid to make the surrounding detail fit.
8. Add sparse lashes
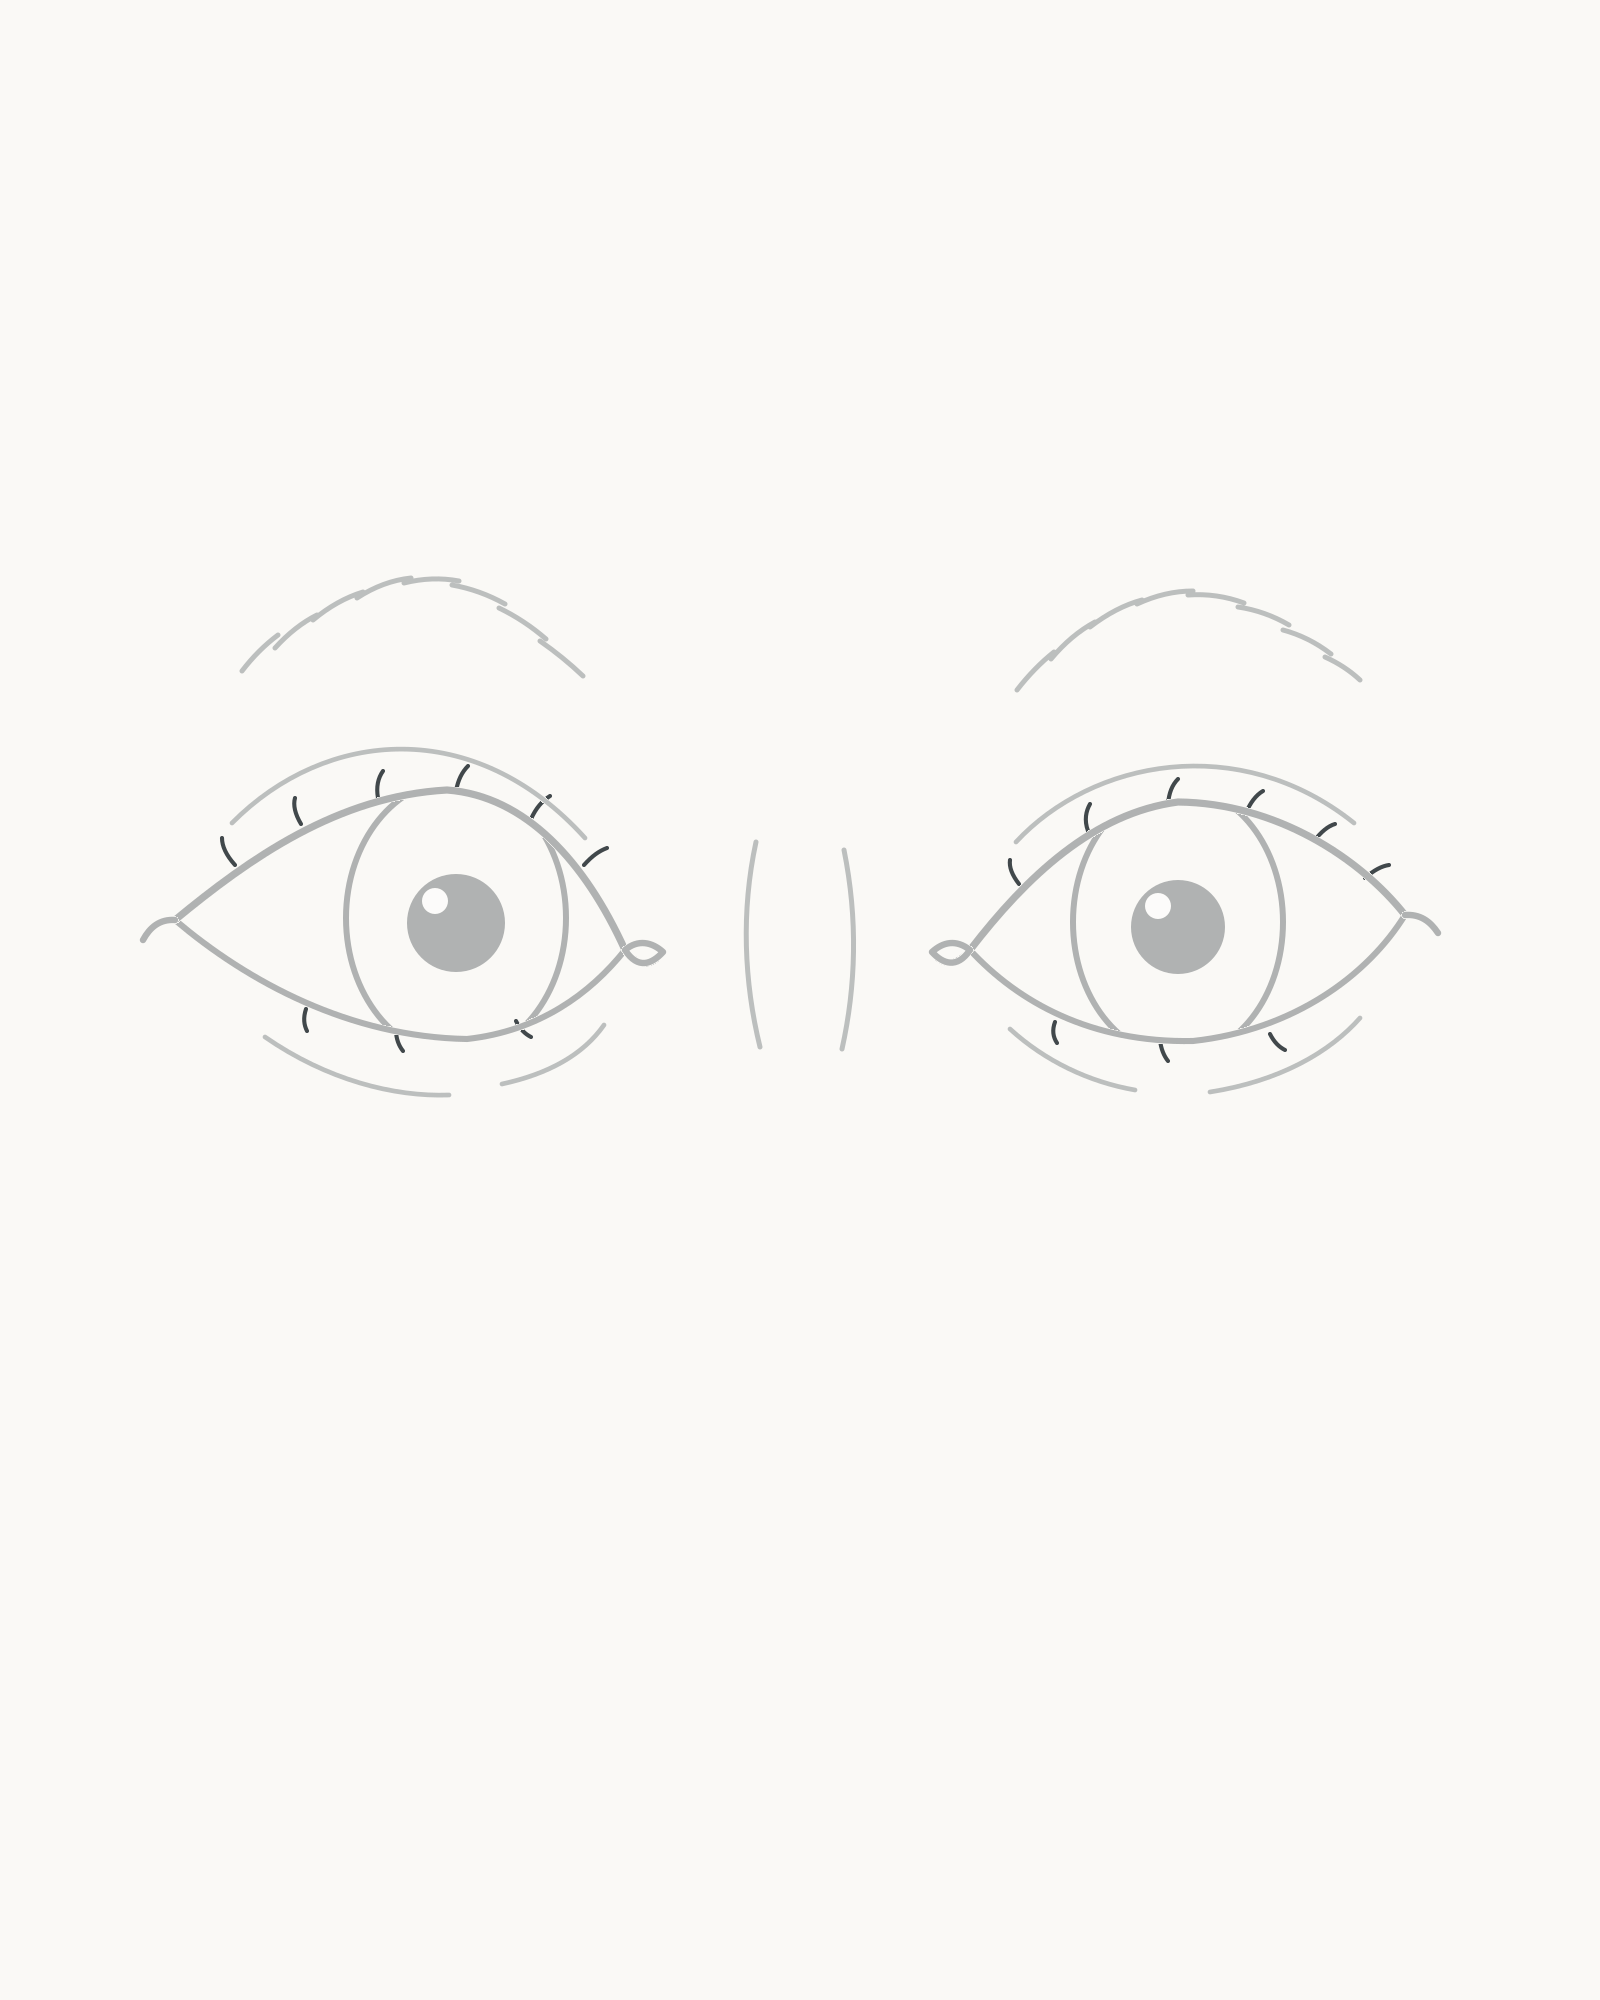
Stage 8 of 9. A few attached lashes add detail without hiding the lid contours. Add six short upper lashes to each eye. Start every stroke on the upper lid edge and curve it gently away, changing the angle as you travel from outer to inner corner. Add only three shorter lower lashes per eye, again beginning at the lid edge.
Keep the lashes well below the upper creases and separate from the lower-rim lines. They are attachment details, not a dark cosmetic fan.
Look for this before moving on: Every lash visibly begins on a lid, the spacing and angles vary, and the main lid contours remain easy to see.
If it goes wrong: Erase or shorten only the floating, repeated or overlong lash. Preserve the lid edge it should attach to and leave the surrounding cluster alone.
9. Finish with iris spokes
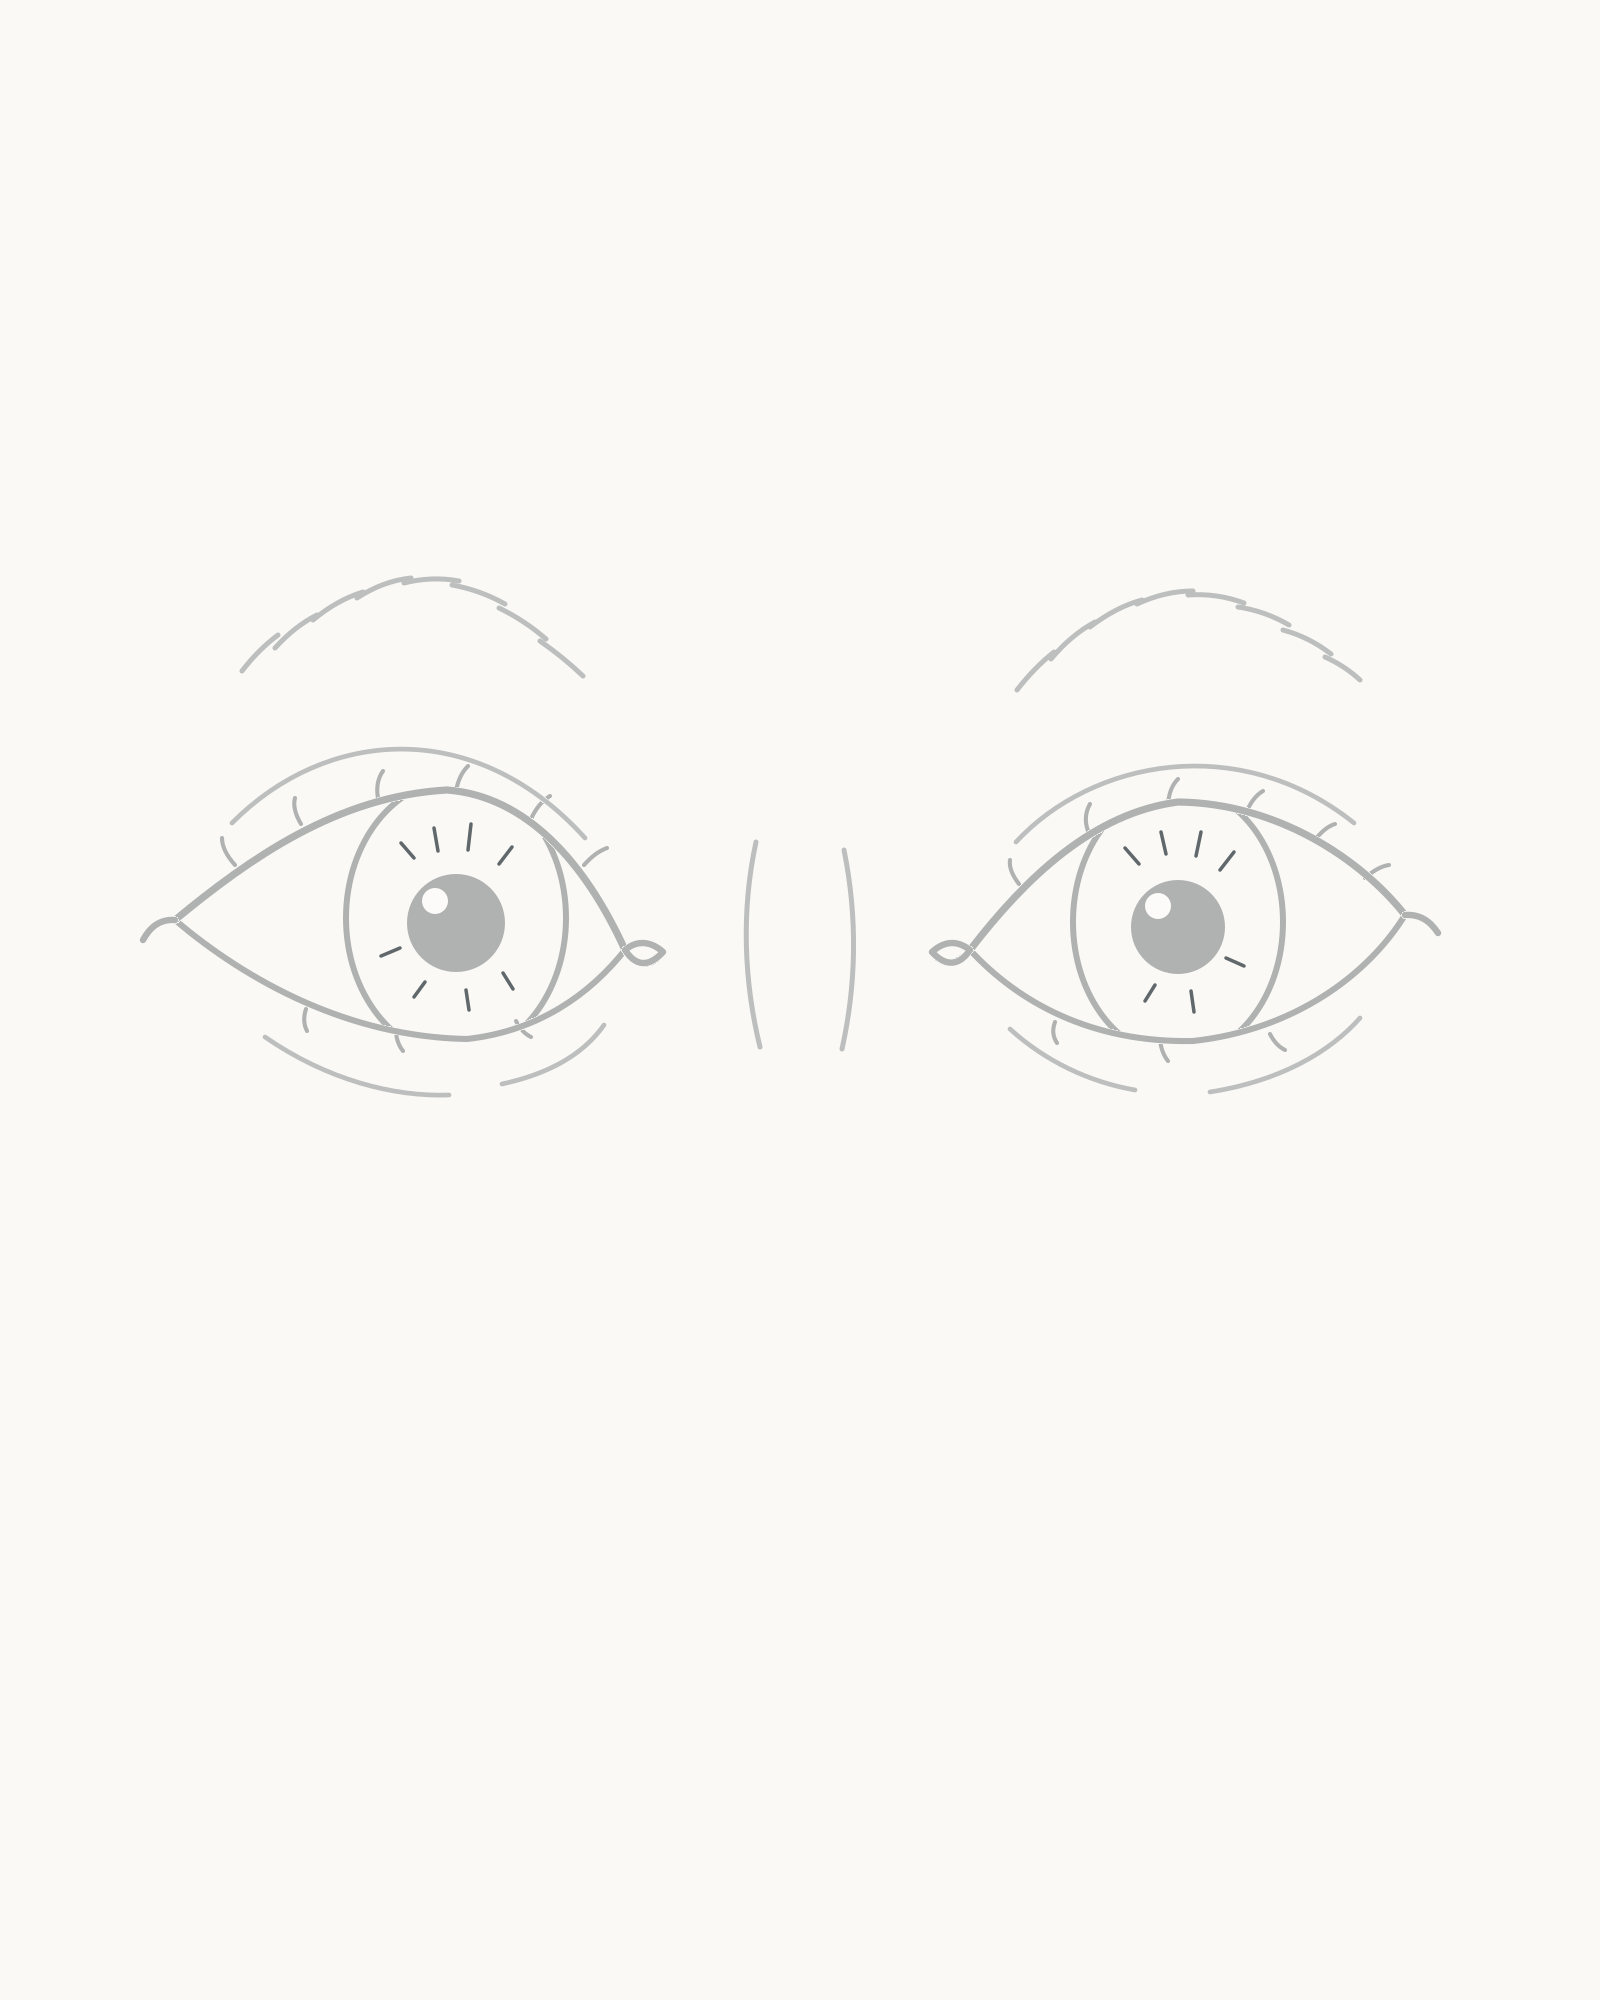
Stage 9 of 9. Sparse uneven iris lines complete the drawing without adding shading. Add a few short lines inside each iris, radiating outward from beyond the pupil. Vary their length and spacing. Keep them clear of the catchlights, stop them before the iris boundary, and leave larger open gaps in several places.
The viewer-left iris has one more visible accent than the viewer-right in this drawing. Do not add a complete sunburst and do not shade between the lines.
Look for this before moving on: The two dark pupils and white catchlights still dominate, the iris marks remain sparse and irregular, and every contour, brow, bridge and lash from Stage 8 is unchanged.
If it goes wrong: Remove only the newest excess spoke or shorten it from the outer end. Do not darken the whole iris to hide uneven spacing.


Common mistakes and small fixes
- One eye is finished but the pair does not align. Return to the four-corner comparison. On a new attempt, place both sets of corners before drawing either upper lid.
- The eyes look like matching symbols. Change one fresh secondary detail, not the structure you have already solved: vary a crease length, brow sweep or the spacing of the final iris marks.
- The gaze feels crossed. Compare the white space on the same side of each iris. Adjust only the iris that breaks the relationship, and do it before filling the pupils.
- The lower lids are too round. Flatten a short middle section. The lower curves should be shallower than the upper lids.
- The lashes float or form a comb. Take them back to the lid edge, shorten them and vary the angles. Fewer attached lashes are clearer than a dense repeated row.
- The drawing became much darker than the example. Stop adding lines. Keep the pupils as the main dark accents and preserve open paper everywhere else.
Practise a different pair
Repeat the nine stages with the same order, but change three relationships: make the viewer-right opening slightly wider, lower one brow a little and move both irises together a small distance towards the same side. Keep the pupils aligned within the irises and the catchlights at the upper left. This practises observation without turning the exercise into a new facial expression or a shaded portrait.
Artists have long used repeated eye studies as a focused drawing exercise. The Metropolitan Museum records a 1619 print of six eye studies after Guercino and an instructional plate from Stefano della Bella's seventeenth-century drawing book. [2][3] Use that precedent practically: several small variations on one page will teach you more about proportion than polishing one pair indefinitely.
Frequently Asked Questions
What is the easiest way to start drawing a pair of eyes?
Place both inner and outer corners before drawing either full eye. Four small landmarks let you compare height, gap and width while corrections are still local.
How far apart should I draw the eyes?
This example uses a gap close to one eye-opening width. It is a useful starting comparison for this drawing, not a universal rule. Measure the person or reference in front of you when drawing a likeness.
Why do my eyes look crossed?
The irises may not leave corresponding white spaces on the same sides. Compare the pair before adding pupils, then adjust only the iris that breaks the shared direction.
Should the whole iris be visible?
Usually not in this front-view lesson. The upper and lower lids interrupt the iris arcs, which helps the eyes feel set behind the lids instead of floating on top of them.
How can I make both eyes match without copying one exactly?
Match the large relationships—height, gaze and overall scale—then allow small differences in lid peak, opening width, crease and brow sweep. Related shapes look more natural than mirrored ones.
Do I need to shade the eyes?
No. The intended result is a complete line drawing. The pupils are solid dark accents, but the irises, whites and surrounding skin remain unshaded.
References
- How the Eyes Work, National Eye Institute — View source.
- Six Eye Studies, The Metropolitan Museum of Art — View source.
- Plate 3 from The Book for Learning to Draw, The Metropolitan Museum of Art — View source.
More DRAWING Guides

How to Draw a Rose: A Step by Step Guide

How to Draw a Tree: A Step by Step Guide

How to Draw Eyes: A Step by Step Guide

How to Draw Leaves: A Step by Step Guide

How to Draw Autumn Leaves: A Step by Step Guide

How to Draw Flowers: A Step by Step Guide

How to Draw a Lily: A Step by Step Guide

How to Draw a Sunflower: A Step by Step Guide

How to Draw a Tulip: A Step by Step Guide

How to Draw a Hibiscus: A Step by Step Guide

How to Draw a Daisy: A Step by Step Guide
