 by Tom Gurney
Tom Gurney BSc (Hons) is an art history expert with over 20 years experience
Email: tomgurney1@gmail.com / Phone: +44 7429 011000
From Powdery First Masses to the Final Dark Accent
Charcoal can move from a pale searching line to a broad matt dark with unusual speed. A stick can be used on its point, broken edge or side; loose particles can be spread, pressed, lifted and redrawn. That responsiveness makes charcoal valuable for large masses and repeated revision, but it also creates dust, smudging and fragile surfaces that need deliberate handling. The eight illustrated works are supplied as Public Domain images through the Met's Open Access programme.[13]
“Charcoal” is not always a secure diagnosis made from a photograph. Getty’s Noir project uses microscopy, X-ray fluorescence and Raman spectroscopy because charcoal, natural chalk and manufactured black crayons may look alike.[1] This guide uses museum labels as documented, identifies practical modern categories cautiously, and concentrates on what a learner can test on their own materials. The wider drawing mediums guide compares charcoal with graphite, ink and pastel.
At a Glance
- Best first toolvine or willow charcoal for light, liftable masses.
- Deepest accentscompressed charcoal, added late and selectively.
- Three contactspoint for line, corner for accents, side for broad tone.
- Revision toolkneaded eraser used to lift light, not only correct mistakes.
- Preservation ruletest fixative and prevent surfaces from rubbing.
Contents
Know the material before choosing a mark
Artists’ charcoal is commonly sold as light vine or willow sticks and as denser compressed sticks or pencils. Vine charcoal usually releases a soft, easily lifted deposit; compressed products tend to make a stronger dark and may contain binders. Those are useful shopping categories, not universal chemical definitions. Read the manufacturer’s label and safety information, since composition and handling advice vary.
Make a small identity chart with the actual tools in your box. For each, draw a pointed line, a side stroke, three layers, a rubbed patch and an erased stripe. Label the product rather than trusting memory. The chart will show which stick lifts cleanly, which fills the paper tooth, and which becomes too dark too early.
Getty’s study of nineteenth-century black media places this simple test in a longer history. New fabricated chalks, crayons, fixatives and papers expanded what artists could do, while current conservation research shows how difficult their materials can be to separate after the fact.[2] A useful practical vocabulary should therefore describe the observed mark—powdery, compact, broken, blended—without turning appearance into certainty.
Start with mass instead of outline
Charcoal rewards thinking in large shapes. Before describing an eye, fold or finger, locate the overall light mass, shadow mass and main directional axis. Hold a stick farther back and use its side to block a broad value. A sharpened end can then clarify selected boundaries. If every boundary becomes a dark contour, the initial advantage of mass drawing is lost.
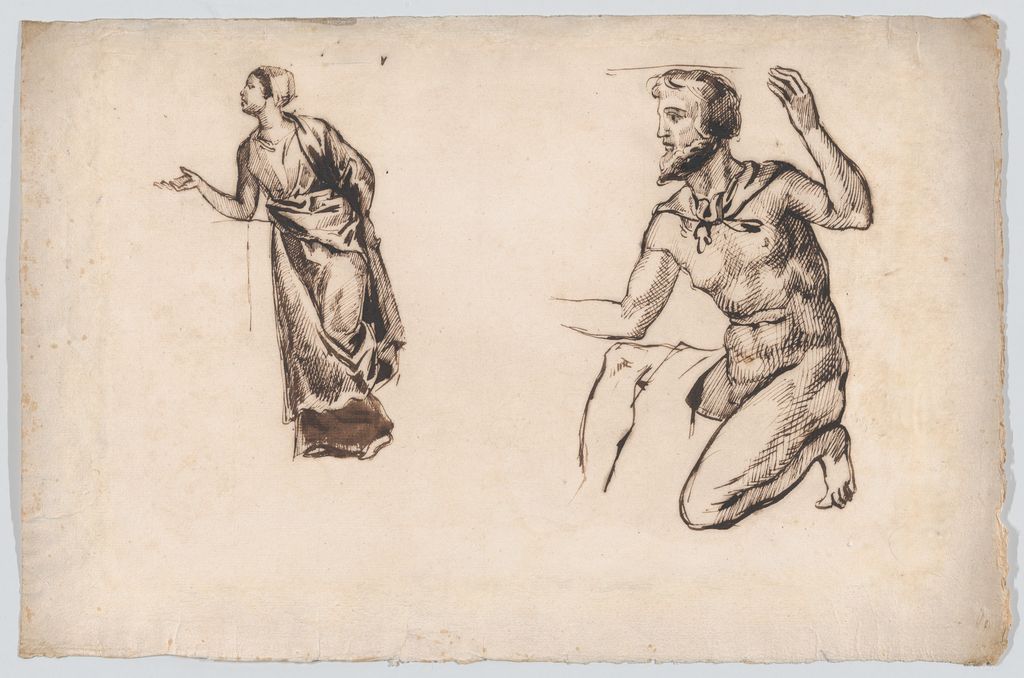
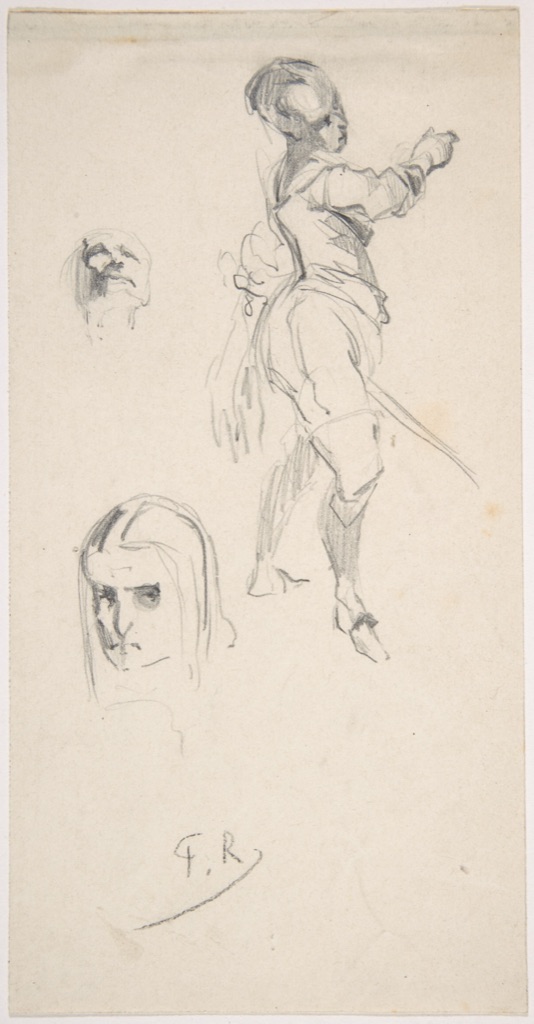
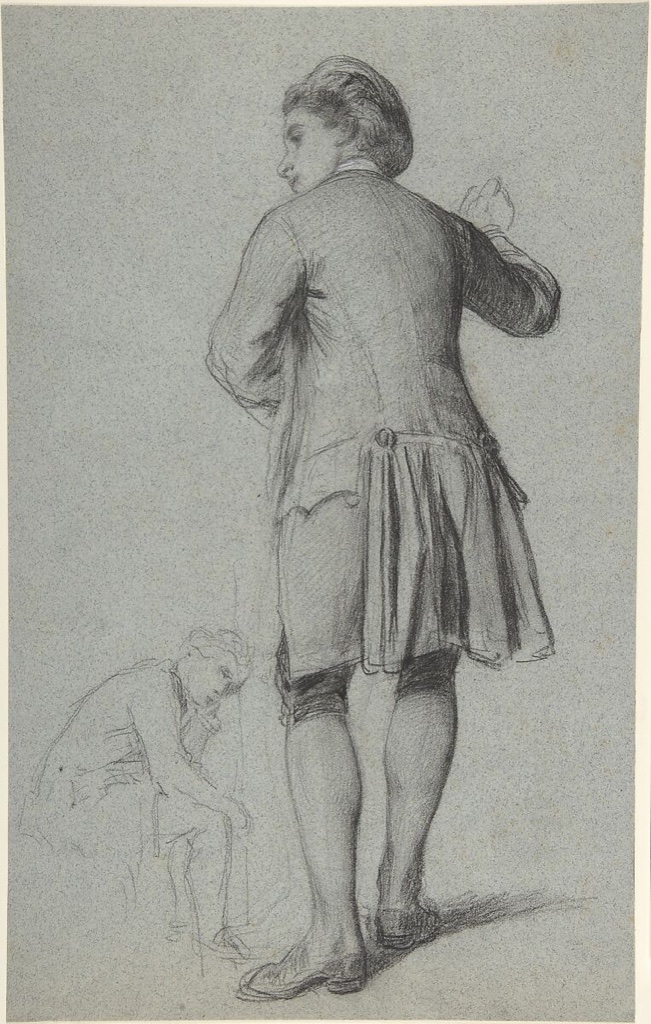
François-Claudius Compte-Calix’s Study of a standing man knocking; sketch of a sitting man, dated broadly 1830–80, is catalogued simply as charcoal.[3] The sparse record does not justify a story about its exact session. It does provide a clear comparison between two abbreviated poses on one sheet. Try the same economy: place two figures as rib-cage, pelvis and limb masses, then strengthen only the overlaps that explain the action.
Use a vertical sheet and a three-minute limit. Spend the first minute placing the whole figure, the second connecting weight through the torso and legs, and the last clarifying two or three edges. At the end, view the drawing from across the room. If the pose reads only close up, the large relationships need work before detail.
A practical charcoal sequence
Charcoal is easiest to control when each stage has a distinct job. This compact sequence prevents dense accents and blending from arriving before the structure is secure.
| Stage | Tool or action | Aim | Stop signal |
|---|---|---|---|
| Placement | Vine charcoal, point | Envelope, axis and proportion | The whole subject fits and balances |
| Mass | Vine charcoal, side | Connect the largest shadow shapes | The design reads from a distance |
| Turn | Selective stumping | Join only the transitions that describe volume | Paper and visible strokes still remain |
| Light | Kneaded or firm eraser | Lift broad, soft and sharp highlights | The light pattern supports the focal area |
| Accent | Compressed charcoal | Add the few deepest darks | No accent competes with the focus |
Point, side and broken contact
A charcoal stick has more than one useful contact. The point produces a narrow line; a corner makes an irregular accent; the side lays a band whose texture records paper tooth. Rotate the stick to vary width without changing tools. A paper with pronounced tooth breaks broad strokes into flecks, while a smoother sheet accepts a more continuous deposit.
Do not assume broad means vague. Lay the side down, move it once, and leave the stroke visible. Repeated rubbing can turn an articulate mark into an even grey. Next, drag a broken edge lightly across the tooth so that only raised fibres catch. Compare this optical texture with a fully blended patch at the same average value.
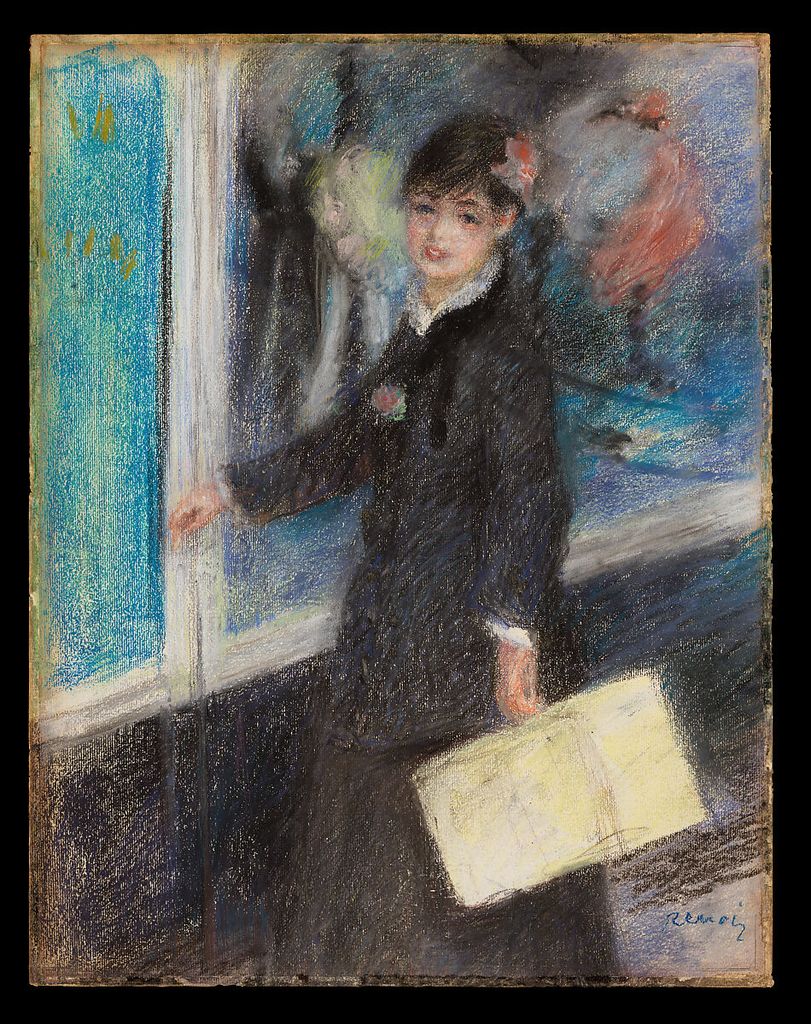
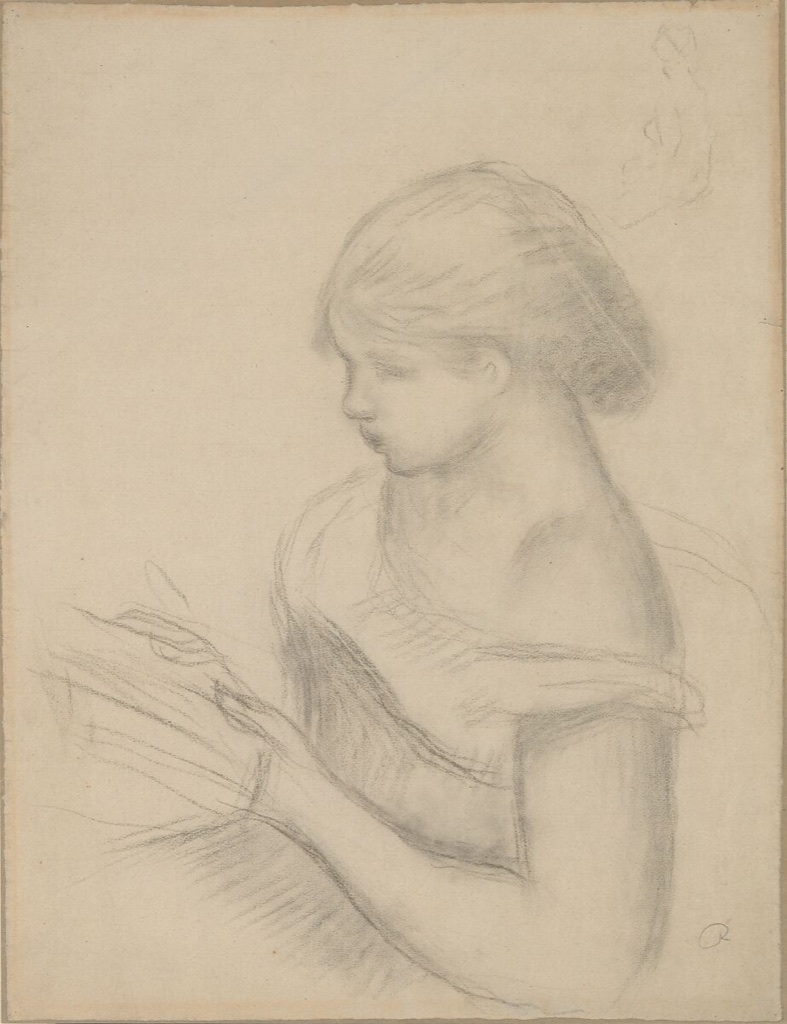
Auguste Renoir’s A Girl Reading (with a Sketch of Seated Woman) is recorded as charcoal with some stumping.[4] The medium line matters: it distinguishes drawn charcoal from the later act of blending. Use the sheet as a prompt to separate stages. First establish direction with visible charcoal; stump only a chosen transition; restore a few edges afterward. Blending should serve form, not erase every decision.
Stump, blend and preserve the lights
Stumping is the blending of dry medium with a shaped implement.[5] It can join strokes, push powder into paper and create a quiet transition. It can also contaminate clean lights and make every surface feel identical. Keep one stump for darks and another for light passages, or clean the working end on scrap paper. Fingers add skin oils and offer poor control, so a purpose-made stump or clean soft tool is preferable.
Begin with less charcoal than the final value requires. Move the stump from light toward dark only when you intend to carry material, and stop before the paper tooth is completely filled. Redraw the focal edge after blending. A convincing charcoal surface often contains three kinds of evidence at once: untouched paper, visible stick marks and compressed tone.
Make a sphere using no outline. Lay a middle tone around the light, deepen the shadow side with another pass, and stump only the turning transition. Lift the core reflection rather than drawing it white. On a second sphere, blend everything equally. The comparison reveals why selective stumping describes volume more clearly than universal smoothing.
Lift charcoal to draw with light
Because loose charcoal can be removed, erasure is a mark-making method rather than merely repair. A kneaded eraser can dab a soft light; a firm edge can cut a narrow highlight; a clean cloth can reduce a whole field. Test each tool on the chosen paper, since a compressed or heavily pressed layer may not return to paper white.
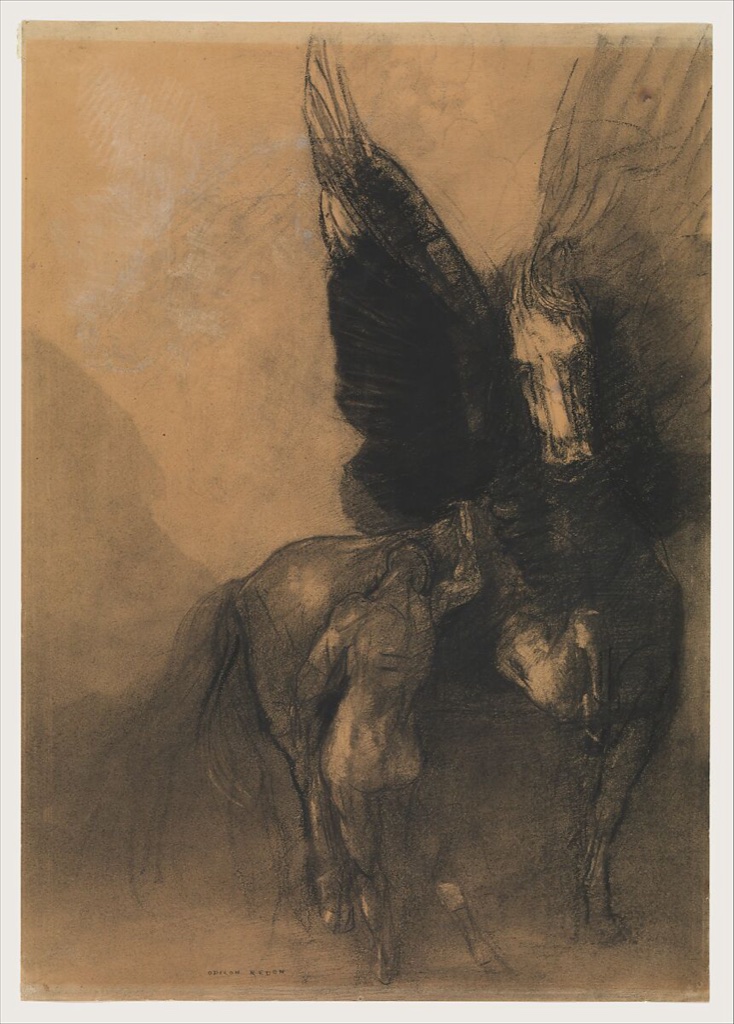
Odilon Redon’s Pegasus and Bellerophon, about 1888, combines charcoal, charcoal wash, white chalk, conté crayon and highlighting by erasure on a buff paper that has darkened.[6] The Met describes pentimenti in the wings and lights made through removal and white heightening. The important lesson is procedural: darkness may be established, revised and reopened, not simply filled around untouched highlights.
Cover a rectangle with two light charcoal layers. Lift one wide beam, one soft cloud and one sharp line. Redraw around only one of them to increase contrast. Label which eraser and pressure produced each result. The exercise turns “erase until it looks right” into a repeatable set of light-making choices.
Work from a toned support
On white paper, charcoal mainly travels downward through the value scale. A middle-toned support permits movement both darker with charcoal and lighter with white. The ground can remain visible across large areas, joining the drawing rather than acting as empty background. Test any white medium beside the charcoal before committing to a full sheet.
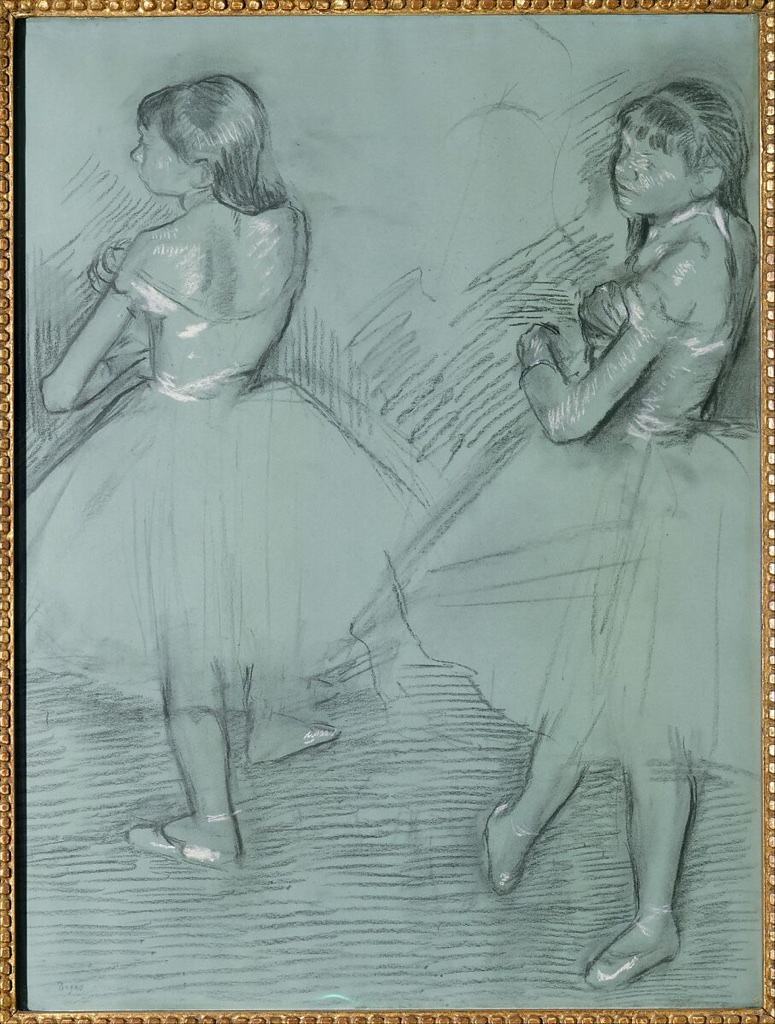
Edgar Degas’s Two Dancers, about 1879, uses charcoal and white chalk on green commercially coated wove paper.[7] The Met notes that the sheet retains its original colour. Treat that green as an active middle value: reserve it, deepen selected shadow shapes, and add white only where light needs to rise above the ground.
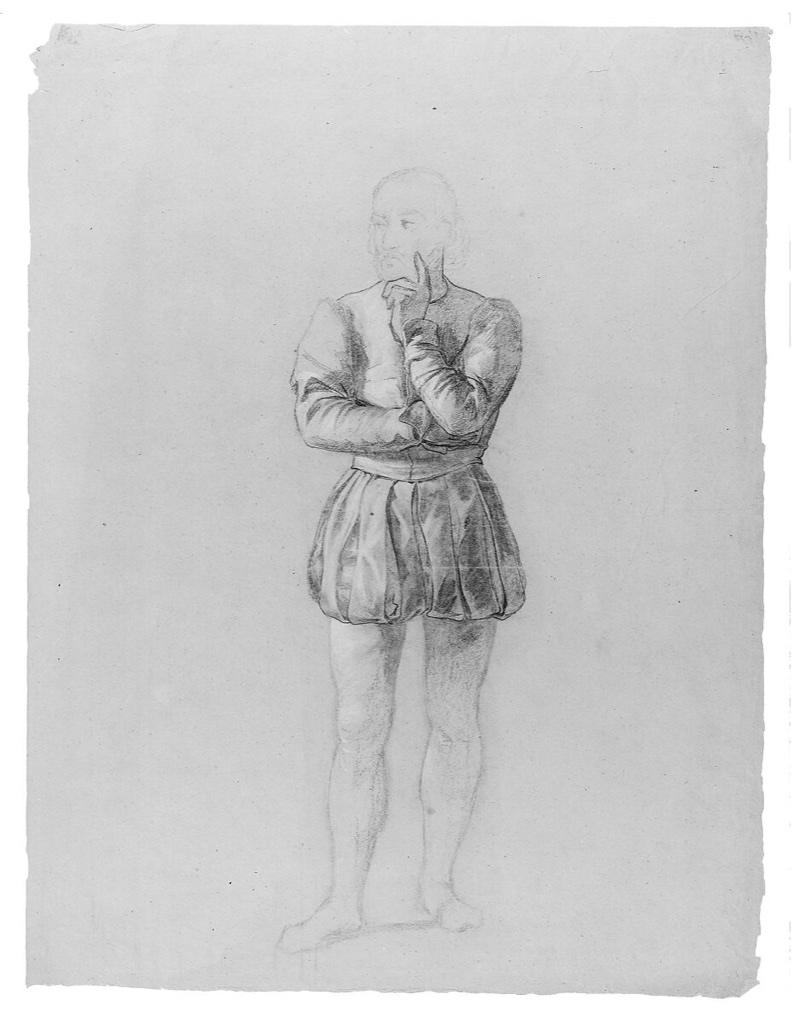
John Vanderlyn’s study of Roderigo Sánchez of Segovia, about 1840–43, uses charcoal and white chalk described as lightly affixed on light grey laid paper.[8] The phrase “lightly affixed” is a useful warning against assuming that every pale accent is applied in the same way. For practice, make a small swatch, flex the paper gently over a table, and observe whether the white or black transfers before choosing a storage method.
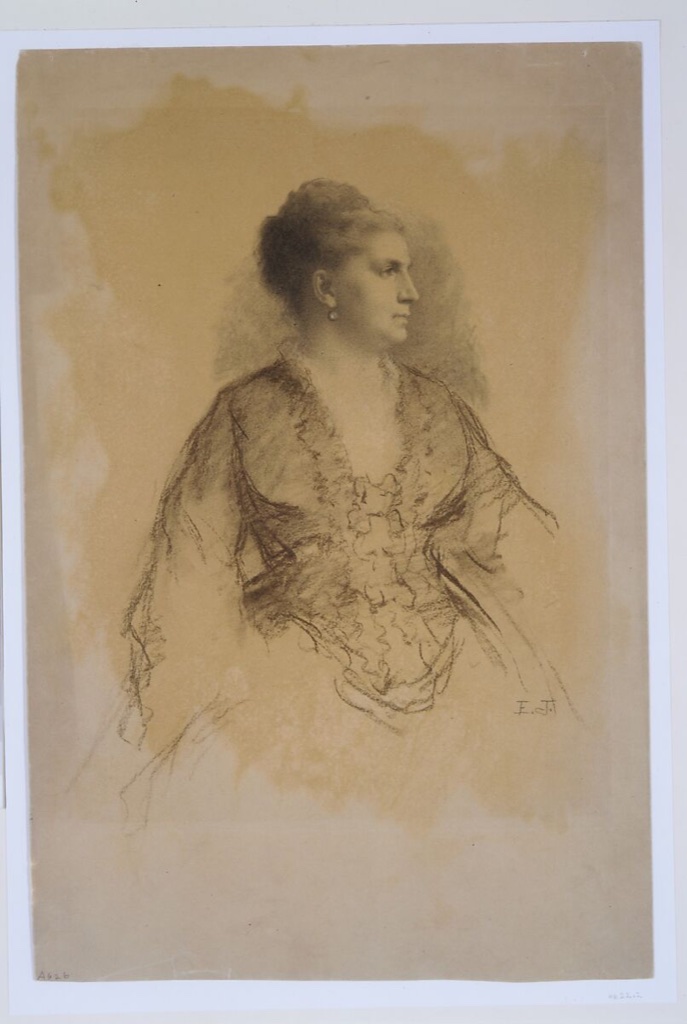
Eastman Johnson’s Portrait of a Woman, about 1871, uses charcoal and white chalk on light brown textured paper.[9] The Met calls attention to rough, unblended strokes in the dress against more accomplished handling of the head. Build a portrait with that hierarchy: broad broken marks for clothing, quieter transitions in the face, and only a few hard accents near the focal features.
Combine charcoal with wash or opaque white
Dry charcoal can coexist with liquid media, but the order changes the surface. Wetting loose charcoal may fix, spread or darken it unpredictably; drawing over a sealed wash may reduce adhesion. Run a sample strip using the same paper and materials. Let each wet stage dry fully before judging it.
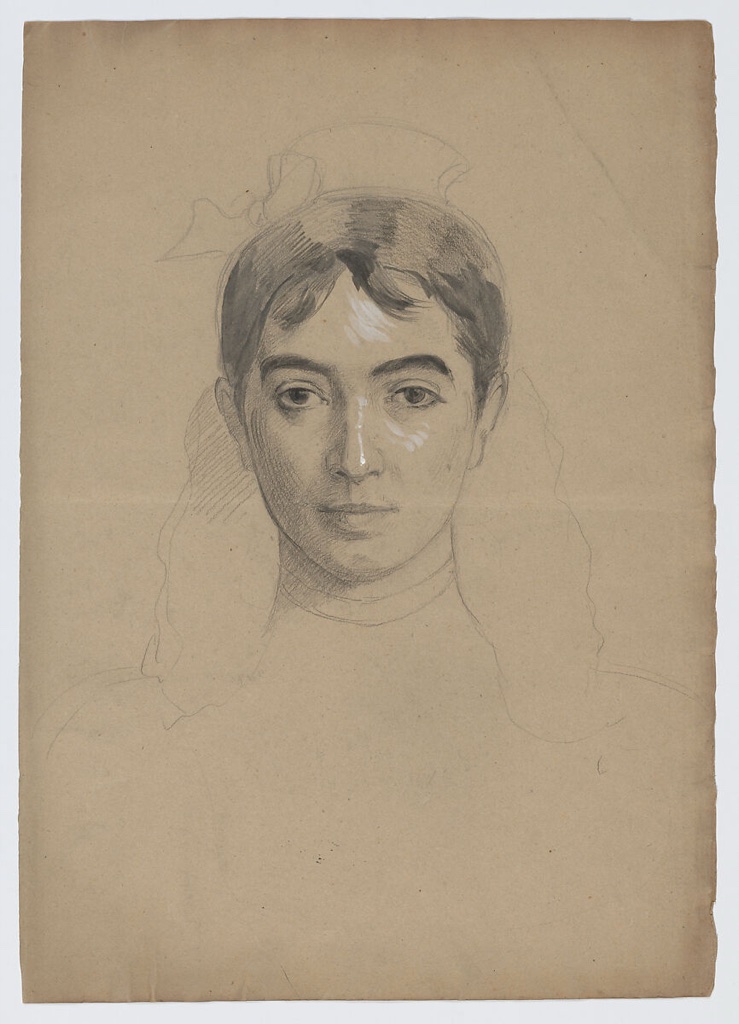
Marie Bracquemond’s self-portrait study, about 1870, is catalogued as charcoal, brown wash and white gouache on the recto, with graphite on the verso.[10] The record also connects the sheet to her only major painted self-portrait. It does not supply a full sequence for every stroke, so use it as evidence of combined media rather than a recipe. In a study, assign charcoal to structure, wash to a limited middle tone and opaque white to selected light.
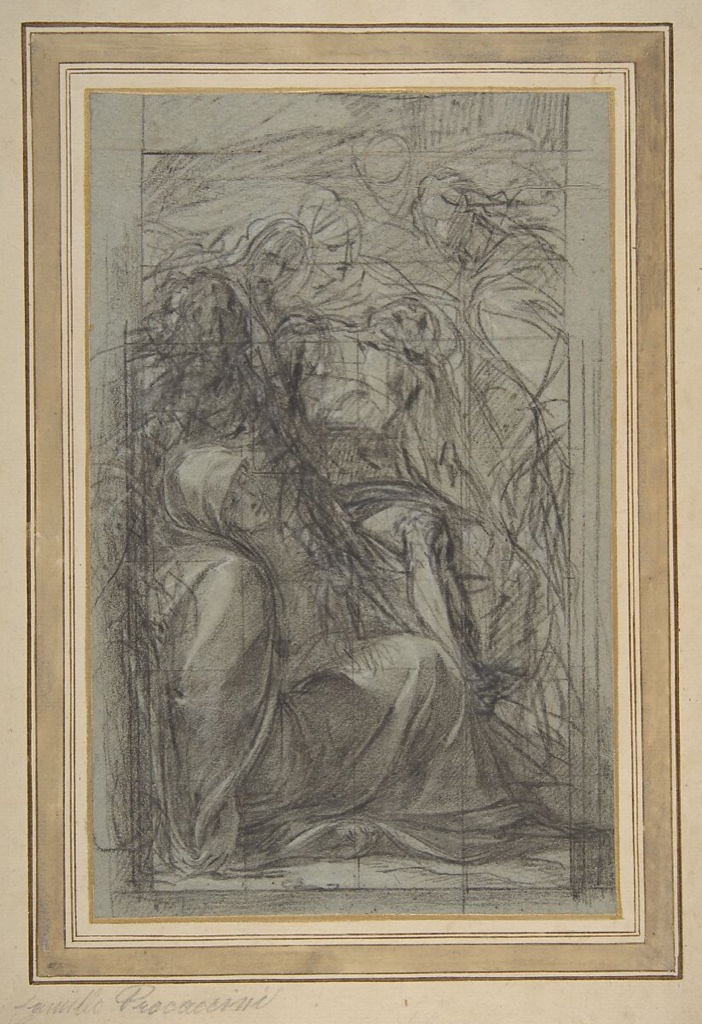
Giulio Cesare Procaccini’s 1604 Study for the Pietà combines charcoal, white gouache, charcoal squaring and blue paper.[11] Here the grid belongs to the documented object, not to a generic claim that all charcoal drawings were transferred. Reproduce a small sketch at double size with a four-by-four grid; keep the grid lighter than the main forms and preserve enough blue or grey ground to hold the middle register.
Control edges and value range
A broad dark is not automatically deep space. Value must work with edge. Hard edges can mark contact, overlap or focus; soft edges can suggest turning form; lost edges allow neighbouring values to join. Charcoal makes all three readily, which is why indiscriminate blending and outlining are especially costly.
Draw a cup against a cloth in five values. First mass the two largest dark shapes. Then identify one hard contact edge, one soft turning edge and one lost boundary. Make no extra detail until those three relationships read from two metres away. Finally add one compressed-charcoal accent, no larger than a fingernail, to test whether it strengthens or unbalances the design.
If the drawing becomes black too quickly, begin with vine charcoal or lighter pressure and reserve the densest tool. If it remains pale, check whether the paper is shedding material before pressing harder. If every plane looks smoky, reintroduce visible strokes and sharper boundaries. If highlights look pasted on, reduce the white and let more of the toned ground bridge light and dark.
Fixative, dust and storage
Historical object records and conservation literature document fixed charcoal surfaces, but that does not make one universal spray appropriate.[12] A modern fixative may darken values, alter colour, change sheen or remain hazardous during application. Follow the specific manufacturer’s directions, ventilation requirements and local disposal guidance. Test on a separate swatch made with the same media and paper.
Avoid blowing charcoal dust into the air. Work with the sheet at a modest angle when practical, tap loose particles into a controllable area, and clean according to the product and studio guidance. Do not eat or drink in the working area. The point is not alarm: it is to keep a mobile particulate medium on the paper and out of the body.
Interleave finished studies with clean archival-quality paper or glassine appropriate to the work, and avoid sliding surfaces against each other. A portfolio should support the sheet without rubbing it. Photograph the drawing before any fixative test, then compare the swatch after it dries. Record product, distance and number of passes so the result can be evaluated rather than remembered vaguely.
A complete charcoal study
Choose a simple subject under one side light and prepare a value scale on the same paper. Spend two minutes placing the envelope with vine charcoal, five minutes massing the major shadow, five minutes refining the boundary between light and shade, and five minutes lifting two lights. Use compressed charcoal only for the final accent if the design needs it.
Pause and inspect the drawing upright. Ask whether the largest light and dark shapes read, whether the focus has a different edge character from the surroundings, and whether the paper still participates. Remove one unnecessary dark, restore one visible stroke, and stop before revision turns into polishing.
The eight museum sheets demonstrate no single charcoal finish. Compte-Calix abbreviates figures; Renoir includes stumping; Degas, Vanderlyn and Johnson work with toned supports and white; Redon constructs light through erasure and mixed black media; Bracquemond combines dry and wet passages; Procaccini squares a blue sheet. Their variety is the practical lesson: charcoal becomes controllable when material, support, value, edge and revision are tested separately, then coordinated.
Continue with gesture drawing for time-limited movement, figure drawing for sustained body studies, or observational drawing for measuring directly from a subject.
Watch: Charcoal from Historic Practice to the Studio
Choose a Getty reconstruction of nineteenth-century methods, a National Portrait Gallery study of Sargent, or a contemporary museum-led charcoal demonstration.
Drawing with Charcoal: Historical Techniques
See nineteenth-century French charcoal materials, preparation and handling reconstructed from technical research.
Watch on YouTubeFrequently Asked Questions
Vine or willow charcoal is forgiving for first masses because its light deposit is usually easier to lift. Add compressed charcoal only when a denser final dark is needed.
Usually. Vine or willow charcoal tends to be soft and readily lifted, while compressed charcoal tends to be denser and may contain binders. Check the maker's label because formulations vary.
Avoid rubbing the surface, interleave it with suitable archival paper or glassine, and support it in a portfolio. Test any fixative on a separate swatch because it can change value, colour or sheen.
Loose charcoal can often be lifted with a kneaded eraser, firm eraser edge or clean cloth. A heavily pressed or compressed layer may not return to the original paper white.
Yes. Museum drawings document charcoal with white chalk, gouache and wash, especially on toned paper, but the combination and order should be tested because wet media can move or darken loose charcoal.
Discussion
Which charcoal decision makes the greatest difference in your own drawing: mass, edge, lifting, toned paper or the final dark accent?
Reader Insights
Build the largest connected shadow before describing small features.
Let untouched paper, visible strokes and blended tone coexist.
Use compressed charcoal late, where one accent strengthens the focus.
Join the Conversation
Share a useful exercise, material test or museum drawing below.
References
- J. Paul Getty Museum, “Noir: Technical Examination and Analysis of 19th-century Black Drawing Materials”: source.
- J. Paul Getty Museum, “Noir: The Romance of Black in 19th-Century French Drawings and Prints”: source.
- The Metropolitan Museum of Art, François-Claudius Compte-Calix, Study of a standing man knocking: source.
- The Metropolitan Museum of Art, Auguste Renoir, A Girl Reading: source.
- Getty Art & Architecture Thesaurus, “stumping”: source.
- The Metropolitan Museum of Art, Odilon Redon, Pegasus and Bellerophon: source.
- The Metropolitan Museum of Art, Edgar Degas, Two Dancers: source.
- The Metropolitan Museum of Art, John Vanderlyn, Study for The Landing of Columbus: source.
- The Metropolitan Museum of Art, Eastman Johnson, Portrait of a Woman: source.
- The Metropolitan Museum of Art, Marie Bracquemond, Self-portrait: source.
- The Metropolitan Museum of Art, Giulio Cesare Procaccini, Study for the Pietà: source.
- J. Paul Getty Museum, “Paper Conservation: Drawings”: source.
- The Metropolitan Museum of Art, Open Access: source.
- Simon & Schuster, Kate Boucher, Drawing with Charcoal: publisher record.
- Search Press, Douglas R. Graves, Life Drawing in Charcoal: publisher record.
- Getty Museum, “Drawing with Charcoal: Historical Techniques of 19th Century France”: watch on YouTube.
- National Portrait Gallery, “John Singer Sargent: Portraits in Charcoal”: watch on YouTube.
- National Gallery Singapore, “DIY with Artists: Art-Making with Charcoal”: watch on YouTube.