



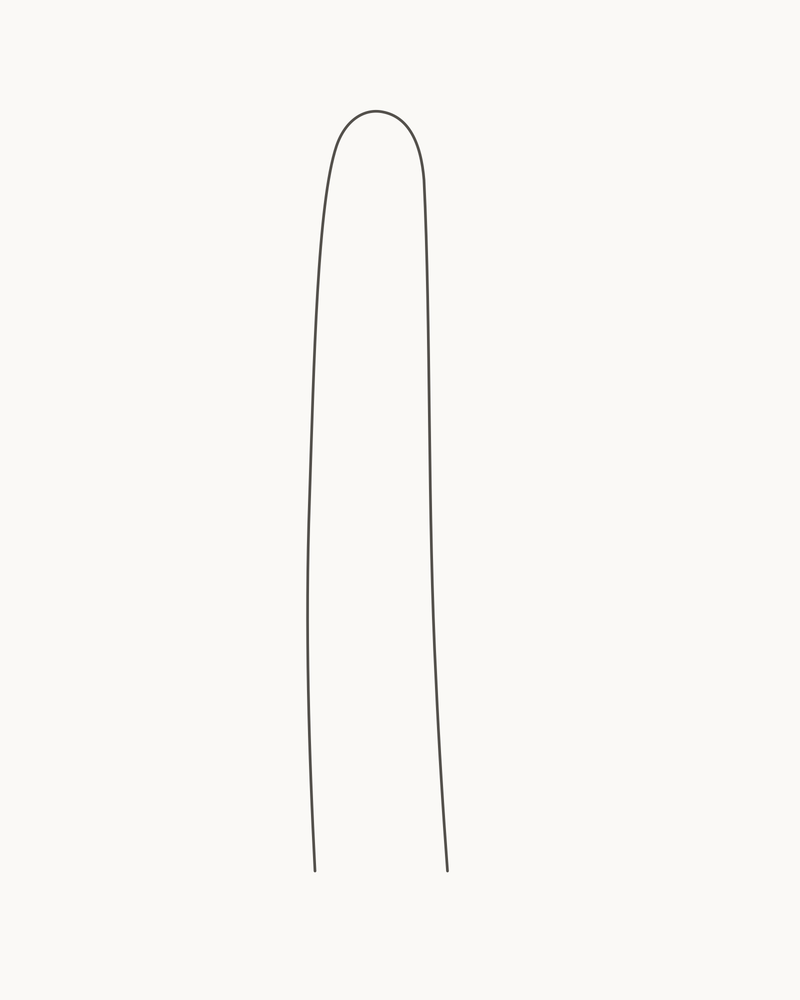
Draw one complete saguaro-type cactus in eight permanent line stages. Establish a tall central column, attach two unequal upturned arms, turn flat interior lines into rounded ribs, then add only enough areoles, spines, ground contact and hatching to make the form convincing. Every sound mark remains visible in the finished drawing. There is no pot, colour pass, full shading stage or final retracing.
Difficulty: Beginner; the main challenges are making the arms join smoothly and bending the ribs with each form
Time: Allow about 35–50 minutes. This is an untested estimate.
Medium: HB or No. 2 pencil, clean line with sparse hatching
Read the cactus as three joined forms
The finished drawing is based on a saguaro-type cactus: one dominant central column and two side arms that turn upwards. The left arm is lower, shorter and fuller; the right is higher, slimmer and longer. Keeping those differences visible is more important than making either side perfectly smooth.
The National Park Service explains that a saguaro's outer pleats correspond to woody ribs inside the plant and can expand or contract as water is stored or used.[1] That observation gives the interior lines a real job in this drawing. They should follow each rounded column rather than sit on top like a striped pattern. The same source notes that ordinary saguaros rarely grow symmetrically.[1] Unequal arms are therefore not a mistake to correct.
Treat the plant as three connected cylinders: the trunk, the left arm and the right arm. The trunk remains in front at both junctions. Each arm begins and ends against its side contour, so the two attachment points act like a pair of shoulders. This lets you preserve the original trunk line instead of cutting into it later.
Materials
- Use a pointed medium-graphite pencil: HB is ideal, but a classroom No. 2 behaves similarly. A mechanical pencil with a medium lead is useful if you prefer not to sharpen while working.
- One smooth white or warm-white sheet in portrait orientation. A clean sketchbook page or printer paper is enough.
- A clean eraser for correcting only the line you have just added. There is no planned cleanup stage.
- Keep a sharpener nearby for a wooden pencil, especially before the areoles and spines.
- Optional: choose a well-lit reference photo of a mature saguaro seen nearly straight-on. Notice arm differences and rib direction in it; follow the supplied image for this exact result.
- Optional: scrap paper for trying one trunk-to-arm junction before Stage 2.
You do not need a ruler, compass, marker, ink, coloured pencil, blending tool or tracing paper. The small surface marks are easier to control with the same pencil held a little farther back and with less pressure.
Before you draw
Imagine a portrait frame four units wide and five high. The top of the central crown sits near the middle of the width and about 12% down from the top. The trunk occupies a narrow central corridor, leaving a broad pocket on each side for the arms. Its base reaches close to the lower edge without touching it.
Use the separate Stage 1 placement panel to compare the crown point, column envelope and reserved arm space. Its dotted lines and arrows are viewing aids, not marks to copy. The optional page grid starts hidden. Switch it on briefly if you need to compare the arm heights or trunk width cell by cell, then turn it off before judging the curves.
Keep the trunk and arm contours calm and clear. Use lighter pressure for ribs, and lighter pressure again for areoles, spines and final hatching. The notional light comes from upper-left, but shape and overlap do most of the work. Stage 8 adds only twelve quiet value marks on lower-right-facing surfaces.
1. Place the central column
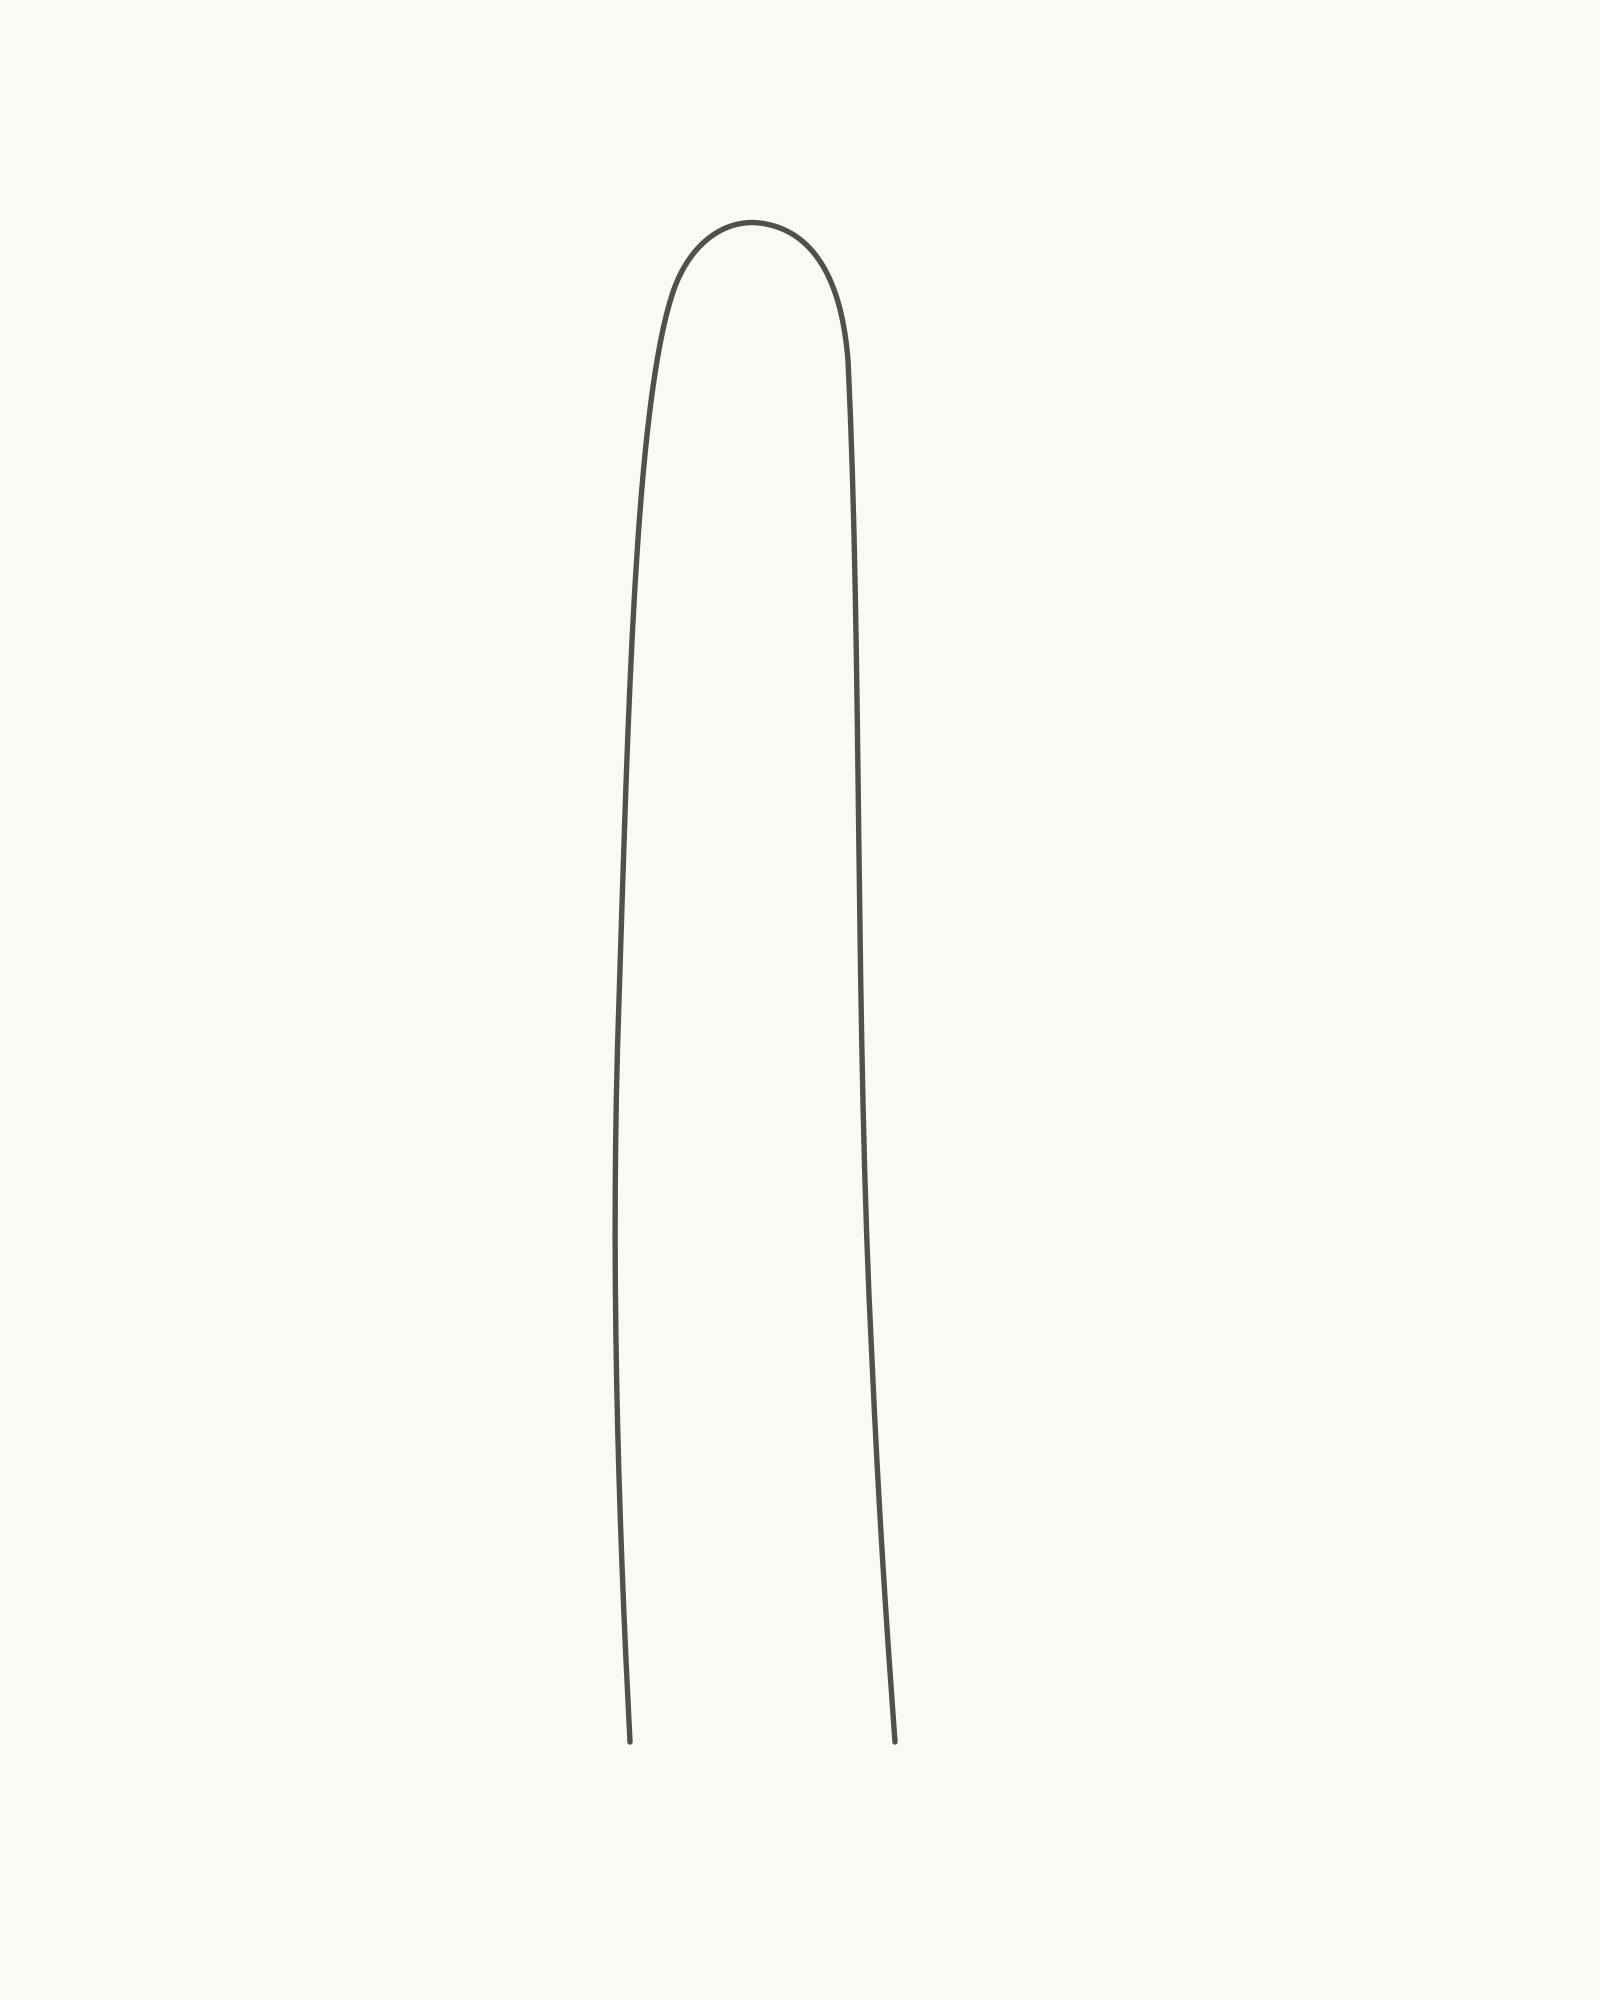
Stage 1 of 8. One unequal column fixes the cactus height, crown and central placement. 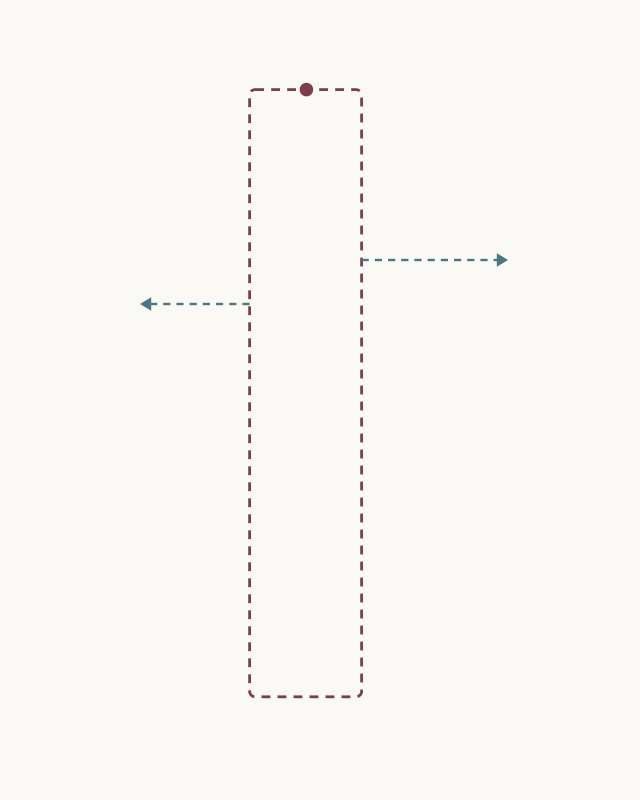
Placement cue: locate the main crown near x50% and y12%. Keep the central envelope narrow and reserve more rising space on the right. Leave every cue mark off the drawing. Start near the lower-left base and climb towards the crown with a slow, slightly outward curve. Round the top without flattening it, then descend along a right edge that is a little straighter and more tapered. Stop near the lower-right base, leaving the short gap between the two endpoints open.
The column should be tall rather than wide. Do not aim for two perfectly parallel sides: a subtle difference between them prevents the form looking like a bottle or a road sign. Keep clear paper above the crown and enough room on both sides for arms that will not be equal.
Look for this before moving on: one tall central column has a rounded crown, gently unequal edges, a subtle taper and an open base. It sits centrally with more arm space on the right.
If it goes wrong: preserve the more natural edge and the crown. Remove only the newest flat, pinched or abruptly bulging segment, then reconnect that short section between the same stable points. Do not close the base to make the shape feel finished.
2. Attach the lower left arm
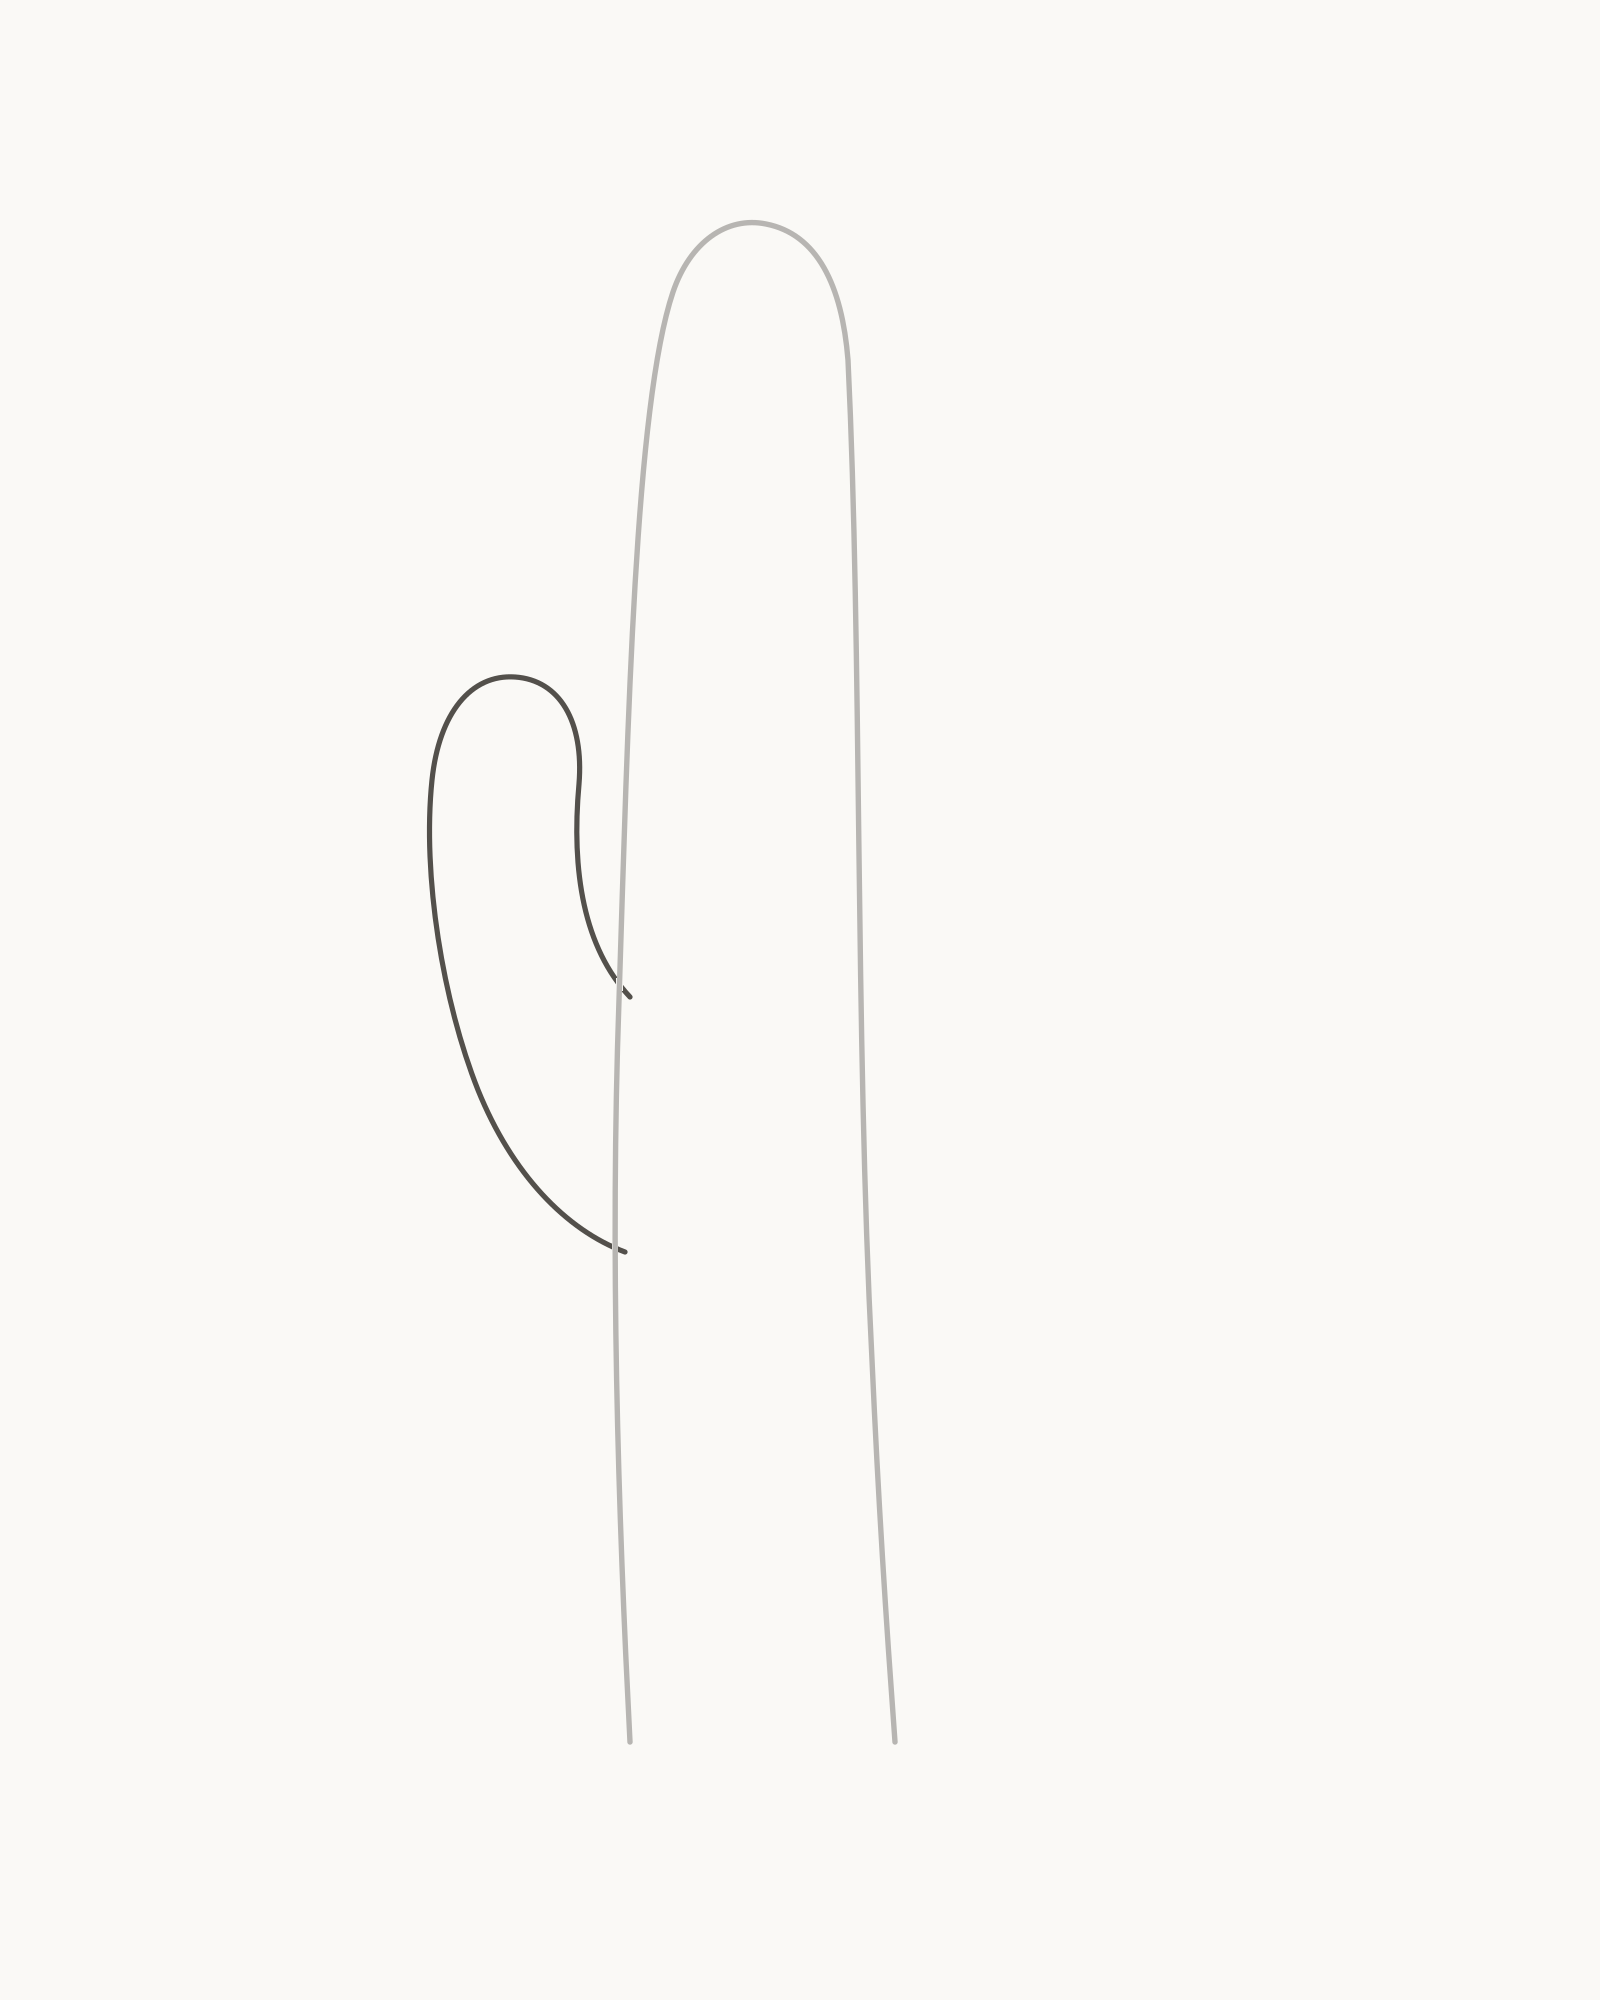
Stage 2 of 8. A shorter left arm tucks behind the trunk through two flowing shoulders. - Outer shoulder
- Upward turn
- Rounded crown
- Inner return
Build this arm in four visible parts. First, leave the left side of the trunk at the lower attachment and curve down-left into a broad outer shoulder. Second, turn the line upwards. Third, round the arm's crown. Fourth, bring the inner edge down and then right until it meets the trunk at the higher attachment.
The trunk line remains visible between those two attachment points, so the arm appears to tuck behind it. Make the arm narrower than the trunk and let its return curve differ from its outside curve. A broad change of direction is easier to believe than a square elbow or a thin neck.
Look for this before moving on: one shorter, fuller arm turns upwards on the left and meets the trunk at two separated points. Its crown is rounded and both shoulder curves arrive smoothly without floating or pinching.
If it goes wrong: leave the trunk untouched. Keep the clearer half of the arm, remove only the newest square turn, flat crown or tangent-like segment, and reconnect it to the same trunk endpoint. If both joins are misplaced, return to Stage 1 rather than cutting the trunk line.
3. Attach the higher right arm
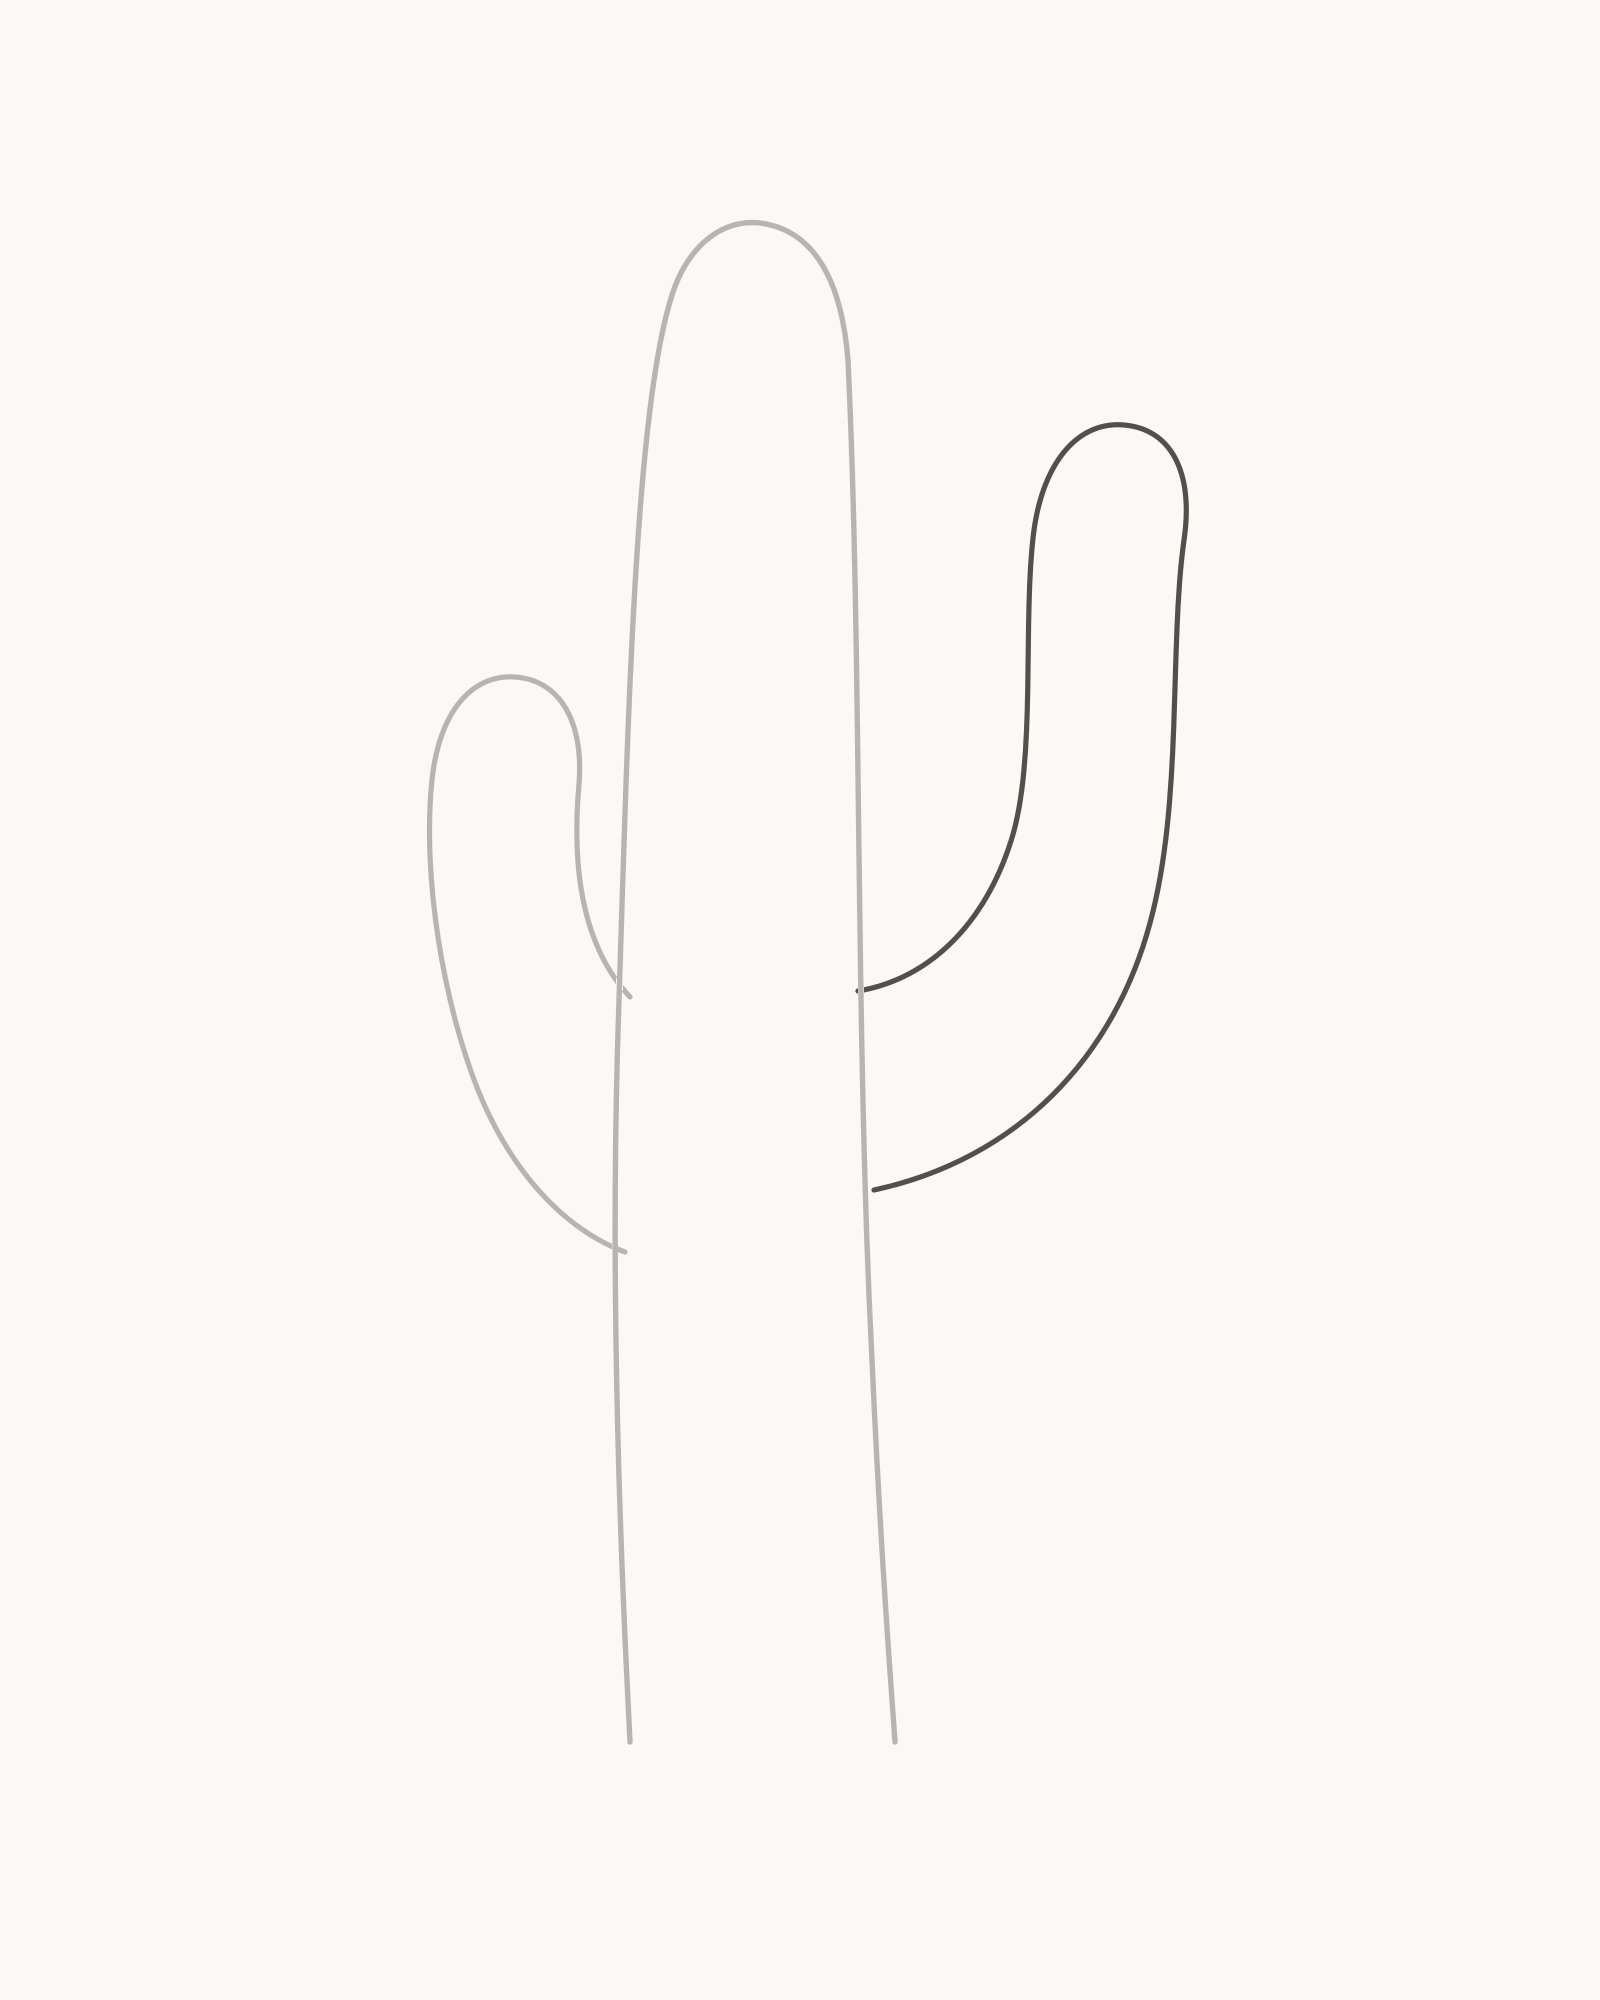
Stage 3 of 8. The longer right arm creates a deliberately asymmetric silhouette. - Outer shoulder
- Long upward rise
- Rounded crown
- Inner return
Use the same four-part order—outer shoulder, upward rise, rounded crown, inner return—but change the proportions. Begin higher on the right side of the trunk, let the arm sweep farther out and upward, and make its tube slightly slimmer. Its crown should sit well above the left crown while remaining below the main one.
Bring the returning edge into a lower point on the trunk so the arm has a generous shoulder. The visible trunk line again stays in front. Avoid copying the left bend in reverse; the two arms belong to one plant, not a mirrored symbol.
Look for this before moving on: the right arm is visibly higher, slimmer and longer than the left, its two shoulders meet the trunk cleanly, and none of the earlier lines has moved or become thicker.
If it goes wrong: keep the trunk and left arm. Remove only the newest repeated bend, equal-height crown or pinched return, then redraw that portion with a longer rise or broader shoulder. Do not add a third arm to balance the shape.
4. Add nine form-following ribs
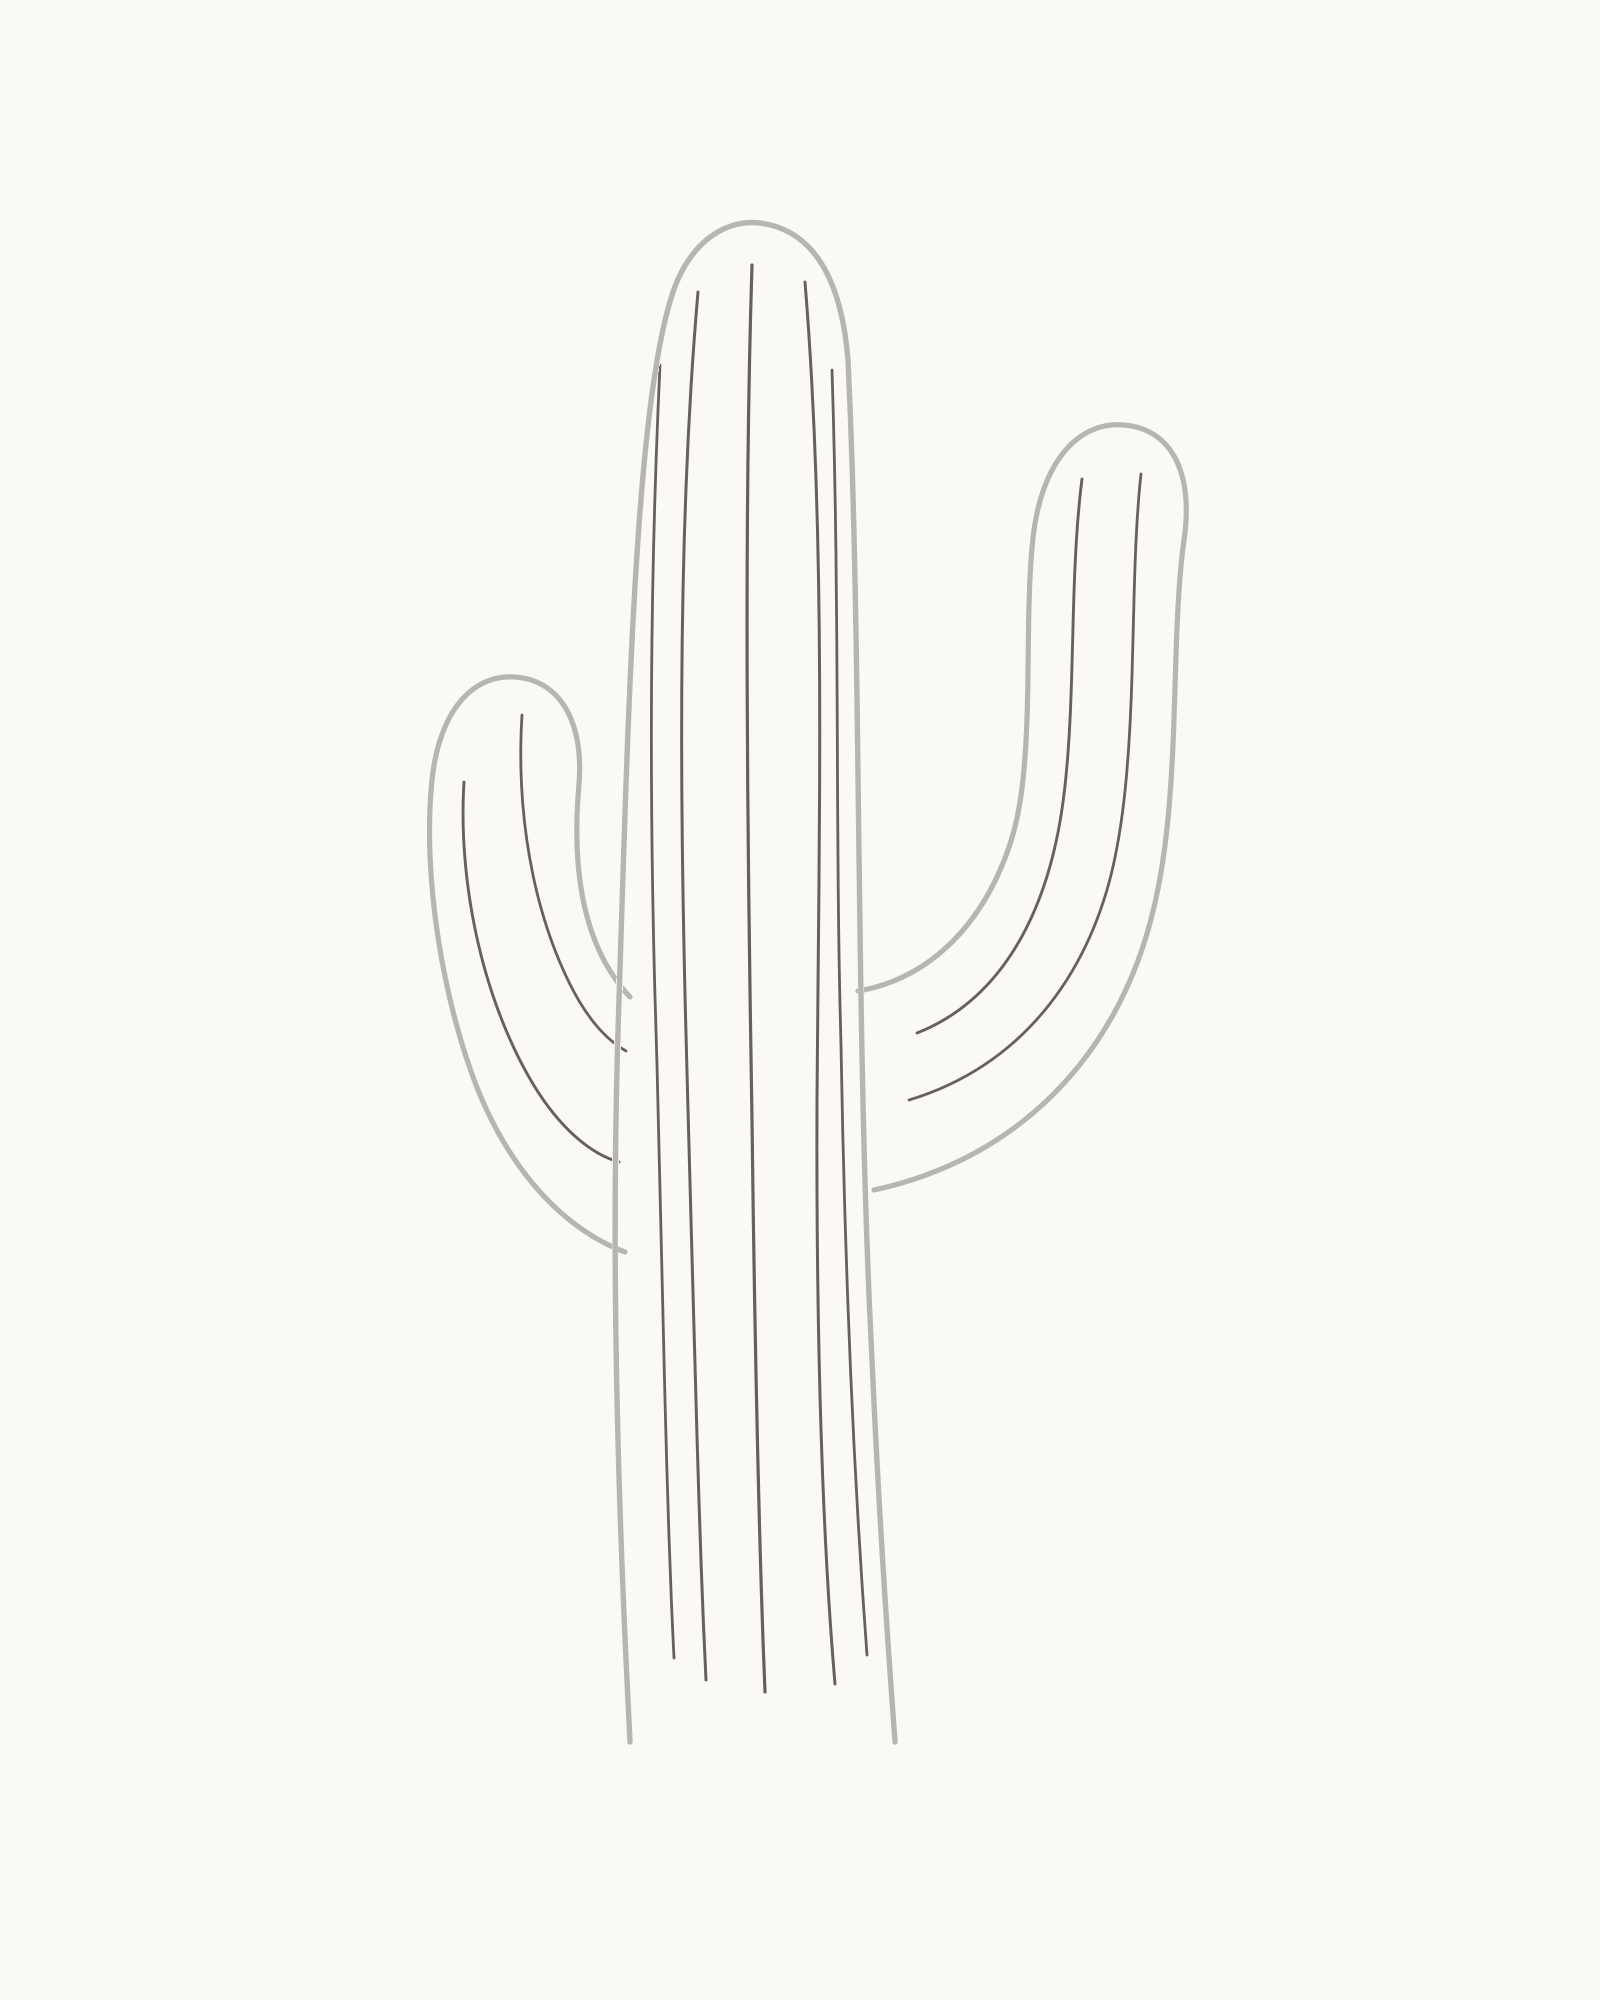
Stage 4 of 8. Nine ribs turn the three joined silhouettes into rounded forms. - Centre trunk rib
- Four side ribs
- Two left-arm ribs
- Two right-arm ribs
Begin with the longest central rib. Let it follow the trunk's lean from below the crown towards the base, stopping short at both ends. Add two ribs to its left and two to its right. The inner lines can remain longer; the lines nearer the edges should bow slightly and feel compressed against the side contours.
Now place two ribs inside the left arm and two inside the right. Follow each upward turn as though the line were running along the surface of a bent tube. Stop before every crown and before each arm reaches the trunk. A rib should never cut across a shoulder junction.
Look for this before moving on: exactly nine ribs are visible—five on the trunk and two on each arm. Every line follows its own form, has clear stopping space and avoids the junctions.
If it goes wrong: preserve the silhouettes and the ribs that turn well. Remove only the newest rigid, crowded or shoulder-crossing line, then redraw it with the local curve. Do not thicken a neighbouring rib to fill the gap.
5. Place twenty-four areoles
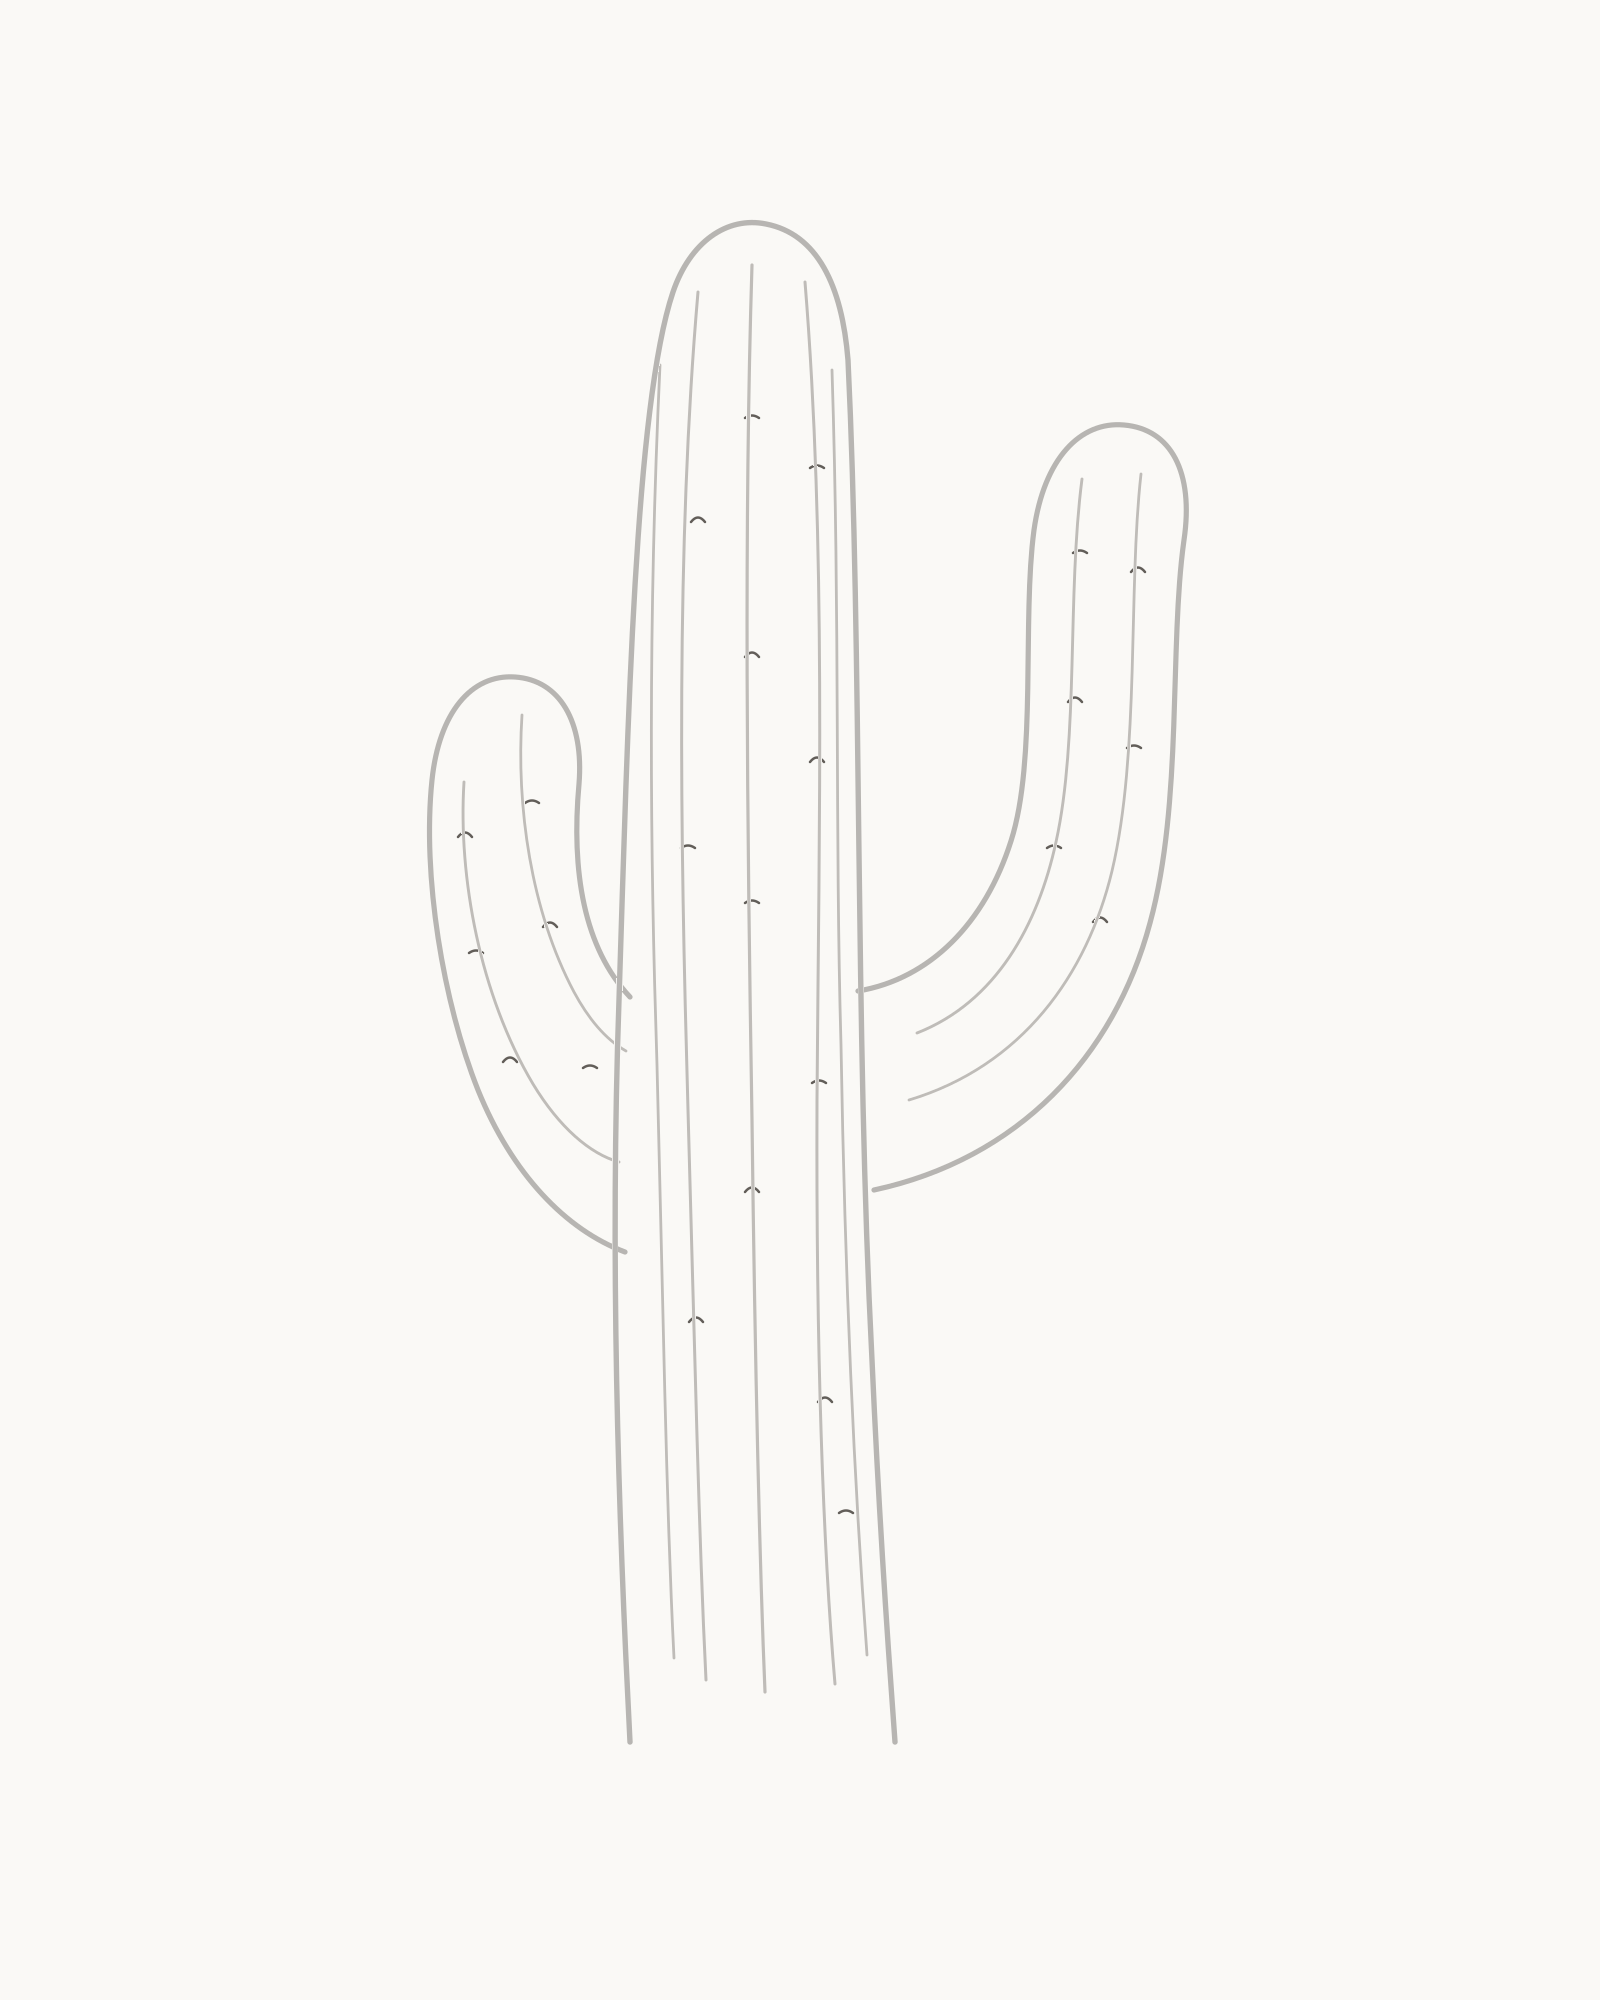
Stage 5 of 8. Twenty-four open areoles establish restrained spine origins. - Twelve on trunk
- Six on left arm
- Six on right arm
- Keep spacing varied
Areoles are the small points from which cactus spines grow. Add them as tiny open C-shapes or short bent dashes, not filled dots. Work from top to bottom: place twelve along selected trunk ribs, then six on the left arm and six on the right.
Let the spacing change slightly. Some marks can sit closer near a bend; others can leave a longer interval. They should belong to rib paths without forming horizontal rows across the cactus. The open shapes need only be large enough to remain distinct from the thinner spines that follow.
Look for this before moving on: exactly twenty-four small open areoles sit on selected ribs—twelve on the trunk and six on each arm—with no rigid grid or floating marks.
If it goes wrong: keep the ribs and the correctly seated areoles. Remove only the newest filled, oversized or off-rib mark, then replace it with one small open shape on that rib. Count before adding another mark for visual balance.
6. Add thirty-six restrained spines
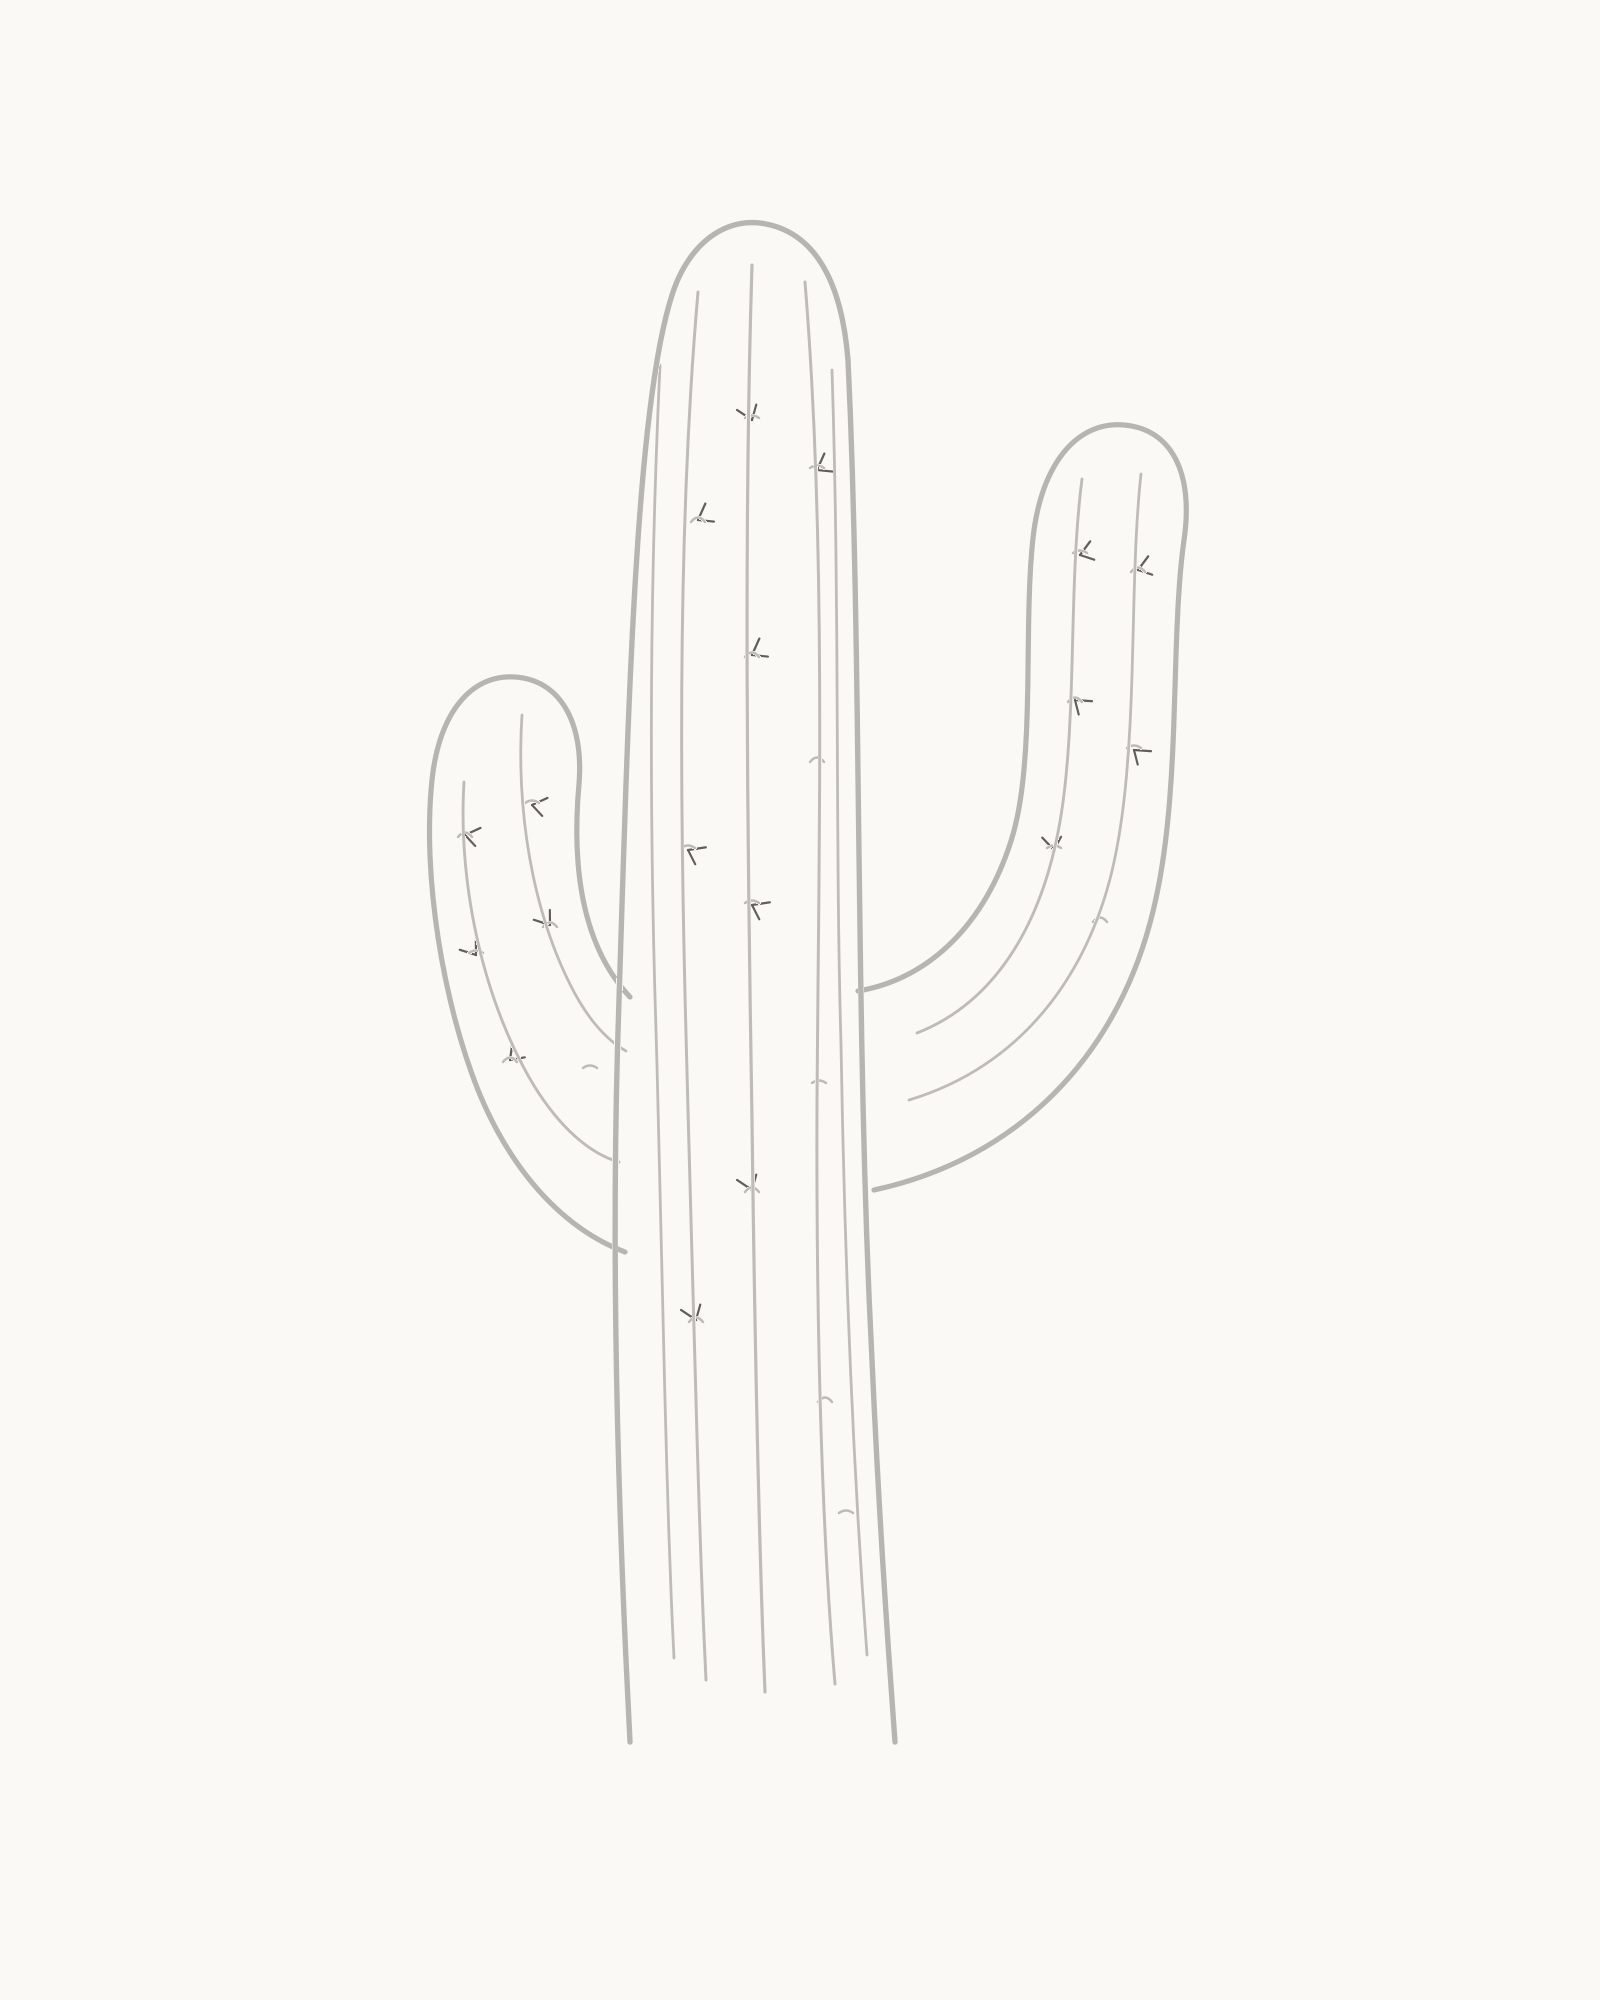
Stage 6 of 8. Short areole-led spines make the cactus recognisable without creating fur. - Sixteen on trunk
- Ten on left arm
- Ten on right arm
- Leave quiet areoles
Use selected areoles as clear origins. Add sixteen short spine strokes on the trunk, ten on the left arm and ten on the right. Most selected areoles receive two strokes that open at different angles; several areoles remain without spines so the surface stays readable.
Keep every spine much shorter than the distance between two ribs. Angle it away from the local surface: side spines can point outwards, while front-facing groups can open diagonally. Avoid identical starbursts. The aim is a recognisable cactus surface, not a dark fringe.
Look for this before moving on: exactly thirty-six short spines begin at visible areoles, vary modestly in angle and leave every contour and rib easy to follow.
If it goes wrong: leave all earlier structure and clear spine groups in place. Remove only the newest floating, overlong or star-like stroke, then reconnect a shorter line to its areole. Do not add extra spines to make both sides equally busy.
7. Anchor the base
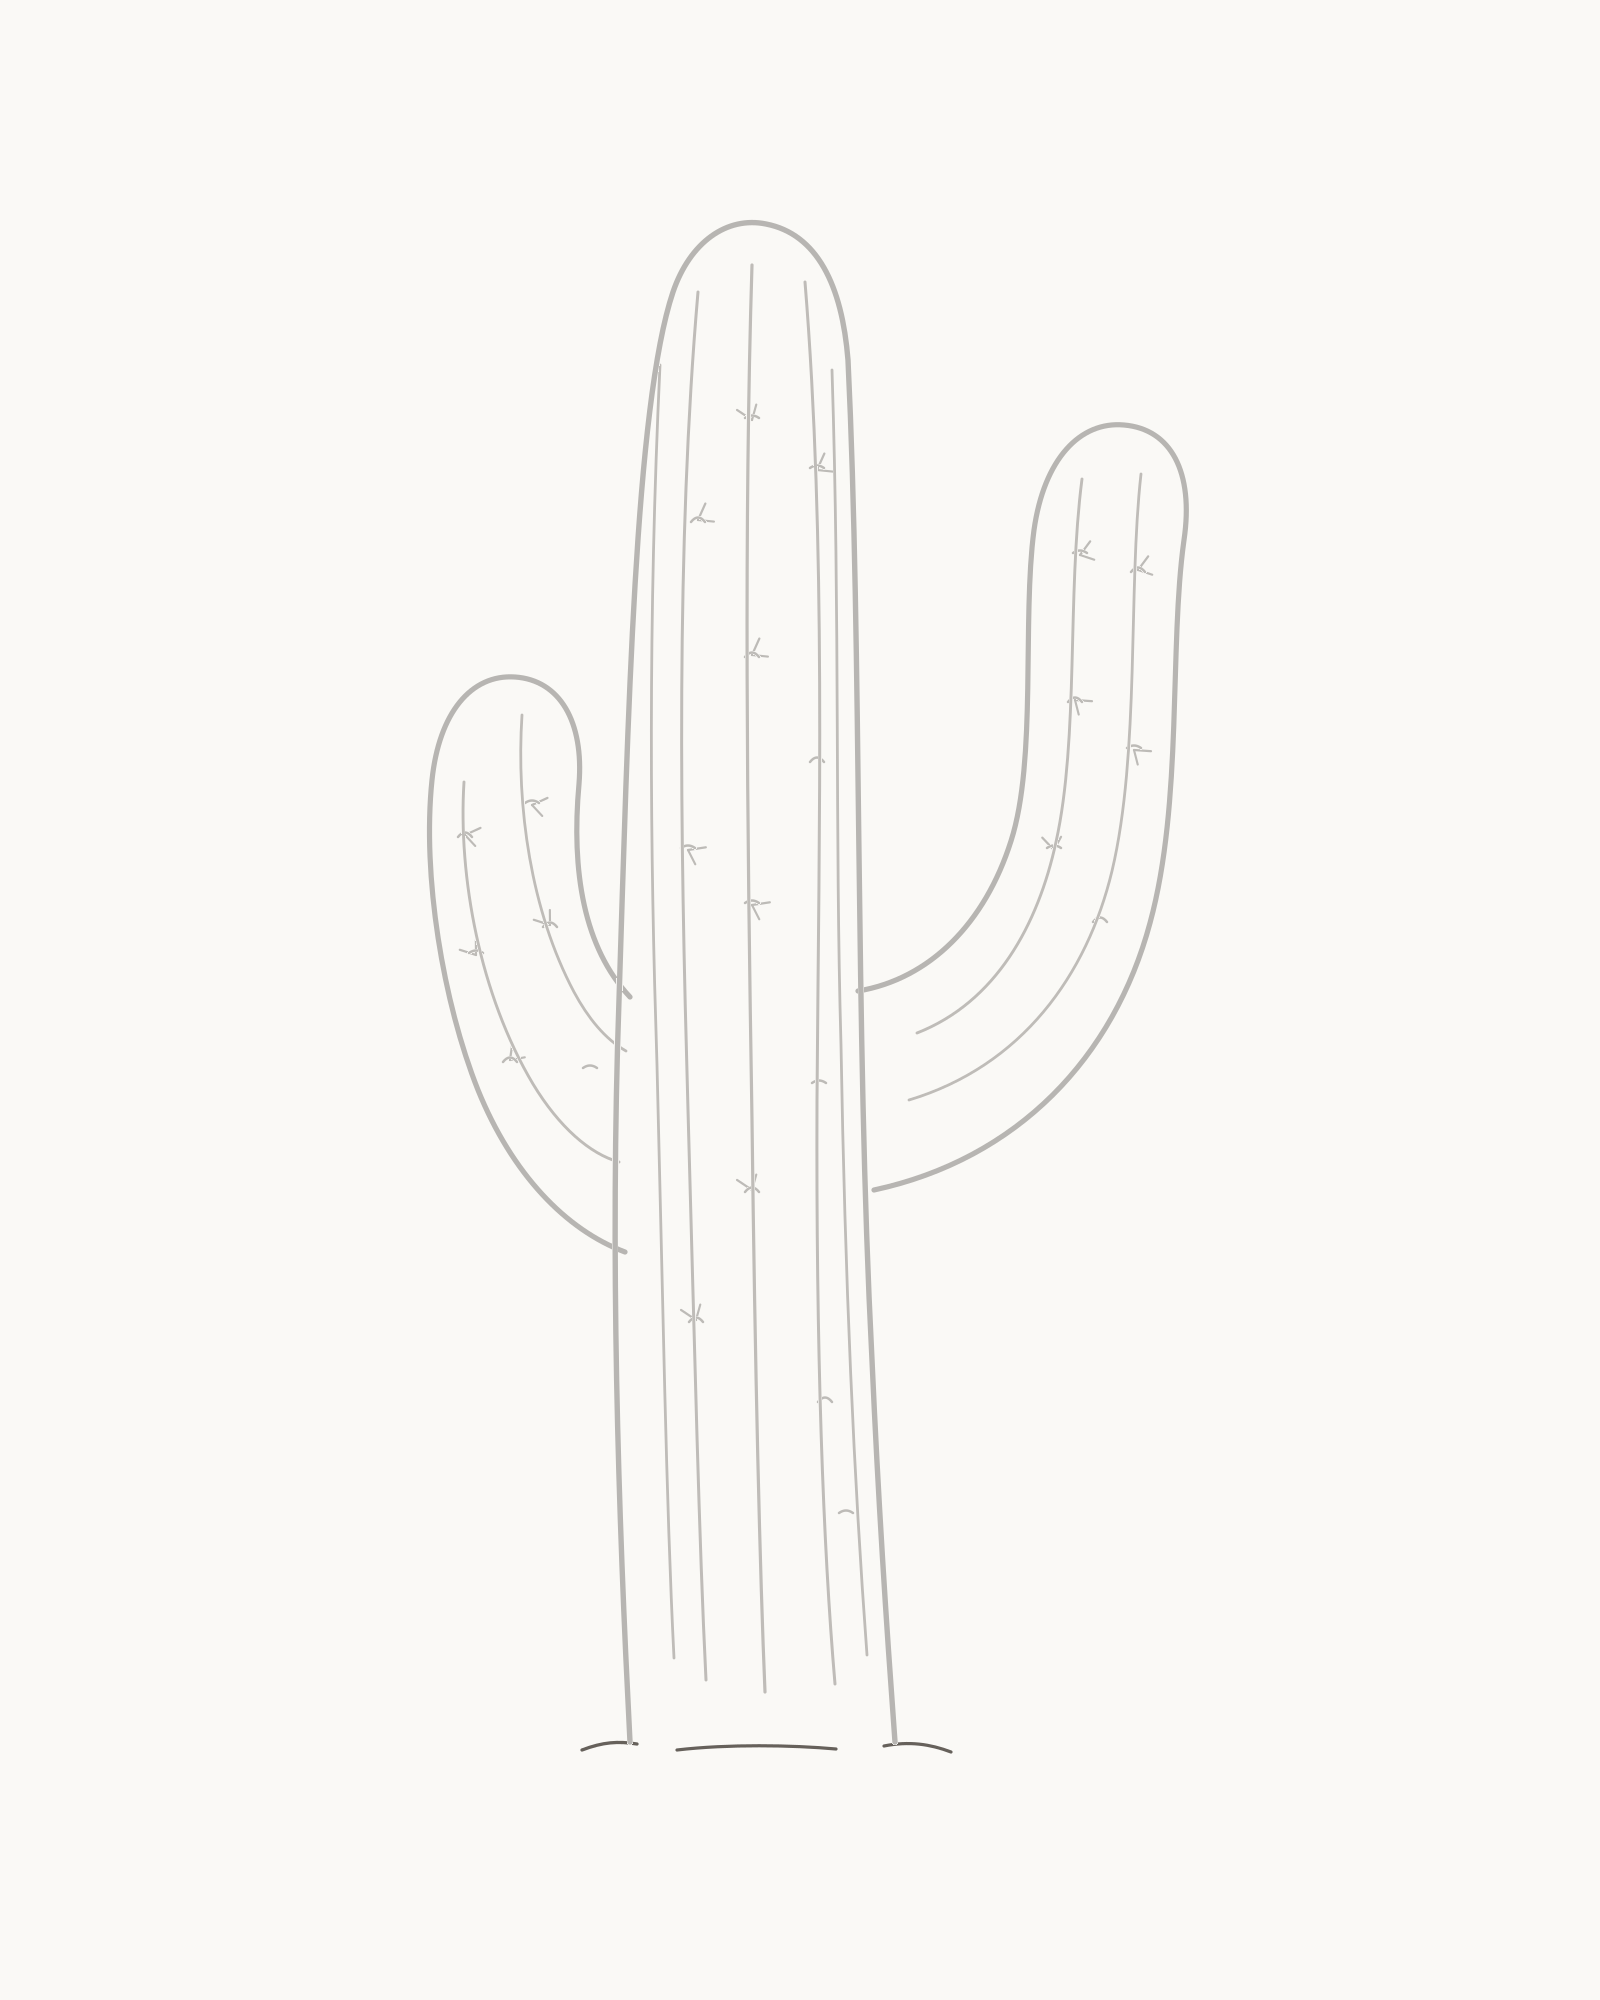
Stage 7 of 8. Three quiet marks settle the cactus without starting a landscape. - Short left mark
- Shallow centre mark
- Short right mark
Place three short strokes around the open trunk base: one just outside the left endpoint, one shallow curve beneath the centre and one outside the right endpoint. Leave clear paper between them so the lower contour remains visible.
These lines indicate contact only. They are not the start of sand, rocks, grass, a horizon or a cast shadow. Their restraint keeps attention on the cactus while stopping the tall form from floating.
Look for this before moving on: exactly three quiet marks settle the trunk on the page, the open base still reads clearly and no broad landscape line has begun.
If it goes wrong: preserve the trunk and the useful contact strokes. Remove only the newest long, heavy or grassy mark, then replace it with one shorter curve near the same base endpoint.
8. Add sparse hatching
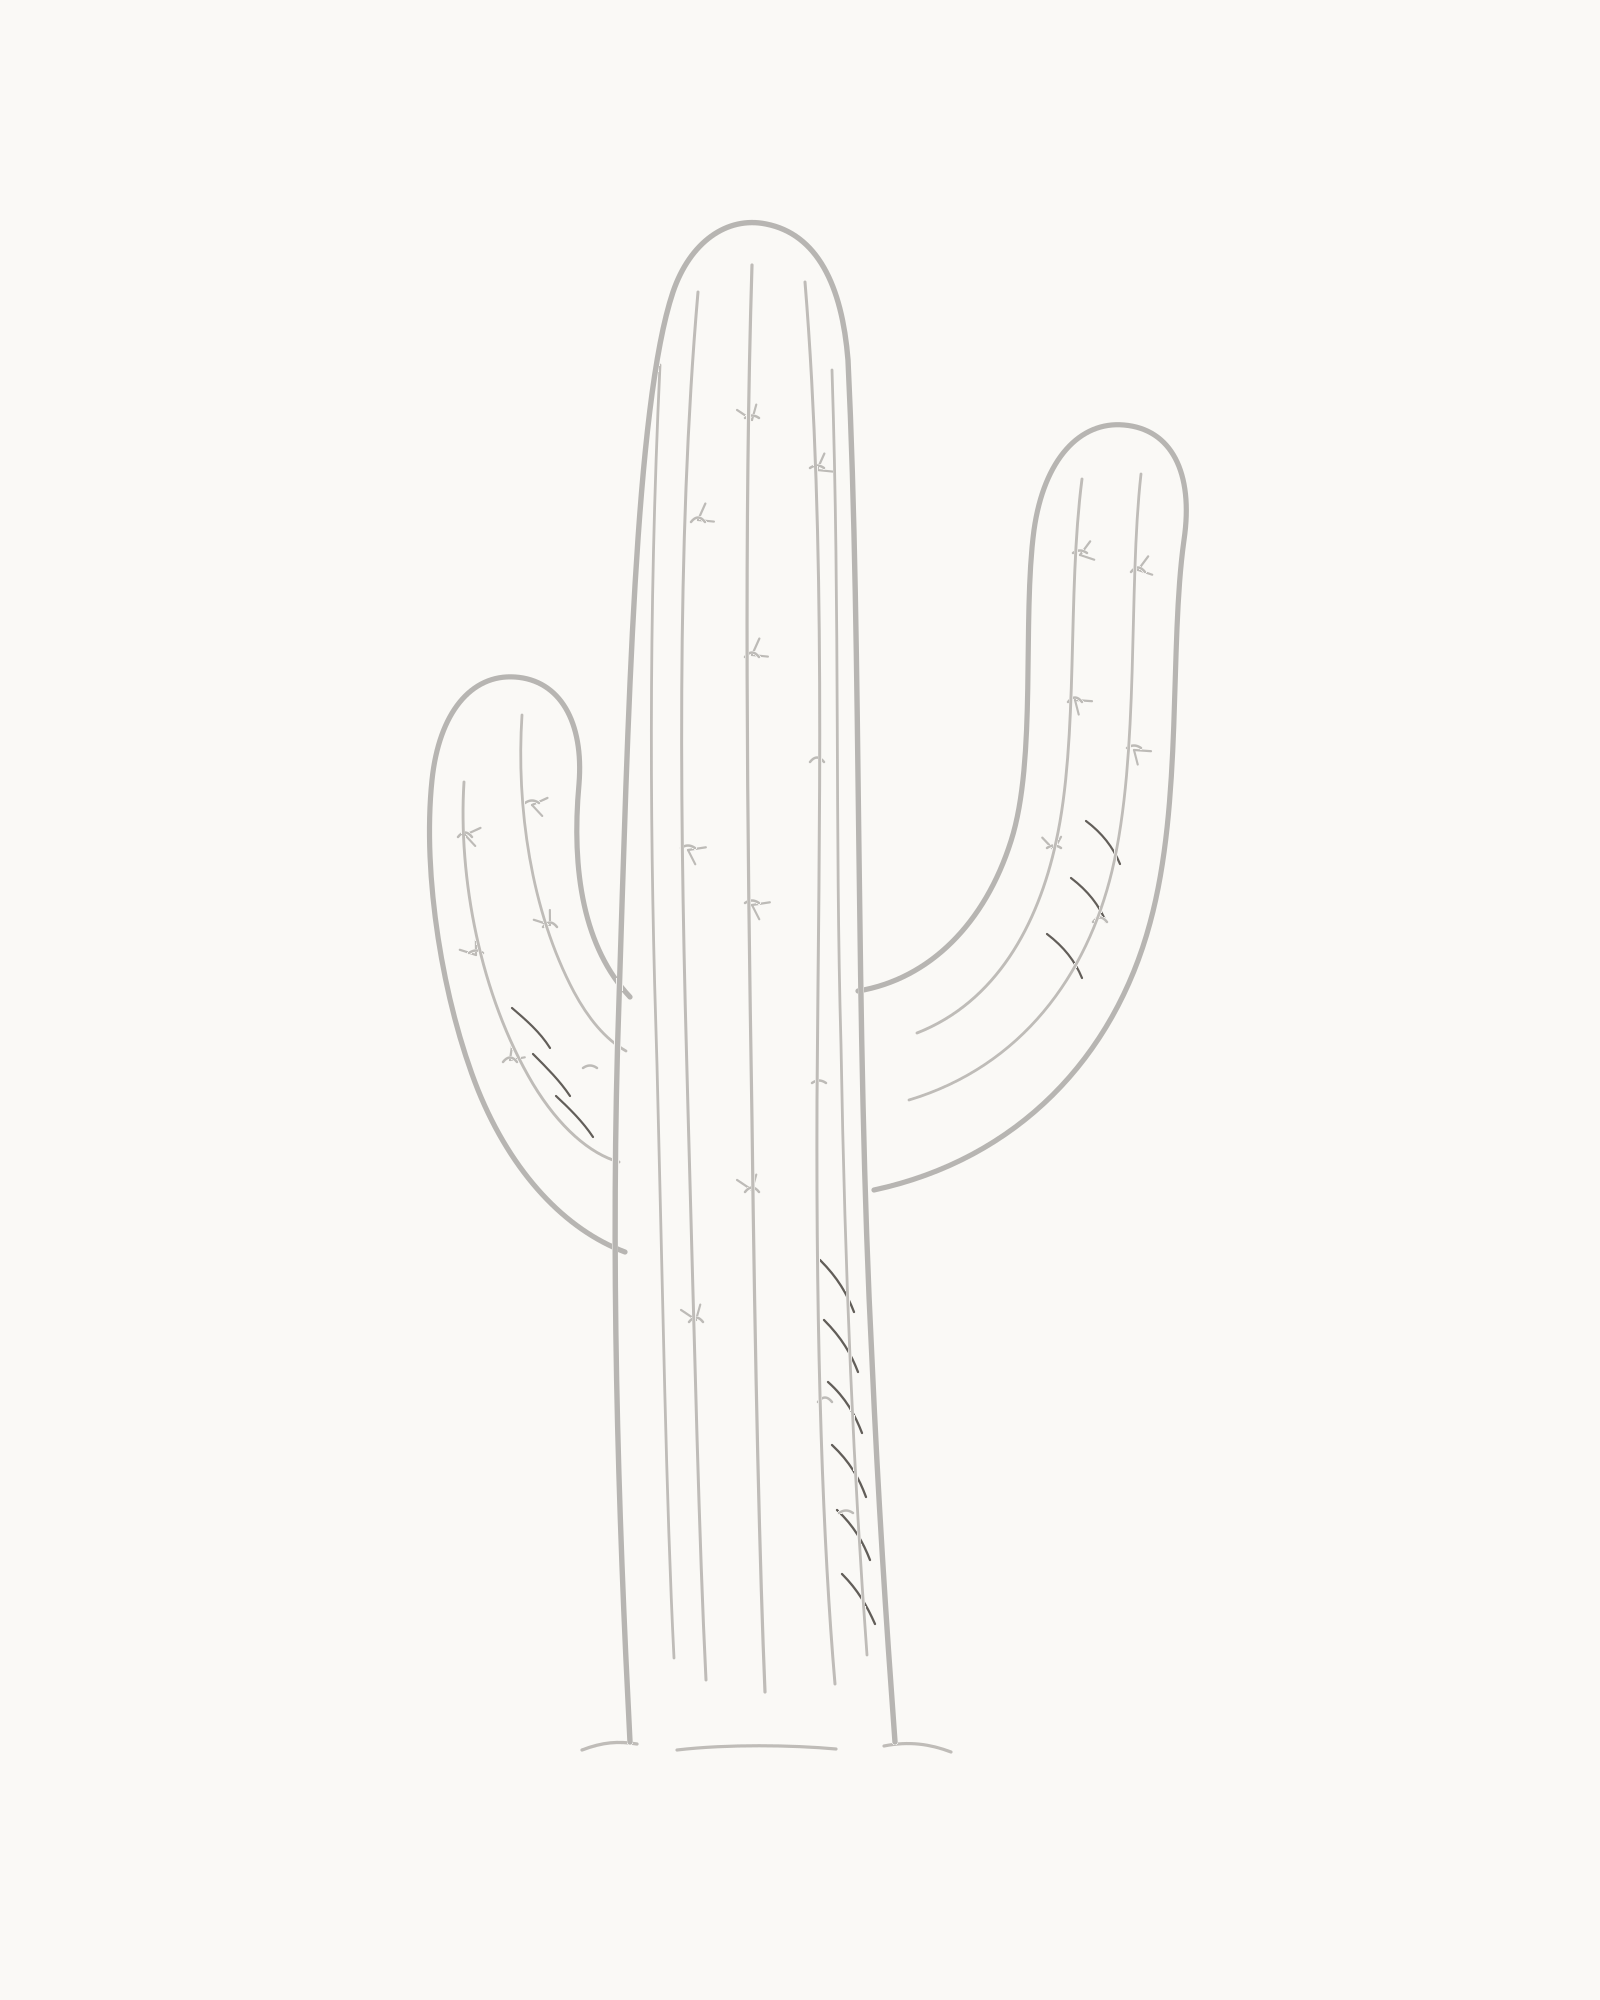
Stage 8 of 8. Twelve hatches complete one upper-left light direction. - Six trunk hatches
- Three left-arm hatches
- Three right-arm hatches
- Leave open paper
Finish with twelve light hatch strokes on lower-right-facing surfaces. Place six along the right half of the trunk, following its downward direction. Add three to the lower-right side of the left arm and three around the lower-right bend of the right arm. Keep them separate from ribs, areoles and spines.
These marks express one upper-left light direction. They should not merge into tone, and they are not a way to repair an arm junction or straighten a rib. Once all twelve are present, leave the silhouettes alone; the line drawing is complete without retracing.
Look for this before moving on: six trunk hatches and three on each arm remain separate, the upper-left-facing areas stay open and all junctions, ribs, areoles and spines are still legible.
If it goes wrong: keep the structure and the useful hatches. Remove only the newest dark, joined or wrong-way stroke, then replace it more lightly along the local cylinder. Do not add more shading to hide an outline problem.


Troubleshooting the finished cactus
The cactus looks like a mirrored icon. Compare arm height, width and bend. Keep the lower left arm fuller and shorter, and the higher right arm slimmer and longer. Repair only the newest segment that repeats the opposite side.
An arm looks pasted onto the trunk. Check both attachment points. They should be separated vertically and arrive tangentially against the trunk while its contour remains in front. Replace the newest shoulder segment rather than cutting through the trunk.
The ribs look like a fence. Use the outside contour as a guide. Side ribs should bow and compress, and arm ribs should follow each bend. Change only the newest rigid line and stop it before the crown or shoulder.
The areoles form rows. Keep the correctly placed marks, then shift only the latest one up or down its rib. Variation should be modest; random scatter is not the answer.
The cactus looks furry. Count the spines and check their origins. Stop at thirty-six, shorten the latest overlong stroke and leave some areoles quiet. Clear paper is part of the surface pattern.
The base looks like a landscape. Keep only the three contact marks. Remove the newest extended horizon, dune or shadow line; the central curve and two side strokes are enough.
The final stage looks dirty. Count twelve hatches and separate them from other marks. Remove only the newest joined or extra stroke. Do not smudge or darken the right side.
Practise one arm junction
On scrap paper, draw two short, slightly curved parallel lines to represent a trunk edge. Choose two points at different heights. From the lower point, sweep out into a rounded shoulder and turn upwards; round a small crown and bring the return curve into the higher point. Repeat once with a slimmer arm and a longer rise. This isolates the hardest relationship without asking you to redraw the whole cactus.
For another lesson in repeated lines following a rounded form, try How to Draw a Sunflower. How to Draw a Tree offers a different branching problem, and How to Draw Flowers practises controlled variation around a centre. The How to Draw index holds every completed practical guide.
Frequently Asked Questions
What is the easiest way to draw a cactus?
Begin with one tall central column, then attach each arm separately before adding surface detail. Once the silhouette reads clearly, place a few form-following ribs, selected areoles and short spines. This keeps the important proportions visible while you work.
How do I make cactus arms look attached?
Give each arm two attachment points at different heights. Curve the outside shoulder away from the lower point and bring the inner return into the higher point. Leave the trunk contour visible between them so the arm reads as passing behind it.
Why are the arms different sizes?
Natural saguaros vary and rarely grow as perfect mirror images.[1] Different heights, widths and bends also make the construction easier to read because the learner can compare two related but non-identical joins.
How many ribs should I draw?
This exercise uses nine teaching lines: five on the central column and two on each arm. It is a simplified visual arrangement, not a botanical total. Add enough to describe the rounded forms and stop before the spacing becomes crowded.
Where should cactus spines start?
Start them at the small areoles placed along selected ribs. Use one or two short strokes at an origin and vary their angle with the local surface. Avoid floating spines and identical star shapes.
Does a cactus drawing need a pot?
No. A pot creates an additional ellipse, rim and perspective problem. This lesson keeps the saguaro-type plant unpotted so you can concentrate on its column, arms and ribs.
Should I shade the whole right side?
No. The final stage uses only twelve separate hatch marks under an upper-left light. The structure should already feel rounded through contour and ribs; dense shading would hide the lesson's key relationships.
Is every cactus shaped like this?
References
- National Park Service, The Saguaro Cactus. View source
- National Park Service, Saguaro Growth. View source
- Arizona-Sonora Desert Museum, Saguaro Cactus Fact Sheet. View source
More DRAWING Guides

How to Draw a Rose: A Step by Step Guide

How to Draw a Tree: A Step by Step Guide

How to Draw Eyes: A Step by Step Guide

How to Draw Leaves: A Step by Step Guide

How to Draw Autumn Leaves: A Step by Step Guide

How to Draw Flowers: A Step by Step Guide

How to Draw a Lily: A Step by Step Guide

How to Draw a Sunflower: A Step by Step Guide

How to Draw a Tulip: A Step by Step Guide

How to Draw a Hibiscus: A Step by Step Guide

How to Draw a Daisy: A Step by Step Guide
