



Draw one whole strawberry in eight permanent line stages. Shape an open, slightly leaning fruit, wrap five sepals around its top, attach a short curved stem, then organise seventeen achenes so the surface feels rounded rather than flat. Every sound line remains in the finished drawing. There is no cleanup stage, colour pass or shading option.
Difficulty: Beginner; the main challenges are wrapping the leafy cap around the fruit and spacing the achenes over a curved surface
Time: Allow about 25–40 minutes. This is an untested estimate.
Medium: HB or No. 2 pencil, line only
Build a rounded fruit, not a heart symbol
The most useful first decision is to leave the top of the fruit open. That gap gives the calyx somewhere to sit without later erasing or drawing a line through the leaves. Keep the shoulders unequal, let the right side remain fuller and place the blunt lower tip just left of centre. Those small differences stop the outline becoming a valentine heart or a perfectly balanced icon.
What look like seeds on the surface are achenes, while the fleshy part is the swollen receptacle and the leafy cap is the calyx, made from sepals.[1][2] That structure explains the order used here: fruit first, rear sepals, front sepals, stem, then the surface marks. The drawing represents a cultivated-strawberry type, commonly recorded botanically as Fragaria × ananassa.[3] It is a simplified observation exercise, not a botanical plate or a count of every achene on a real fruit.
Materials
- A sharpened HB pencil; an ordinary No. 2 school pencil will make a comparable line.
- Turn a plain, smooth sheet upright. Warm-white sketch paper is ideal, though a clean printer sheet is enough for a first attempt.
- Keep an eraser nearby, using it only on the curve you have just added.
- A sharpener if you are using a wooden pencil.
- Optional: one clear photograph of a single strawberry seen slightly from the side. Use it to notice unequal shoulders, overlapping sepals and the way edge achenes narrow; follow the supplied drawing for the exact lesson result.
- Optional: a scrap of paper for practising three full central achenes and three narrower side achenes before Stage 5.
Set aside measuring tools, ink, colour, blending equipment and tracing materials: none belongs in this line exercise. If steadiness matters more than the feel of wood, use a mechanical pencil with a fine 0.5–0.7 mm lead.
Before you draw
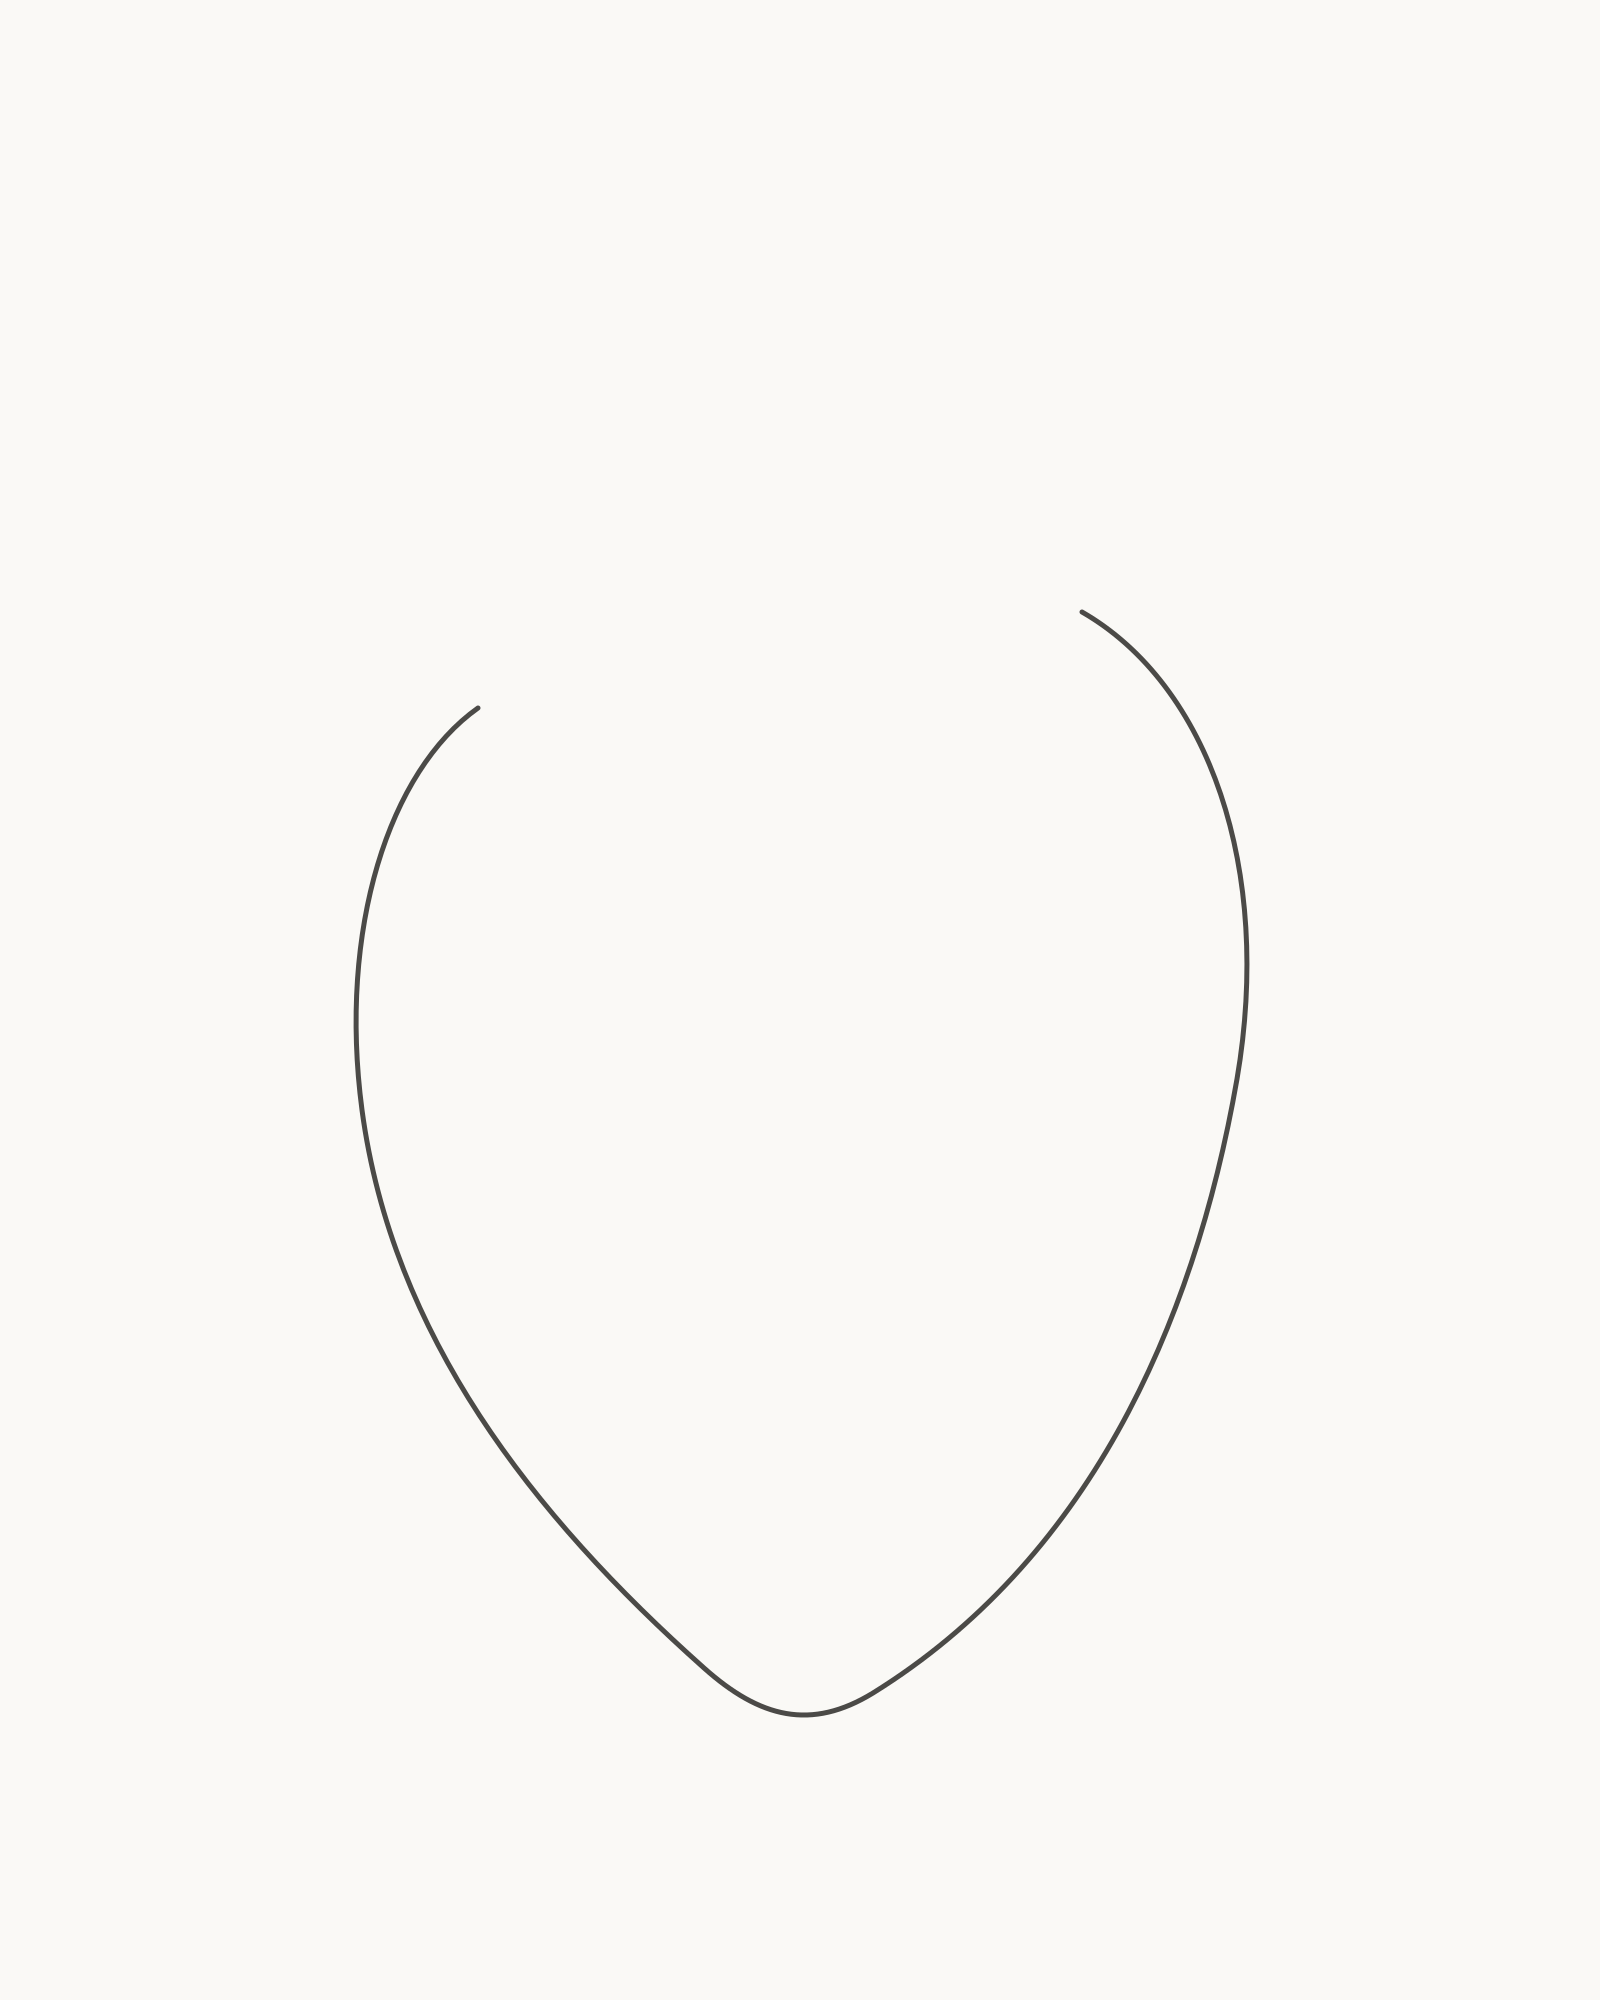
Imagine a portrait frame four units wide and five high. The calyx junction sits close to 51% of the page width and 27% of its height. Leave more open paper beneath it than above it. The body will occupy the central area, with the short stem turning into the upper margin.
Use the separate Stage 1 placement panel to compare the fruit envelope and leaning axis. The percentage marker and dotted guides are viewing aids; do not copy them onto the paper. The page grid is optional and initially hidden. Reveal it for a quick cell-by-cell check of a shoulder, the lower tip or an achene band, then hide it and carry on freehand.
Keep the outer contour and calyx calm and clear. Make the achenes and their small cavity arcs a little finer. Upper-left is the notional light direction, expressed only by putting each final cavity arc on the lower-right side of its achene. No tonal shading is added.
1. Shape the open fruit
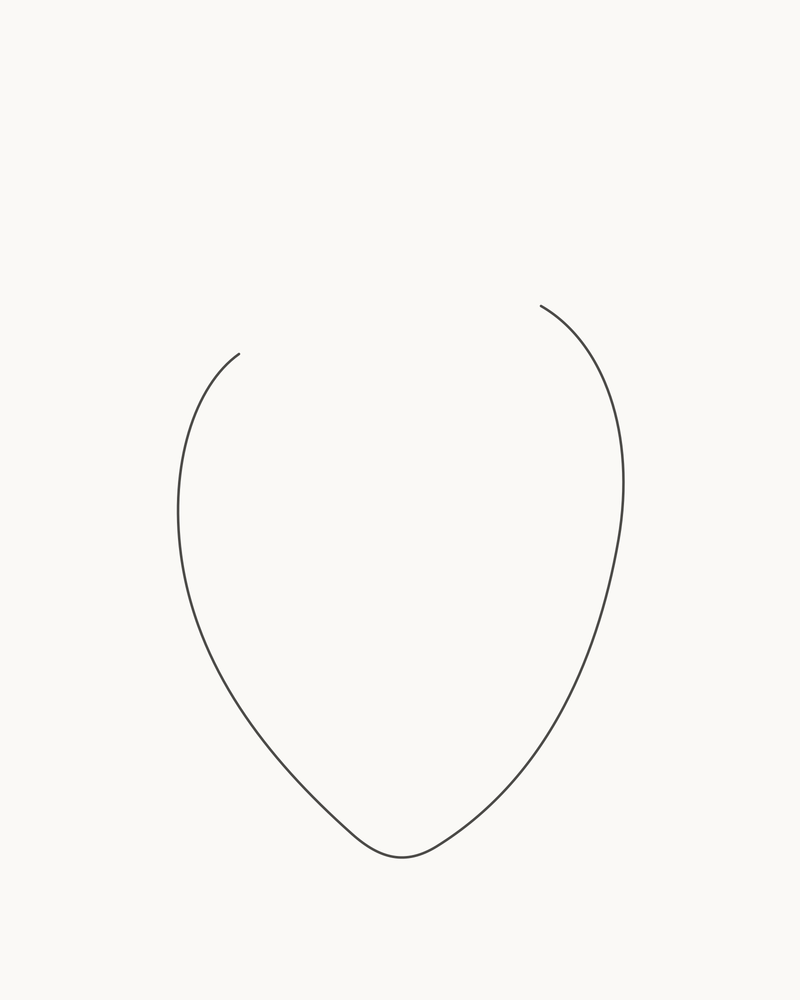
Stage 1 of 8. An open asymmetric contour establishes the rounded fruit without making a heart. 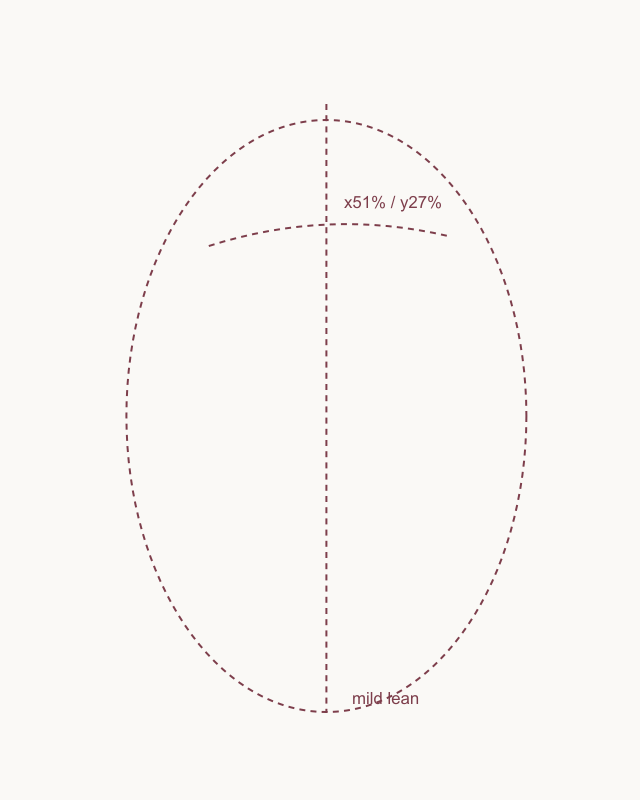
Placement cue: locate the calyx junction around x51% and y27%. Use the dotted fruit envelope and leaning axis only for comparison; leave every cue mark off the drawing. Begin at the left shoulder, a little below the future right shoulder. Curve down the left side, allowing it to turn inward sooner than the right. Round the line through a blunt lower tip just left of centre, then sweep upwards along a fuller right side. Stop at the right shoulder without connecting the two top ends.
The result is one continuous lower contour with an intentional gap at the top. Avoid a dip between the shoulders: the opening is for the leafy cap, not the notch of a heart. Keep the lower tip rounded rather than needle-sharp.
Look for this before moving on: one open-topped fruit fills the centre of the page; the right shoulder sits higher and feels fuller, the left side turns sooner, and the blunt lower tip is offset slightly left.
If it goes wrong: preserve the more useful side and the rounded tip. Remove only the newest mirrored, notched or sharply pointed section, then reconnect that short section between the same stable points.
2. Add three rear sepals
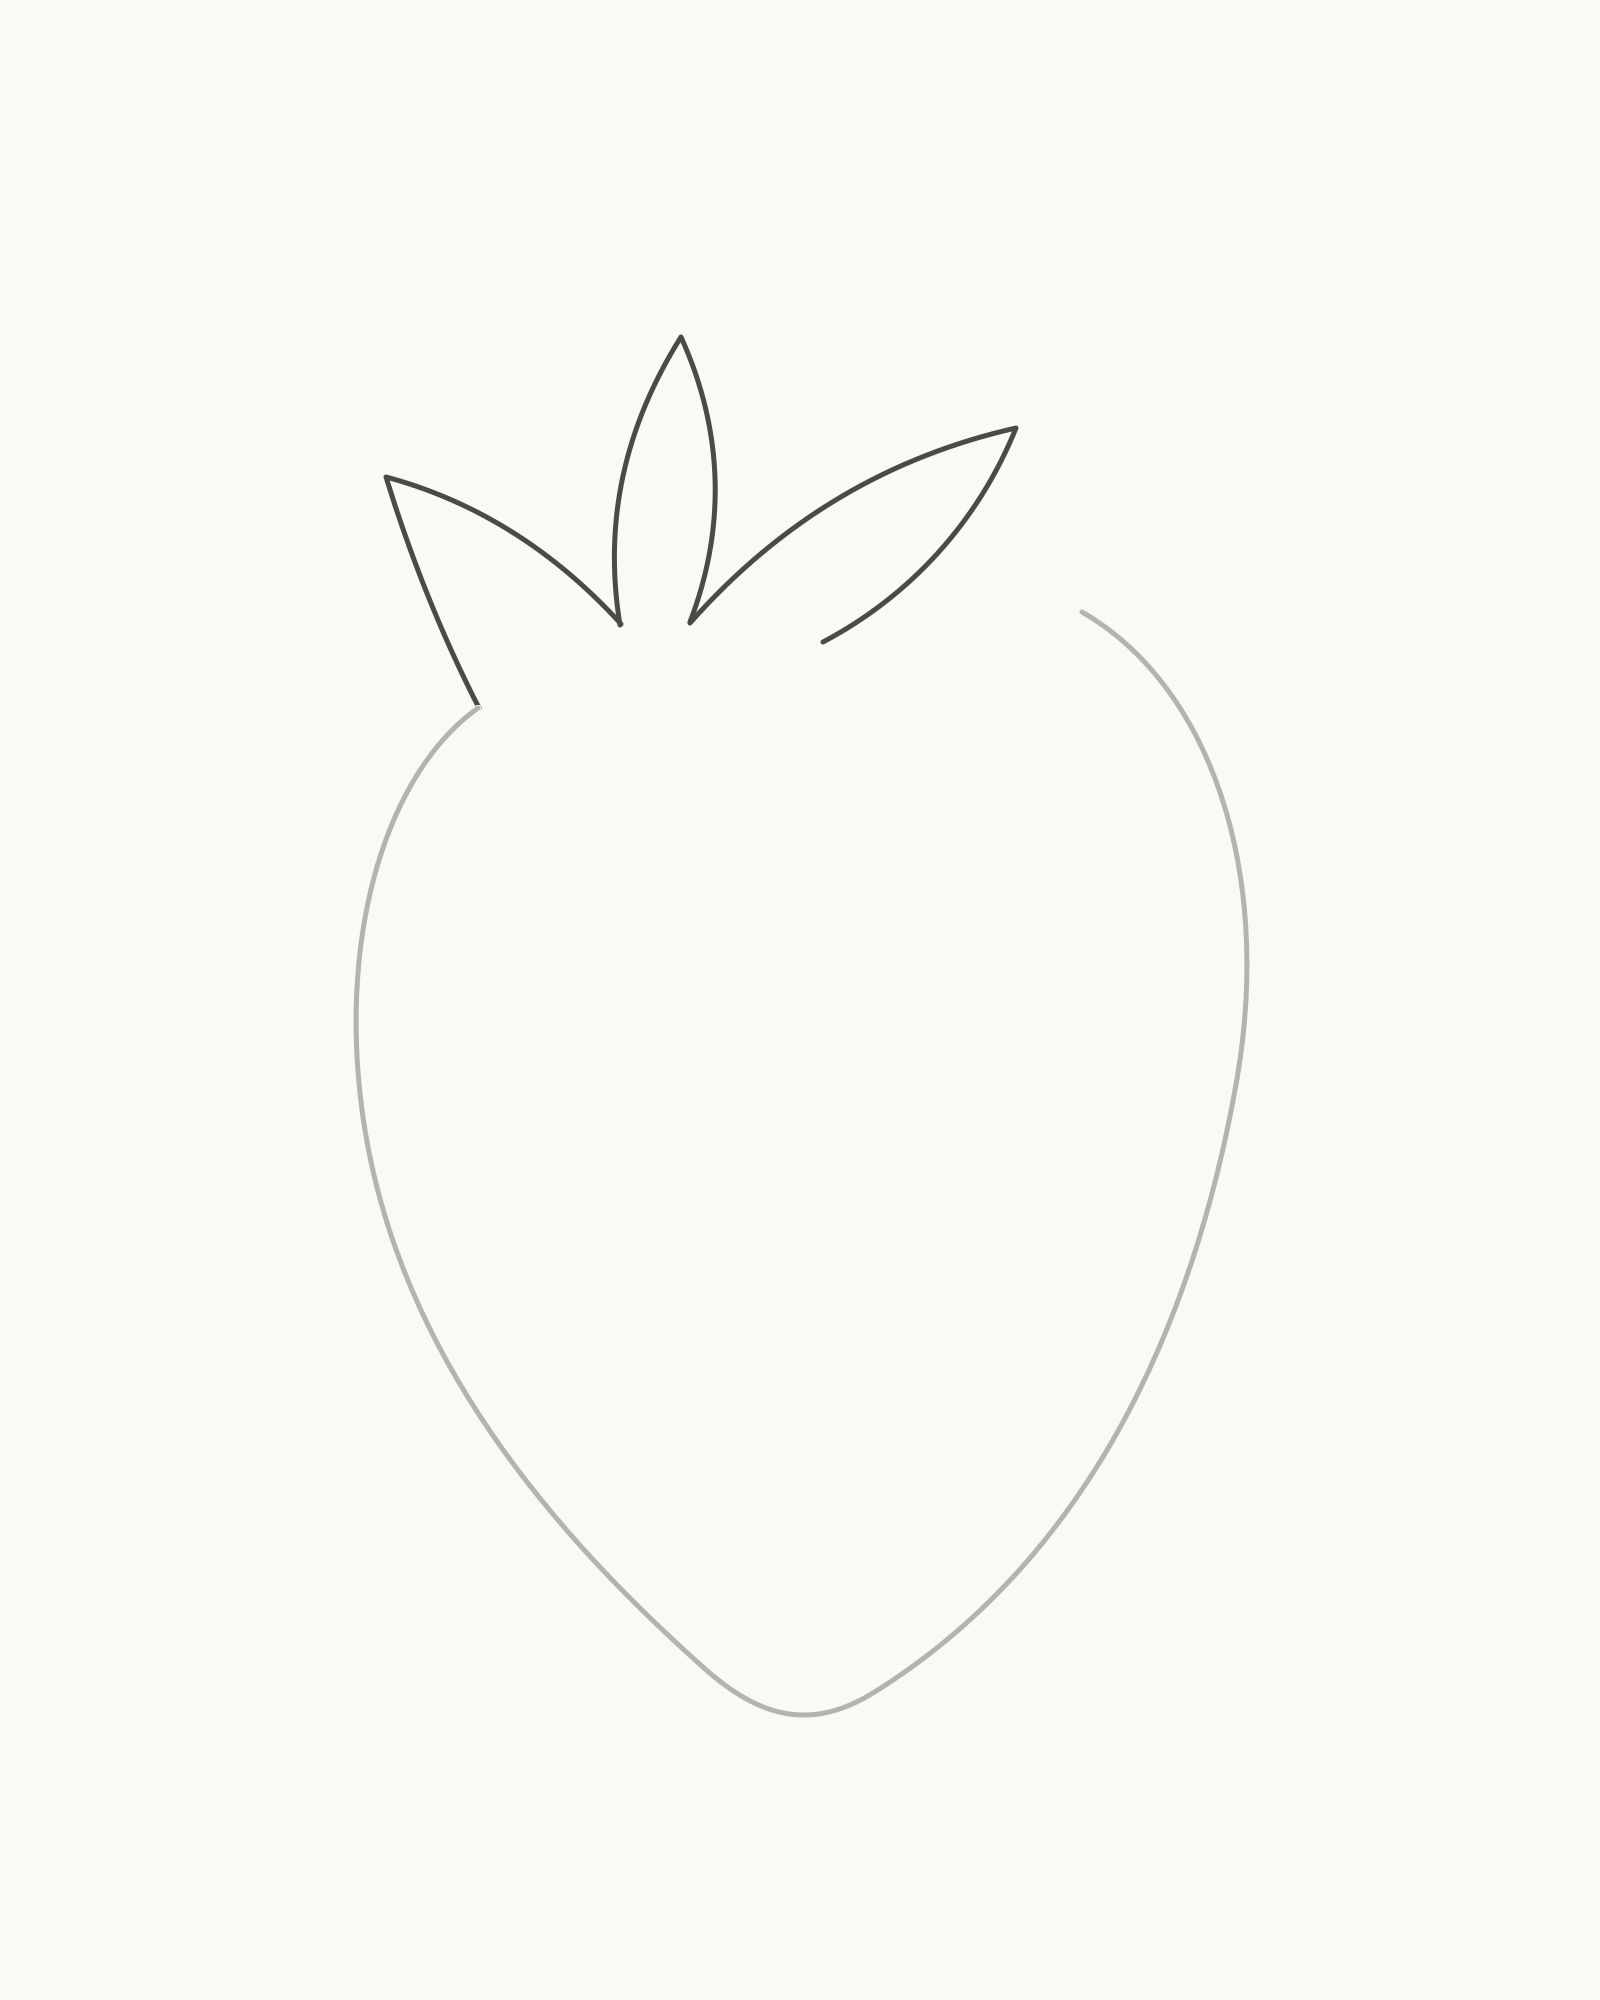
Stage 2 of 8. Three unequal rear sepals begin the leafy cap. - Left rear sepal
- Tall centre sepal
- Right rear sepal
Work from left to right. From the left shoulder, raise a short sepal that leans outward and return it towards the calyx centre. Add a taller centre sepal, giving its two edges different curves. Finish with a longer right-leaning sepal that stretches above the fuller shoulder and returns towards the top rim.
These three leaves form the rear tier. Their visible returns meet the open top rather than floating above it. Vary the widths and tip directions so the group does not become a regular three-point crown.
Look for this before moving on: exactly three rear sepals are countable, the centre rises highest, and each one returns to a believable contact around the fruit opening.
If it goes wrong: keep the fruit outline and the finished rear sepals. Lift only the newest repeated, floating or shoulder-crossing curve, then change its width or lean before returning it to the same contact.
3. Wrap two sepals across the front
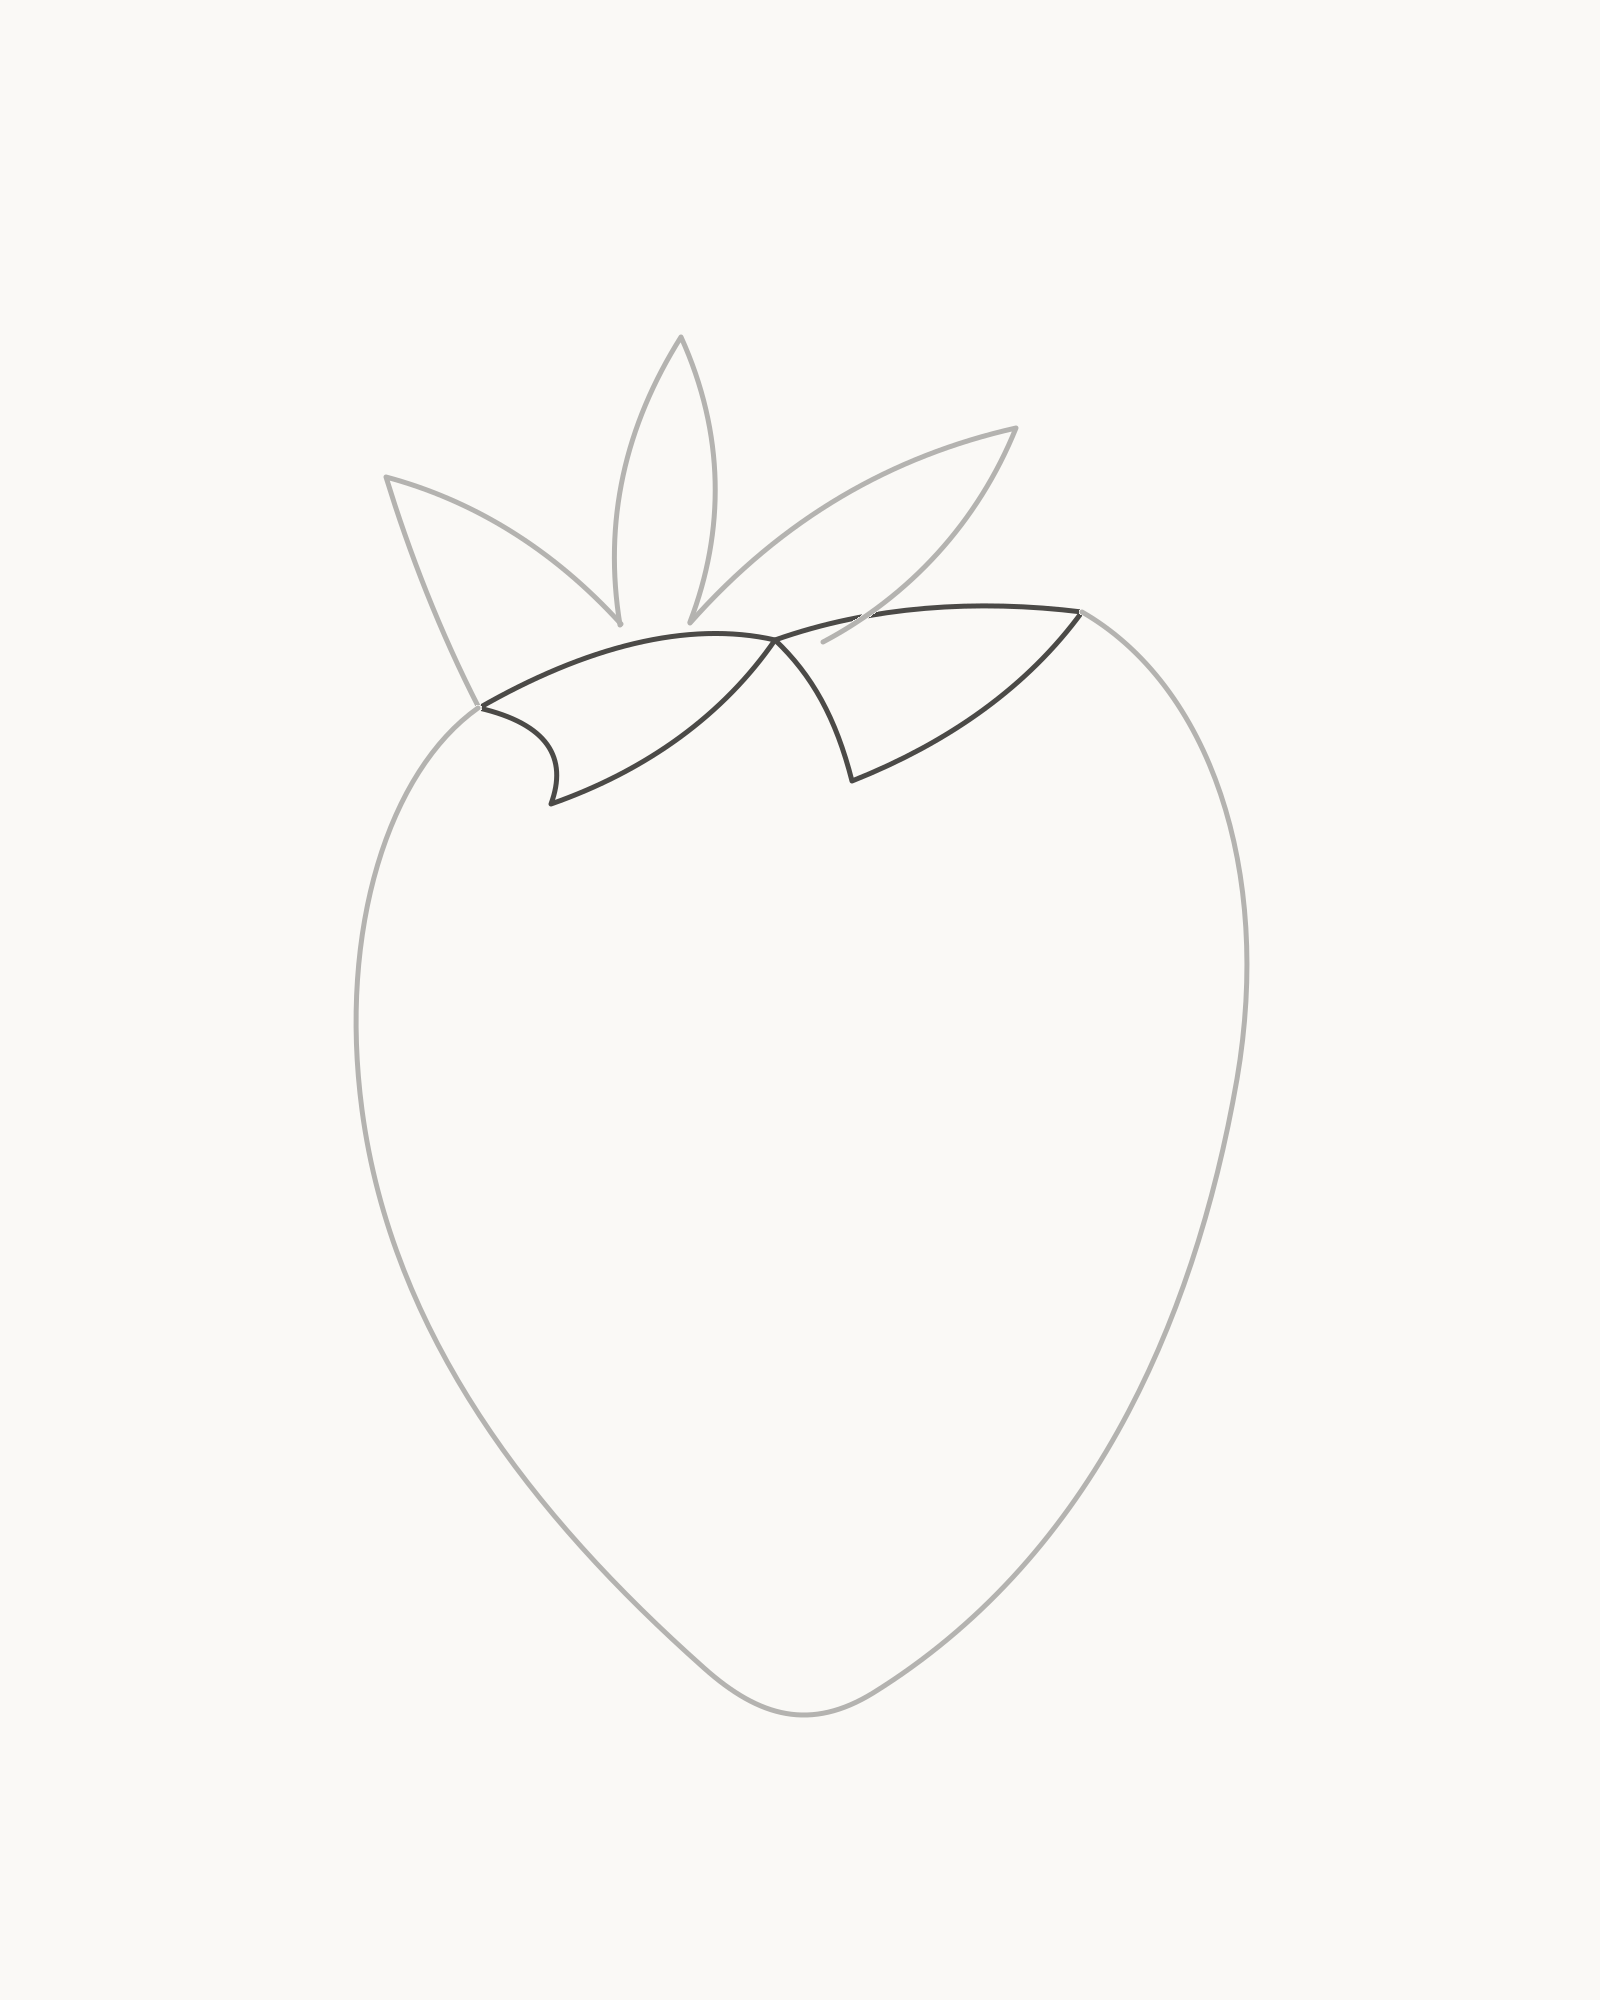
Stage 3 of 8. Two front sepals wrap the five-part calyx around the fruit. - Longer front-left sepal
- Broader front-right sepal
- Count five sepals
Add the longer front-left sepal first. Begin at the left shoulder, carry its upper edge towards the centre contact, then bow the return down across the upper-left fruit. It should partly cover the bases of the rear leaves.
From that same central area, draw the broader front-right sepal. Let it travel along the top before turning down-right, and stop its lower point well inside the outer contour. The two new forms overlap the rear tier; they do not make a flat line across the fruit.
Look for this before moving on: five sepals are now visible—three behind and two in front—and the longer left and broader right additions appear to wrap around the upper rim.
If it goes wrong: retain the three rear sepals and the clear front form. Replace only the newest pasted-on, mirrored or contour-crossing edge from its last secure contact; do not add a sixth leaf to hide a poor join.
4. Attach the short stem
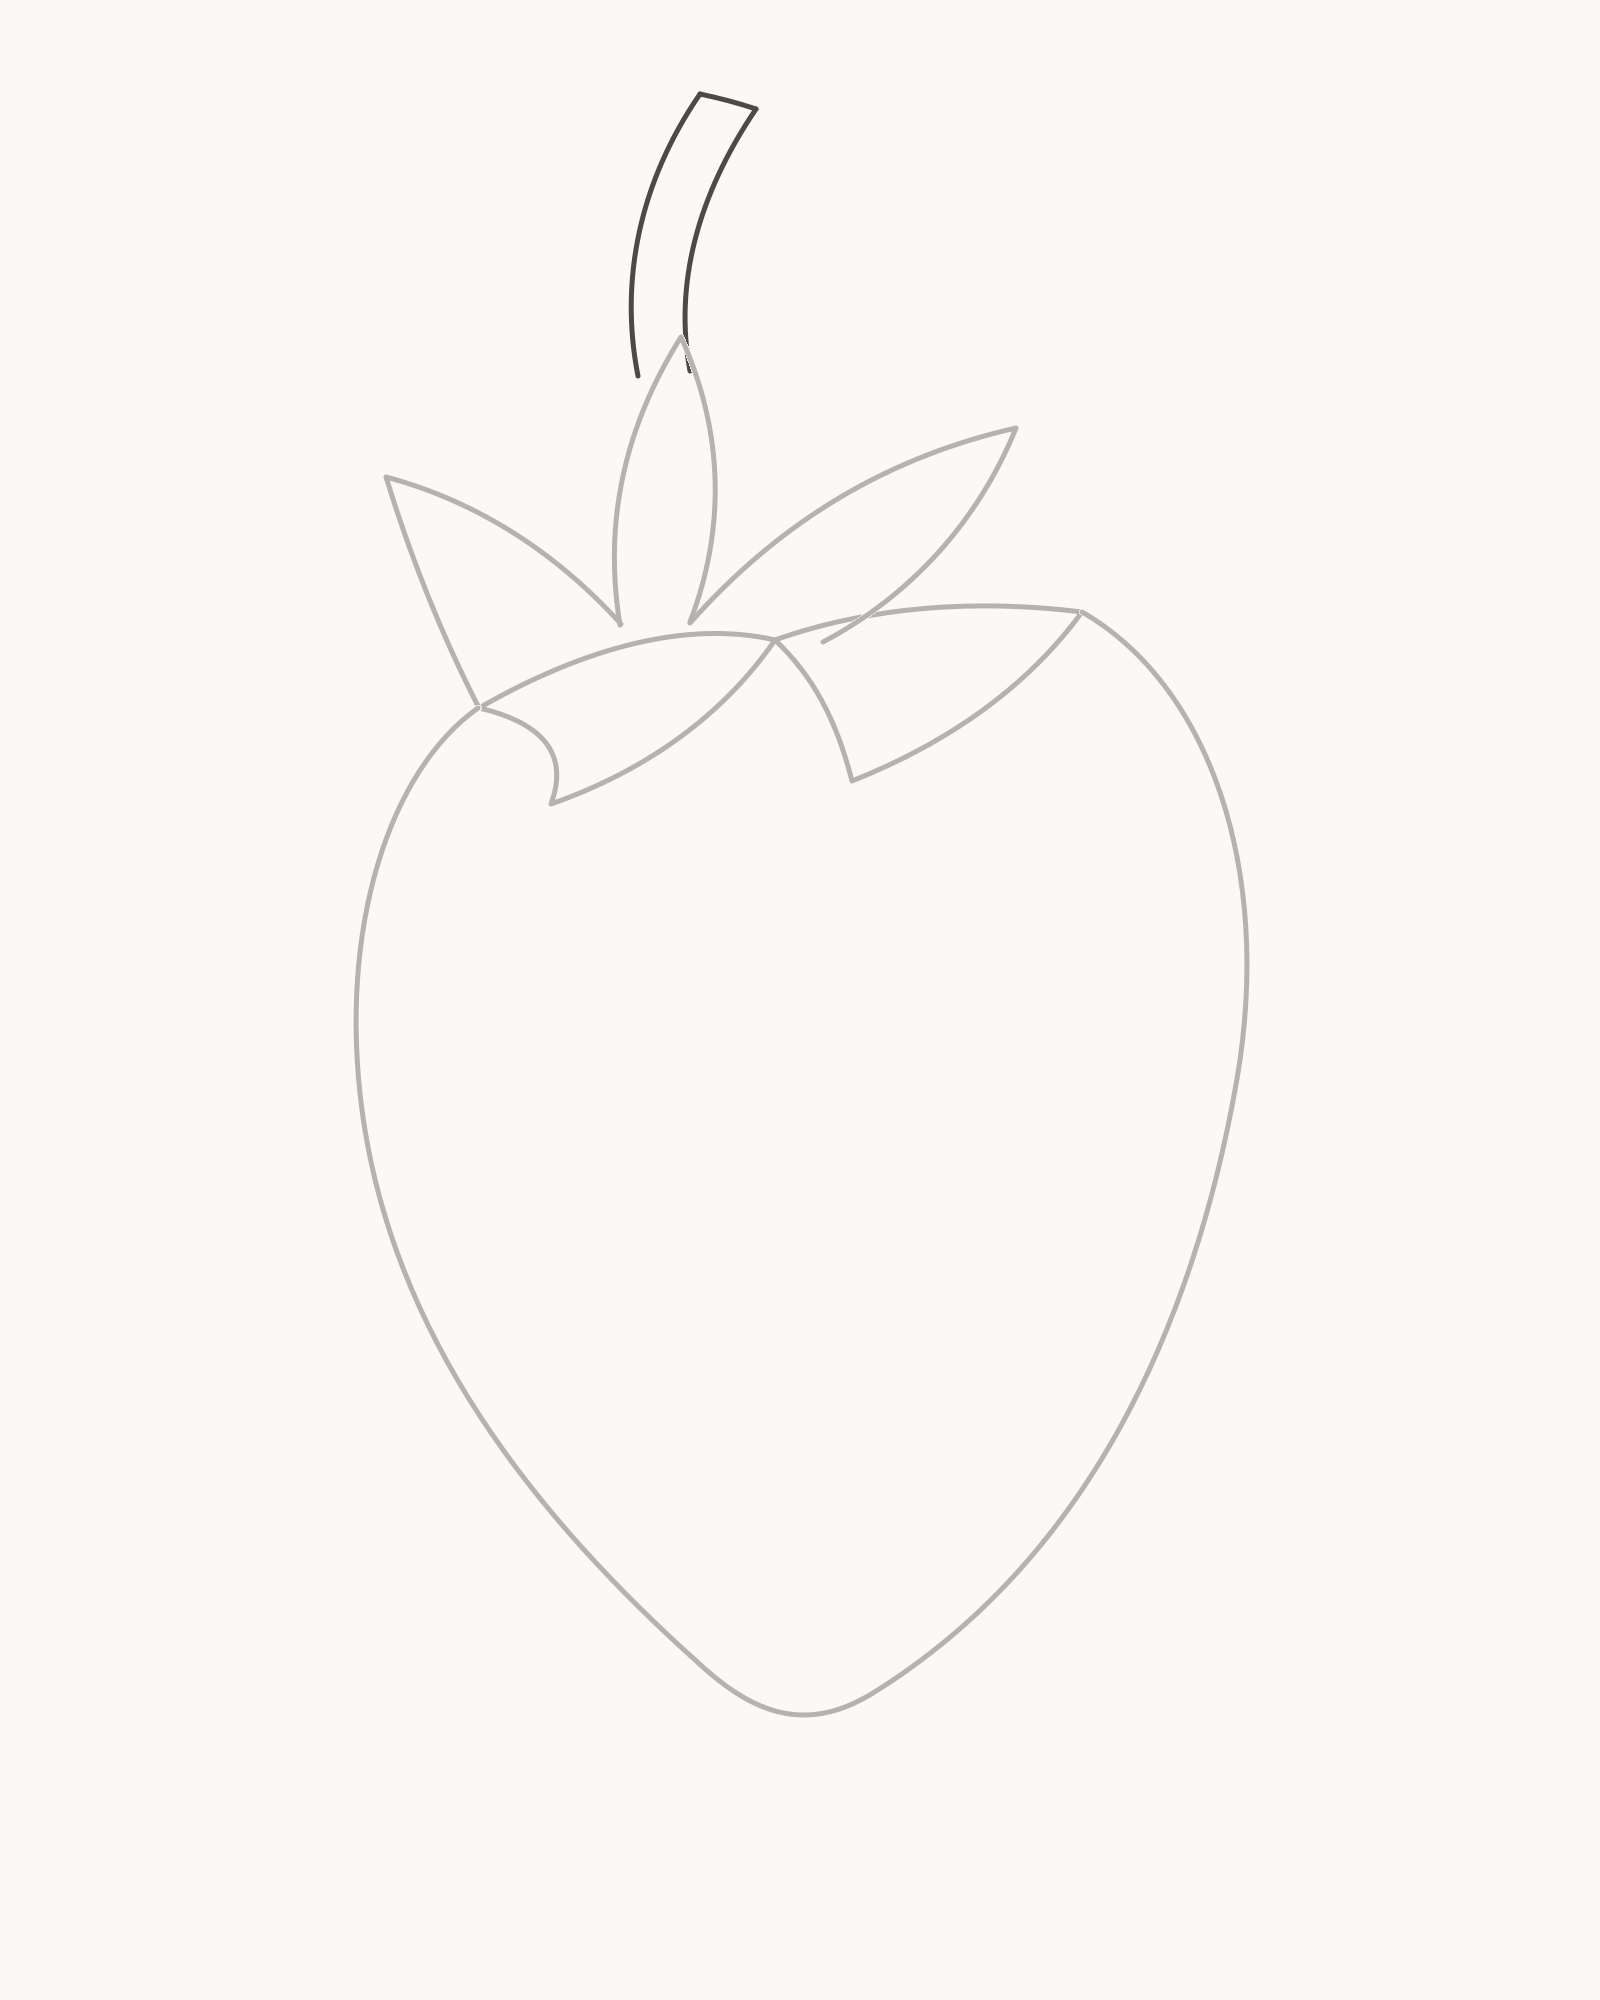
Stage 4 of 8. A short two-edge stem rises from a hidden calyx junction. - First curved edge
- Second curved edge
- Slanted cut end
Above the central rear sepal, place two narrow edges for the stem. Begin at two separate hidden contacts behind the leafy cap and bend both edges gently to the right as they rise. Close the top with one short slanted line so the stem has a small cut end.
The centre-rear sepal hides the junction, so no stem line travels through a front leaf. Keep the width narrow and fairly even without making the edges ruler-parallel.
Look for this before moving on: two non-crossing stem edges continue from behind the centre of the calyx, follow one quiet right bend and meet at one angled cut end.
If it goes wrong: leave the calyx untouched. Correct only the newest rigid, flared or crossing stem edge—or the cut line if it leaves the end open—using the same hidden starting contact.
5. Place five central achenes
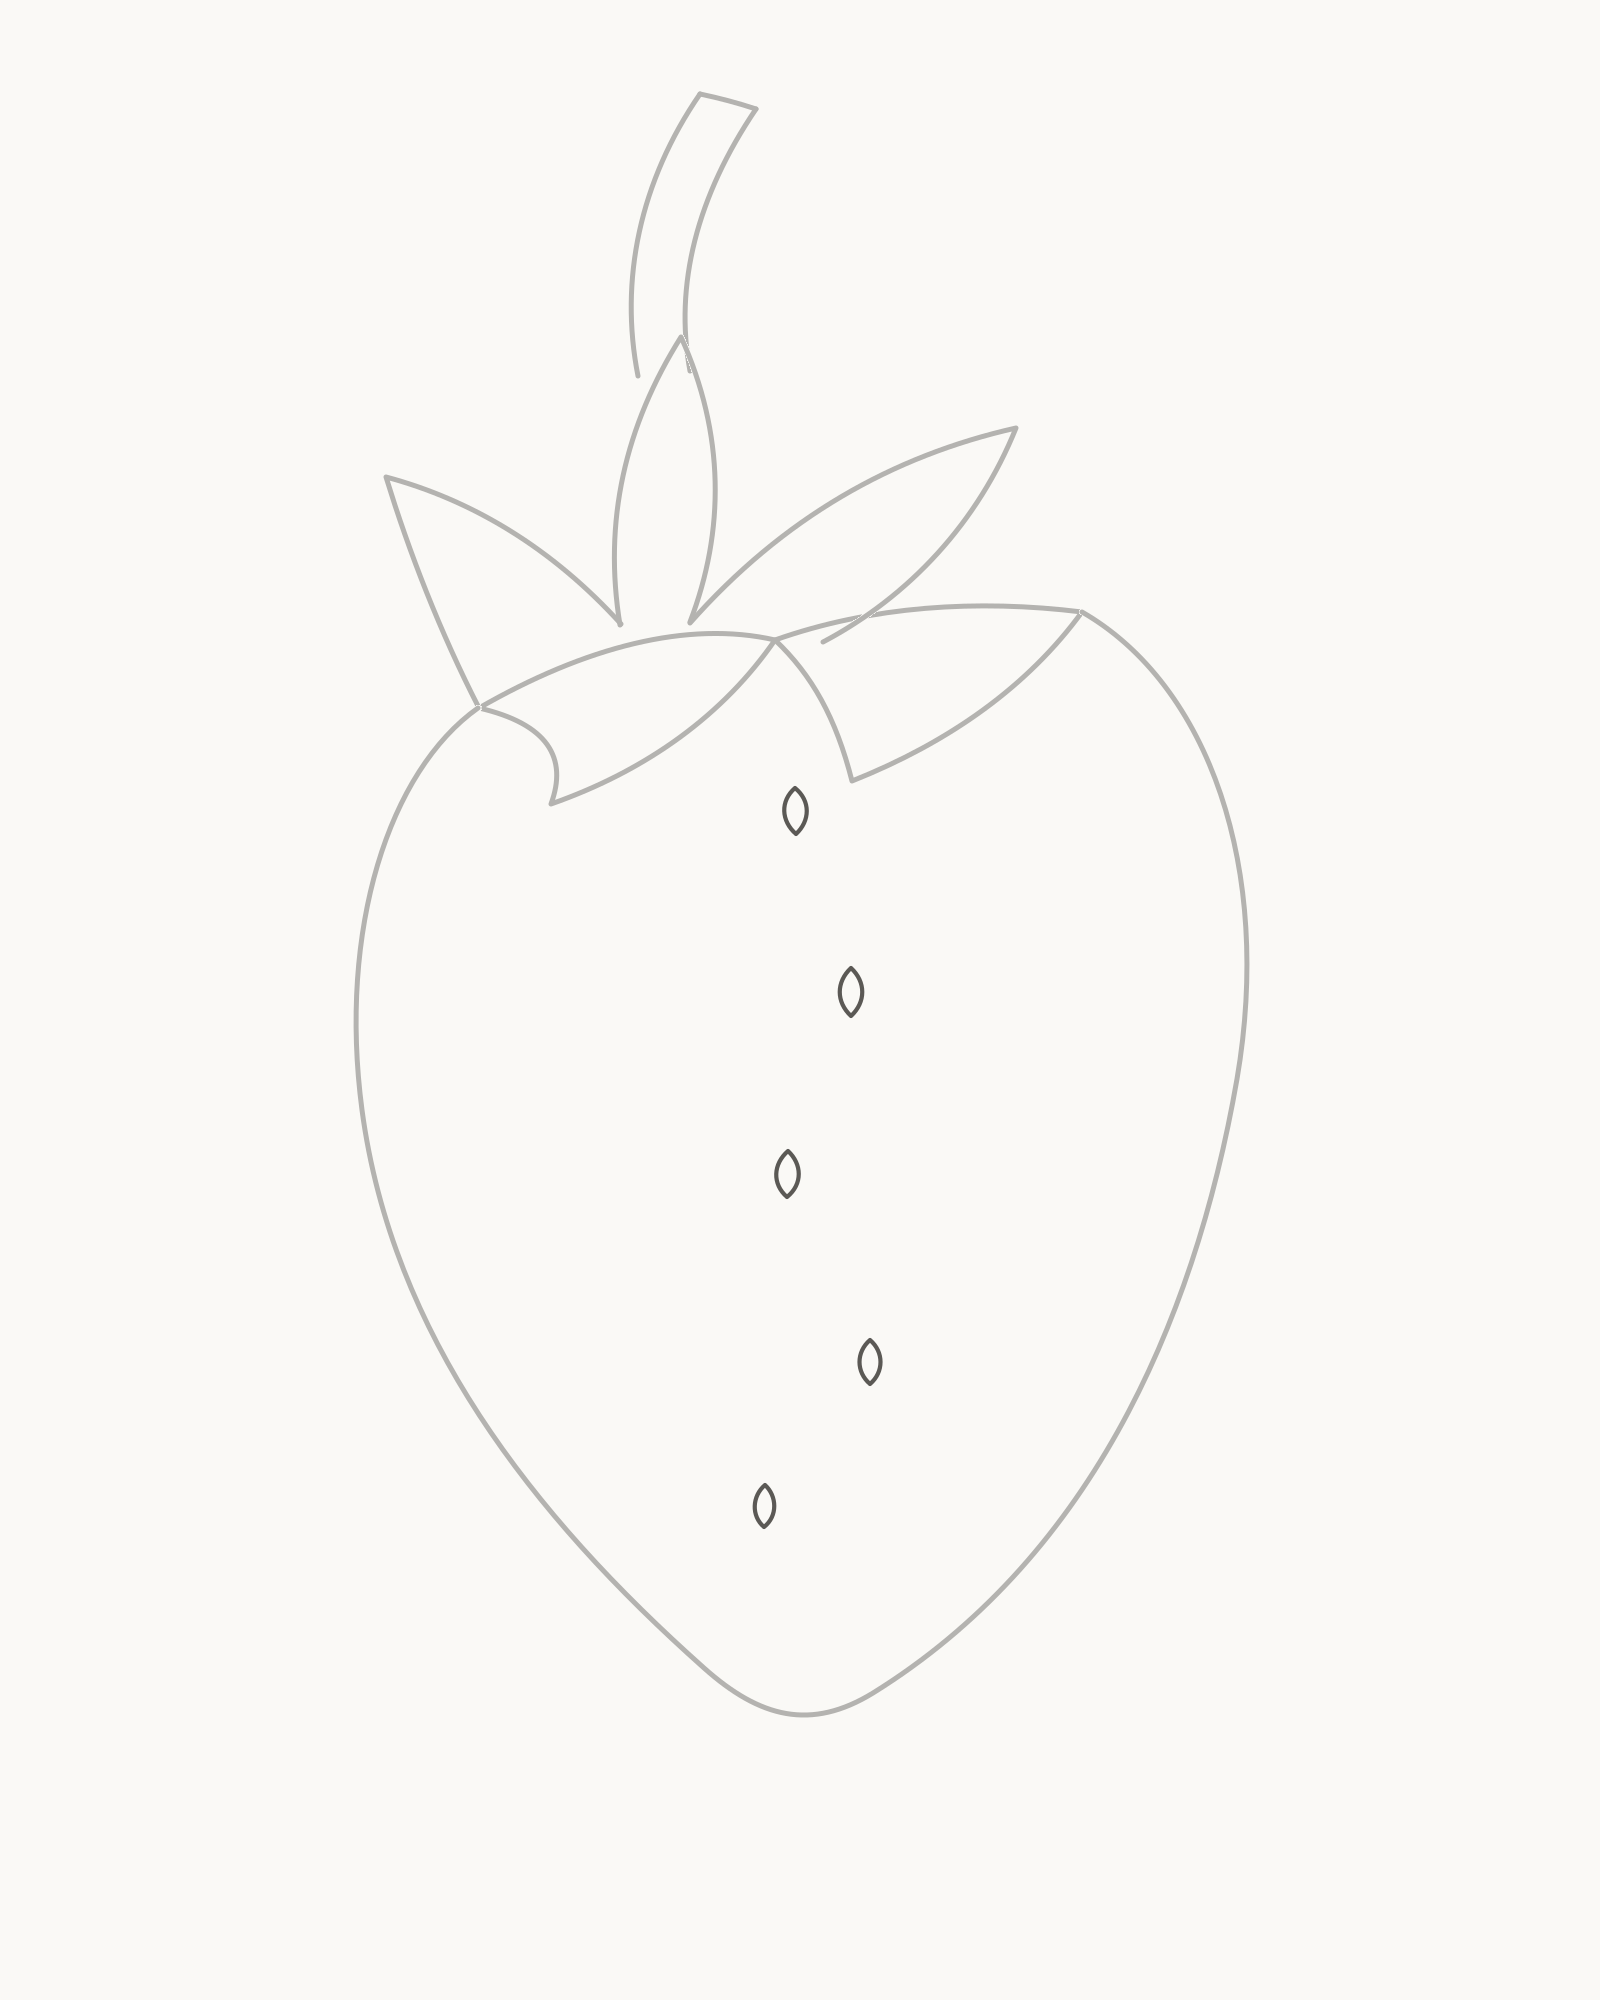
Stage 5 of 8. Five central achenes establish the front-facing surface. - Work top to bottom
- Stagger the centres
- Stop at five
Draw five small achene outlines in a loose top-to-bottom sweep through the centre of the fruit. Each is a narrow almond or teardrop with warm paper inside. Stagger them rather than stacking them on one exact vertical line, and let their heights and widths differ slightly.
These central forms face the viewer most directly, so they are the fullest and most widely spaced. Do not add the small cavity arcs yet; that is a separate final action.
Look for this before moving on: exactly five complete central achenes are visible, each is separate and open, and the staggered sweep follows the direction of the fruit rather than a straight ruler line.
If it goes wrong: keep every clear achene. Remove only the newest dot, identical oval or touching form, then redraw that single shape around its planned centre.
6. Turn six achenes around the left side
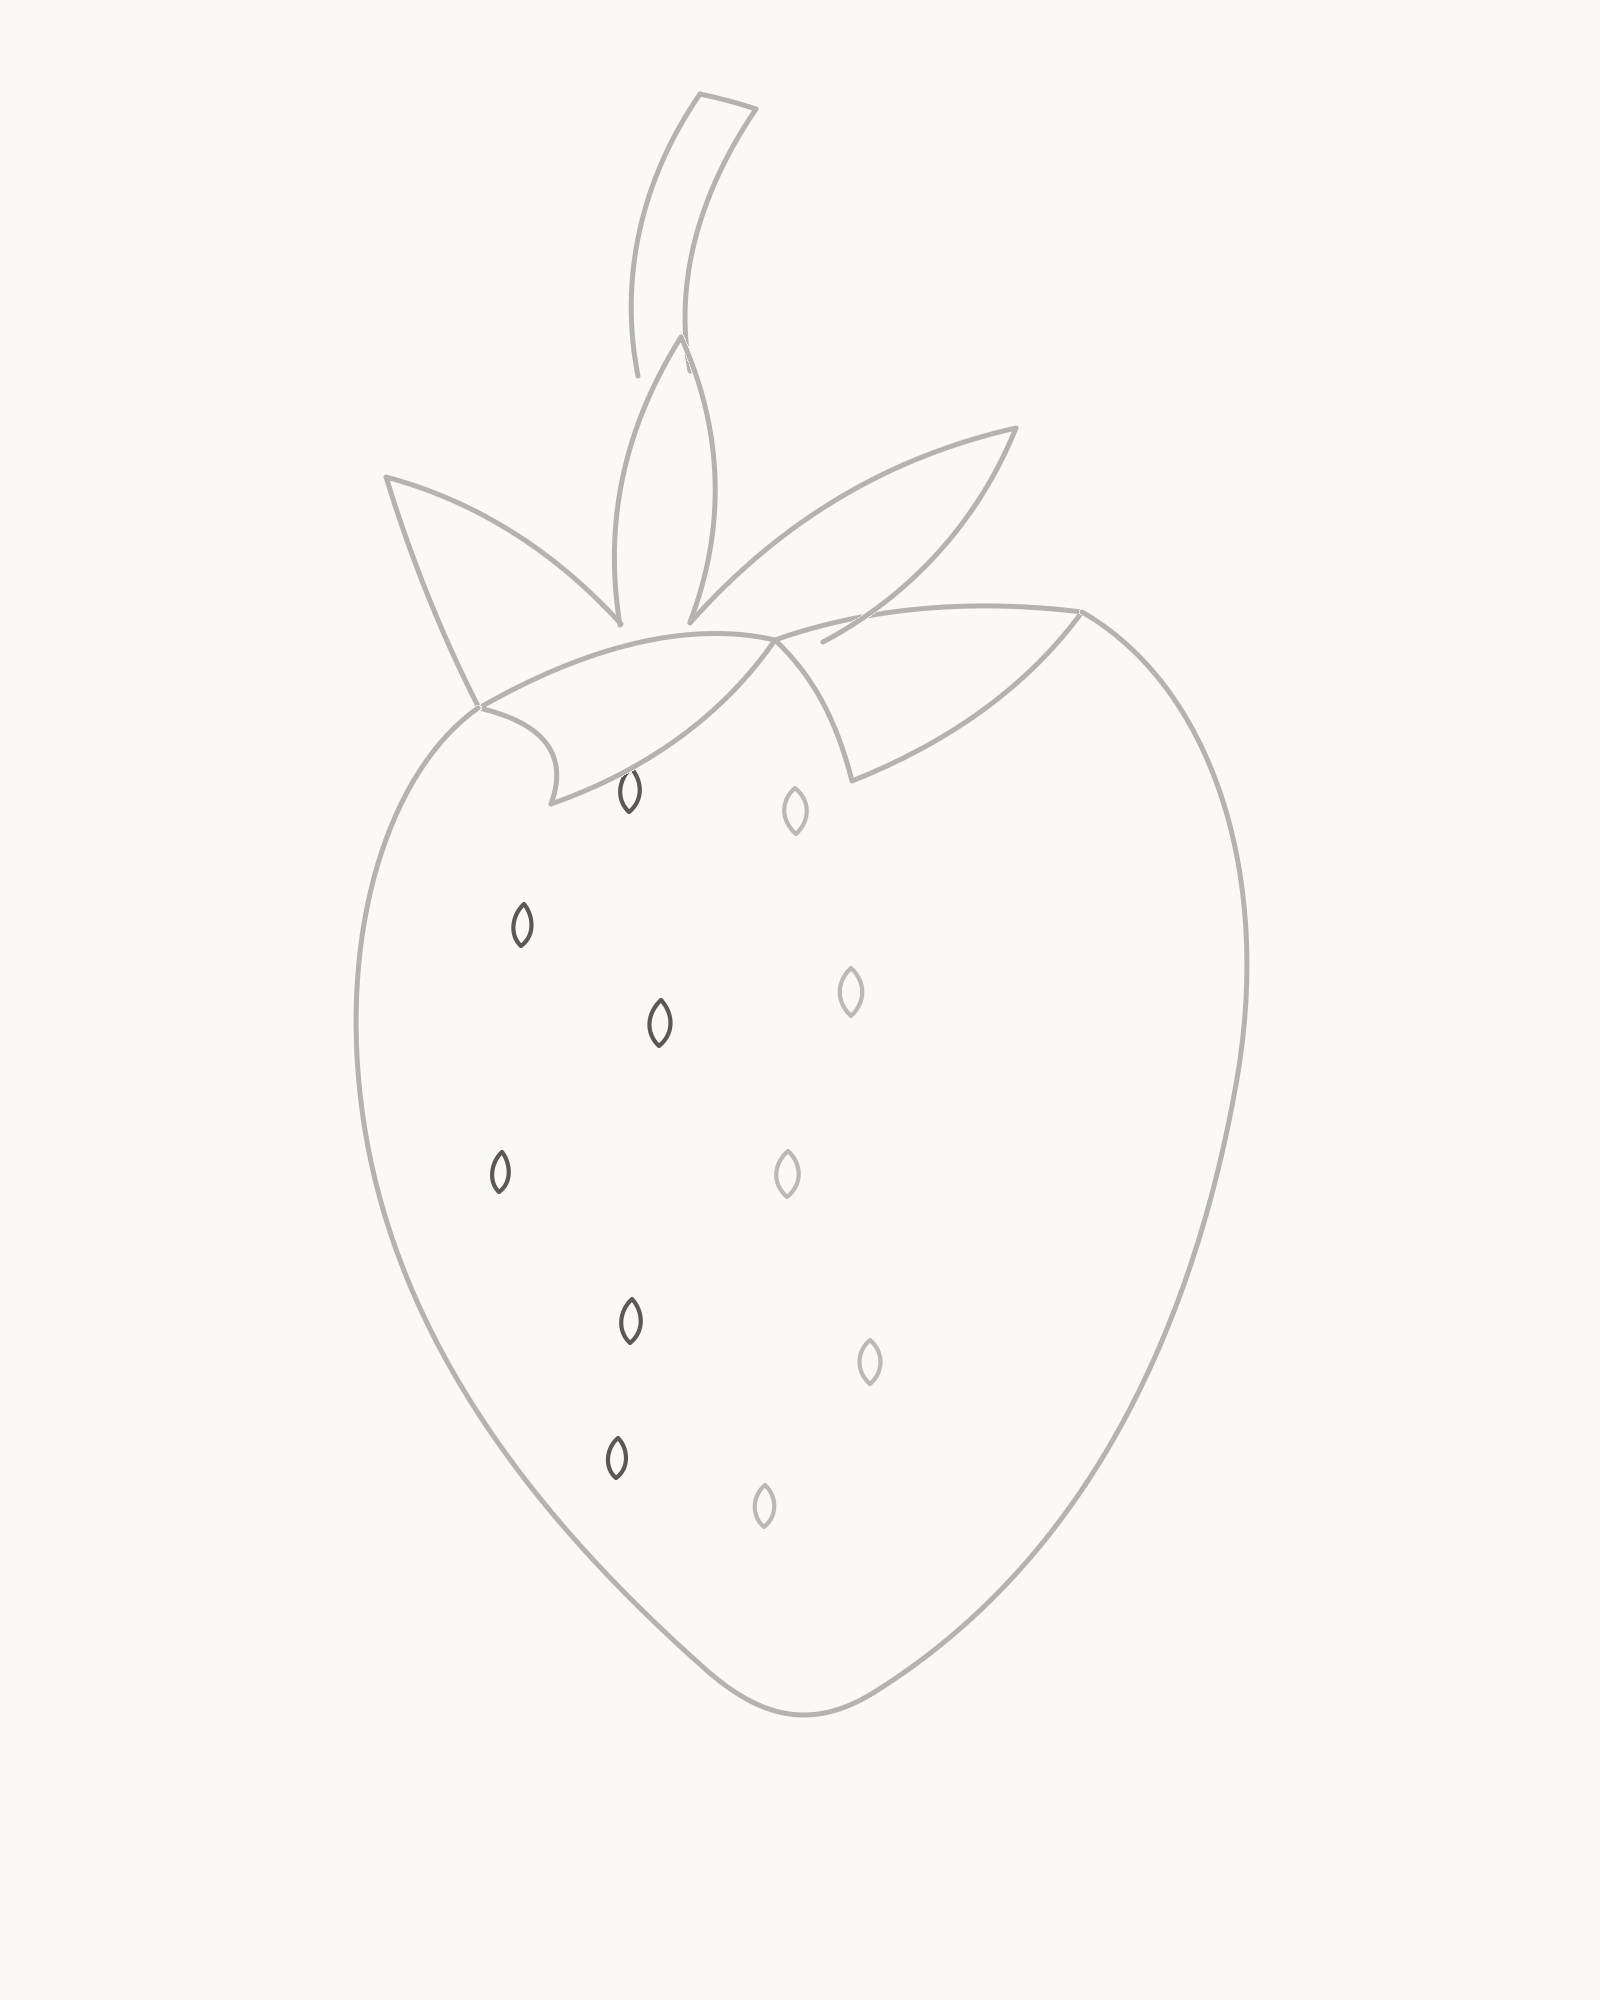
Stage 6 of 8. Six narrower left-side forms begin to turn around the fruit. - Upper-left forms
- Lower-left forms
- Count eleven total
Add six more achenes over the left half. Work from the upper-left area downwards in two offset curved bands. Make the outer shapes a little narrower than the central five and allow a slight change of lean as the fruit surface turns away.
Keep clear paper between every achene and the outside contour. Count the whole fruit when the sixth left-side form is finished: you should now have eleven.
Look for this before moving on: exactly eleven achenes are present; the six new left-side forms make two staggered bands, narrow towards the edge and remain comfortably inside the fruit.
If it goes wrong: preserve the central sweep and the useful left forms. Replace only the newest clipped, grid-aligned or over-wide achene; do not squeeze in a seventh to balance a gap.
7. Complete the right-side pattern
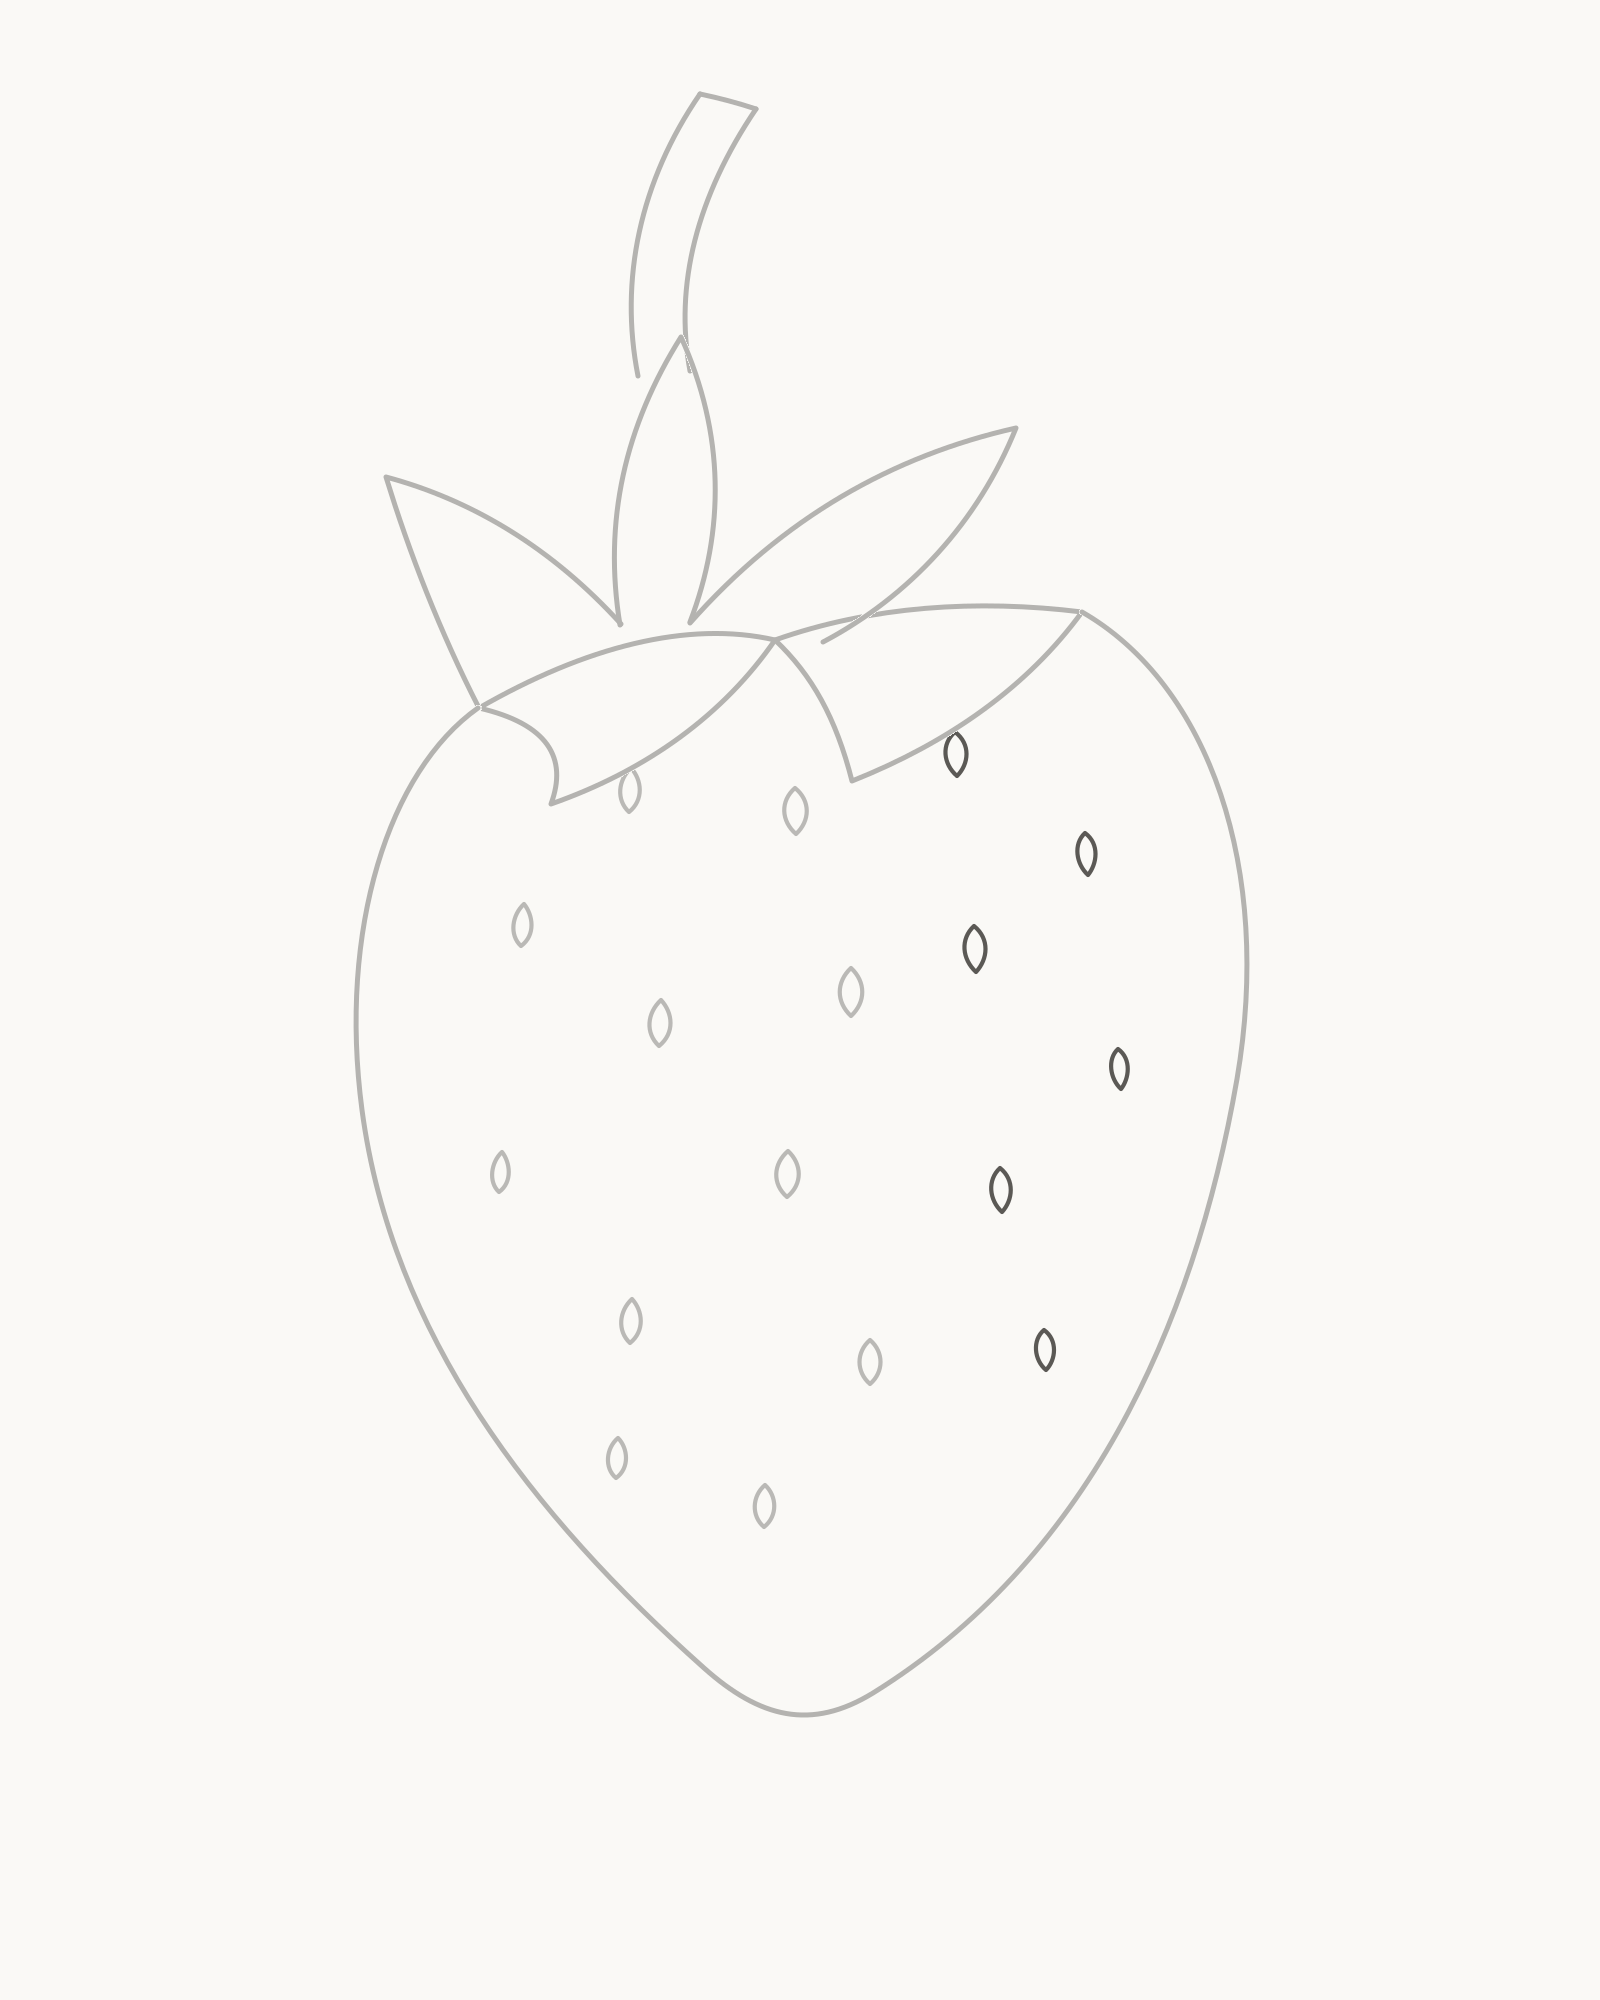
Stage 7 of 8. Six different right-side positions complete the organic surface map. - Upper-right forms
- Lower-right forms
- Count seventeen total
Place six achenes on the right half, again working from upper area to lower area. Use a different stagger from the left. The right side is fuller, so the bands have room to bow before the last shapes compress near the contour.
Avoid pairing every right achene with one at the same height on the left. A slightly irregular rhythm makes the marks travel around the fruit rather than sit on it like printed polka dots. Stop when the total reaches seventeen.
Look for this before moving on: seventeen achenes are countable, all remain inside the outline, and the six new right-side forms neither mirror the left group nor fall into straight rows.
If it goes wrong: keep the eleven earlier forms and each useful addition. Remove only the newest mirrored, crowded or edge-touching achene, then shift that one centre before redrawing it.
8. Add the cavity arcs
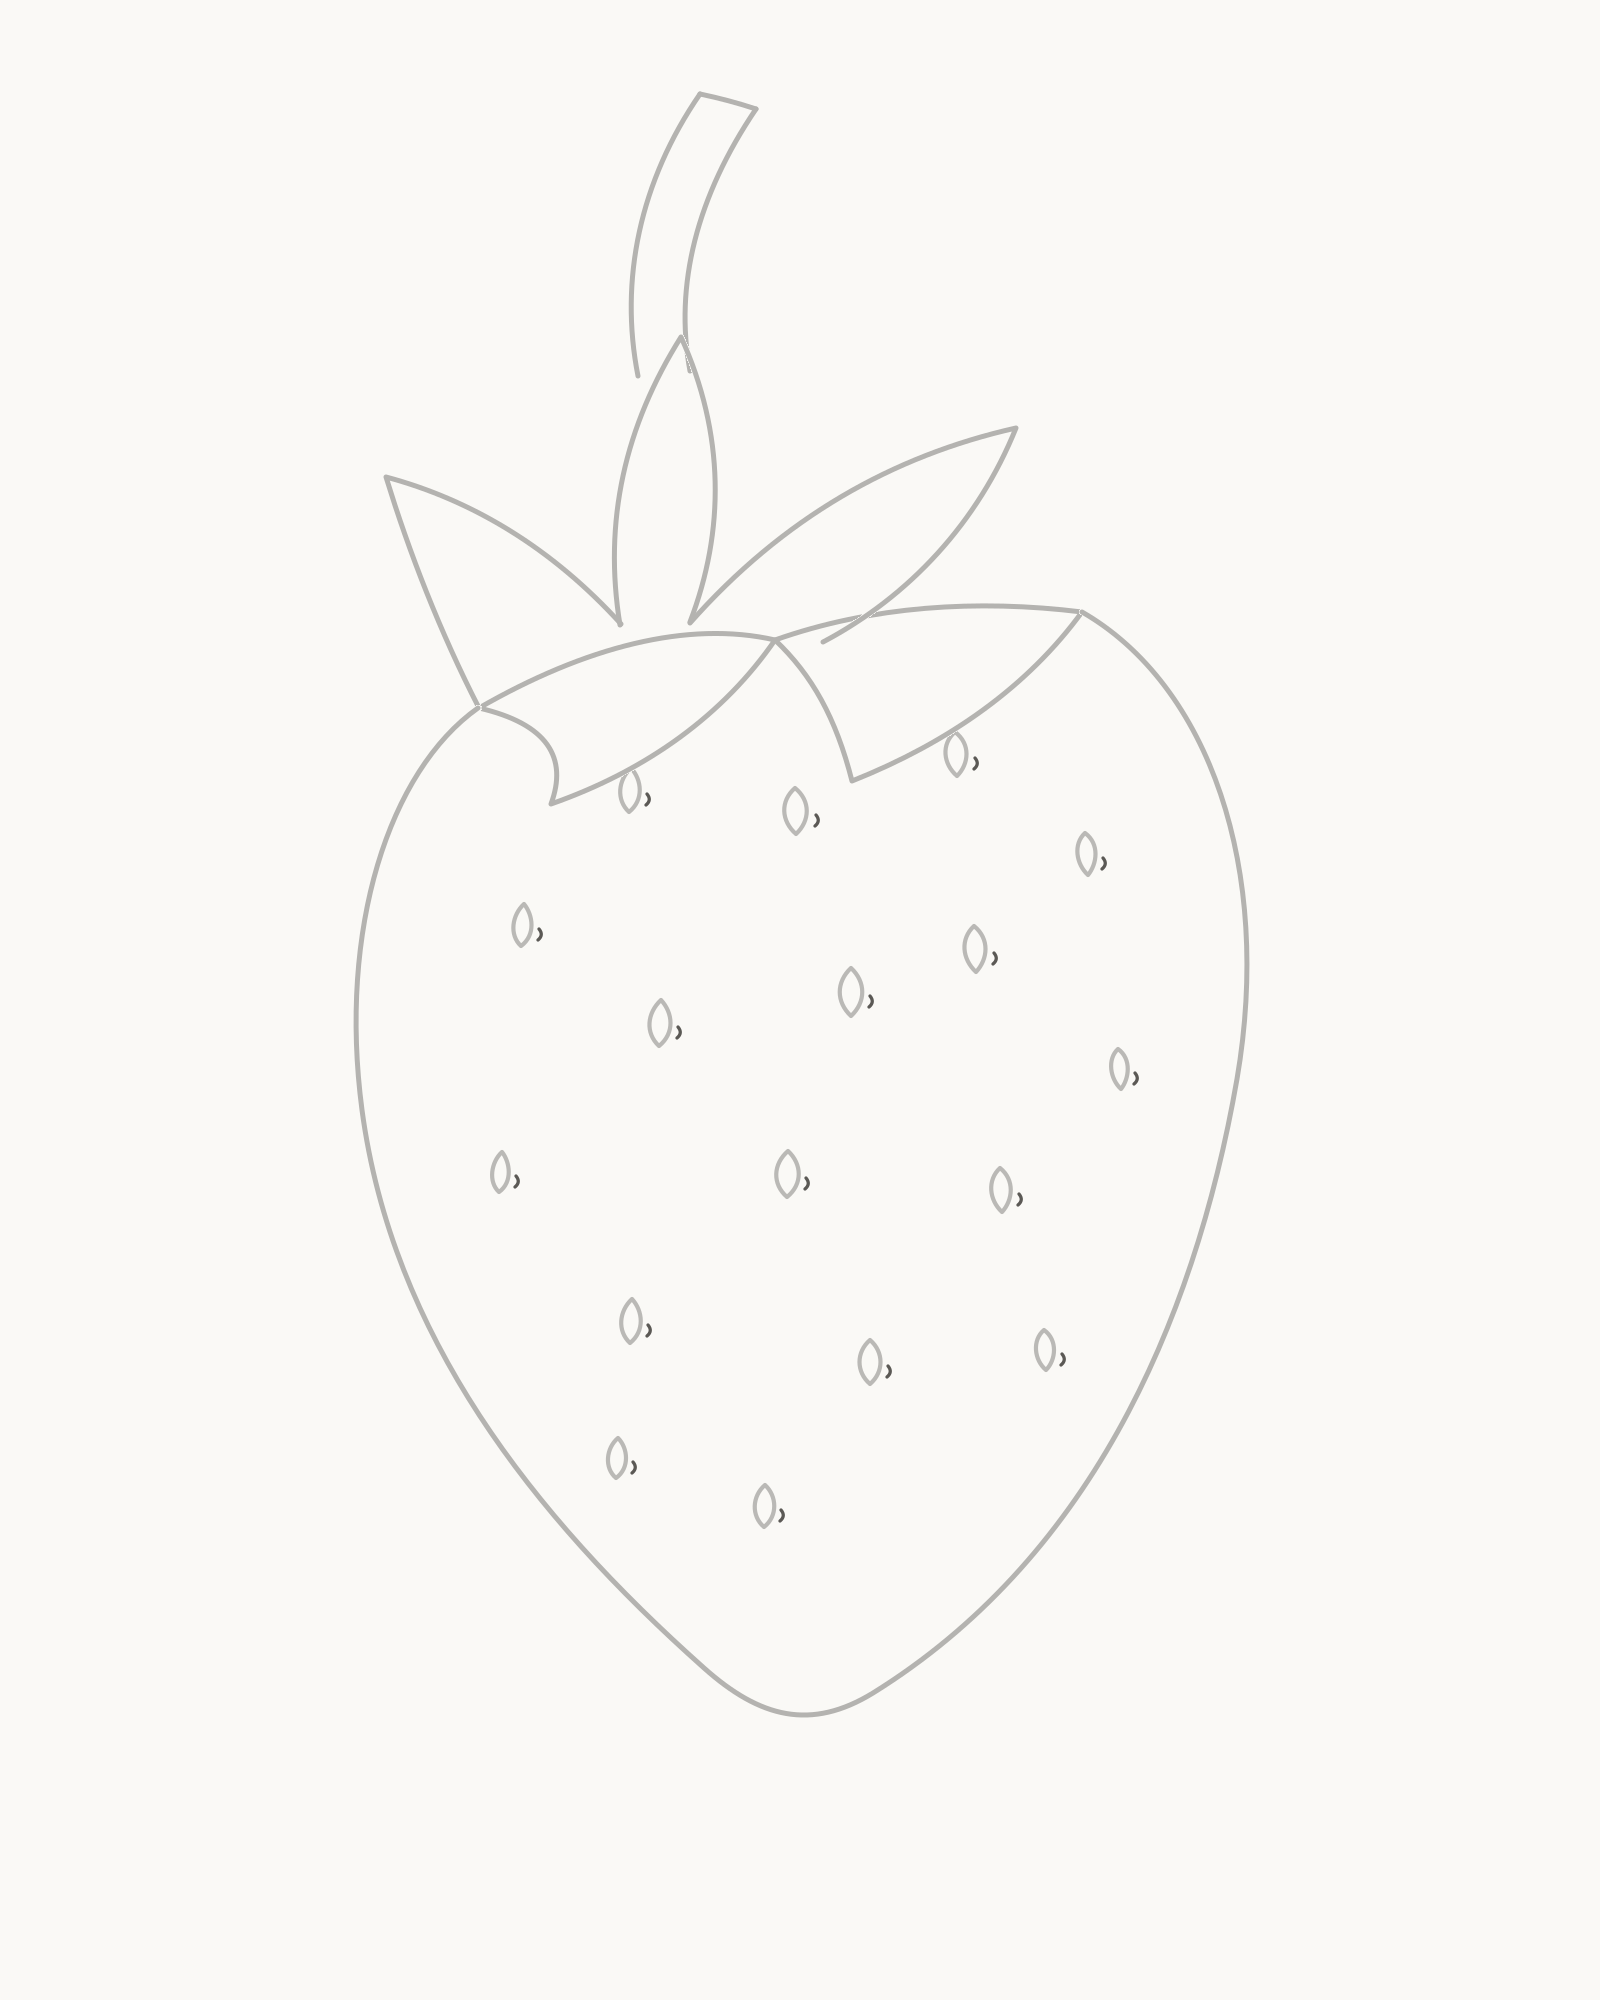
Stage 8 of 8. Seventeen small lower-right arcs complete the line drawing without shading. - Five central arcs
- Six left arcs
- Six right arcs
Beside each achene, place one short open arc on its lower-right side. Work through the five central forms first, then the six on the left and the six on the right. Keep a sliver of warm paper between an achene outline and its arc.
All seventeen arcs face the same broad direction, but they need not be mechanically identical. Their job is to suggest the small recess around each achene and one upper-left light direction. They are not hatching, shadows, extra seeds or closed rings. The line drawing is complete when the seventeenth arc is in place; do not retrace the outer contour.
Look for this before moving on: every achene has one separate lower-right arc, all seventeen pairs remain open and legible, and no dark hole or shaded patch has appeared.
If it goes wrong: retain every clear pair. Remove only the newest touching, closed or wrong-sided arc, then replace that small mark with more breathing space beside the same achene.


Troubleshooting the finished strawberry
The fruit still looks like a heart. Check the newest section of the body rather than the calyx. Remove a central top notch if one appeared, lower the left shoulder slightly or round only the sharpest part of the tip. Do not redraw the whole outline symmetrically.
The calyx looks like a star placed on top. Make sure the three rear sepals meet the open rim and the two broad front sepals cross in front of them. Repair the latest floating return; do not circle the cap with a collar line.
The stem looks attached to a leaf tip. Its two edges begin from separate hidden contacts behind the centre-rear sepal. Shorten only the newest visible base segment until the sepal hides the junction cleanly.
The achenes look like a spreadsheet grid. Keep the clearest shapes, then shift only the latest centre sideways or vertically. The central five, left six and right six follow different staggered sweeps.
The edge achenes make the fruit look flat. Narrow only the newest outer form and angle it with the turning surface. Keep it clear of the body contour.
The final marks look like punctuation. Check their relationship to the achene outlines. Each arc belongs just outside one lower-right edge and follows the same light direction; remove any isolated extra mark.
Change the viewpoint
On a fresh area of paper, repeat the same eight-stage order but make the right shoulder noticeably closer and broader. Compress the six right-side achenes more strongly while allowing the left group to remain fuller. Keep five sepals, seventeen total achenes and one lower-right arc per achene. This practises turning a surface through overlap and spacing without adding tone.
For extra practice before repeating the calyx, try How to Draw Leaves. The How to Draw Flowers guide gives a different exercise in overlapping organic forms, and How to Draw holds the practical lesson index. Historical examples remain in the separate Flower drawings gallery; this page owns only the strawberry construction.
Frequently Asked Questions
What is the easiest way to draw a strawberry?
Start with one open asymmetric fruit contour, then close the gap with three rear sepals and two front sepals. Add the stem before placing the surface achenes. This order avoids erasing a complete top outline later.
How do I stop a strawberry drawing from looking like a heart?
Remove the central notch, use unequal shoulder heights, make one side fuller and round the lower tip. A strawberry narrows downwards, but it does not need a sharp valentine point.
Are the marks on a strawberry seeds?
The small seed-like structures on the surface are achenes, carried on the swollen receptacle.[1][2] For this drawing, the distinction is useful because each achene sits in its own shallow cavity rather than appearing as a random dot.
How many achenes should I draw?
This lesson uses seventeen visible achenes: five through the centre, six on the left and six on the right. It is a deliberate, countable drawing pattern rather than a botanical total.
How can I make the strawberry look rounded without shading?
Use a fuller right contour, stagger the achenes along curved bands and make the side forms narrower than the central five. The small lower-right cavity arcs reinforce one light direction without tonal fill.
Do I erase the first outline under the sepals?
No. Stage 1 leaves the top open, so the five sepals can close and overlap that gap without scheduled erasure. Correct only the newest faulty segment as you work.
Does this lesson include colour or shading?
No. It finishes as a clean pencil line drawing. The on-page comparison switch can make previous-stage marks paler to clarify the newest action, but it does not change the cumulative source drawing.
Why are there five sepals?
Five unequal forms create a clear wrapping calyx for this simplified exercise: three at the rear and two across the front. The count is a construction decision, not a claim that every real strawberry presents the cap in exactly this view.
References
- Cal Poly Strawberry Center, Test Your Strawberry Anatomy Skills, Part 2. View source
- Chicago Botanic Garden, Strawberries. View source
- Kew Science, Fragaria × ananassa (Weston) Duchesne ex Rozier. View source
More DRAWING Guides

How to Draw a Rose: A Step by Step Guide

How to Draw a Tree: A Step by Step Guide

How to Draw Eyes: A Step by Step Guide

How to Draw Leaves: A Step by Step Guide

How to Draw Autumn Leaves: A Step by Step Guide

How to Draw Flowers: A Step by Step Guide

How to Draw a Lily: A Step by Step Guide

How to Draw a Sunflower: A Step by Step Guide

How to Draw a Tulip: A Step by Step Guide

How to Draw a Hibiscus: A Step by Step Guide

How to Draw a Daisy: A Step by Step Guide
