



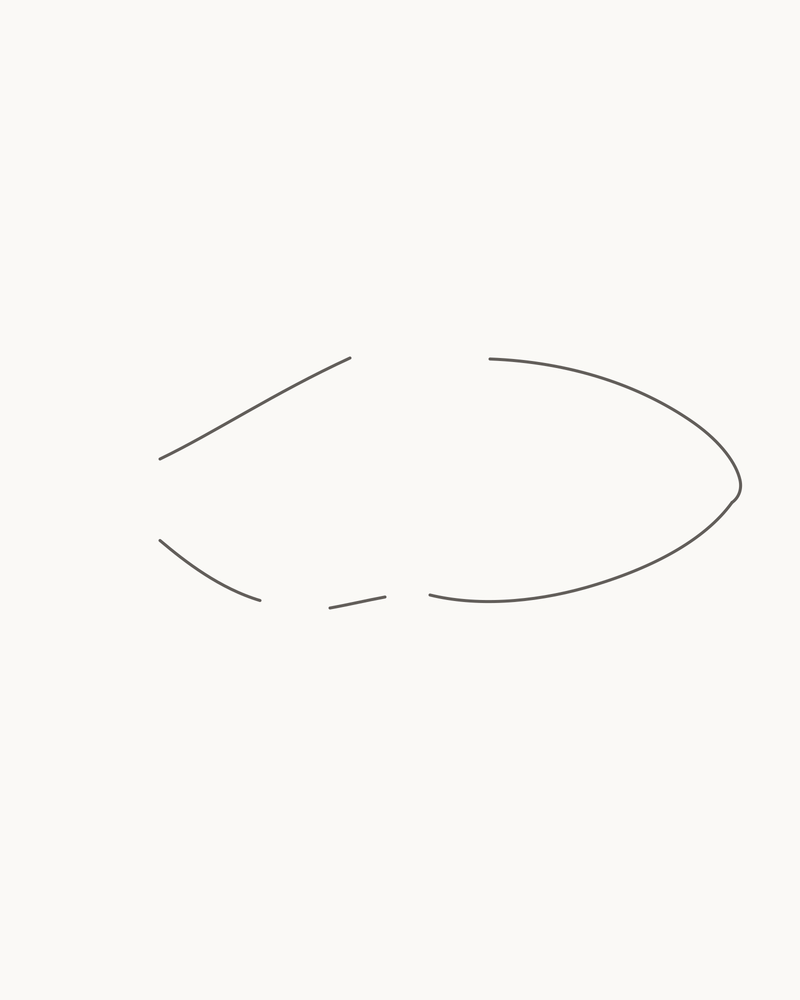
Draw one complete fish in side view
Draw one complete fish facing right in a clear side view. Eight additive stages establish the permanent body, attach the tail and four visible fins, then add just enough surface detail to describe the form. The finished result is a clean pencil line drawing—not a cartoon symbol, a named-species portrait or a shaded study.
Difficulty: Beginner, with particular care needed at the tail base and fin roots
Time: Allow about 35–50 minutes. This is an untested estimate, so let the visual checks beneath each stage set your pace.
Medium: HB or No. 2 pencil, line only
This is a generalised fish rather than a portrait of one species. Its strict side view makes the useful relationships easy to see: a long body narrows into the tail base, the gill cover stays inside the head, and each fin has a distinct attachment. The upper and lower outlines are deliberately not mirror images. A slightly flatter back, fuller lower contour and unequal tail keep the result natural without requiring complex anatomy.
Treat every opening in the first body contour as a planned junction. The tail closes the rear opening. The dorsal, anal and pelvic fins bridge their own gaps, while the near pectoral fin begins inside the body just behind the gill cover. Every line remains in the finished drawing; there are no temporary ovals, centre lines or scheduled erasure.
The fin names are useful as location labels rather than a natural-history test. “Dorsal” identifies the fin on the back, “anal” the lower rear fin, “pectoral” the fin just behind the gill region, and “pelvic” the smaller lower fin farther back. Concentrate on their roots and spacing before considering any surface marks.
Materials
- A pointed HB or No. 2 pencil. A 0.5 or 0.7 mm mechanical pencil is a suitable alternative.
- One vertical sheet without ruled lines, in white or warm white. Basic copier paper will do for practice.
- A clean eraser for lifting only the most recently misplaced curve.
- A sharpener.
- Optional: a spare scrap on which to rehearse the shallow tail fork or a single fin contour.
- Optional: a rights-cleared side-view fish reference for comparing the body taper and fin positions.
There is no need for a graphite set, charcoal, a blender, tracing sheets, markers, colour pencils or a downloadable worksheet. Use light-to-moderate pressure and keep the point clear enough to make the small attachment points readable.
Before you draw
Work inside a vertical rectangle whose width and height have a 4:5 ratio. The fish crosses the middle of the page and faces right, with its body centred around 55% of the width and 49% of the height. Leave more horizontal space than vertical space: the tail must open to the left, while the snout needs clear paper on the right.
Use the separate Stage 1 placement cue if needed. Its target and optional 8×10 grid are viewing aids outside the drawing, not boxes or lines to copy onto the fish. Switch the grid off as soon as the body position is clear.
Keep the main body, tail and outer fins at one restrained line weight. Use a slightly finer touch for the gill cover, eye, mouth, lateral line and scale arcs. The notional light comes from the upper left, but this line-only lesson adds no shading. Do not darken or retrace earlier marks as later parts arrive.
1. Place the permanent body and snout
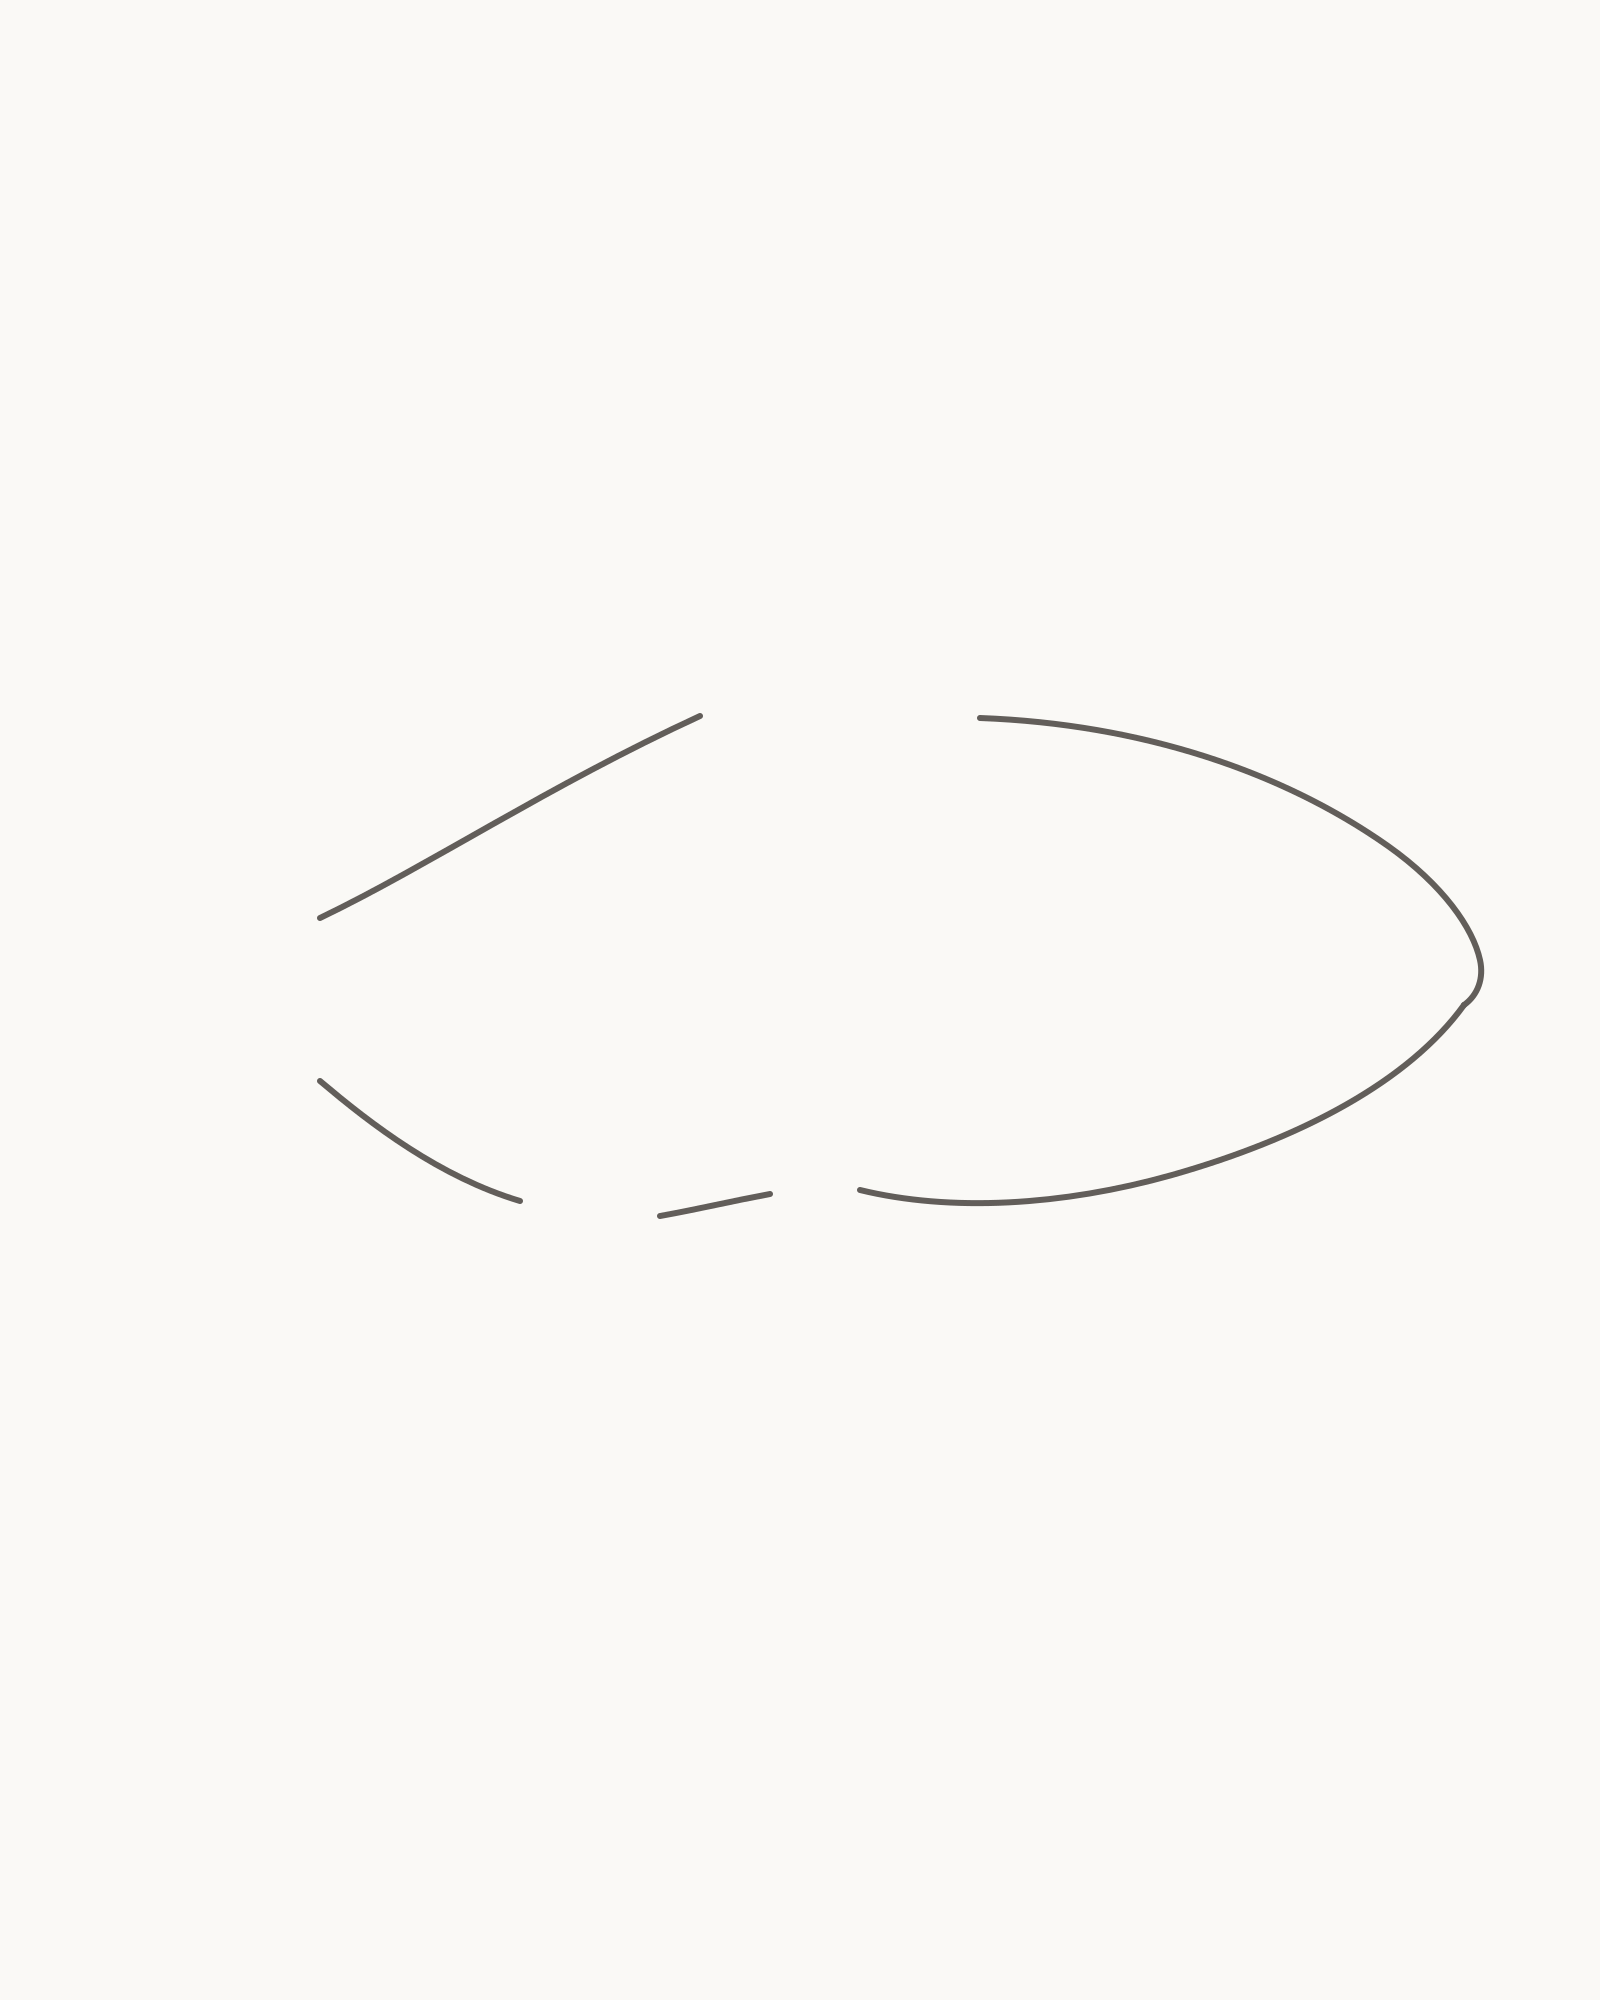
Stage 1 of 8. The permanent body fixes the fish’s placement and reserves every outer attachment. 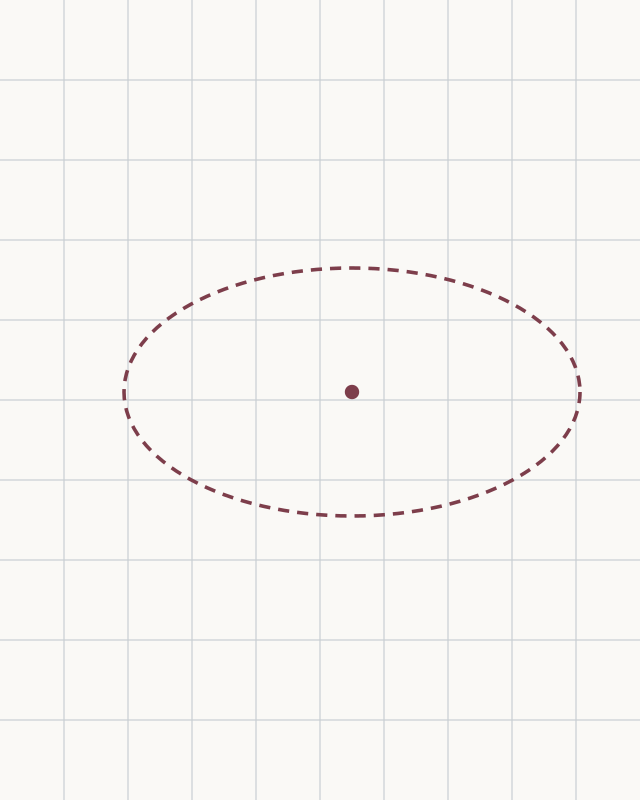
Placement cue: set the body around x55% and y49%. Leave clear paper to the left for the tail, to the right for the blunt snout, and above and below for the fins. Keep the cue off the drawing. - Upper contour and snout
- Short jaw
- Belly return
- Keep each opening clear
Use the placement cue to set the body around x55%/y49%. Start at the upper tail-base opening and draw the long back towards the right. Round the forehead into a blunt snout, then turn through the short jaw and carry the belly back towards the lower tail-base opening.
Copy the separate lower sections shown in the image and leave the three outer-fin spaces open. The back should feel a little flatter than the belly, and the front should be much blunter than the narrow rear. These are permanent final contours, not a loose oval waiting to be replaced.
Look for this before moving on: the body is long rather than deep, the snout is rounded instead of pointed, the back and belly are unequal, and the tail, dorsal, anal and pelvic openings all look intentional.
If it goes wrong: keep the more convincing contour and its nearest fixed endpoint. Replace only the newest short section; do not close a reserved gap simply to make the body look finished.
2. Attach the shallow-forked tail
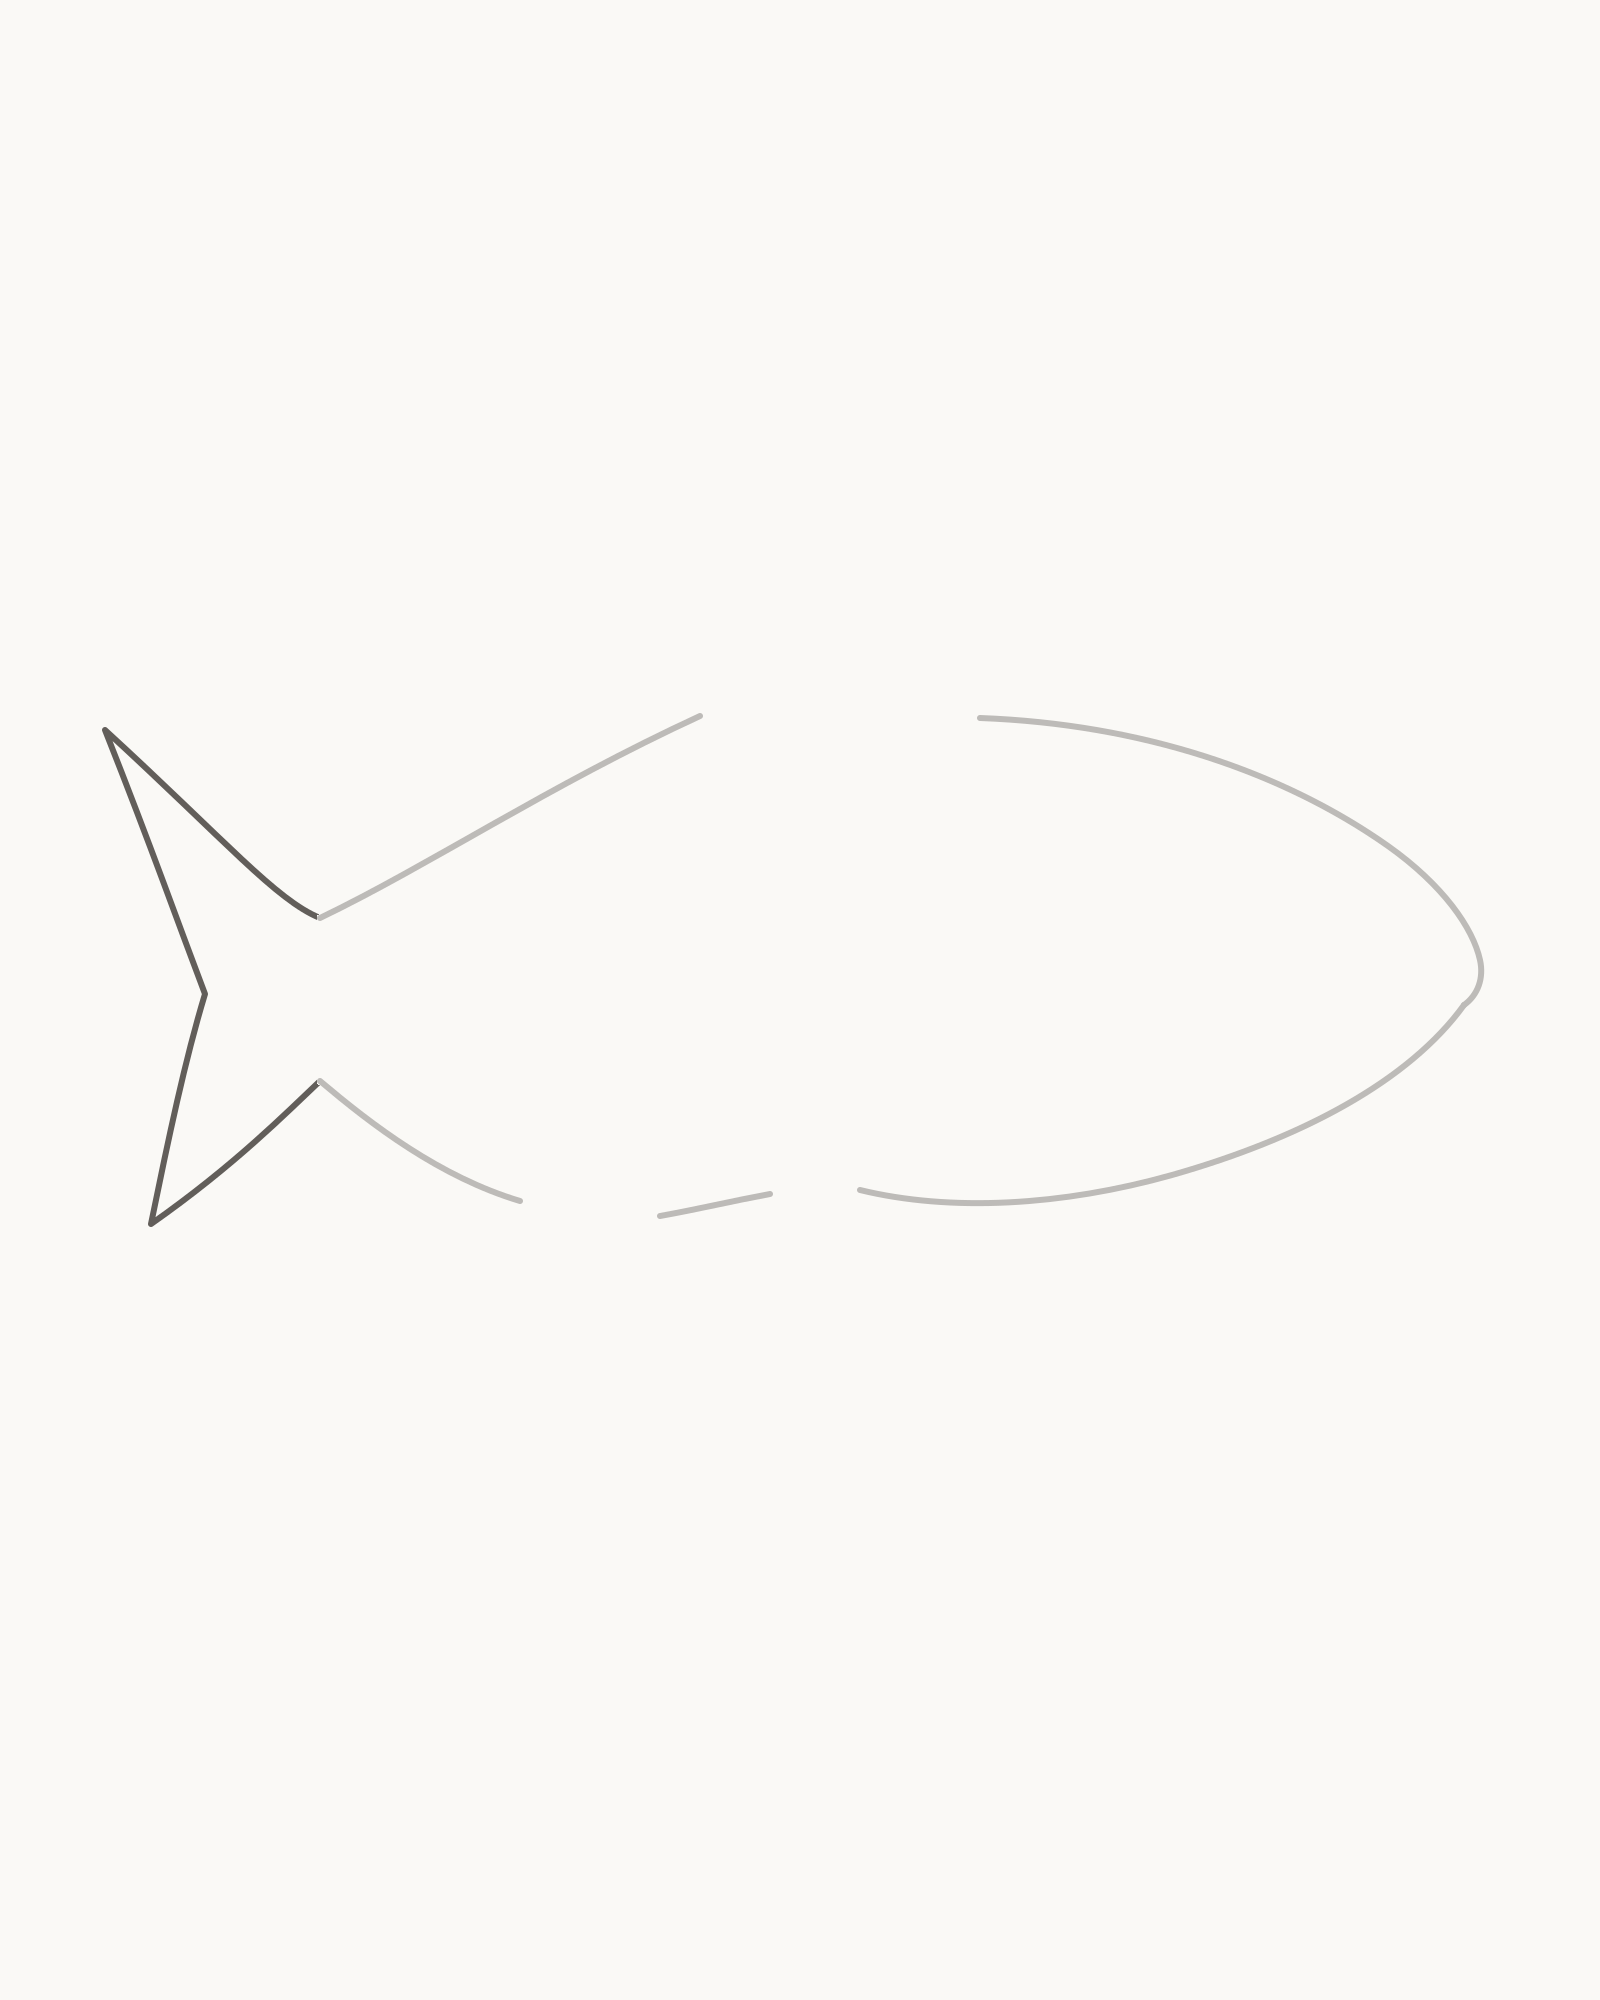
Stage 2 of 8. Both unequal lobes return to one narrow tail base. - Upper tail-base return
- Longer upper lobe
- Shallow fork
- Lower lobe and return
Work in a fixed order so the tail remains one attachment. Add the upper tail-base return first, then the longer upper lobe. Turn into the shallow fork, sweep around the rounder lower lobe and finish with the lower return to the waiting body endpoint.
Both lobes must grow from the same narrow base. The upper one is visibly, but not dramatically, larger. Keep the fork shallow and the outer curves soft; a deep V or two matching triangles would turn the fish into a symbol.
Look for this before moving on: the body tapers into one narrow tail base, both lobes return cleanly to it, the upper lobe is longer, and the complete tail clears the left edge of the page.
If it goes wrong: preserve the Stage 1 body and the better part of the tail. Replace only the newest return, lobe or fork between established points rather than widening the tail base to force a join.
3. Add the gill cover, eye and mouth
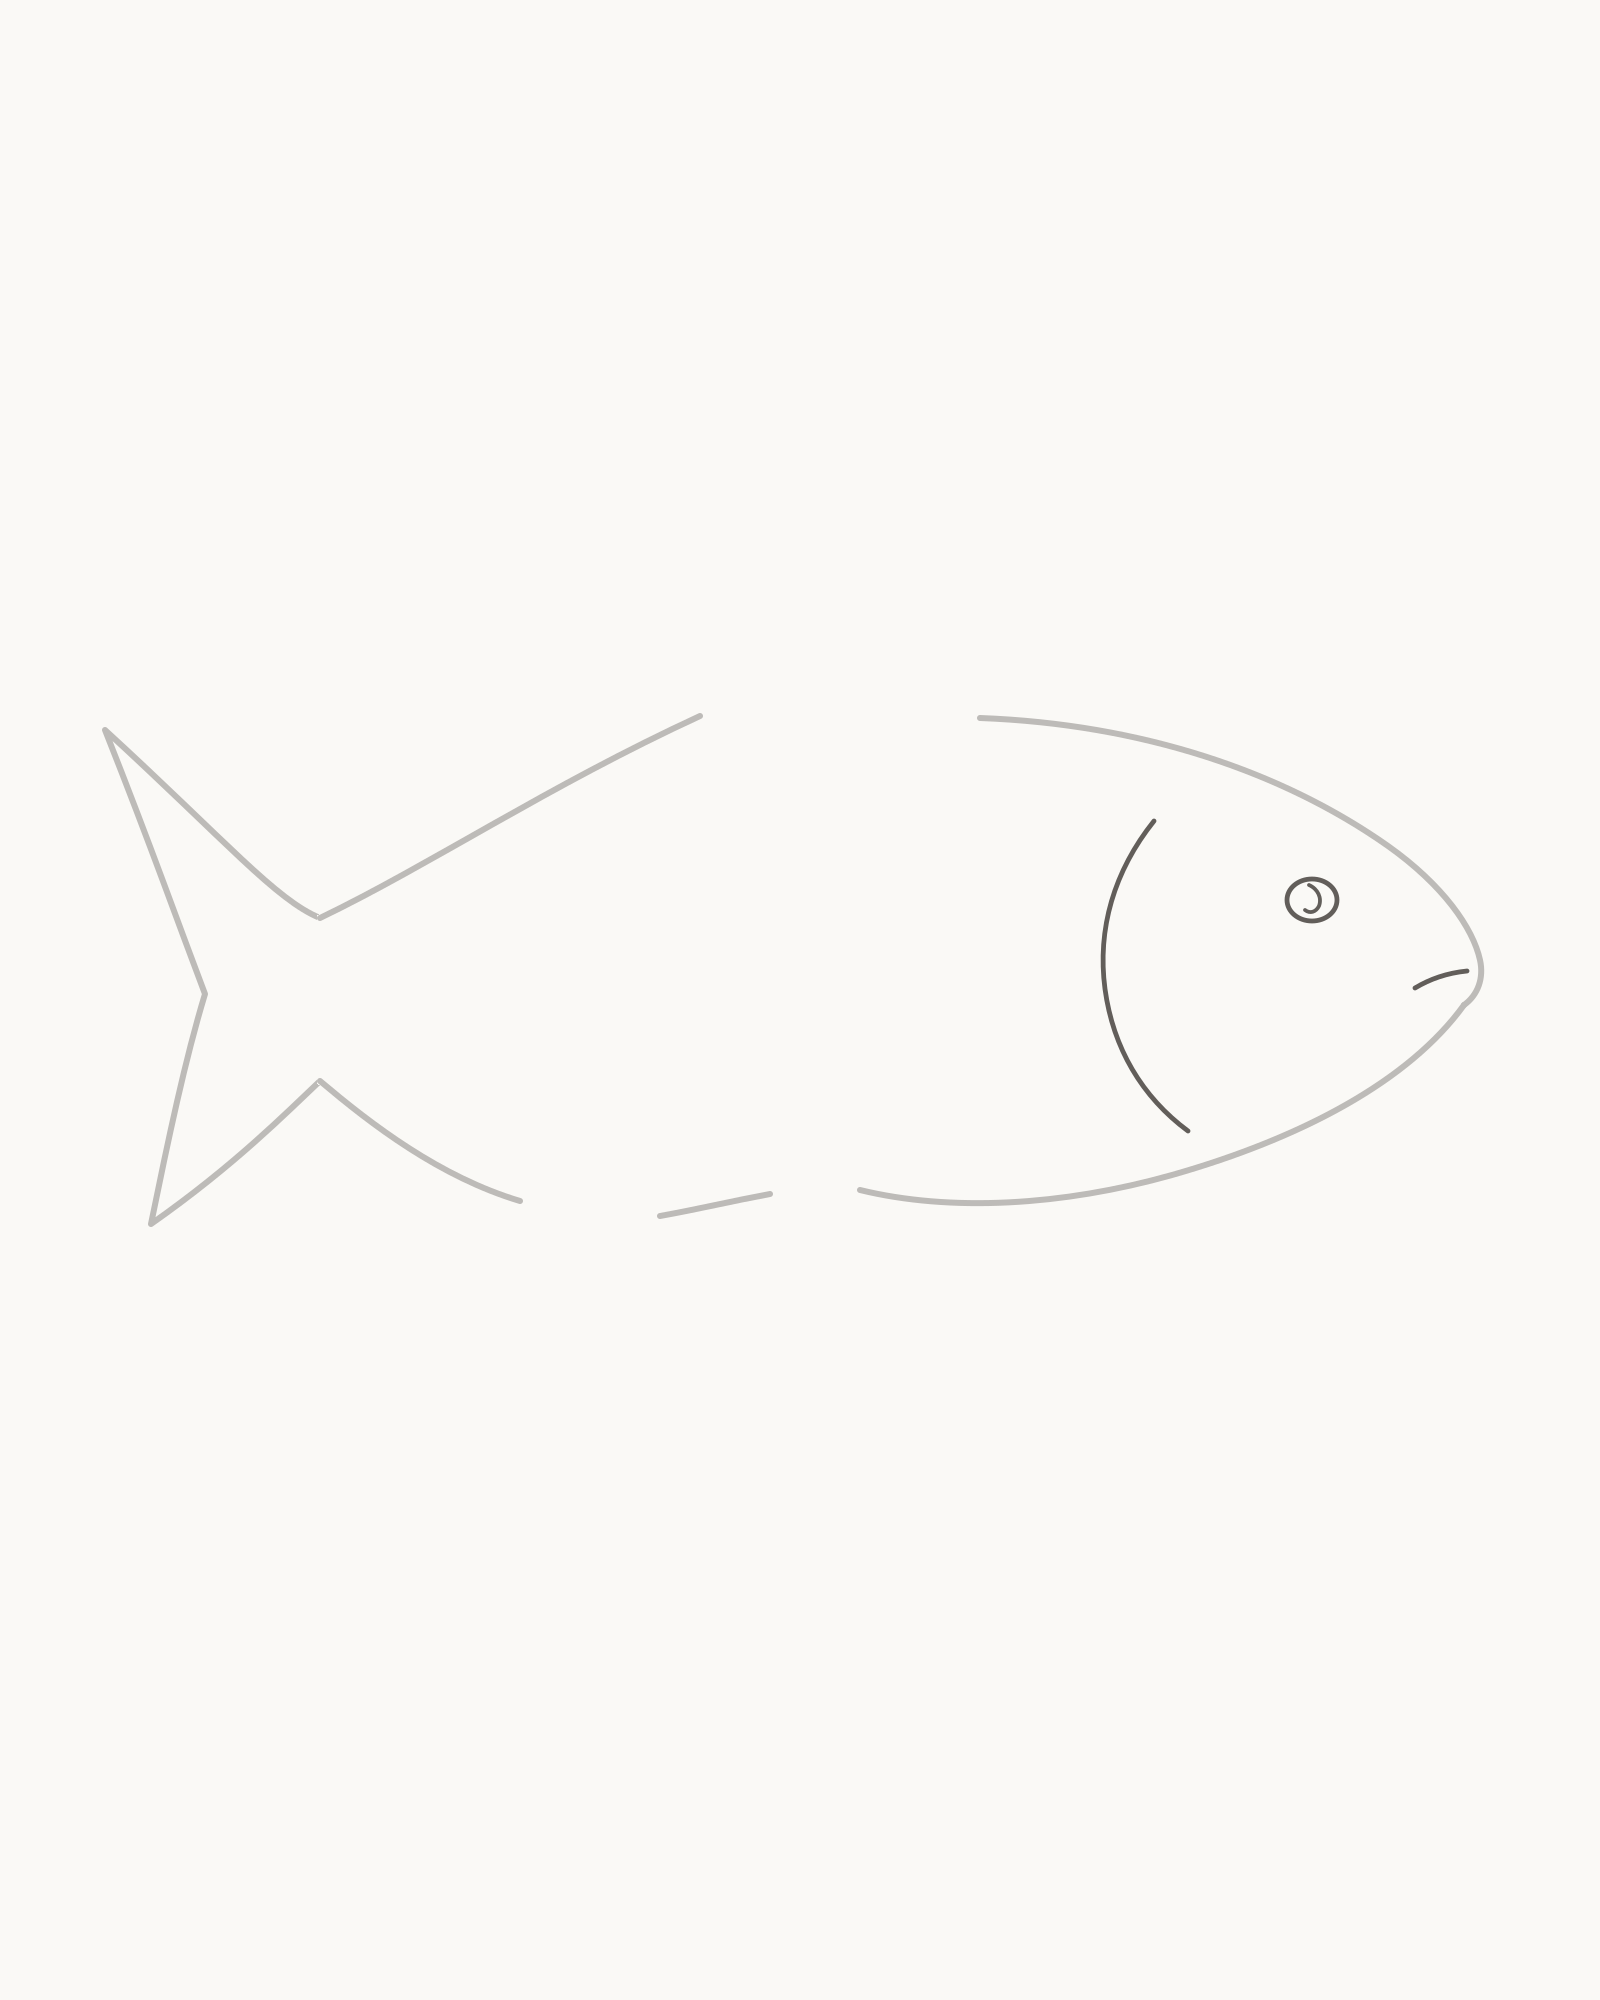
Stage 3 of 8. Three restrained landmarks make the fixed head readable without changing the snout. - Gill cover
- Small open eye
- Short mouth
Draw the gill cover first. Begin high inside the head and let the curve bow gently backwards before ending above the belly. It should divide the head from the body without becoming a circle or crossing an outer contour.
Place the small open eye above the body midline, then add the short mouth split near the front and below it. Keep both features restrained. The eye is a simple neutral landmark, not a large black button, and the mouth stops well before it reaches the gill.
Look for this before moving on: the gill curve stays inside the body, the eye sits above the mouth, the mouth remains short, and the fixed snout still has exactly the same shape as Stage 2.
If it goes wrong: leave the head outline untouched. Replace only the newest gill, eye or mouth mark; do not enlarge the face or thicken a feature to hide its position.
4. Attach the dorsal fin
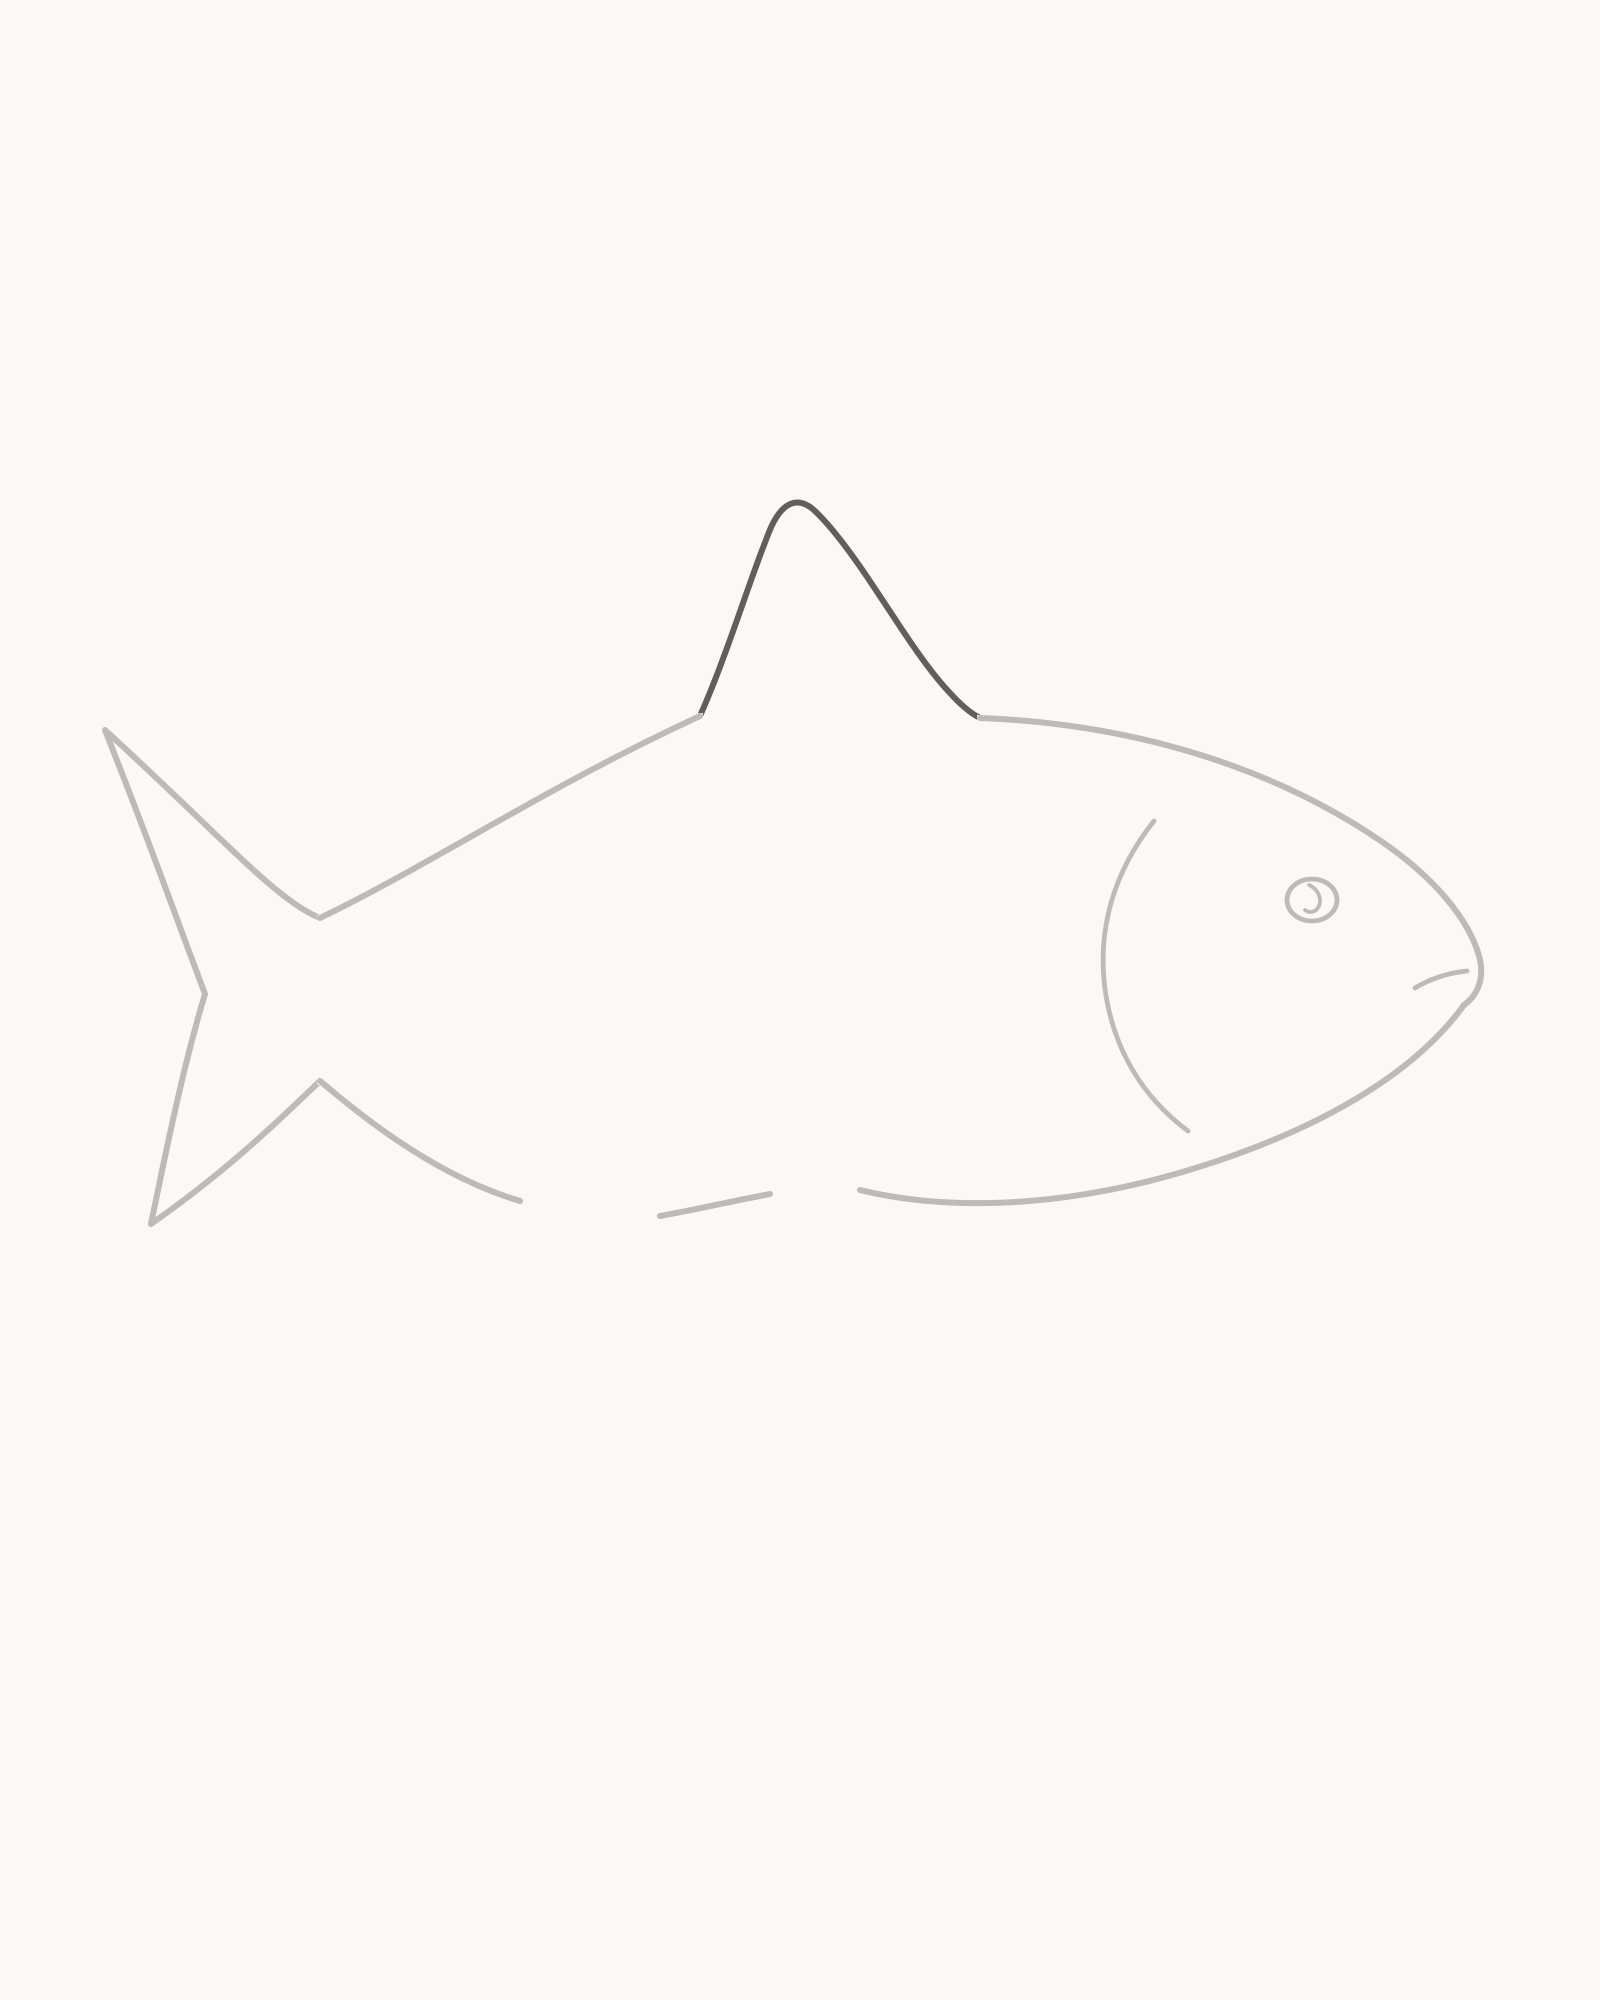
Stage 4 of 8. The dorsal fin bridges its exact back opening with a gentle rearward lean. - Steep leading edge
- Swept outer curve
- Gentle trailing return
Use the waiting opening on the back. Raise a fairly steep leading edge, carry an unequal rounded sweep over the top, then return more gently to the second body endpoint. The peak leans slightly towards the tail rather than sitting in perfect symmetry over the base.
The dorsal fin is the largest fin attached to the body in this drawing. Its broad root is more important than a decorative edge, so keep the contour plain and add no rays or repeated notches.
Look for this before moving on: both fin edges meet the exact back endpoints, the base is broad, the peak is asymmetric, and no duplicate back line runs beneath the fin.
If it goes wrong: retain the body opening and whichever fin edge has the cleaner attachment. Replace only the newest outer-fin segment between the same two endpoints.
5. Attach the anal fin
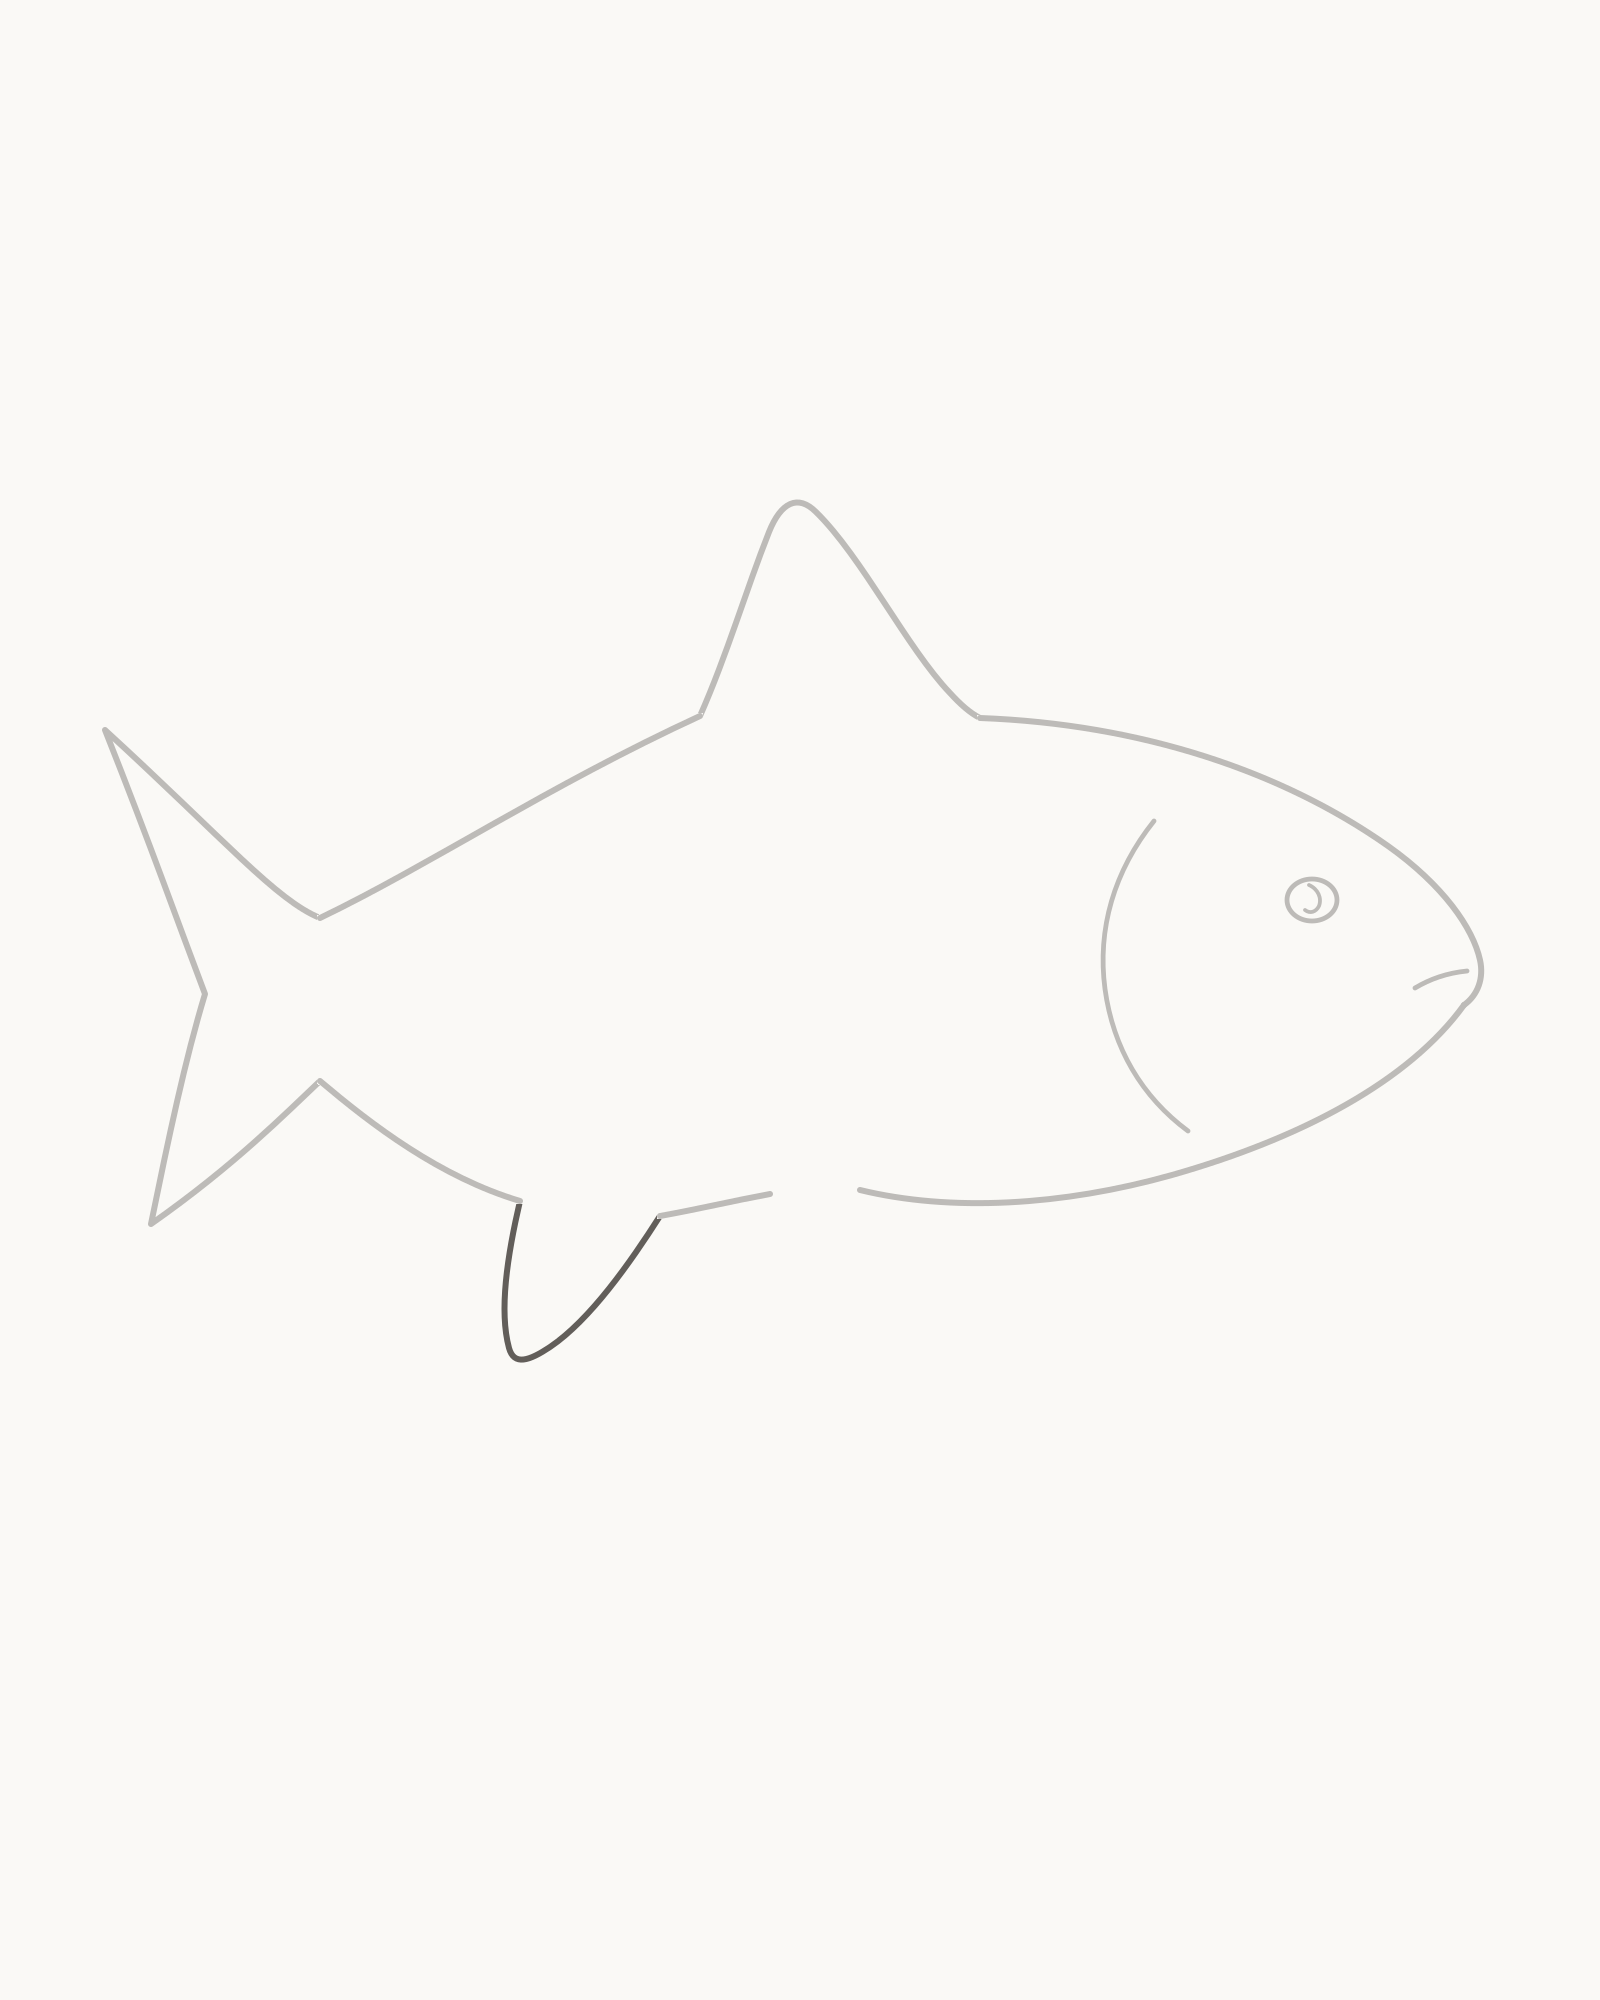
Stage 5 of 8. The smaller anal fin attaches behind the midpoint at a different angle from the dorsal fin. - Short leading edge
- Soft lower point
- Longer rear return
Move to the lower rear opening. Draw the shorter leading edge down and slightly back, turn around the soft point and use the longer returning edge to meet the rear endpoint. This fin should be smaller and differently angled from the dorsal fin above.
Keep clear paper around the point and preserve the existing belly intervals on both sides. The fin belongs behind the middle of the fish; sliding it forwards would confuse its relationship with the pelvic fin still to come.
Look for this before moving on: two clean roots bridge the intended lower-rear gap, the fin sits behind the body midpoint, and its size and angle are distinct from the dorsal fin.
If it goes wrong: keep all earlier contours and the better anal-fin edge. Replace only the newest edge or tip; never draw over the belly to manufacture a wider root.
6. Add the near pectoral fin
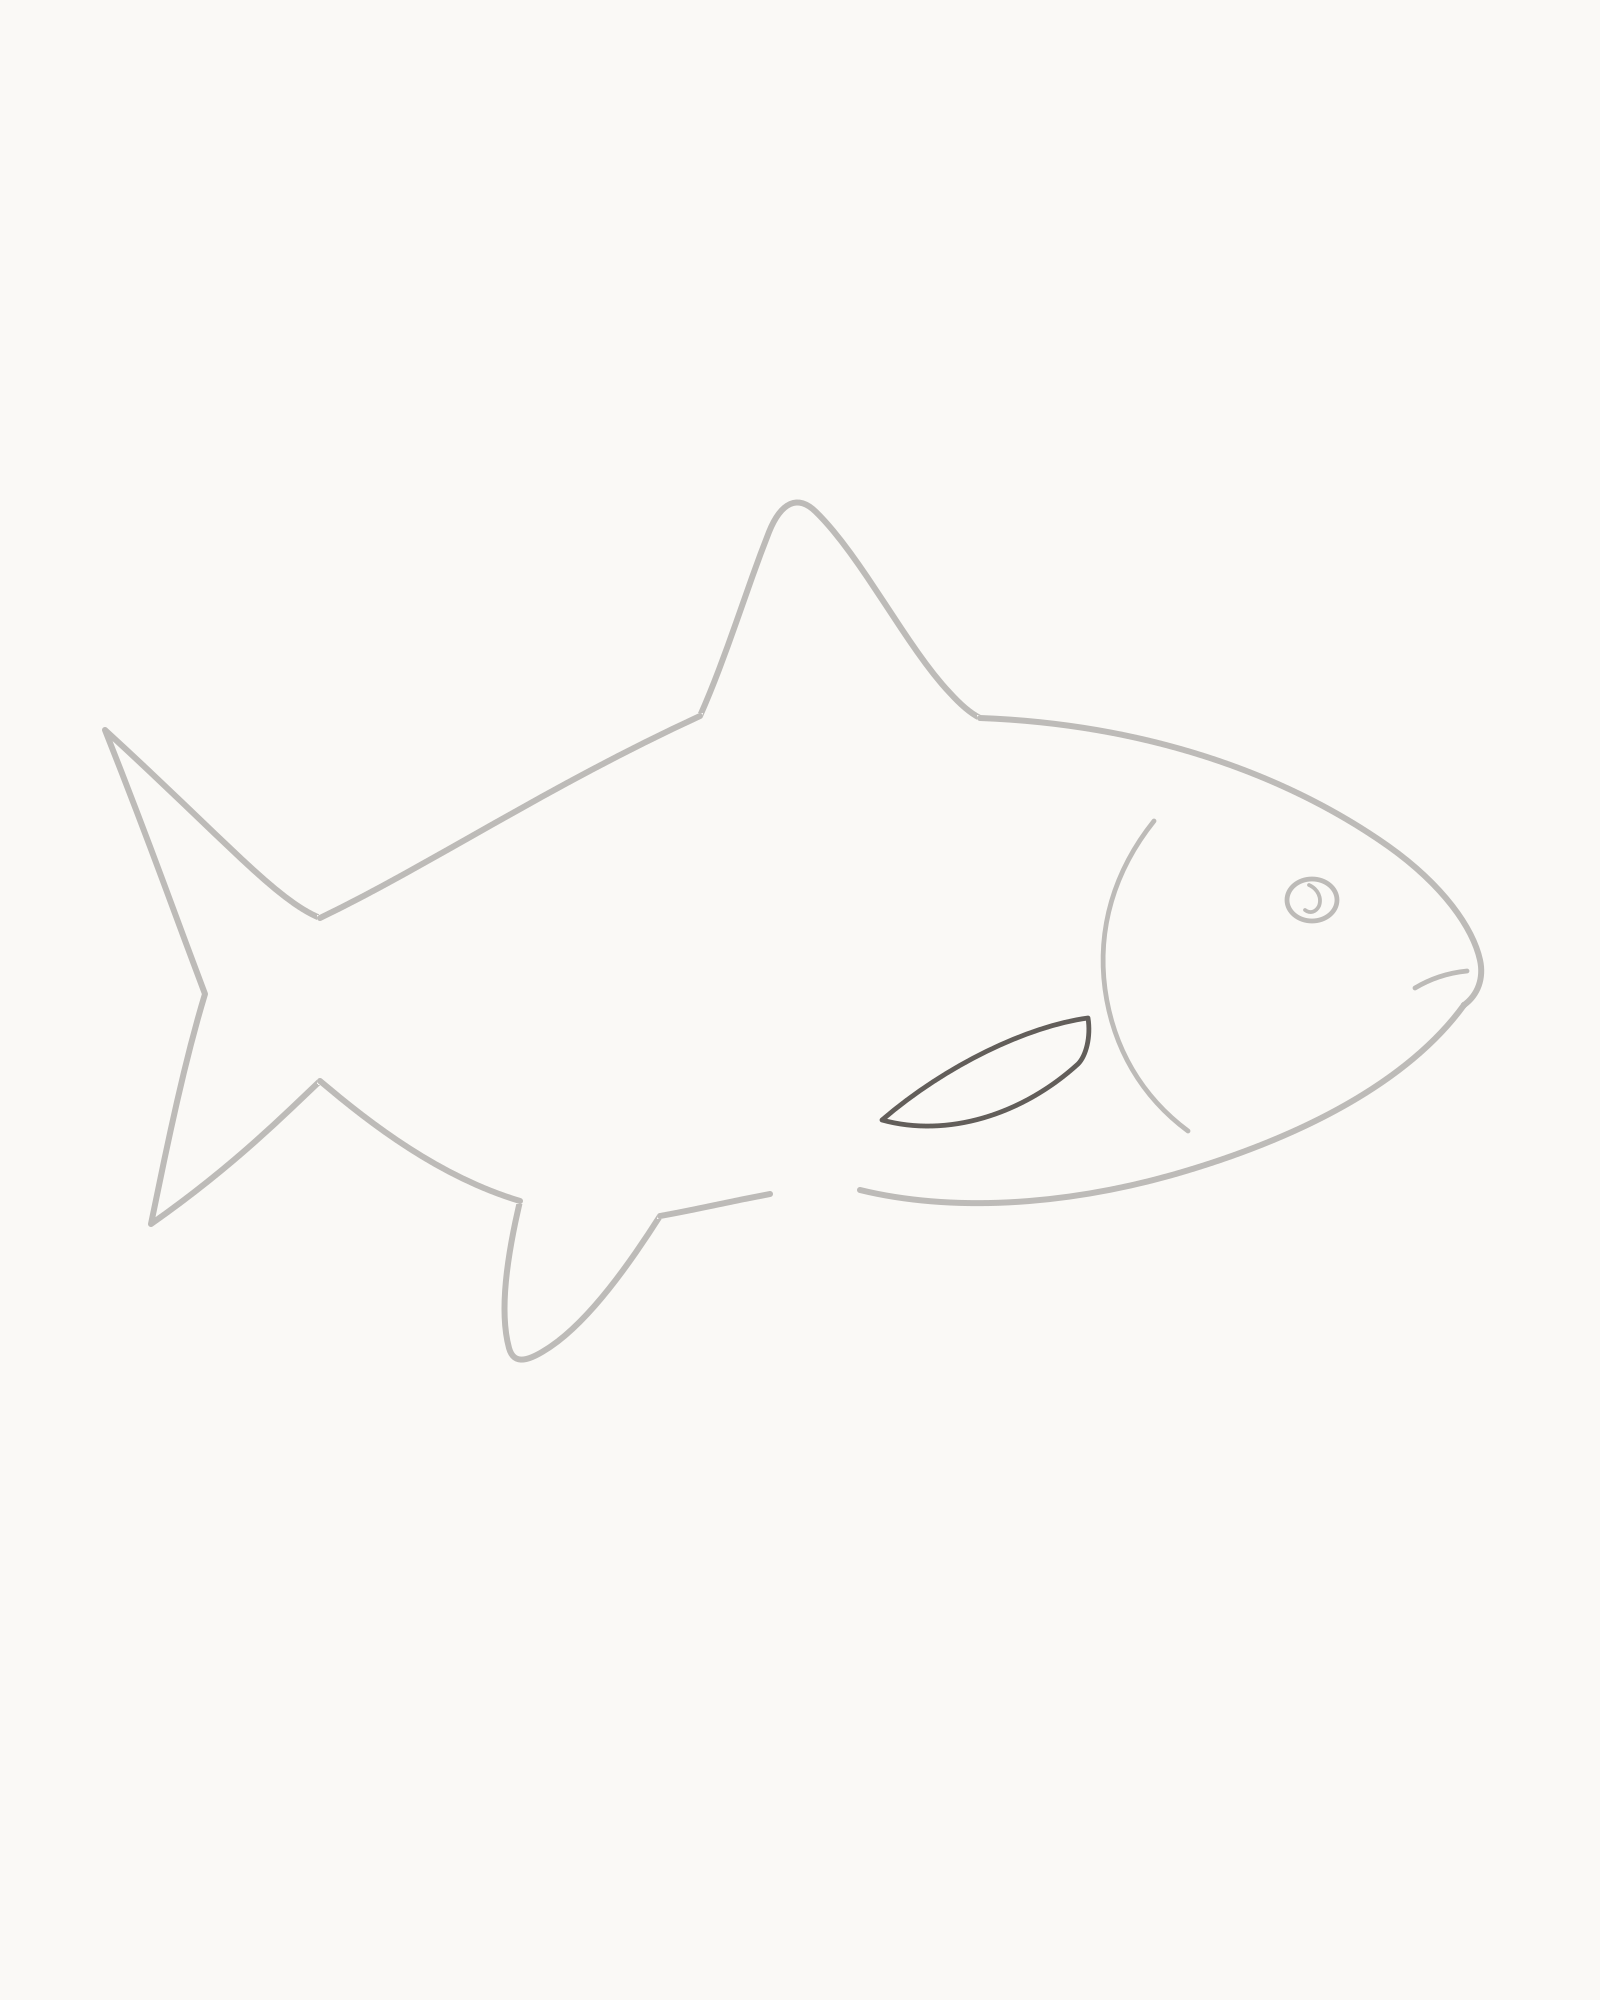
Stage 6 of 8. A compact separated root makes the near-side pectoral fin read as attached. - Upper interior root
- Back-and-down curve
- Rounded point
- Lower return
Find the compact area just behind and below the gill cover. From a small interior root, send one curve back and down to a rounded point. Return with a second tapering curve to a nearby root so the fin stays completely inside the body silhouette.
This fin overlaps the visible side of the fish, unlike the three fins that bridge outer openings. Leave a sliver of clear space between its root and the end of the gill curve. That separation makes the attachment legible without adding a dark connector.
Look for this before moving on: the root is clear of the gill, the fin angles back and down, its two edges taper towards one rounded point, and the point does not touch the belly or anal fin.
If it goes wrong: preserve the gill and outer body. Replace only the newest pectoral edge or root, using the same small interior area as your anchor.
7. Add the near pelvic fin
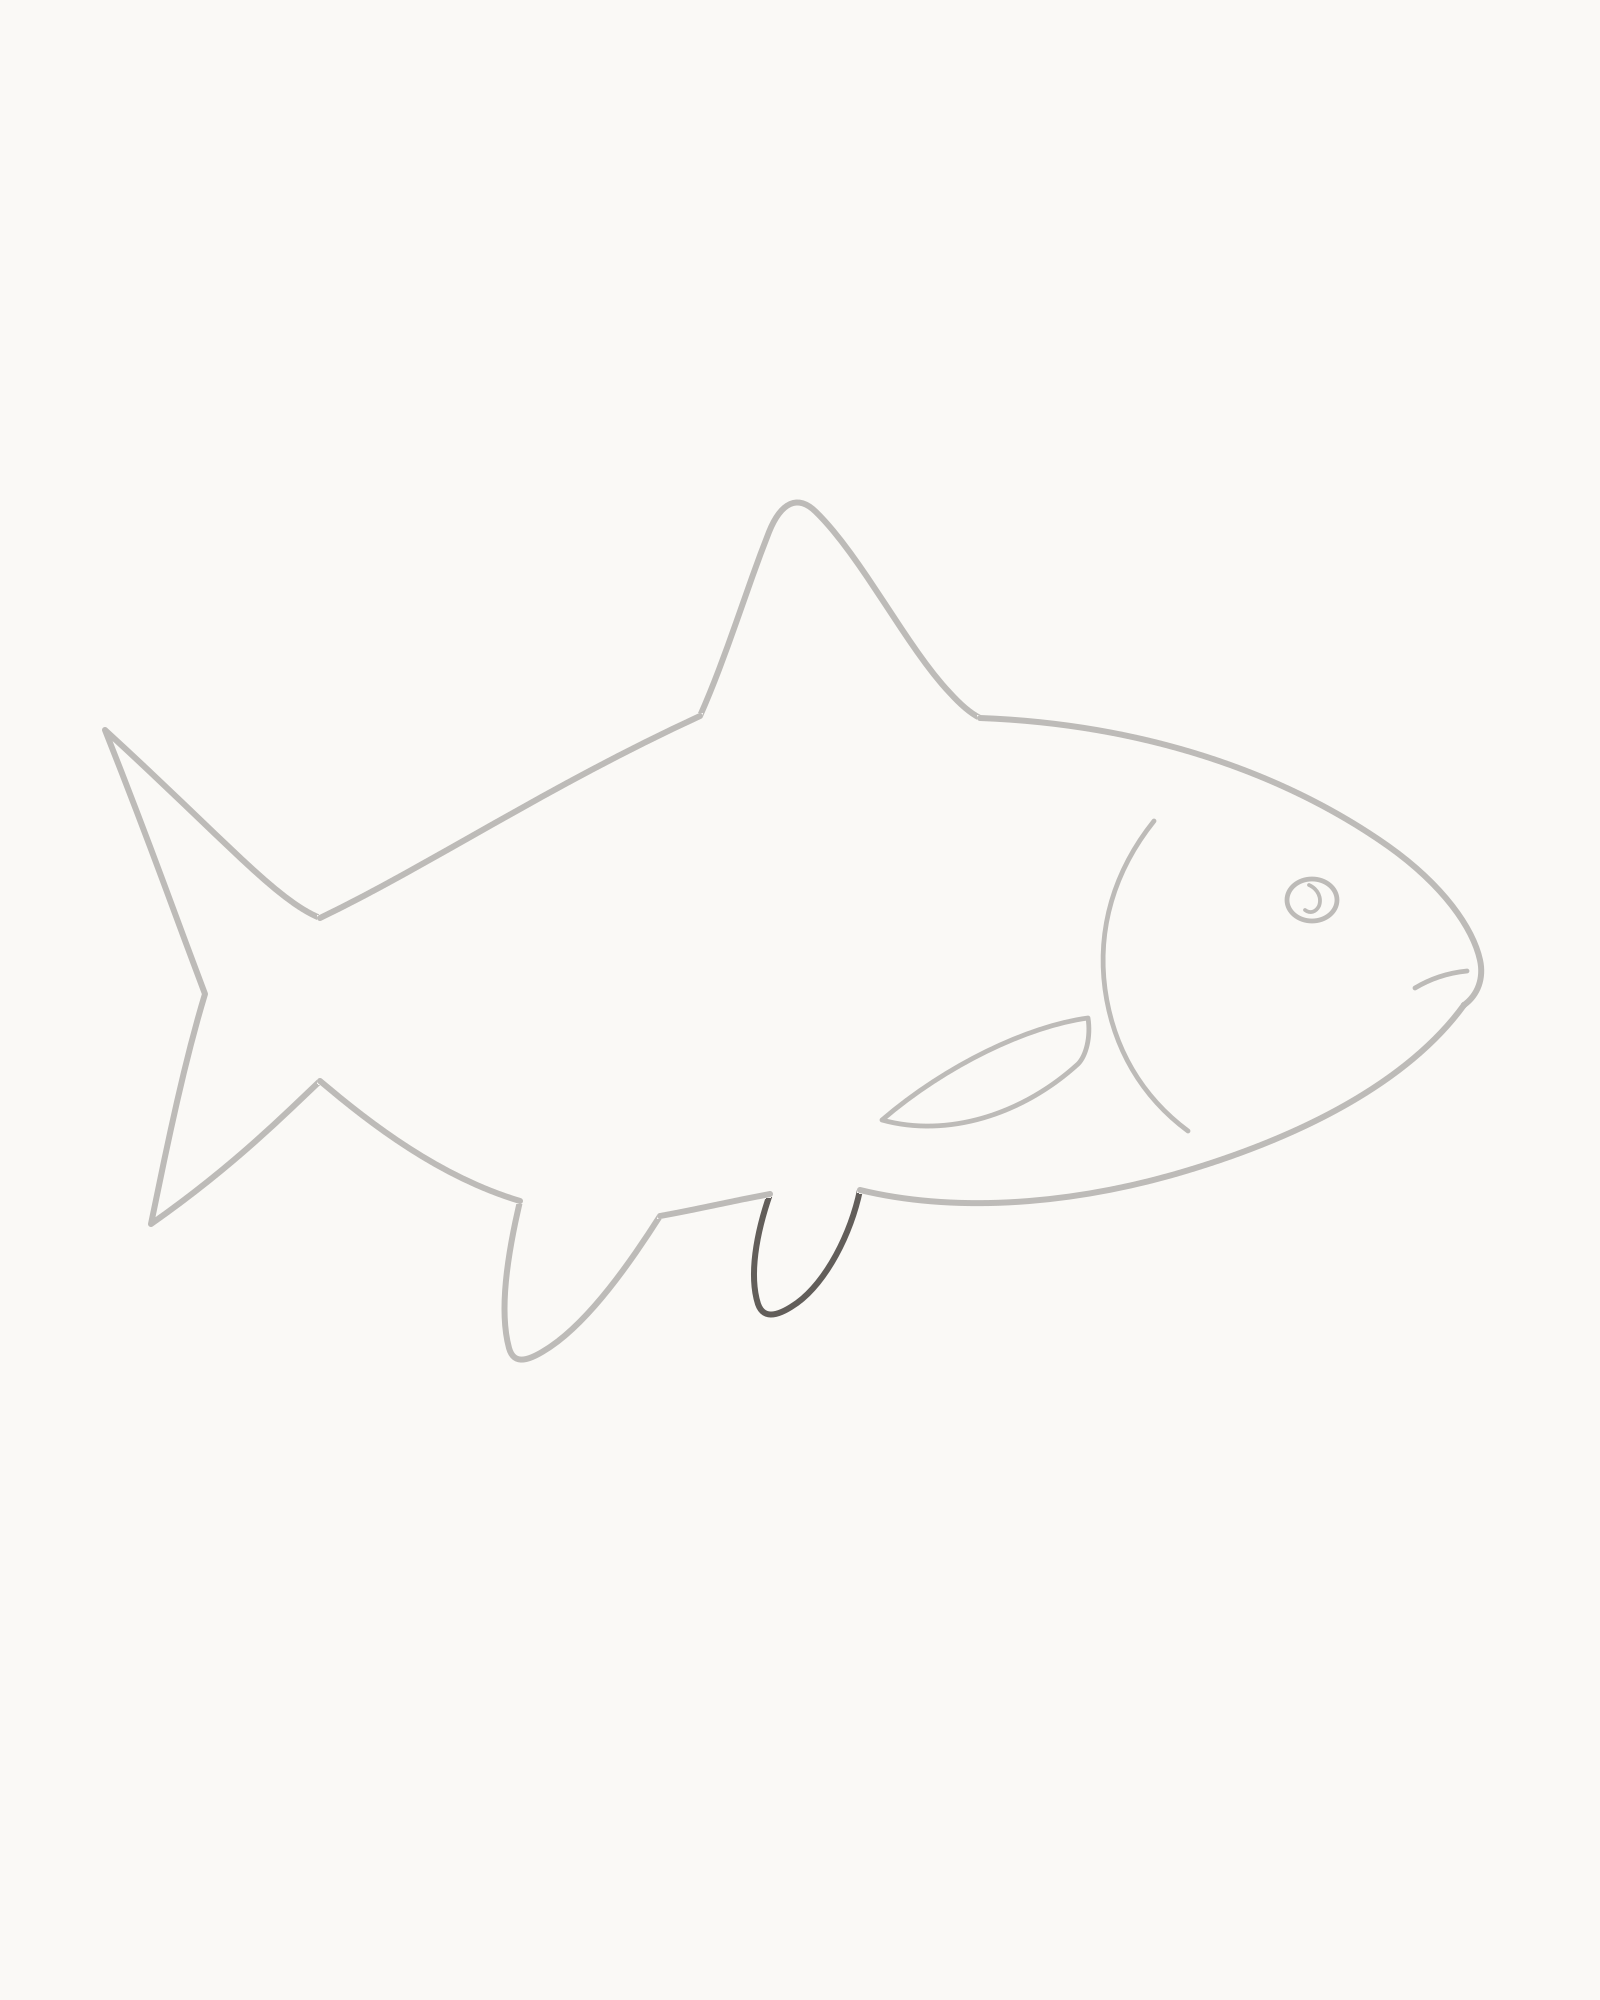
Stage 7 of 8. The small forward pelvic fin completes four separately readable attachments. - Short forward edge
- Asymmetric point
- Longer rear return
Bridge the small lower opening in front of the anal fin. Make a short forward edge, turn through an asymmetric point and bring the longer rear edge back to the second waiting endpoint. Keep this fin smaller than the anal fin.
The two lower fins need a visible stretch of belly between them. Their different sizes, angles and roots are what allow each to be read separately; matching them would make the pair look decorative.
Look for this before moving on: the pelvic fin is attached ahead of the anal fin, it is the smaller of the pair, and an uninterrupted body interval remains visible between their roots.
If it goes wrong: leave the anal fin and belly sections alone. Replace only the newest pelvic edge or point between the fixed opening endpoints.
8. Suggest the surface direction
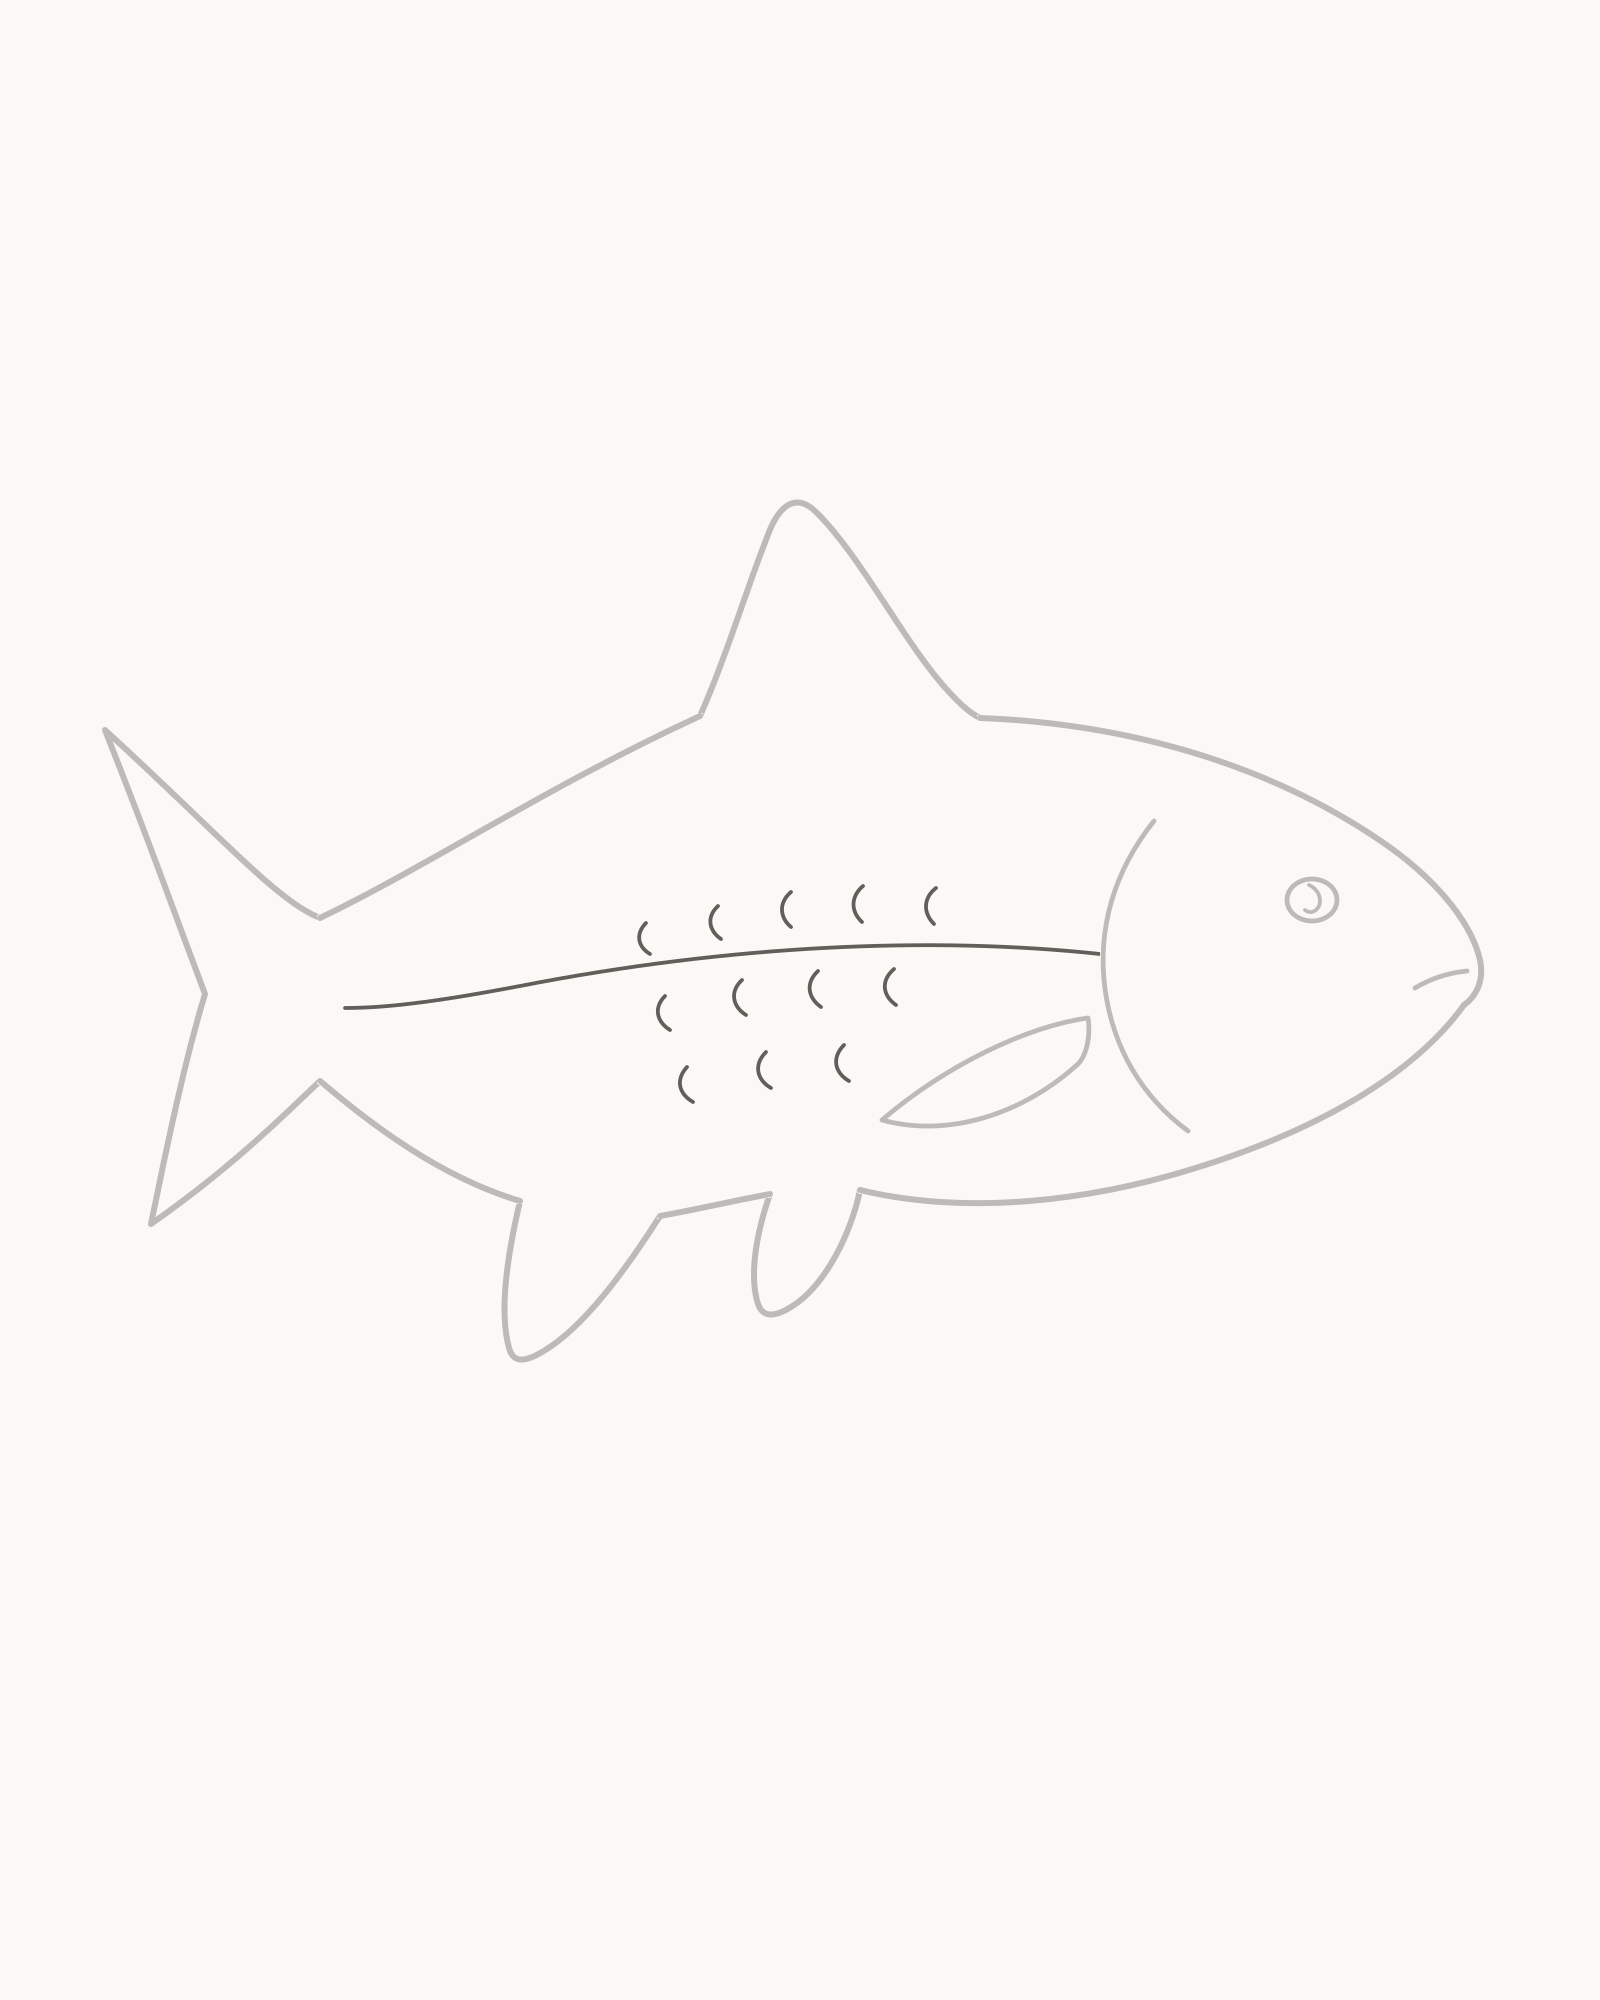
Stage 8 of 8. A lateral line and twelve restrained arcs describe direction without hiding the construction. - Lateral line first
- Three staggered bands
- Twelve partial arcs
- Stop before every root
Add the lateral line first. Begin behind the gill cover and follow the body taper towards the tail, stopping before the narrow tail base. Keep it gently angled rather than ruler-straight.
Next, place twelve partial scale arcs in three short staggered bands through the middle and rear of the body. Let the arcs follow the fish’s curvature and become a little smaller towards the tail. They are sparse direction marks, not a complete armour of scales, and they should avoid the gill, fin roots, outer contour and lateral-line endpoint.
Look for this before moving on: the lateral line reinforces the taper, twelve arcs remain easy to count, the rows are staggered rather than mechanical, and every Stage 1–7 junction stays uncovered and unchanged.
If it goes wrong: remove only the newest line or arc and replace it with the body curve in mind. Never use surface detail to hide a poor tail, gill or fin attachment.


Fix small construction problems
The body looks like a leaf or rugby ball. Compare the flatter back, fuller lower contour and blunt head. Replace the newest section that creates symmetry; do not redraw both sides at once.
The tail looks pasted on. Trace both body contours into the narrow base, then follow each lobe back to that same root. Correct one new tail edge rather than thickening the junction.
The fish has a cartoon expression. Keep the eye small and open and the mouth short. Remove the newest enlarged or curved feature; the outer snout should not move around it.
A fin appears to float. Check that both edges reach their own two endpoints. Repair the missed edge only, without adding a dark oval or knot around the root.
The lower fins look identical. The pelvic fin is smaller and farther forward; the anal fin is larger and farther back. Correct only the newer pelvic contour.
The pectoral fin merges with the gill. Restore a narrow clear interval between them. Shorten the newest pectoral root rather than changing the gill cover.
The scales look like wallpaper. Keep only three short staggered bands and vary the spaces slightly. Remove the newest repeated arcs before they spread across the entire body.
Practise a different fish proportion
On a second sheet, repeat Stages 1–7 at half size but make the body slightly shorter and deeper. Preserve the same attachment order, narrow tail base and four visible fins. Leave off the scale arcs until every root is clear. Comparing the two silhouettes will show how much variety can come from changing the large body proportions while keeping the construction logic stable.
For another animal built from carefully attached parts, try How to Draw a Bird. Browse the complete practical collection from How to Draw. Examples of how artists have treated fish as drawing subjects remain in the separate Fish Drawings gallery.
Frequently Asked Questions
What is the easiest way to start drawing a fish?
Begin with one long permanent body contour and leave planned openings for the tail and outer fins. A strict side view keeps the taper and attachment points visible, while the separate placement cue helps reserve enough paper around the subject.
What simple shapes make up this fish drawing?
Think of an unequal spindle-like body, a narrow tail base, two soft tail lobes and four tapered fin forms. The lesson does not draw temporary ovals or triangles; every visible contour remains part of the finished fish.
Where should the fins go on a fish drawing?
In this side view, the dorsal fin bridges the back, the anal fin sits on the lower rear, the pectoral fin begins inside the body just behind the gill, and the smaller pelvic fin attaches along the lower body ahead of the anal fin. Other species vary, so treat these positions as landmarks for this drawing rather than a universal diagram.
How do I draw fish scales without making the body too busy?
Place the lateral line first, then add only twelve partial arcs in three staggered bands. Follow the body’s curve, reduce the arcs towards the tail and stop before every fin or gill junction.
How can I make a simple fish look natural without shading?
Use asymmetry and attachment instead of tone. Keep the back and belly unequal, narrow the body into the tail base, vary the tail lobes and give every fin a readable root. Sparse directional marks are enough to suggest the surface.
Does a beginner need a grid to draw this fish?
No. The optional grid and x55%/y49% target can help place the first body, but they stay outside the drawing and can be switched off. The permanent contours are copied by comparing curves and spaces, not by tracing cells.
Can I use an ordinary pencil and printer paper?
Yes. One pointed HB or No. 2 pencil on plain copier paper is sufficient. A common mechanical pencil also works; multiple graphite grades and textured art sheets are unnecessary for this line-only result.
Should I erase the first outline or shade the finished fish?
No. The first body marks are final contours, and every later stage adds to them. Use an eraser only for the newest local mistake. Stage 8 finishes with the lateral line and sparse scale arcs, not shading or darker retracing.
References
- The Fisheries Blog, How to draw a fish: Fins and all. View source
- John Muir Laws, How to Draw Fish I. View source
- EasyDrawingTips, How to Draw a Fish in 10 Steps (Perch). View source
More DRAWING Guides

How to Draw a Rose: A Step by Step Guide

How to Draw a Tree: A Step by Step Guide

How to Draw Eyes: A Step by Step Guide

How to Draw Leaves: A Step by Step Guide

How to Draw Autumn Leaves: A Step by Step Guide

How to Draw Flowers: A Step by Step Guide

How to Draw a Lily: A Step by Step Guide

How to Draw a Sunflower: A Step by Step Guide

How to Draw a Tulip: A Step by Step Guide

How to Draw a Hibiscus: A Step by Step Guide

How to Draw a Daisy: A Step by Step Guide
