



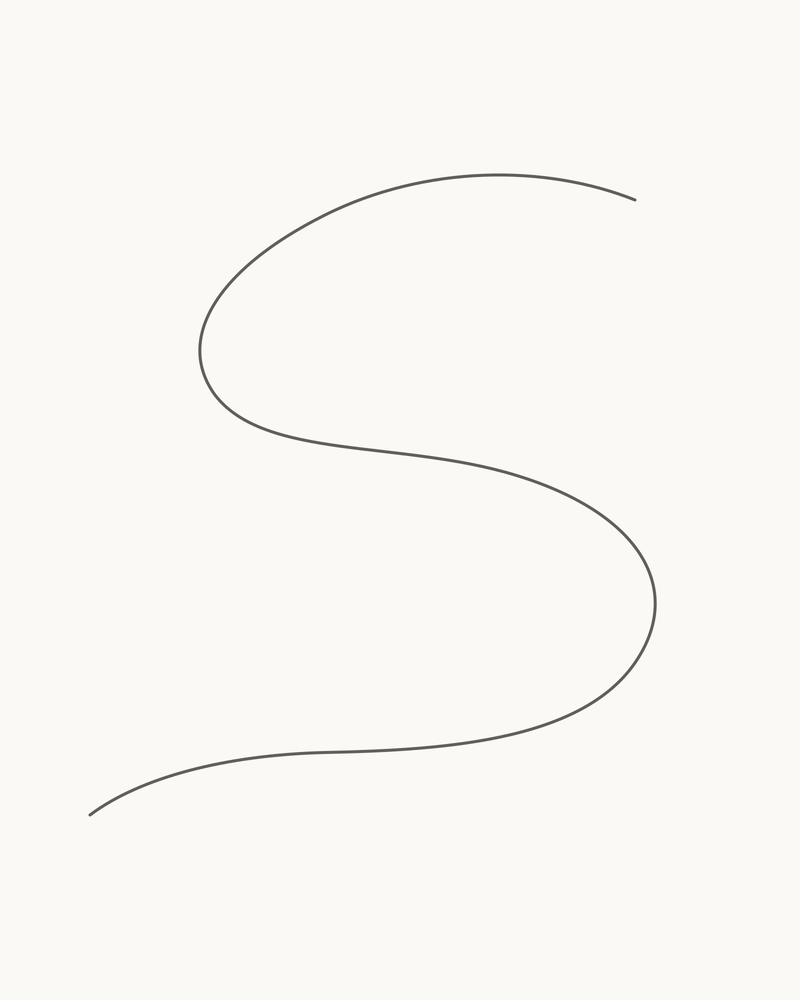
Draw one complete snake in an S curve
Draw a complete snake in a loose, flowing S curve, with a tapered tail, an attached wedge-shaped head and just enough pattern and direction marks to turn the body through space. The result is a restrained pencil outline viewed from slightly above, with the head facing upper-right and no body overlap to untangle.
Difficulty: Beginner to intermediate
Time: Allow about 35–50 minutes; this is an untested estimate rather than a timed drawing session.
Medium: A pointed HB or No. 2 pencil on smooth, unlined paper.
The two long body edges are the main challenge. Work slowly enough to compare the space between them through every turn. Each line is intended to remain in the finished drawing, so there is no hidden centreline and no final retracing step.
A snake reads as one connected movement, not as several bends placed side by side. The Smithsonian National Zoo describes snake motion as a long body shifting weight from curve to curve in a fluid wave. That observation is useful even in a still drawing: let each arc lead into the next, then keep the second contour responsive to the first.
This lesson makes a species-neutral snake rather than a cobra, rattlesnake or python. The small surface marks help the body turn in space, but they are not a claim about one species' exact scales or pattern.
Materials
- A pointed HB or No. 2 pencil. If you prefer a consistent narrow line, a common mechanical pencil will also work.
- One unlined sheet turned vertically. Smooth copier paper is enough for practising this sequence.
- A clean eraser, reserved for the most recent faulty curve.
- A pencil sharpener.
- Optional scrap paper for rehearsing one long S curve or the small forked tongue.
- An optional grid or placement cue if you want help judging the crop. These guides stay outside the drawing.
You do not need several graphite grades, charcoal, a blending stump, tracing paper or specialist drawing paper. Keep the pencil pressure light to moderate so the long edges stay controlled rather than heavy.
Before you draw
Turn the page vertically. The drawing will occupy most of the centre, while leaving clear paper around the head, tongue and tail. The head sits high and to the right; the tail finishes low and to the left. The body never crosses itself.
Use the optional 8 × 10 grid to compare large positions, or work from the percentages alone. The first line starts around x80% / y21% and ends near x18% / y81%. Think of those as two placement targets, not points that must be marked on the paper.
The notional light comes from the upper left. Most of the drawing remains open line work; only the last stage adds a few short strokes on lower-right-facing edges. Do not press harder on the outline to create tone.
1. Draw the outside S contour
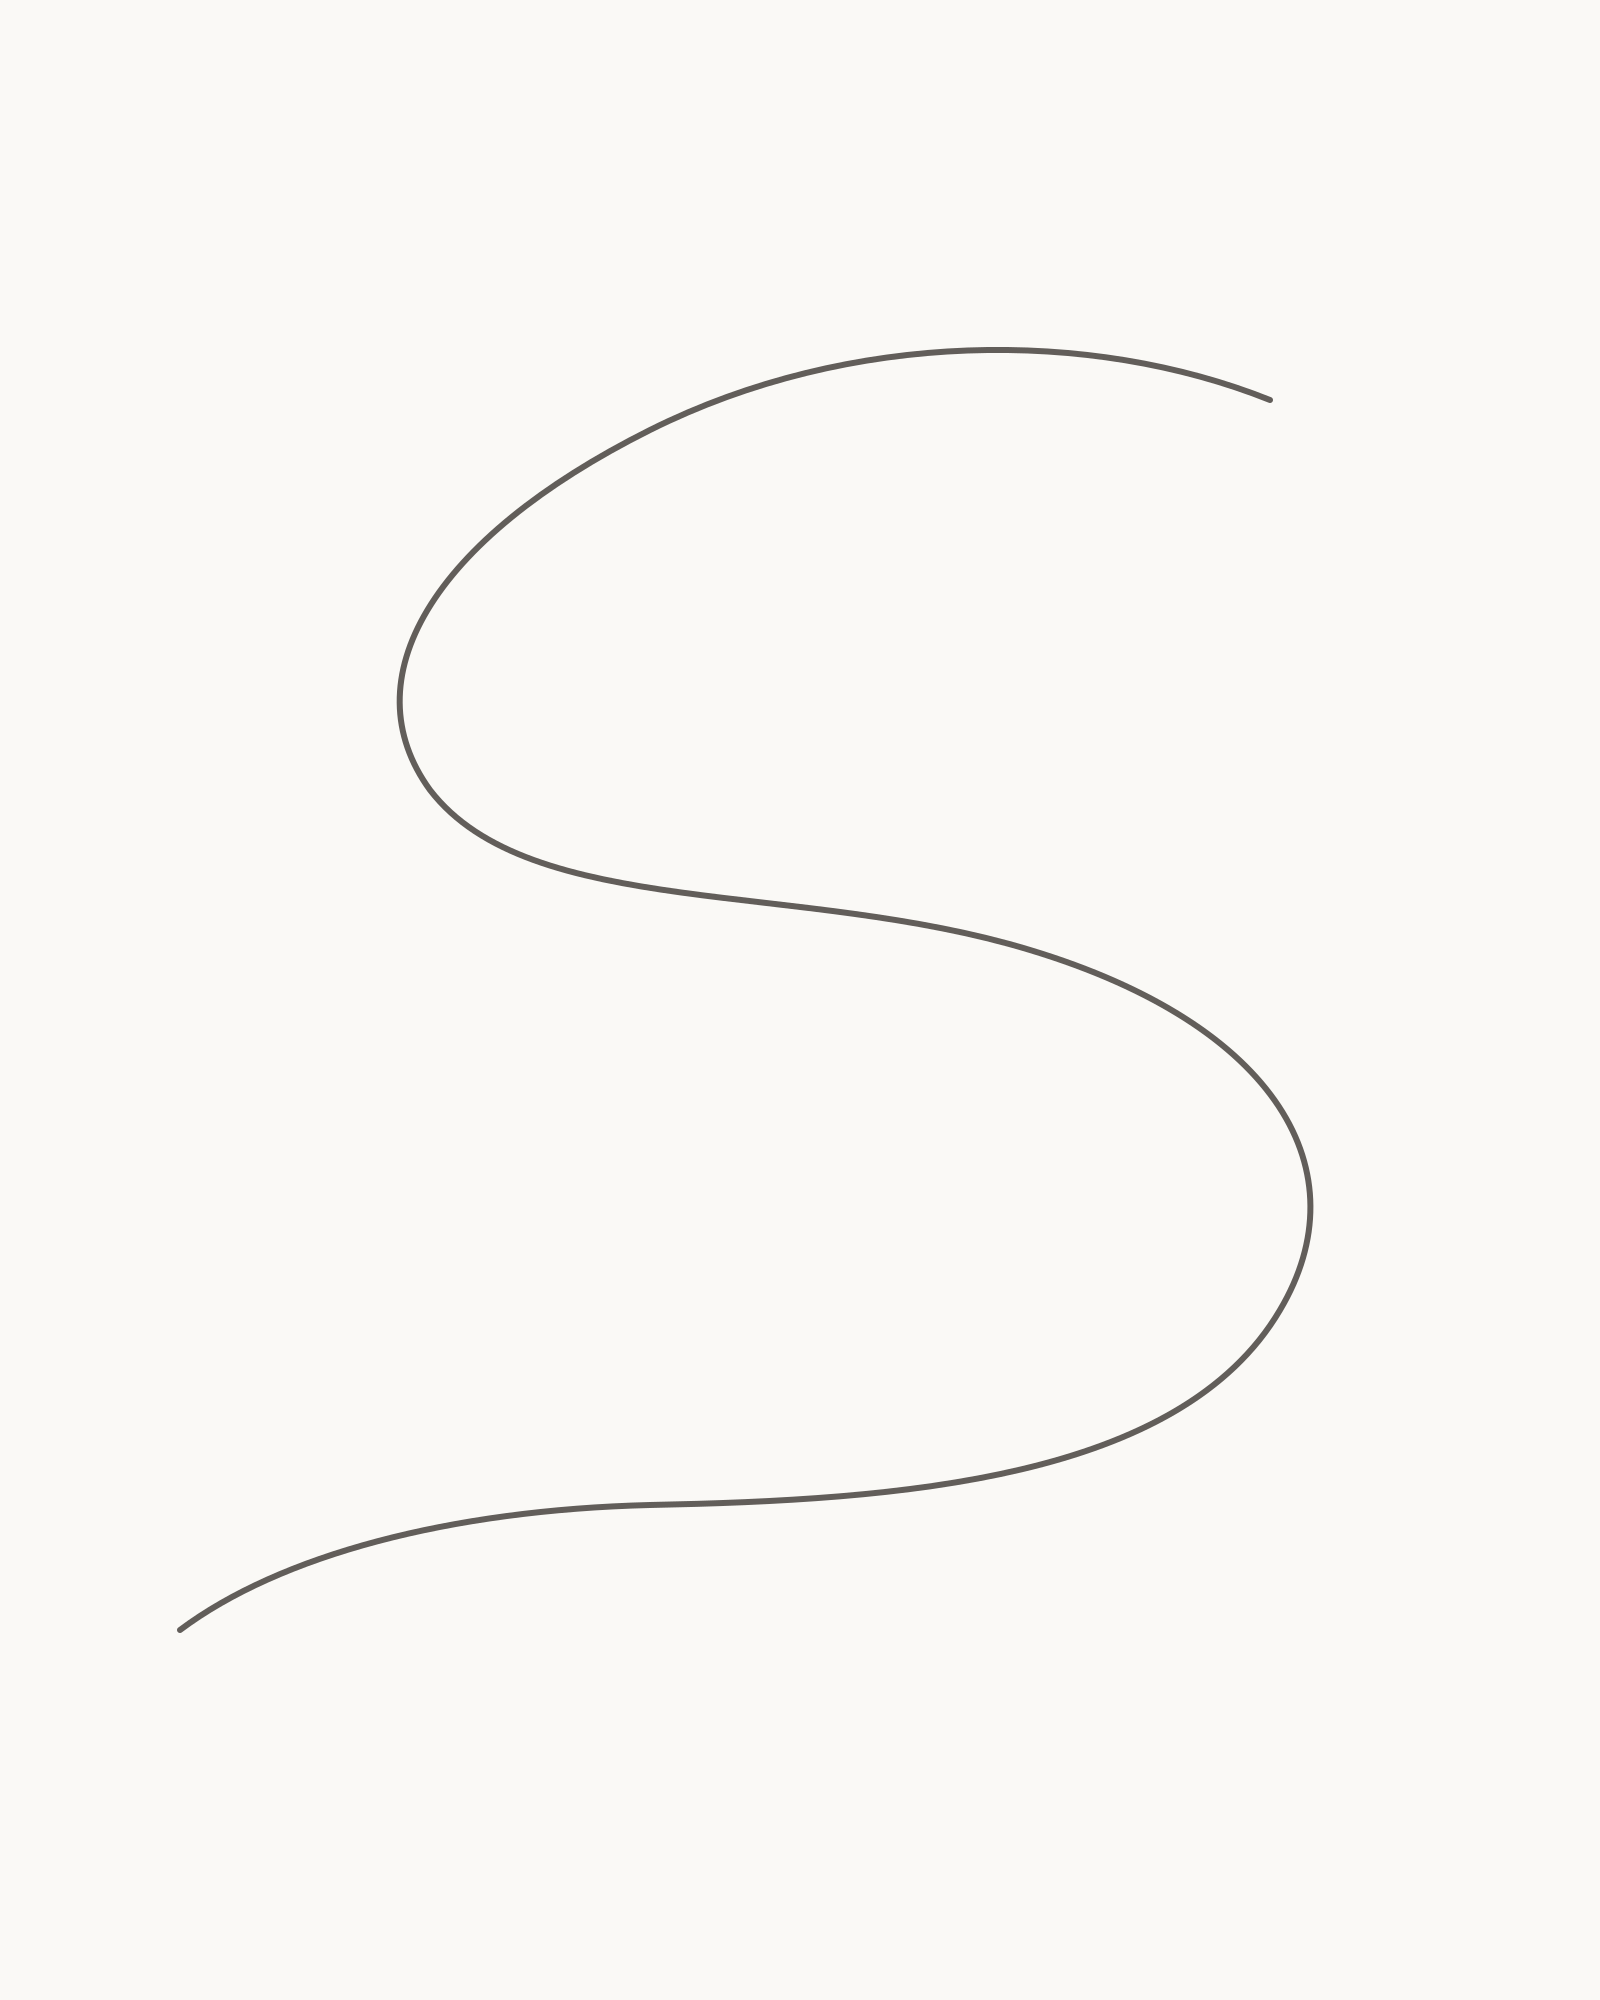
Stage 1 of 8. One continuous outside edge fixes the crop, rhythm and eventual tail point. 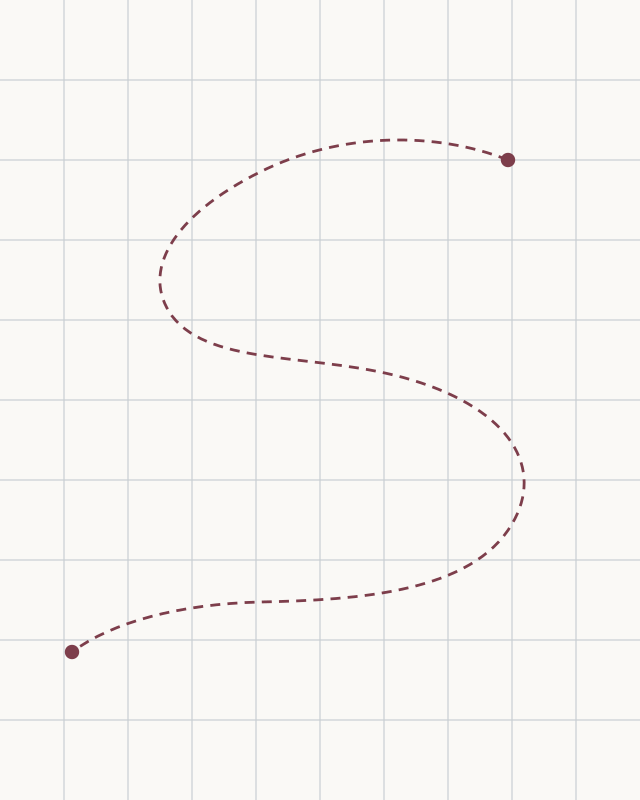
Placement cue: start the head opening around x80% / y21% and finish the tail near x18% / y81%. Keep the cue off the drawing. - Upper-right head opening
- Compact first turn
- Broad second turn
- Taper to lower-left tail
Begin at the upper-rear opening where the head will later join the neck, around x80% / y21%. Lead the line left and down into the first broad turn. Let it swing back towards the right through a larger middle arc, then carry it down and left while gradually narrowing the motion towards the tail endpoint near x18% / y81%.
Make this one permanent outside edge. The three arcs should differ: the upper turn is compact, the middle turn opens more widely, and the final run settles into a narrow taper. Avoid making three matching scallops or pausing at each change of direction.
Look for this before moving on: both placement targets have comfortable clearance from the page edges, the two main turns are easy to distinguish, the middle does not go straight, and the final third becomes progressively narrower in movement.
If it goes wrong: keep the stable portion of the line. Replace only the newest interval between two points where the curve is already flowing; do not erase the complete S because of one flat, hook or kink.
2. Return with the inside contour
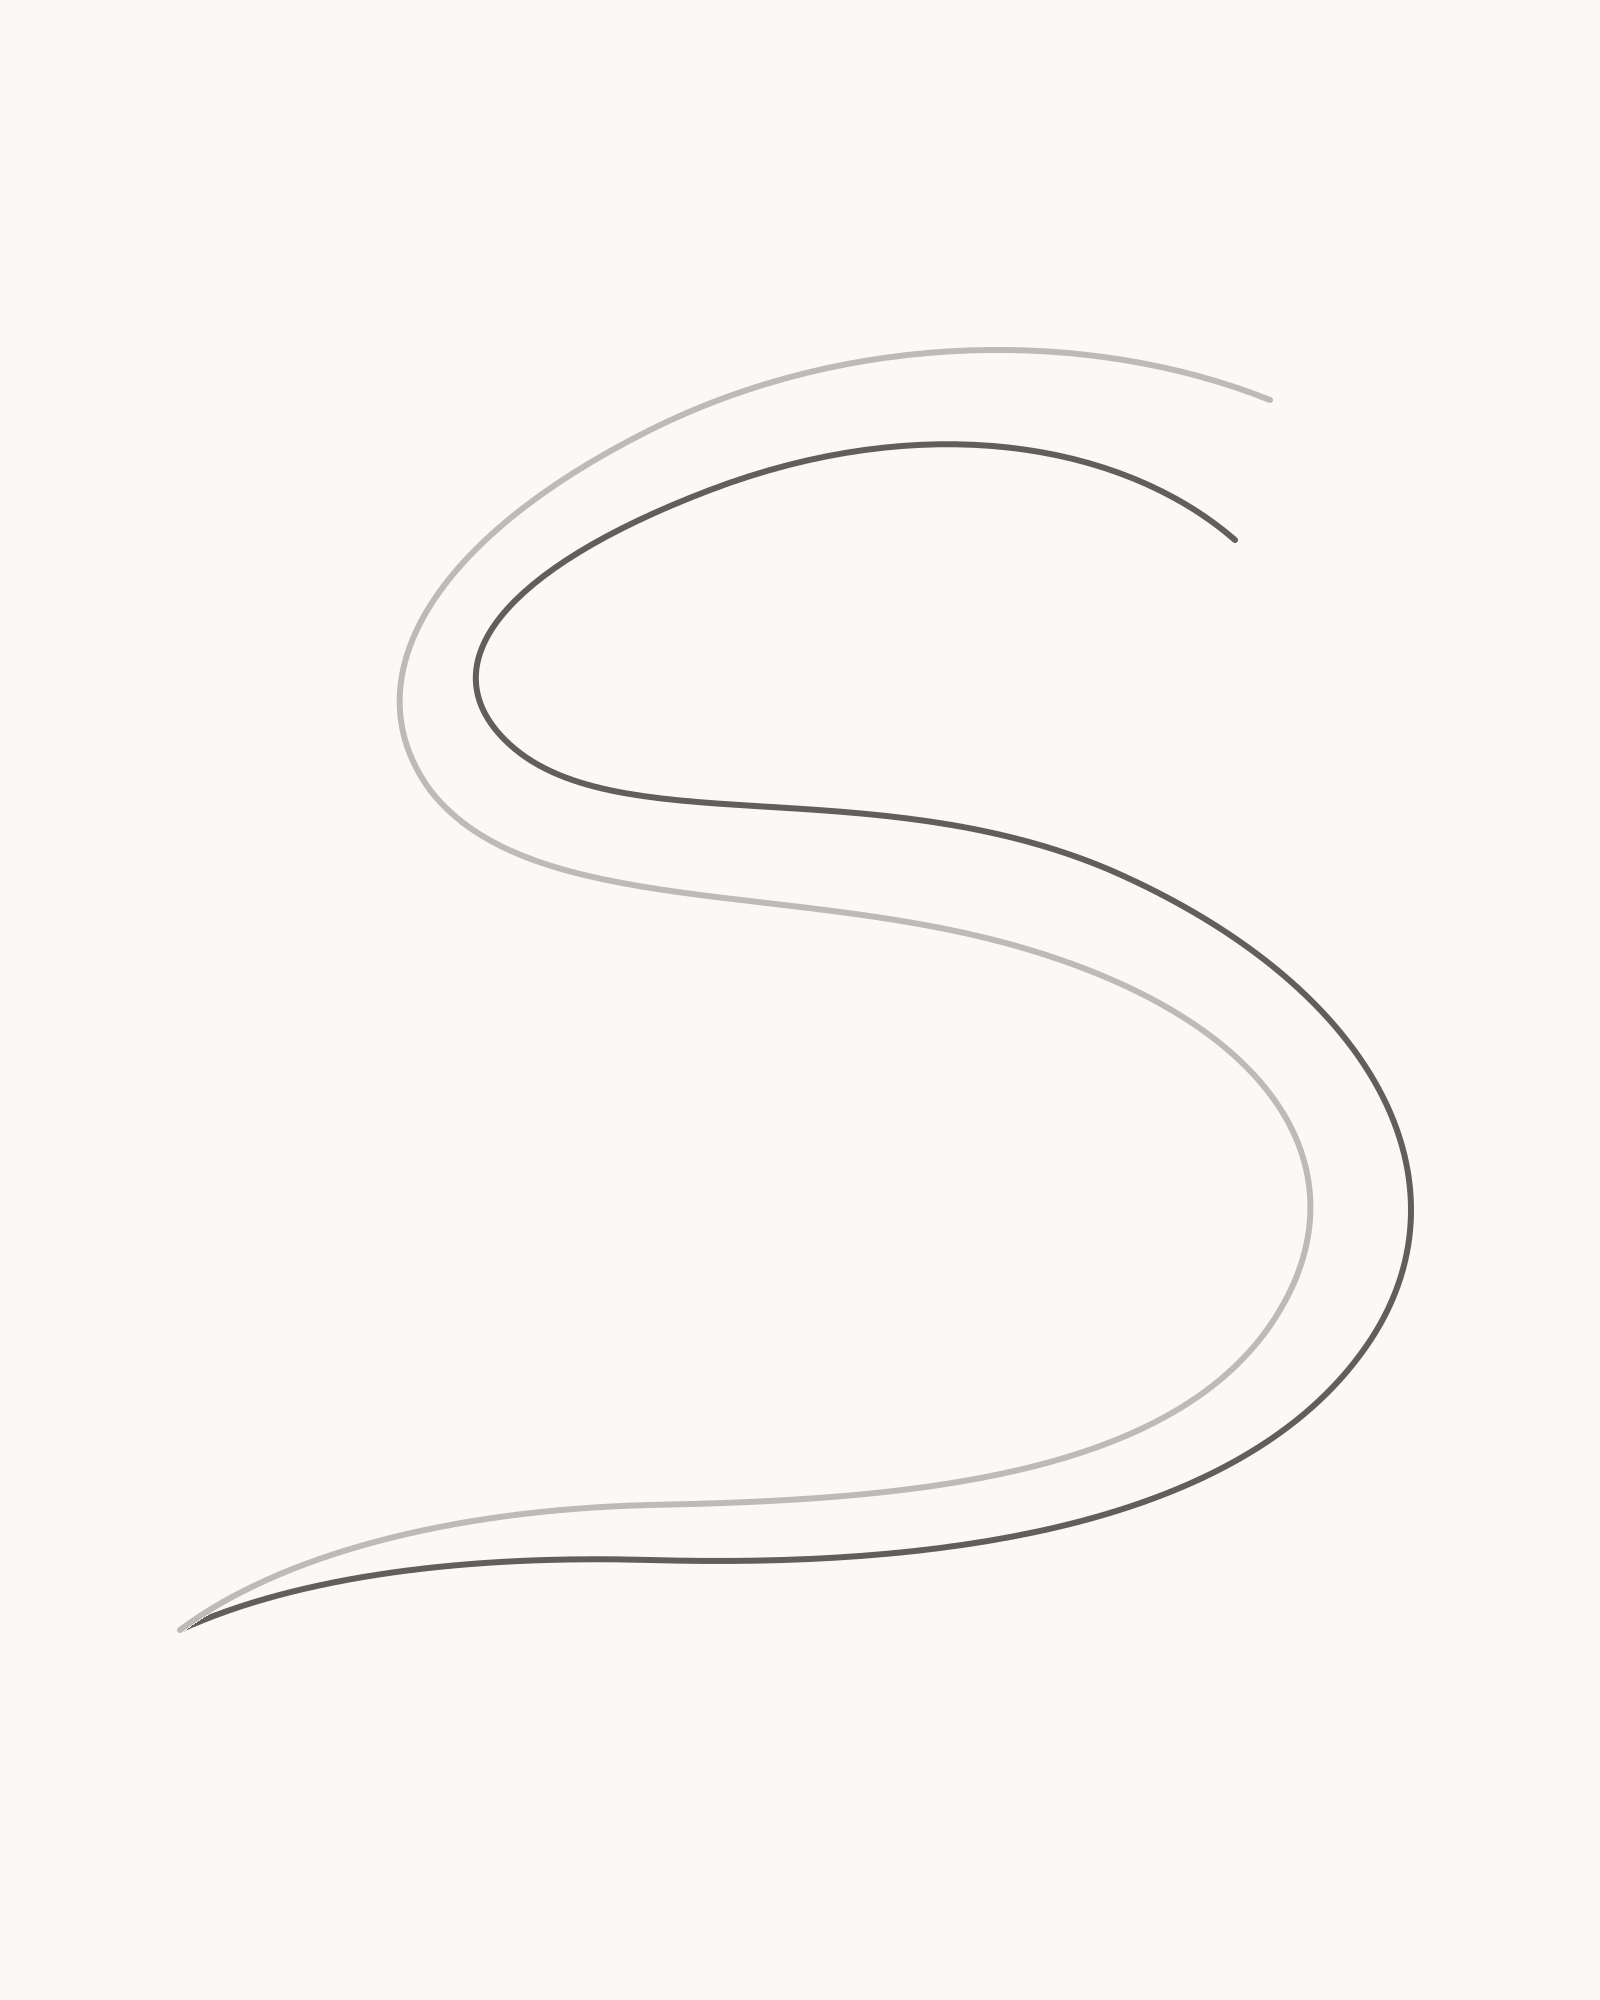
Stage 2 of 8. The returning contour adds variable body width while preserving the first S exactly. - Shared tail point
- Lower tail
- Lower body
- Second turn
- Waist and first turn
- Lower head opening
Start at the exact tail point you just made. Work back in this order: follow the lower tail, open the space through the lower body, round the broad second turn, narrow through the middle waist, round the first turn, then stop at the lower-rear head opening.
This second contour is not a fixed parallel copy. Bring it closer to the first line as it approaches the tail, allow a fuller width through the middle body and narrow it modestly through the waist. Keep looking across the blank body interior rather than staring only at your pencil point.
Look for this before moving on: both contours meet at one clean tail tip, never touch or cross elsewhere, and create gradual width changes instead of a uniform hose or a series of pinches. Two separate endpoints remain ready for the head.
If it goes wrong: leave the Stage 1 edge and shared tail point where they are. Remove only the newest faulty part of the inside contour, then reconnect it between two trustworthy points with the neighbouring body widths as your guide.
3. Close the head shape
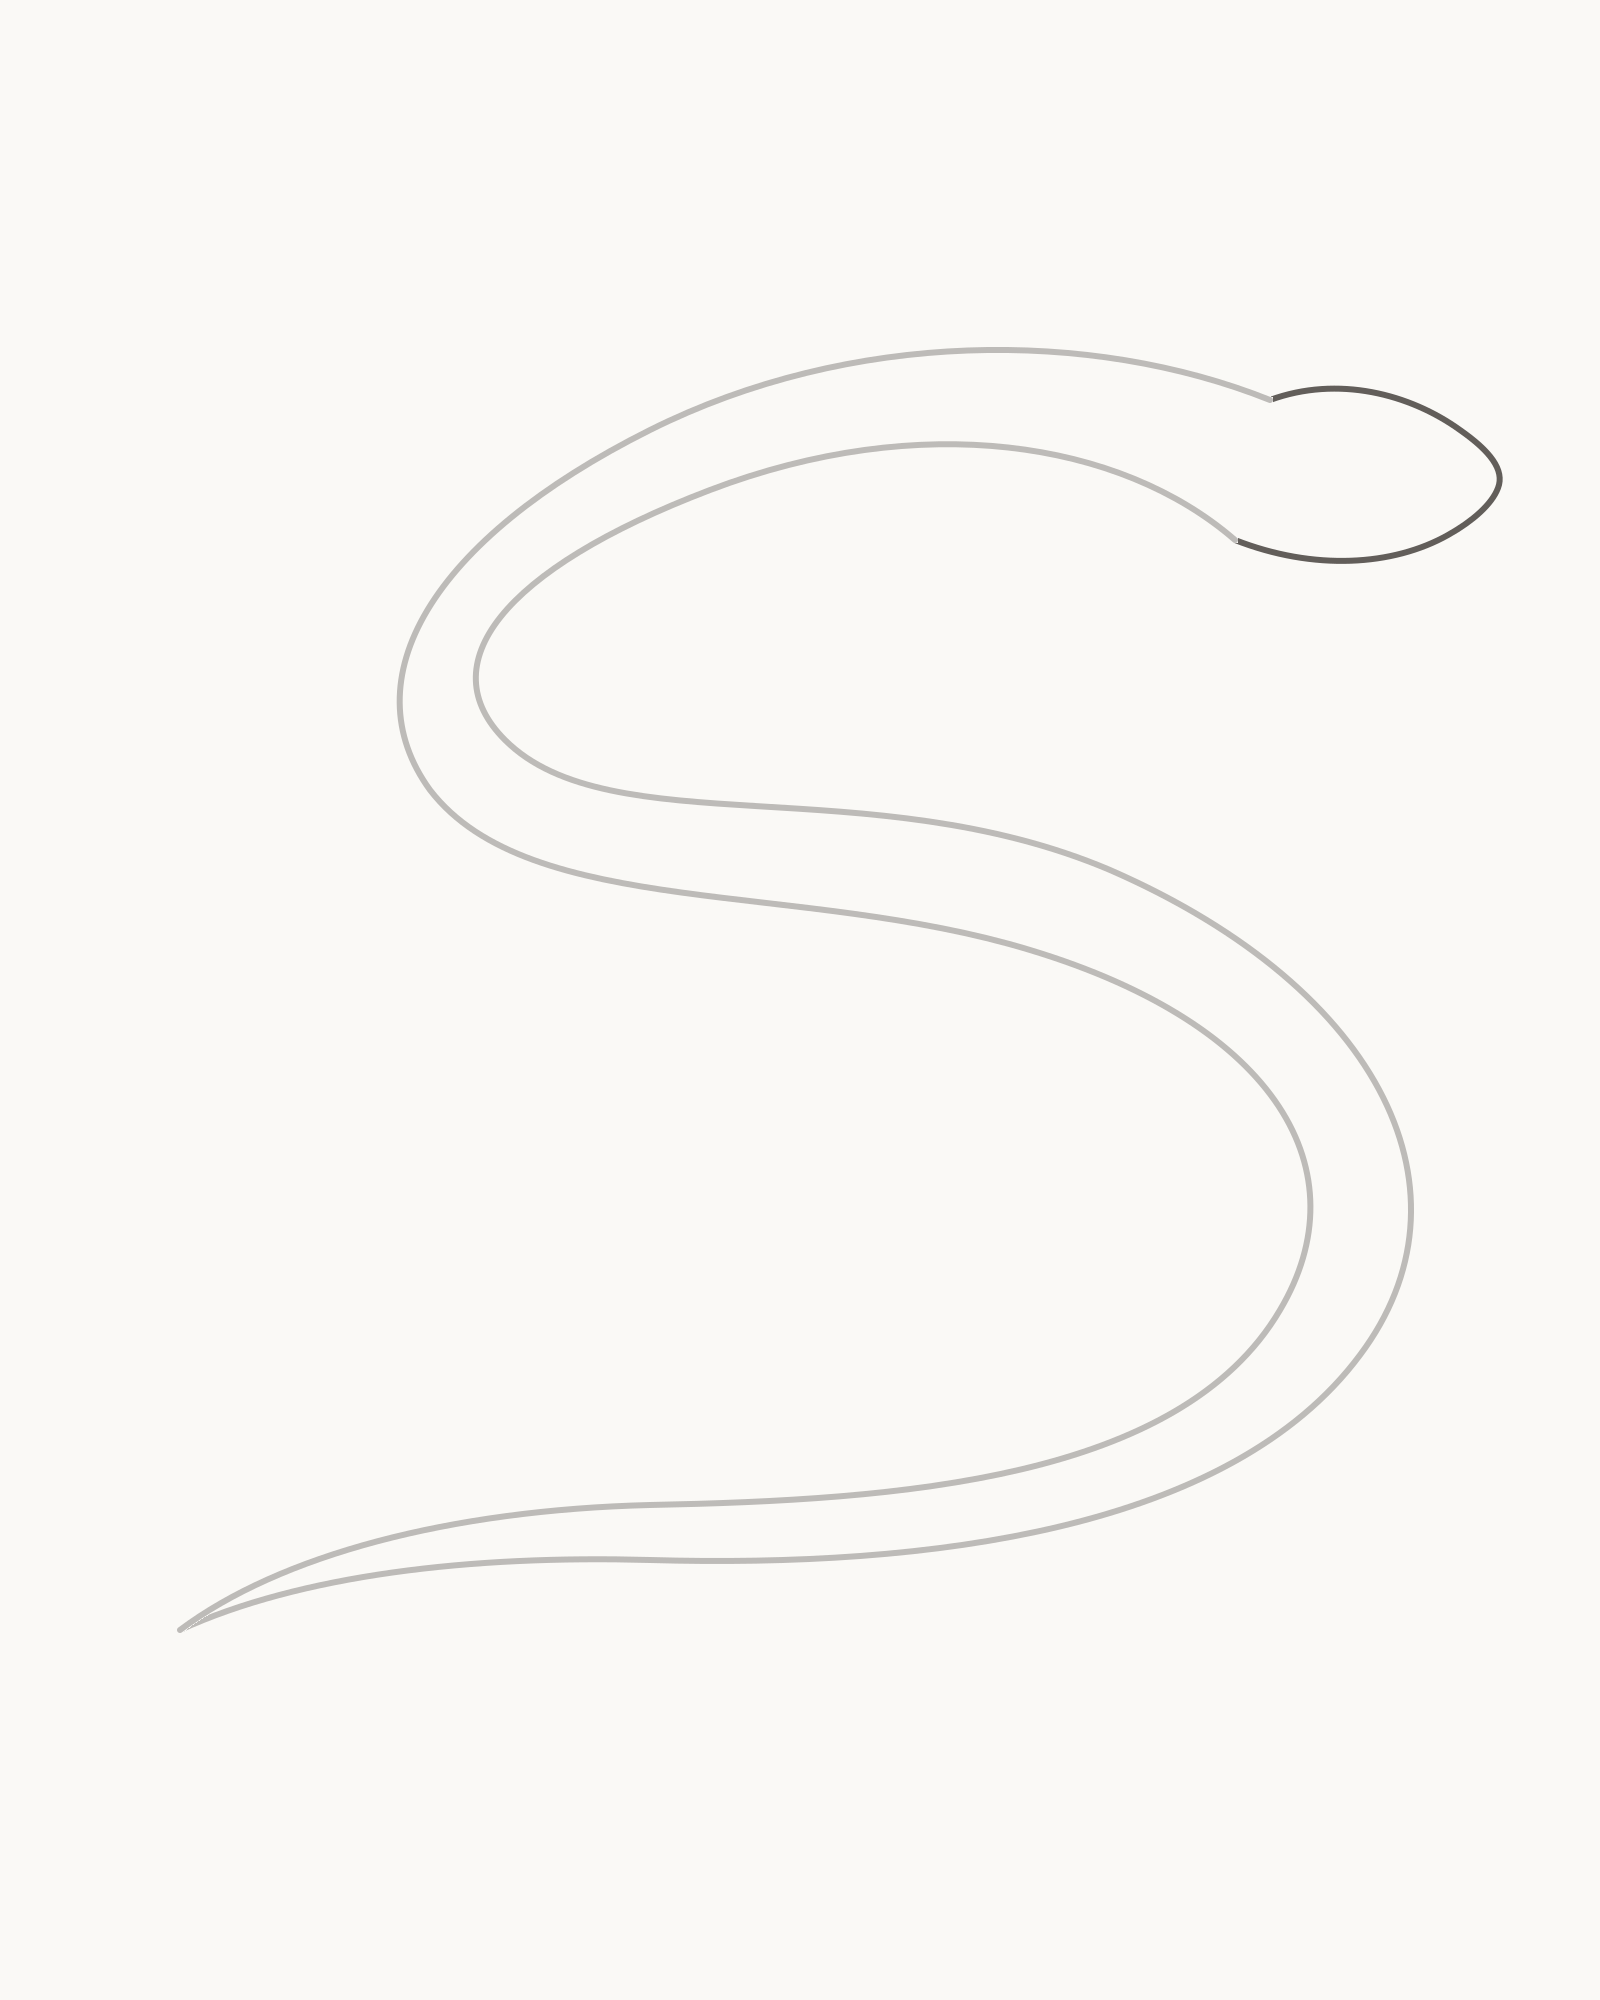
Stage 3 of 8. A fuller brow, blunt snout and shallow jaw join the two retained neck endpoints. - Fixed upper endpoint
- Fuller brow
- Blunt snout and shallow jaw
- Fixed lower endpoint
Use the two waiting neck endpoints as fixed anchors. From the upper one, draw a slightly fuller brow towards the upper-right. Round into a blunt, asymmetric snout, turn through a shallower lower jaw and return to the lower neck endpoint.
The head should extend only about one neck-width beyond its roots. Keep it low rather than circular. The brow can be a little more generous than the jaw, but the join into both body contours must remain smooth and uninterrupted.
Look for this before moving on: the head is a low wedge attached at both fixed neck endpoints, the snout is blunt rather than pointed, and there is no collar, gap, round bump or sudden width change at the neck.
If it goes wrong: preserve both body contours and their endpoints. Replace only the new head segment between those anchors; adjusting one brow or jaw interval is safer than moving the neck to accommodate it.
4. Place the eye and nostril
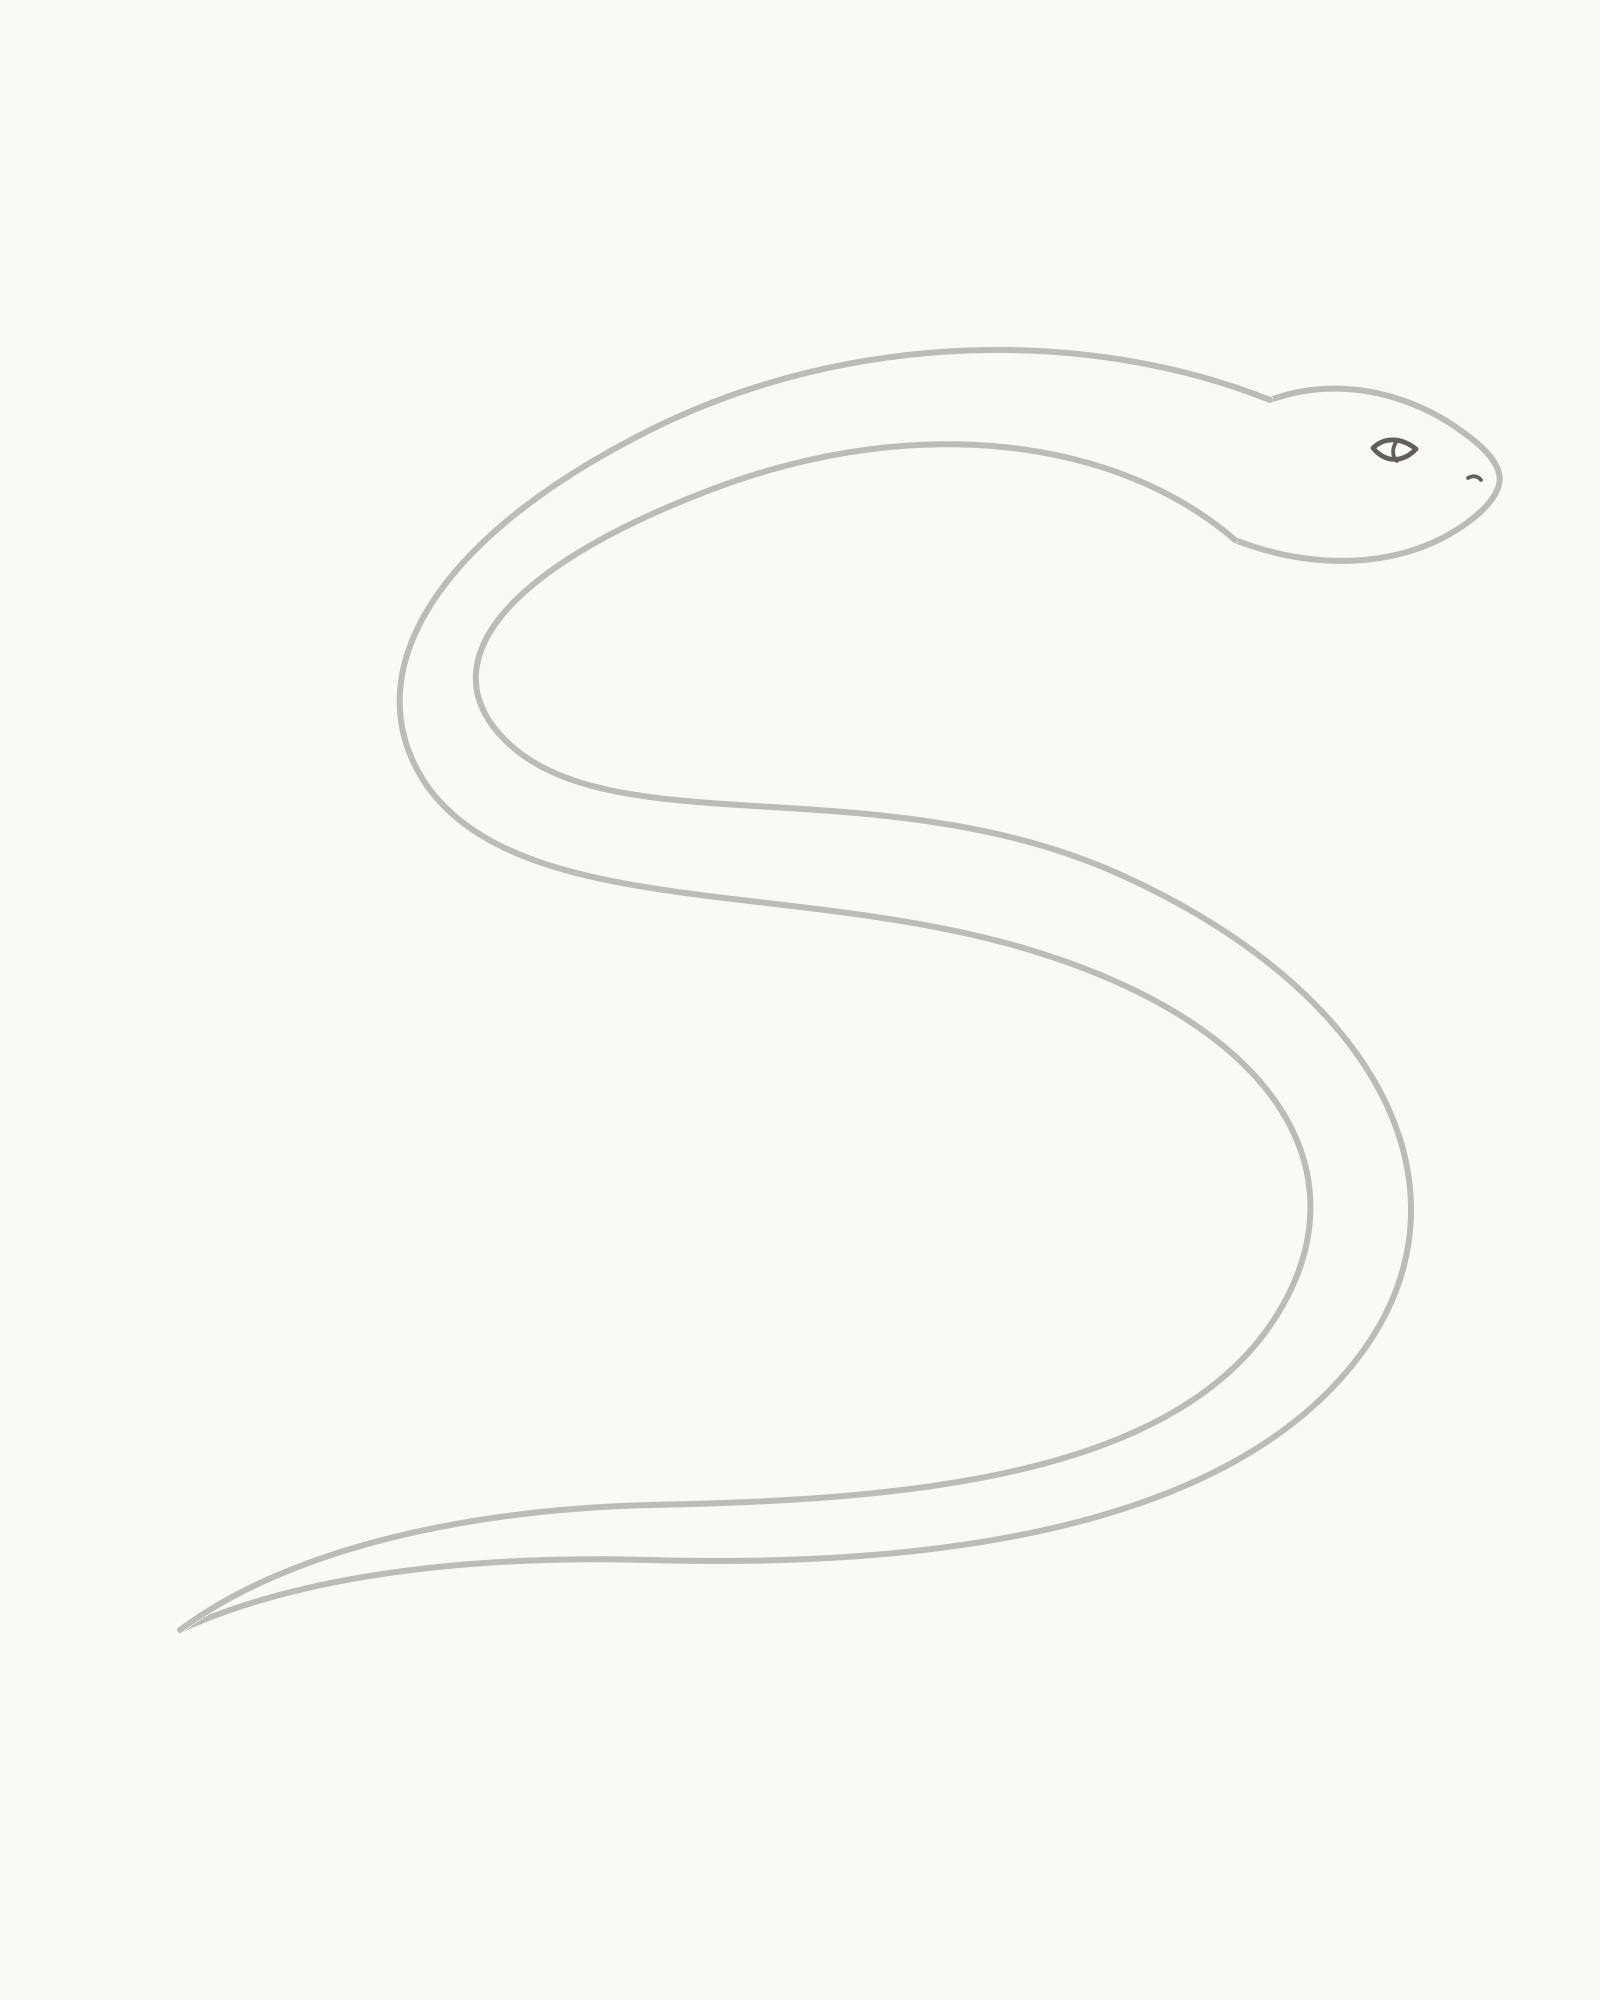
Stage 4 of 8. A compact eye and subordinate nostril establish the upper-right head direction. - Small near eye
- Tiny open highlight
- Understated nostril
Put one small almond-shaped eye above the head's midline, closer to the brow than the jaw. Add a restrained dark pupil while leaving a tiny point of paper open. Then place one small nostril forward and slightly below the eye.
Only the near eye is visible in this viewpoint. Real snakes have a transparent scale, often called a spectacle, covering the eye rather than movable eyelids; for this simple drawing, the compact almond and pupil are enough. Keep the nostril subordinate so the two marks direct the head without turning into a large cartoon face.
Look for this before moving on: the eye and nostril sit fully inside the head, point the face towards the upper-right, and remain small in relation to the snout. The eye retains its tiny open highlight.
If it goes wrong: do not reshape the head around an oversized feature. Remove only the newest eye or nostril mark and replace it smaller, using the brow, snout and head midline as local landmarks.
5. Add the mouth and tongue
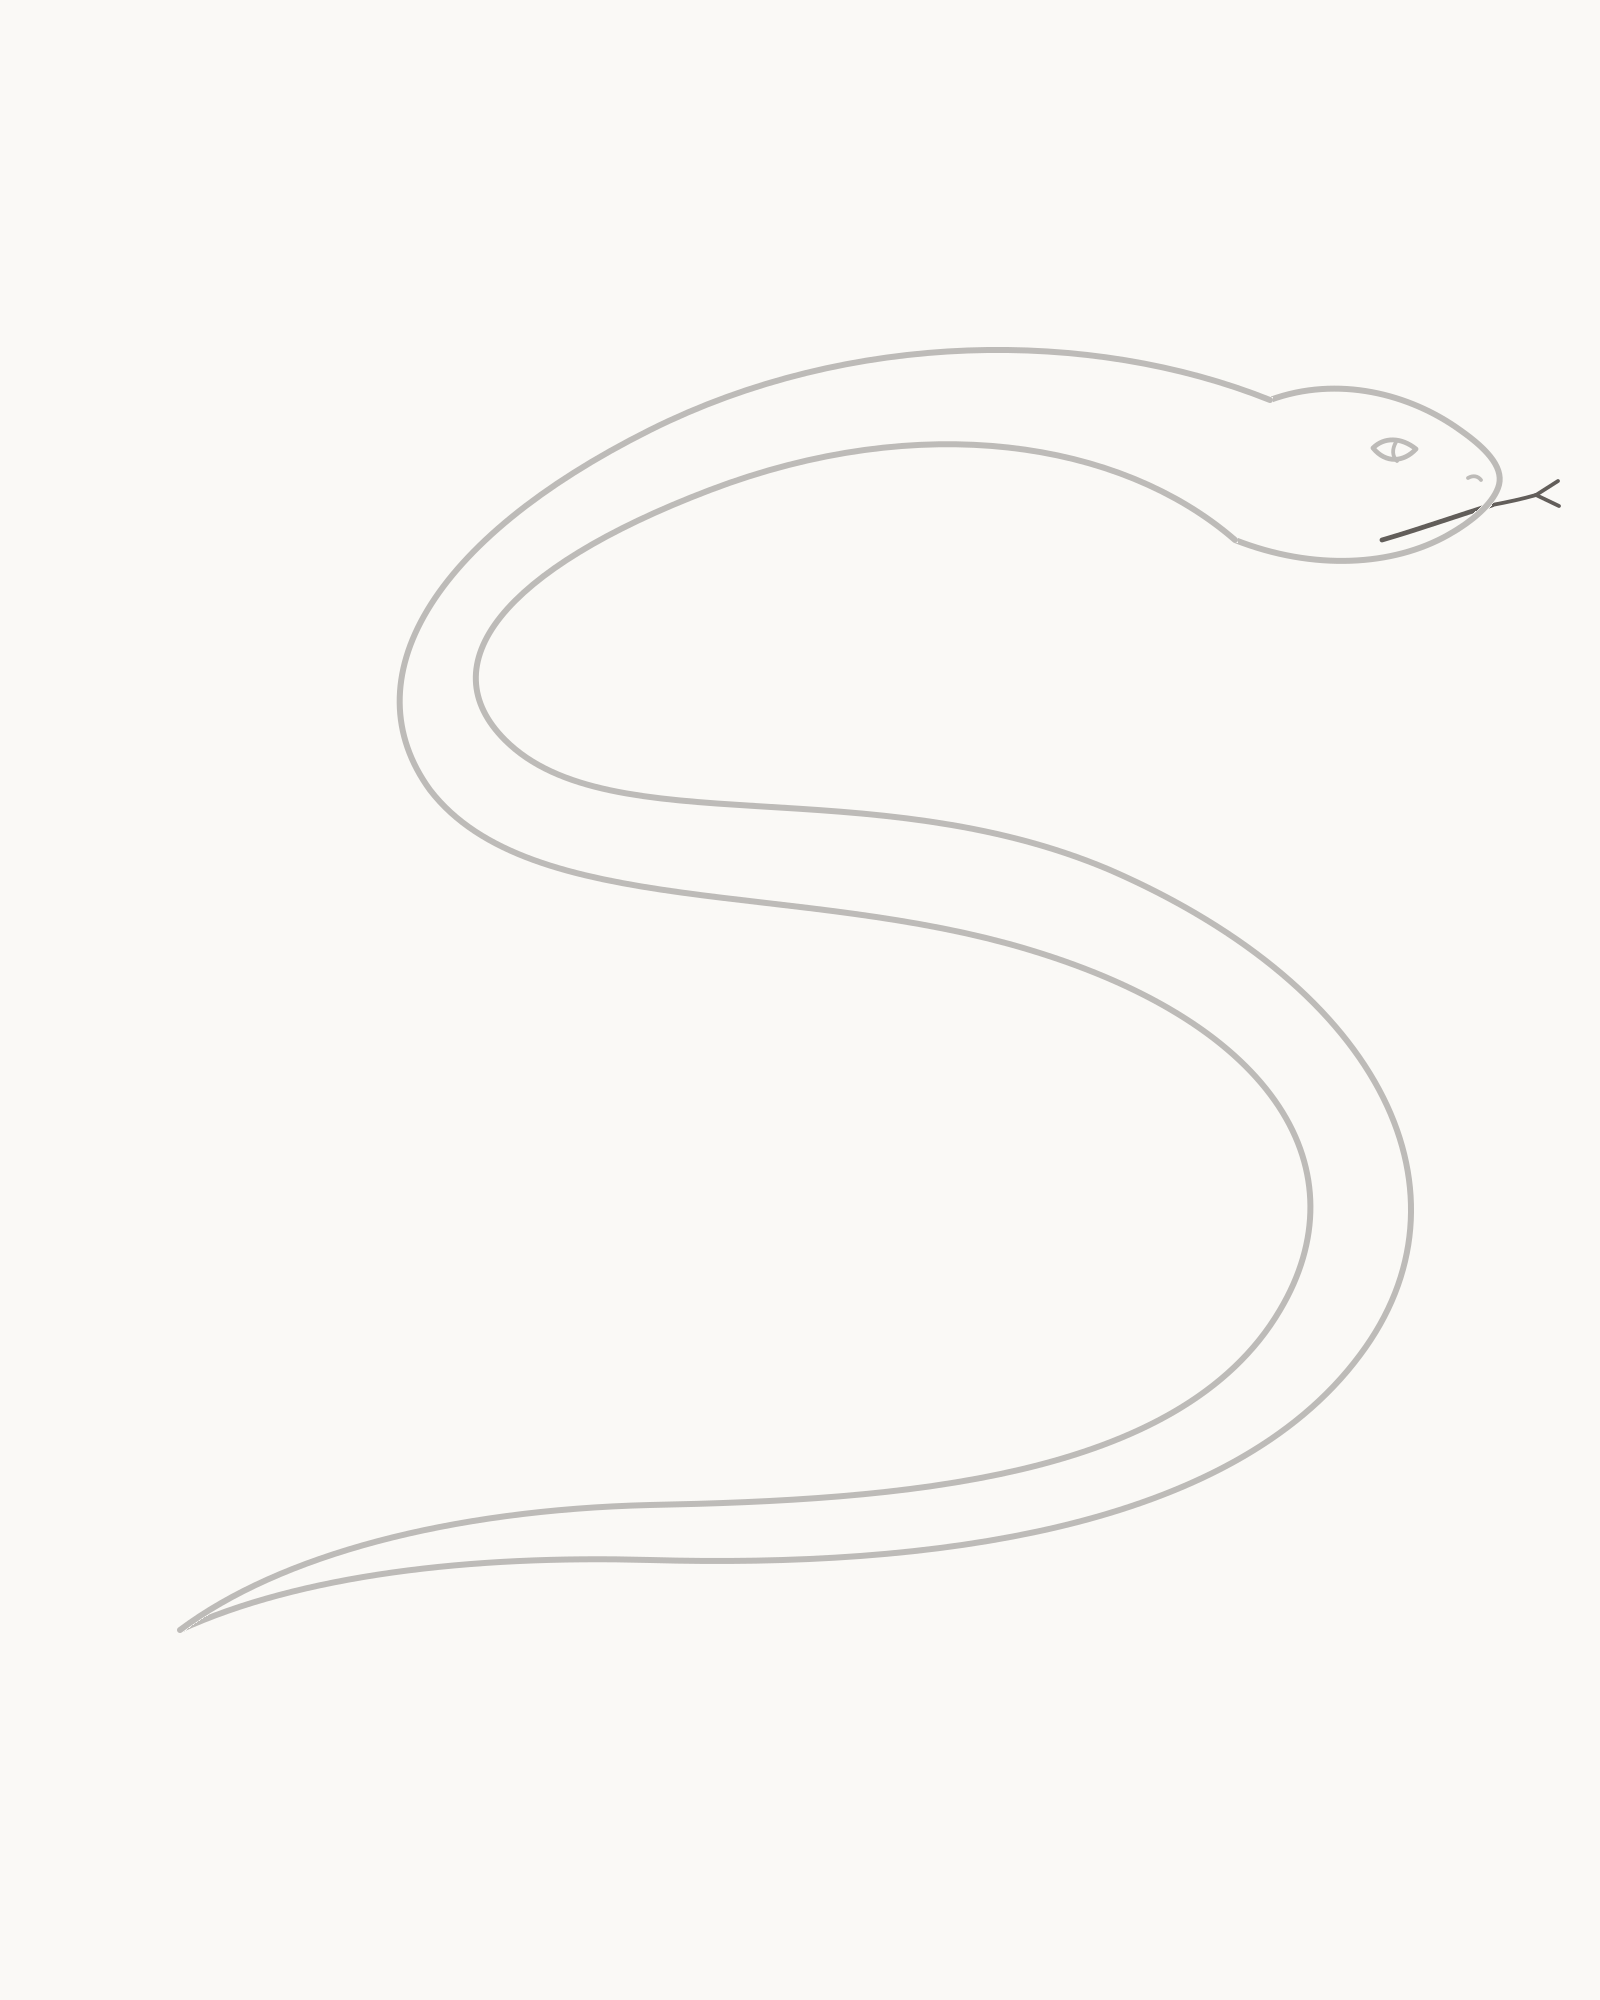
Stage 5 of 8. The short seam and small attached fork complete the head without changing its outline. - Short mouth seam
- Attached tongue stem
- Small final fork
Draw a short mouth seam from the snout back along the jaw angle, stopping well before the neck. At the mouth opening, extend one slim tongue stem in the direction the head faces. Split it only in its final third to make a small fork.
The tongue must touch the mouth opening; a gap makes it look pasted on. Keep the stem longer than either fork and avoid a sharp lightning-bolt shape. These compact additions should not compete with the long body rhythm.
Look for this before moving on: the mouth is short and restrained, the tongue emerges directly from it, and the small fork stays aligned with the upper-right head direction without approaching the frame edge.
If it goes wrong: keep the head, eye and nostril untouched. Replace only the newest mouth interval, tongue stem or fork; do not lengthen the mouth towards the neck to make the attachment easier.
6. Curve seven underside bands
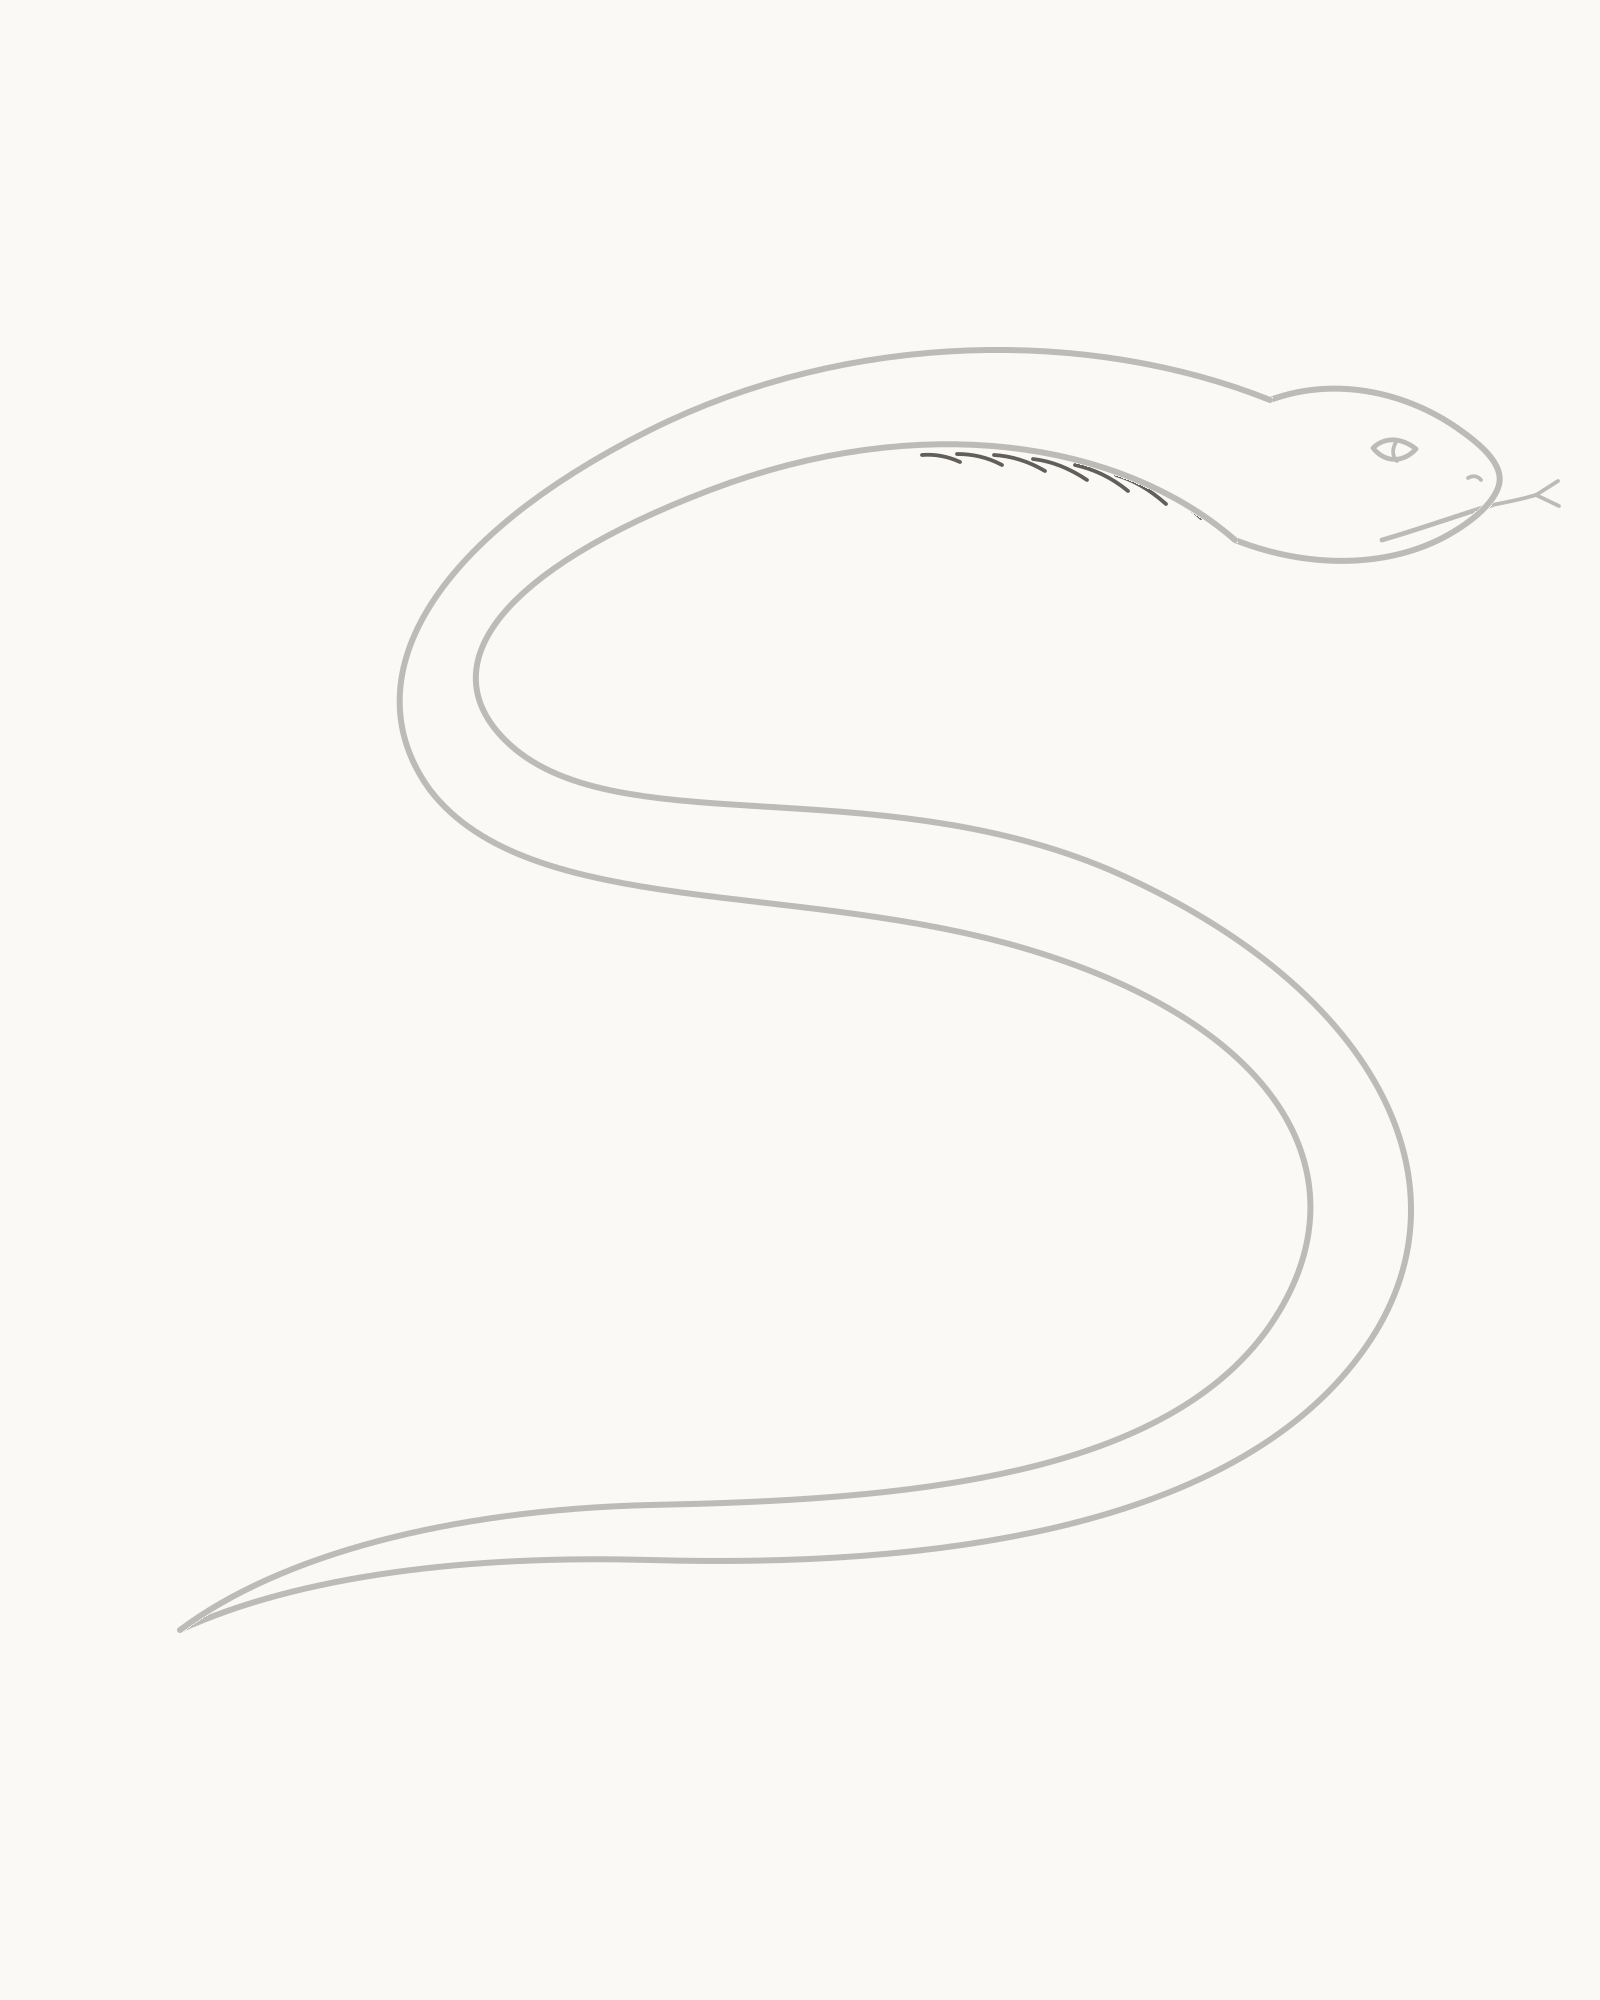
Stage 6 of 8. Seven varied arcs turn with the first inner bend and remain clear of both edges. - First inner turn
- Seven varied arcs
- Stop inside the outline
Add exactly seven short curved bands around the lower side of the first inner turn. Begin with the longest useful arc, then place the others one at a time, allowing their spacing and length to vary slightly. Turn every band with the body rather than keeping them vertical on the page.
Each arc starts and ends comfortably inside the silhouette. They suggest the underside rolling through the bend, not a ladder that connects both outer edges.
Look for this before moving on: seven bands are easy to count, their curve follows the first turn, their rhythm varies gently, and none touches the outline, eye, mouth or tongue.
If it goes wrong: preserve the body and the better bands. Remove only the newest arc that is too straight, crowded or long, then replace it while comparing its angle with the body immediately around it.
7. Add six irregular saddle marks
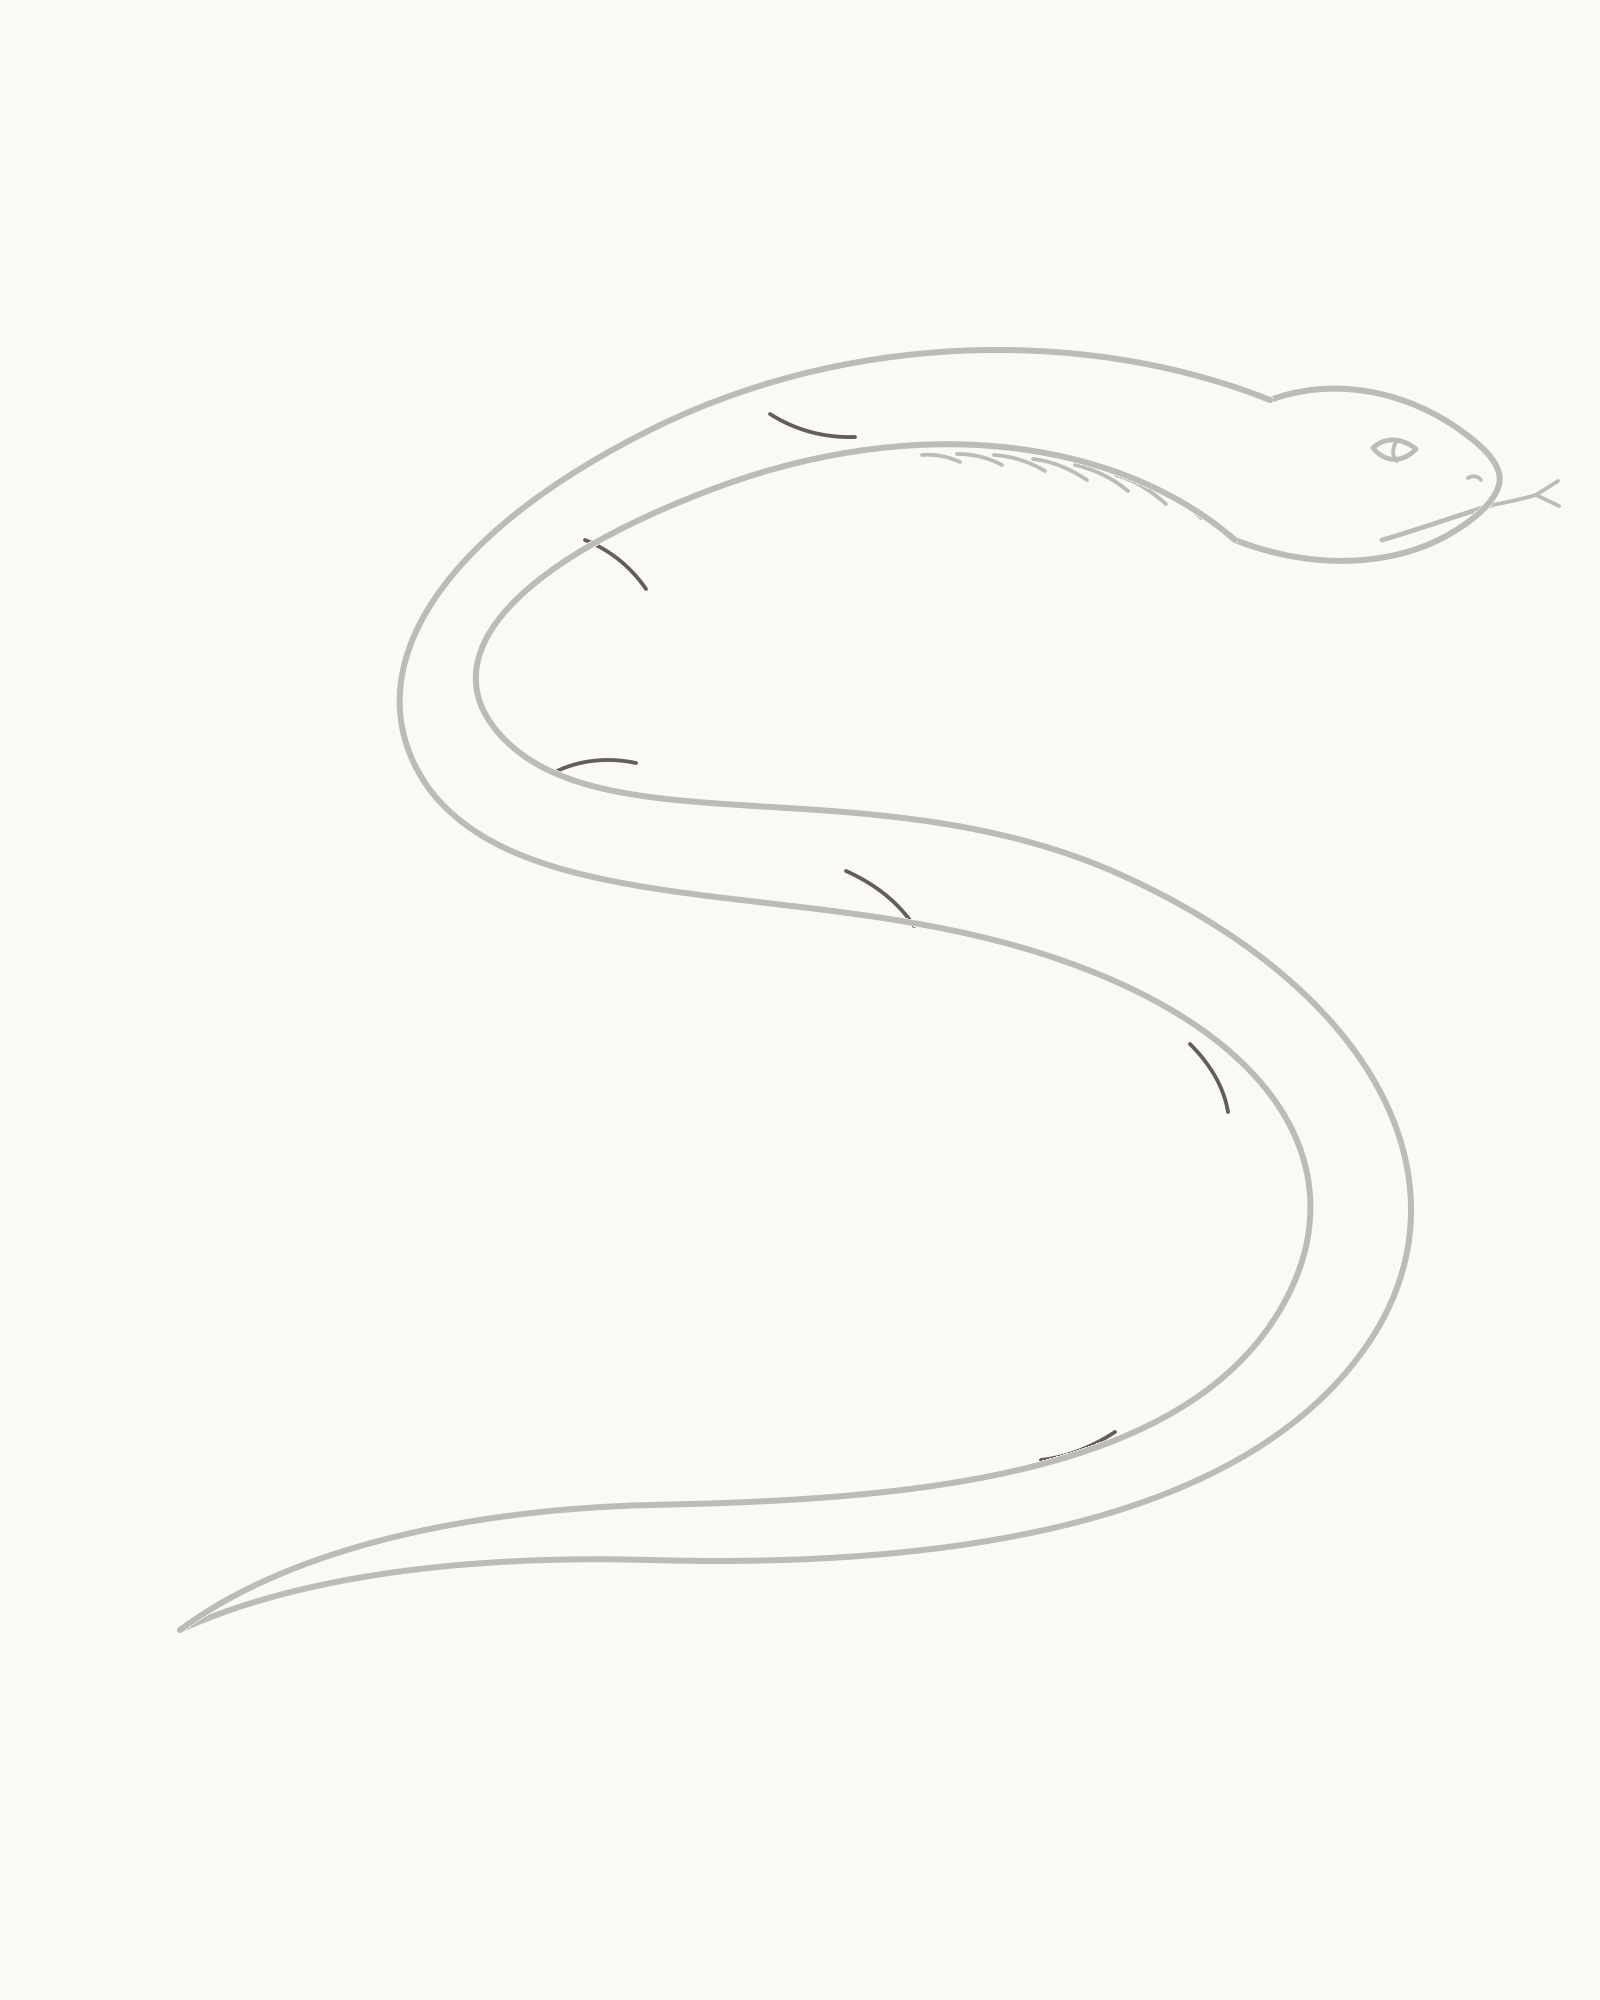
Stage 7 of 8. Six open fragments follow the body flow without becoming a repeated species pattern. - Start near upper body
- Rotate with each curve
- Shrink towards the tail
- Keep every fragment separate
Place exactly six open, unequal saddle fragments along the centre-facing flow of the body. Begin near the upper body and work down the S, rotating each fragment with the local curve. Reduce the later ones as the body tapers.
Leave generous gaps and change the width, opening and angle from one mark to the next. These fragments provide surface rhythm only; they should not become repeated diamonds, scallops or a dense species pattern.
Look for this before moving on: six fragments remain separate from one another and from every outline and underside band, they turn with the S, and their scale decreases naturally towards the tail.
If it goes wrong: leave all established contours and successful marks in place. Remove only the newest fragment, then make it less regular or move it inward so that open paper remains around its edges.
8. Add sparse direction strokes
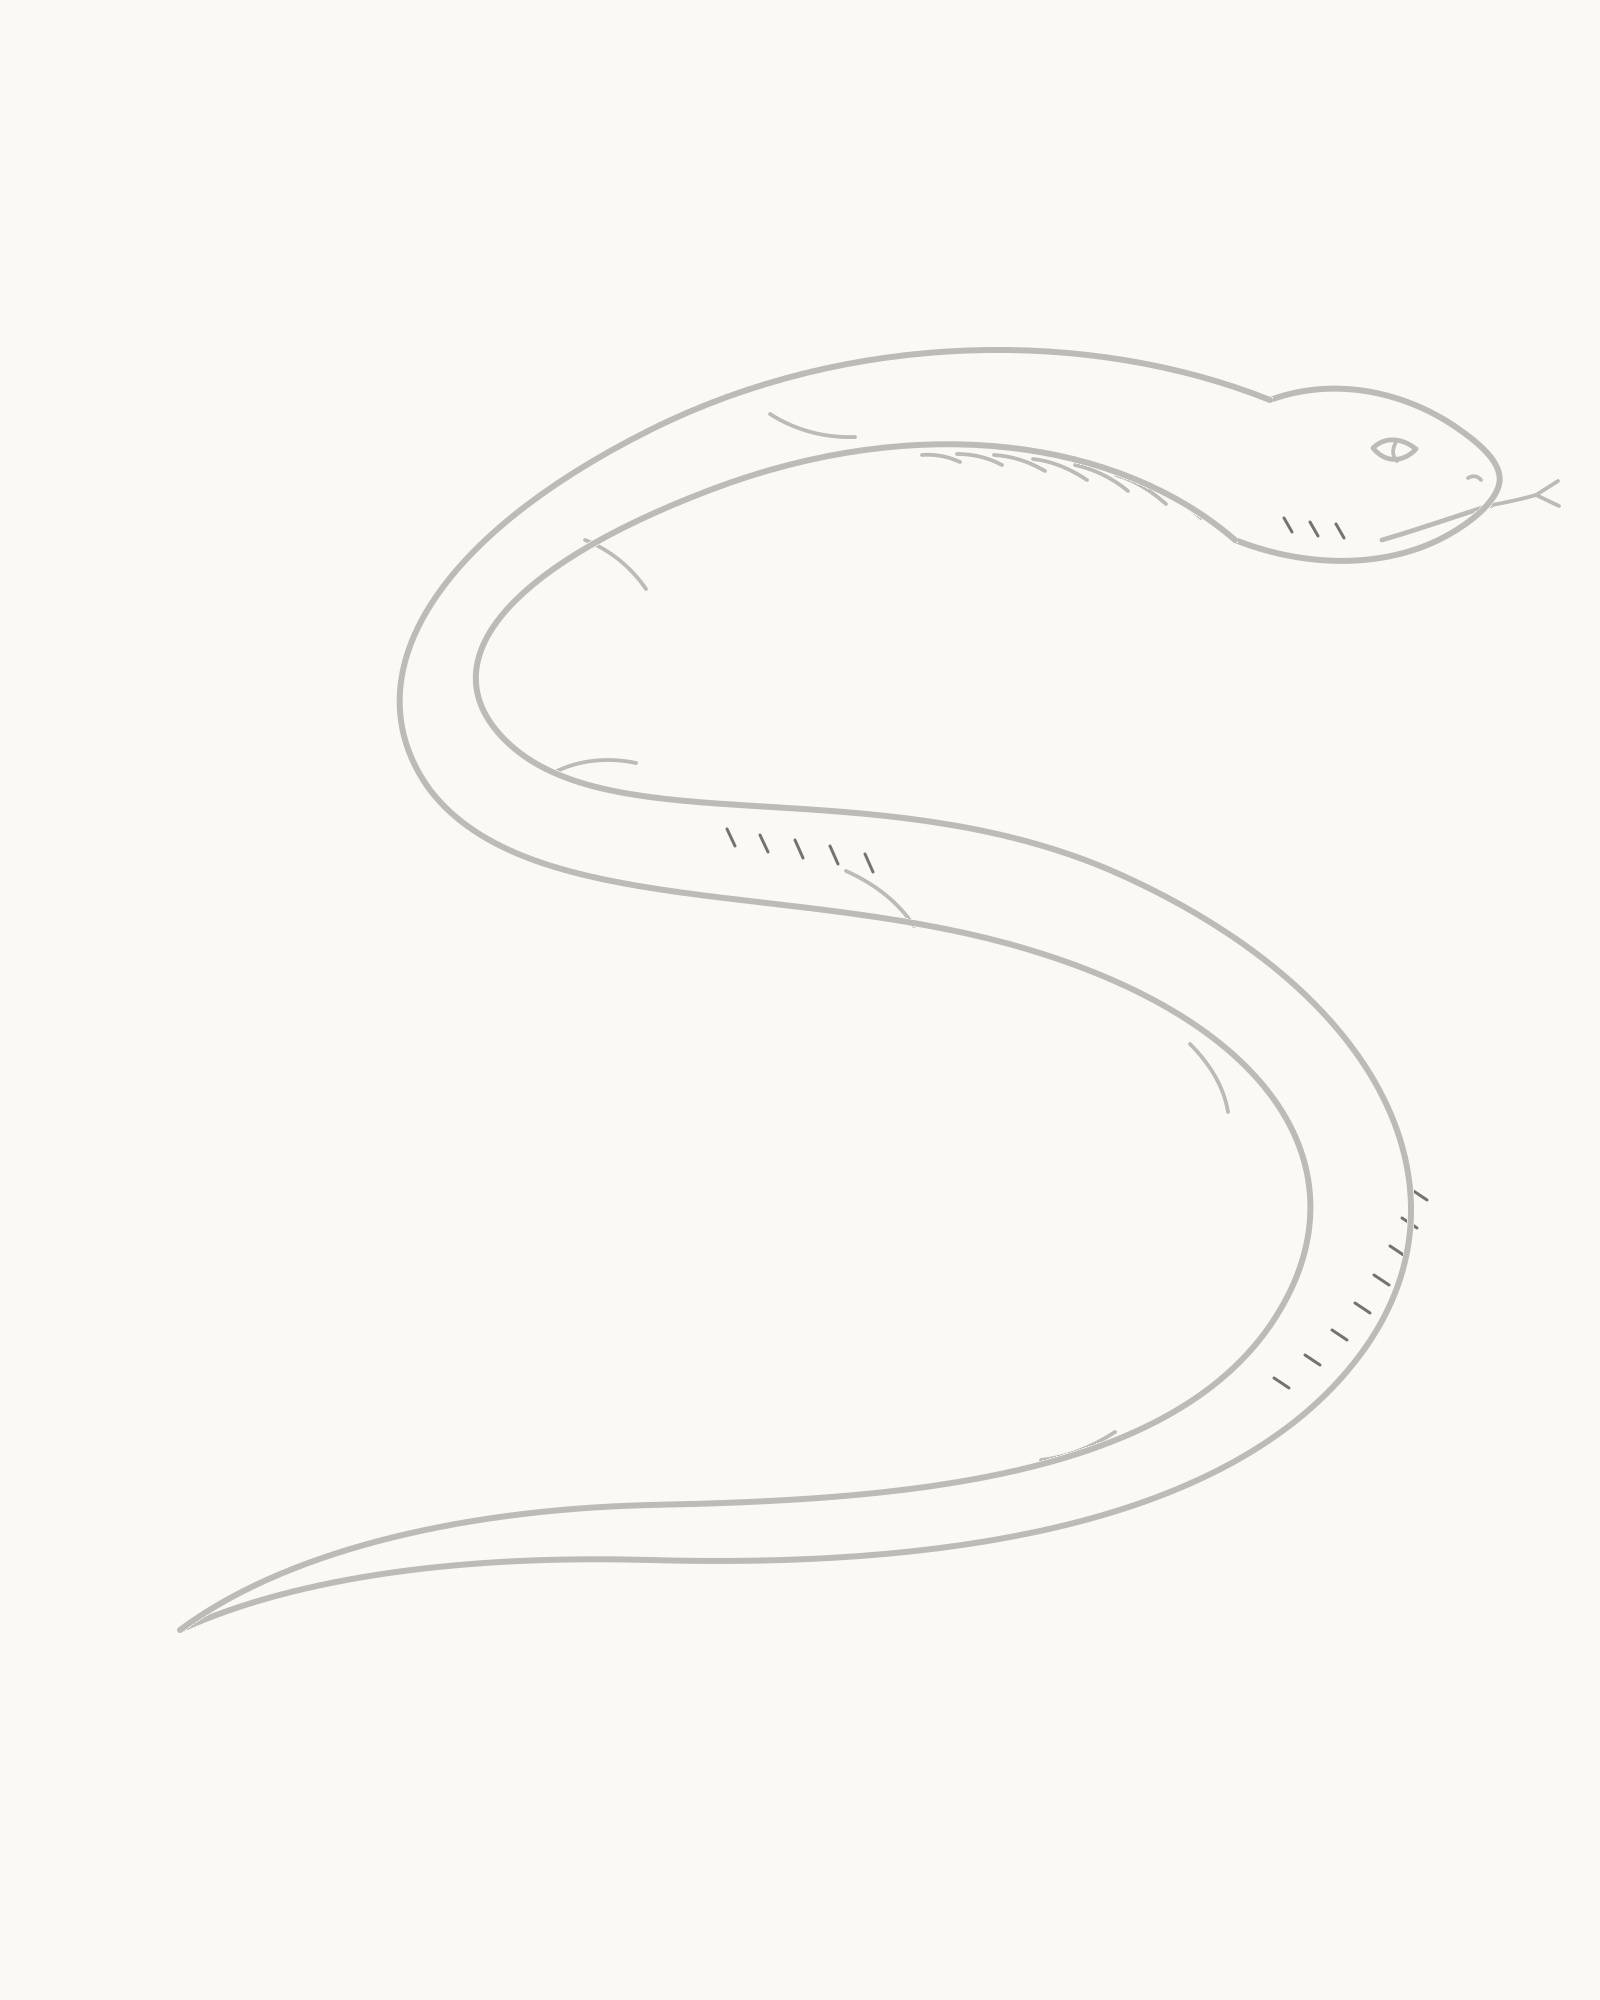
Stage 8 of 8. Thirteen light accents describe the lower-right form edges without creating a separate shaded finish. - Keep upper-left open
- Place thirteen short strokes
- Follow local body curves
Finish with exactly thirteen short, light strokes on selected lower-right-facing edges of the head and two body turns. Curve each stroke with the nearby form and stop it well before any outline, facial feature, band or saddle mark. Keep the upper-left-facing areas open to preserve the chosen light direction.
This is still the same line drawing, not a separate shaded finish. The strokes are sparse directional accents, so leave the surrounding paper open and keep the outer contour at its existing weight. These accents cannot correct a width problem or awkward junction from an earlier stage.
Look for this before moving on: thirteen strokes remain lighter and shorter than the main outline, the lower-right placement is consistent, the upper-left stays open, and every Stage 1–7 mark is still clear and unchanged.
If it goes wrong: remove only the newest direction stroke and replace it with a shorter, lighter one that follows the local curve. If an earlier contour still bothers you, leave it visible and use that observation on the next attempt rather than covering it with extra marks.


Fix small construction problems
The S looks stiff. Compare the whole outside edge as one journey from head to tail. Replace the newest flat interval with a curve that starts turning before the next bend; do not add decorative marks to distract from it.
The body looks like a tube. Check the negative space between the contours. The middle body should open more than the waist, while the final third narrows towards one point. Correct only the newer inside edge.
The tail has a bump or two endpoints. Keep the original Stage 1 tail point. Return the inside contour to that exact point with a gradual taper instead of adding a loop or dark knot.
The head looks like a circle stuck onto the neck. Flatten the lower jaw, keep the brow slightly fuller and reconnect the newest head edge to the existing neck endpoint. Do not draw a collar around the join.
The face looks cute rather than alert. Reduce the newest eye or mouth mark. A small high eye, subordinate nostril and short seam are enough to establish direction.
The tongue looks detached. Restore one slim stem that visibly begins at the mouth opening, then fork only its final third. Avoid thickening the mouth to meet it.
The underside marks look like a ladder. Shorten the newest band, vary the spacing and turn each arc with the body. None should bridge from one outline to the other.
The pattern looks stamped on. Remove the newest repeated fragment and change its opening, angle or size. Six irregular, well-spaced suggestions are more useful than a complete repeated motif.
Practise a different S curve
On a second sheet, repeat Stages 1–5 at half size but open the lower turn a little wider. Keep one shared tail point, gradual width changes and the same head attachment. Leave the surface marks off until the silhouette reads clearly. Comparing the two versions will show how changing one large curve alters the sense of movement without requiring a new set of details.
For another lesson built around two controlled outer edges, try How to Draw a Fish. How to Draw a Horse offers a more complex animal construction, while the full practical collection is available from How to Draw.
Frequently Asked Questions
What is the easiest way to start drawing a snake?
Begin with one long outside S contour from the future head opening to the tail. Do not start with the eye or a row of circles. Once that first edge flows well, return from the same tail point with a second contour that controls width and taper.
What simple shape should I use for a snake body?
Use a loose vertical S as the main gesture, then think of the body as a changing ribbon around it. This lesson keeps the two final edges rather than drawing and erasing a centreline or chain of ovals.
How do I keep both sides of the snake even?
The sides should relate, but they should not be evenly spaced everywhere. Compare the open space between them: wider through the middle, narrower through the waist and steadily tapering through the final third. Work on short intervals of the inside contour.
How can I draw a snake head that does not look pasted on?
Leave two body endpoints for the neck, then bridge them with one low asymmetric wedge. A slightly fuller brow, blunt snout and shallow jaw should return directly to those fixed anchors without a collar or circular outline.
How do I draw a forked snake tongue?
Start one narrow stem at the mouth opening and keep it aligned with the head. Split only the final third into two short forks. A small attached tongue looks clearer than a large zigzag.
Do I need to draw every scale?
No. Seven short underside bands and six irregular saddle fragments are enough for this lesson. Their job is to follow the turns and taper, not to identify a species or cover the whole body.
Does a beginner need a grid to draw this snake?
No. The optional grid and x80%/y21% to x18%/y81% cue can help place the first line, but they remain outside the finished drawing. You can instead compare the head and tail positions with the edges of the page.
Should I erase the first line or make a darker final outline?
No. The first S is a permanent outside contour and every later stage preserves it. Use the eraser only for the newest local mistake. Keep the final line weight restrained rather than tracing over the entire silhouette.
References
- Smithsonian's National Zoo, How Do Snakes Move Without Legs? View source
- Smithsonian's National Zoo, Do Snakes Have Ears? And Other Sensational Serpent Questions. View source
- Smithsonian Institution, A Guide to the Snakes of the United States National Museum. View source
More DRAWING Guides

How to Draw a Rose: A Step by Step Guide

How to Draw a Tree: A Step by Step Guide

How to Draw Eyes: A Step by Step Guide

How to Draw Leaves: A Step by Step Guide

How to Draw Autumn Leaves: A Step by Step Guide

How to Draw Flowers: A Step by Step Guide

How to Draw a Lily: A Step by Step Guide

How to Draw a Sunflower: A Step by Step Guide

How to Draw a Tulip: A Step by Step Guide

How to Draw a Hibiscus: A Step by Step Guide

How to Draw a Daisy: A Step by Step Guide
