



Draw one complete adult tiger
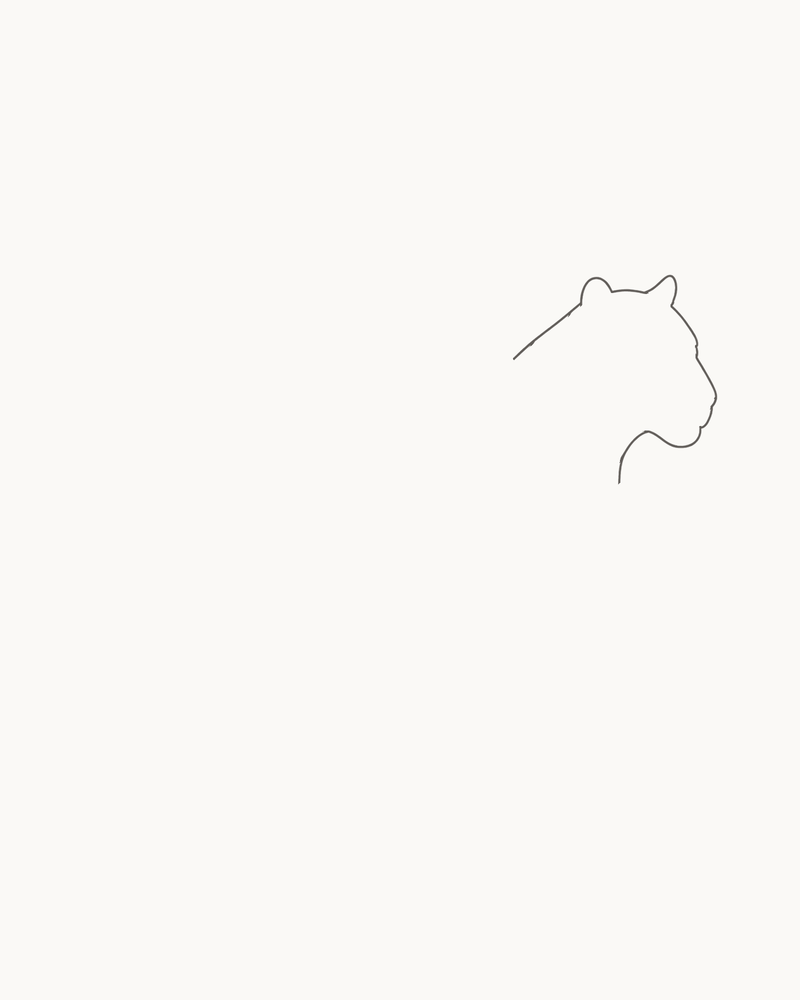
Draw a complete adult tiger standing calmly in an almost-profile view, facing right. Eight stages build the permanent head, long body, four readable legs, raised tail, one visible eye and an unequal pattern of open stripes. The finished result is a clean pencil line drawing: there is no colour, dense fur or shading to hide the construction.
Difficulty: Beginner to intermediate
Time: Allow about 45–60 minutes; this is an untested editorial estimate, not a timed drawing session.
Medium: A pointed HB or No. 2 graphite pencil on smooth, unlined paper.
The four legs are the most exacting part. Give each attachment its own place before adding the tiger's stripes. Every line shown at one stage remains visible in the next, so the sequence does not depend on erased ovals, a darker retraced outline or a final cleanup.
The broad shoulder, substantial front legs and wide paws matter before any pattern is added. Animal Diversity Web describes tigers as having a short, thick neck, broad shoulders, massive forelimbs and broad forepaws. It also notes that stripe size, length and spacing vary. Those observations lead to two useful drawing decisions here: keep the chest sturdy rather than pinched, and avoid stamping identical marks along the body.
Smithsonian's National Zoo and San Diego Zoo both describe stripe patterns as individual. You do not need to reproduce a particular animal's markings. Let the open curves change length and angle as they move from the head to the torso, legs and tail.
Materials
- A pointed HB or No. 2 pencil. A common 0.5–0.7 mm mechanical pencil is a suitable substitute.
- One smooth, unlined sheet in portrait orientation. Ordinary printer paper is enough for practice.
- A clean eraser, used only on the newest local mistake rather than for scheduled cleanup.
- A pencil sharpener.
- Optional scrap paper for rehearsing a broad paw and three differently curved stripe marks.
- An optional ruler if you want to read the external placement grid. It is not used to draw boxes inside the tiger.
You do not need tracing paper, a compass, marker, coloured pencils, charcoal, blending tools, specialist graphite grades, a printable or a video. Keep the pencil at light-to-moderate pressure so the permanent contours stay controlled.
Before you draw
Turn the paper vertically. The tiger stretches across the middle of the page, with the raised tail on the left and the muzzle on the right. Leave clear paper above the ears, below all four paws and beyond both ends of the animal.
The optional 8 × 10 grid is only a placement aid. The first-stage cue puts the muzzle near x89% / y43% and the two open neck endpoints near x70% / y40–48%. Treat those percentages as visual landmarks; they do not need to be marked on the paper.
This is an almost-profile view. Only the near eye is visible. The farther legs appear through their offset positions and attachments, not because their lines are paler. The final stripe marks remain open contours, not filled bars or shading. A notional upper-left light is reserved for consistency if you later practise value on a separate drawing, but no value is added in these eight stages.
1. Draw the permanent head and unequal ears
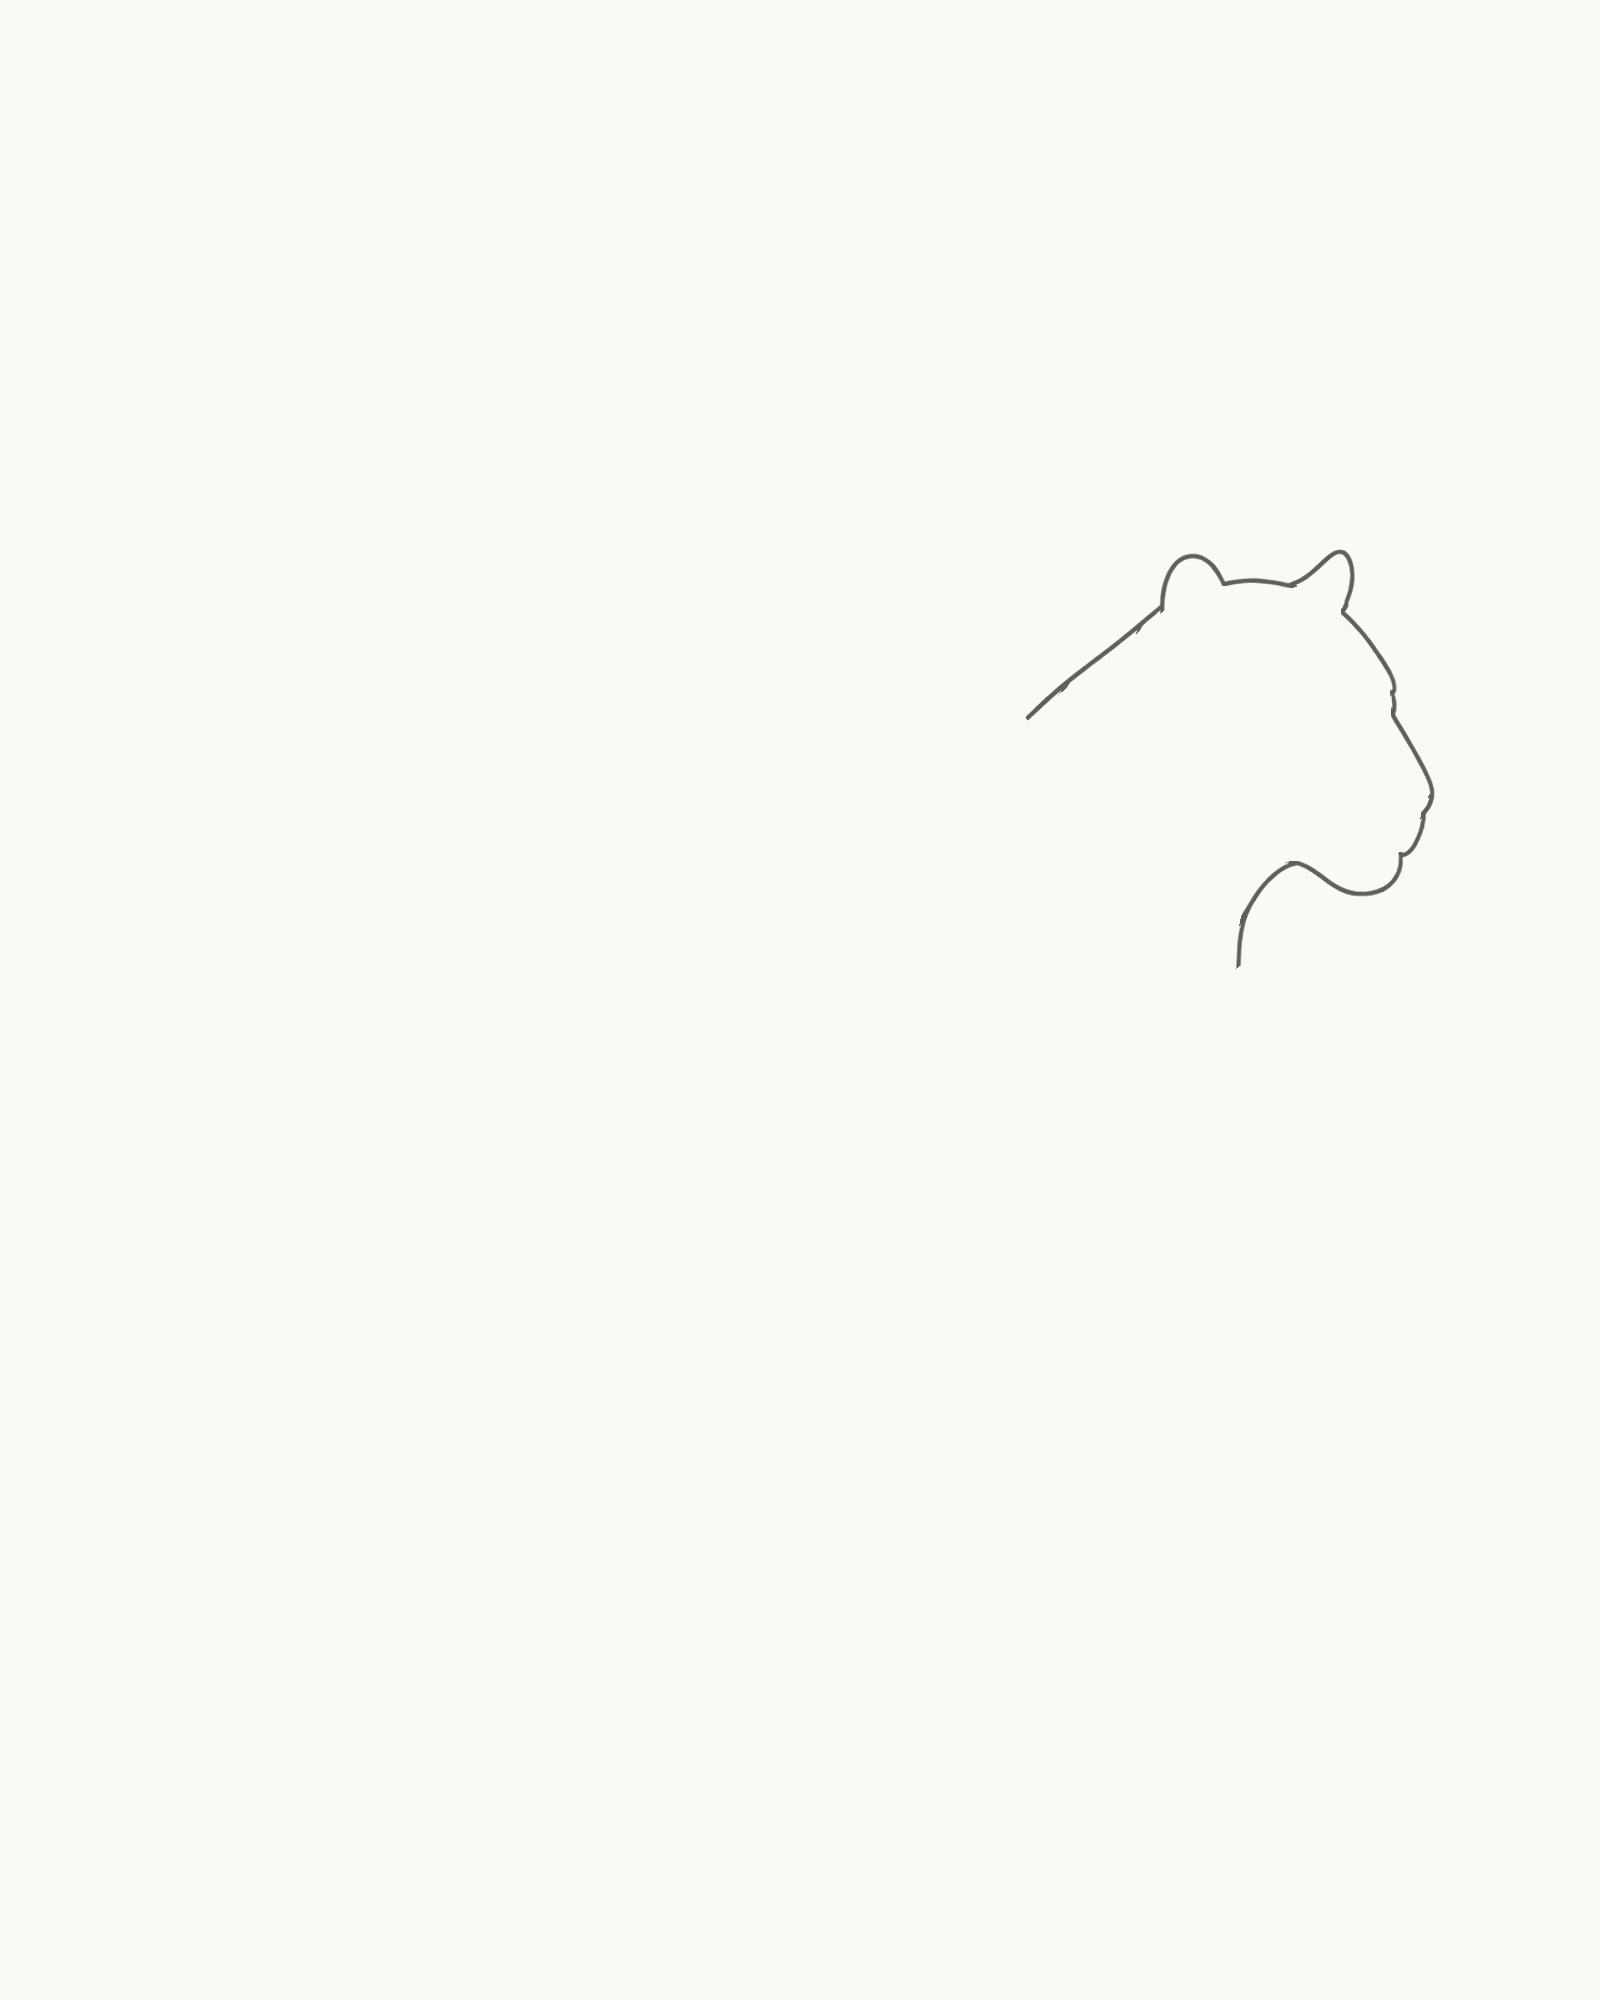
Stage 1 of 8. One permanent contour establishes the low adult head, unequal ears and two separate neck endpoints. 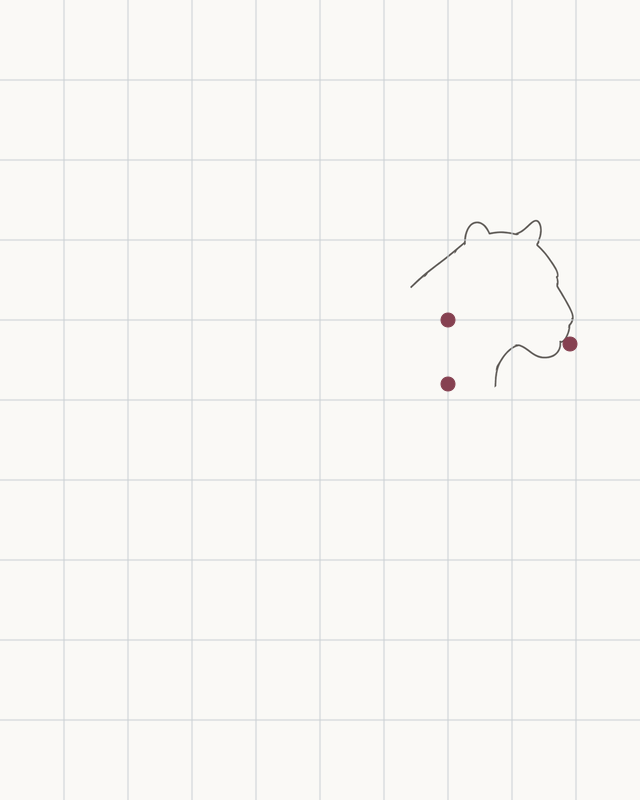
Placement cue: place the muzzle near x89% / y43% and the open neck endpoints around x70% / y40–48%. Keep the cue off the drawing. - Lower neck and jaw
- Muzzle and brow
- Near ear and crown
- Smaller far ear to upper neck
Begin at the lower neck opening near x70% / y48%. Draw forward through the short jaw, turn around the muzzle and rise along the gently convex brow. Continue into the taller near ear, cross a shallow crown, form the slightly smaller far ear and finish at the upper neck opening near x70% / y40%.
Keep the head low and wedge-shaped rather than round. The ears belong to the same outer contour; they should differ modestly in height and angle instead of looking like two matching triangles. Stop at the two separate neck endpoints. Do not join them behind the head.
Look for this before moving on: the muzzle sits comfortably inside the right edge, the head occupies less than one fifth of the page width, both ears are attached and unequal, and two clear rear endpoints remain for the neck.
If it goes wrong: keep every interval that already has the right direction. Remove only the newest circular bump, pointed snout or mirrored ear, then reconnect that short section between two stable points. Do not enlarge the head to absorb the correction.
2. Extend the torso with planned openings
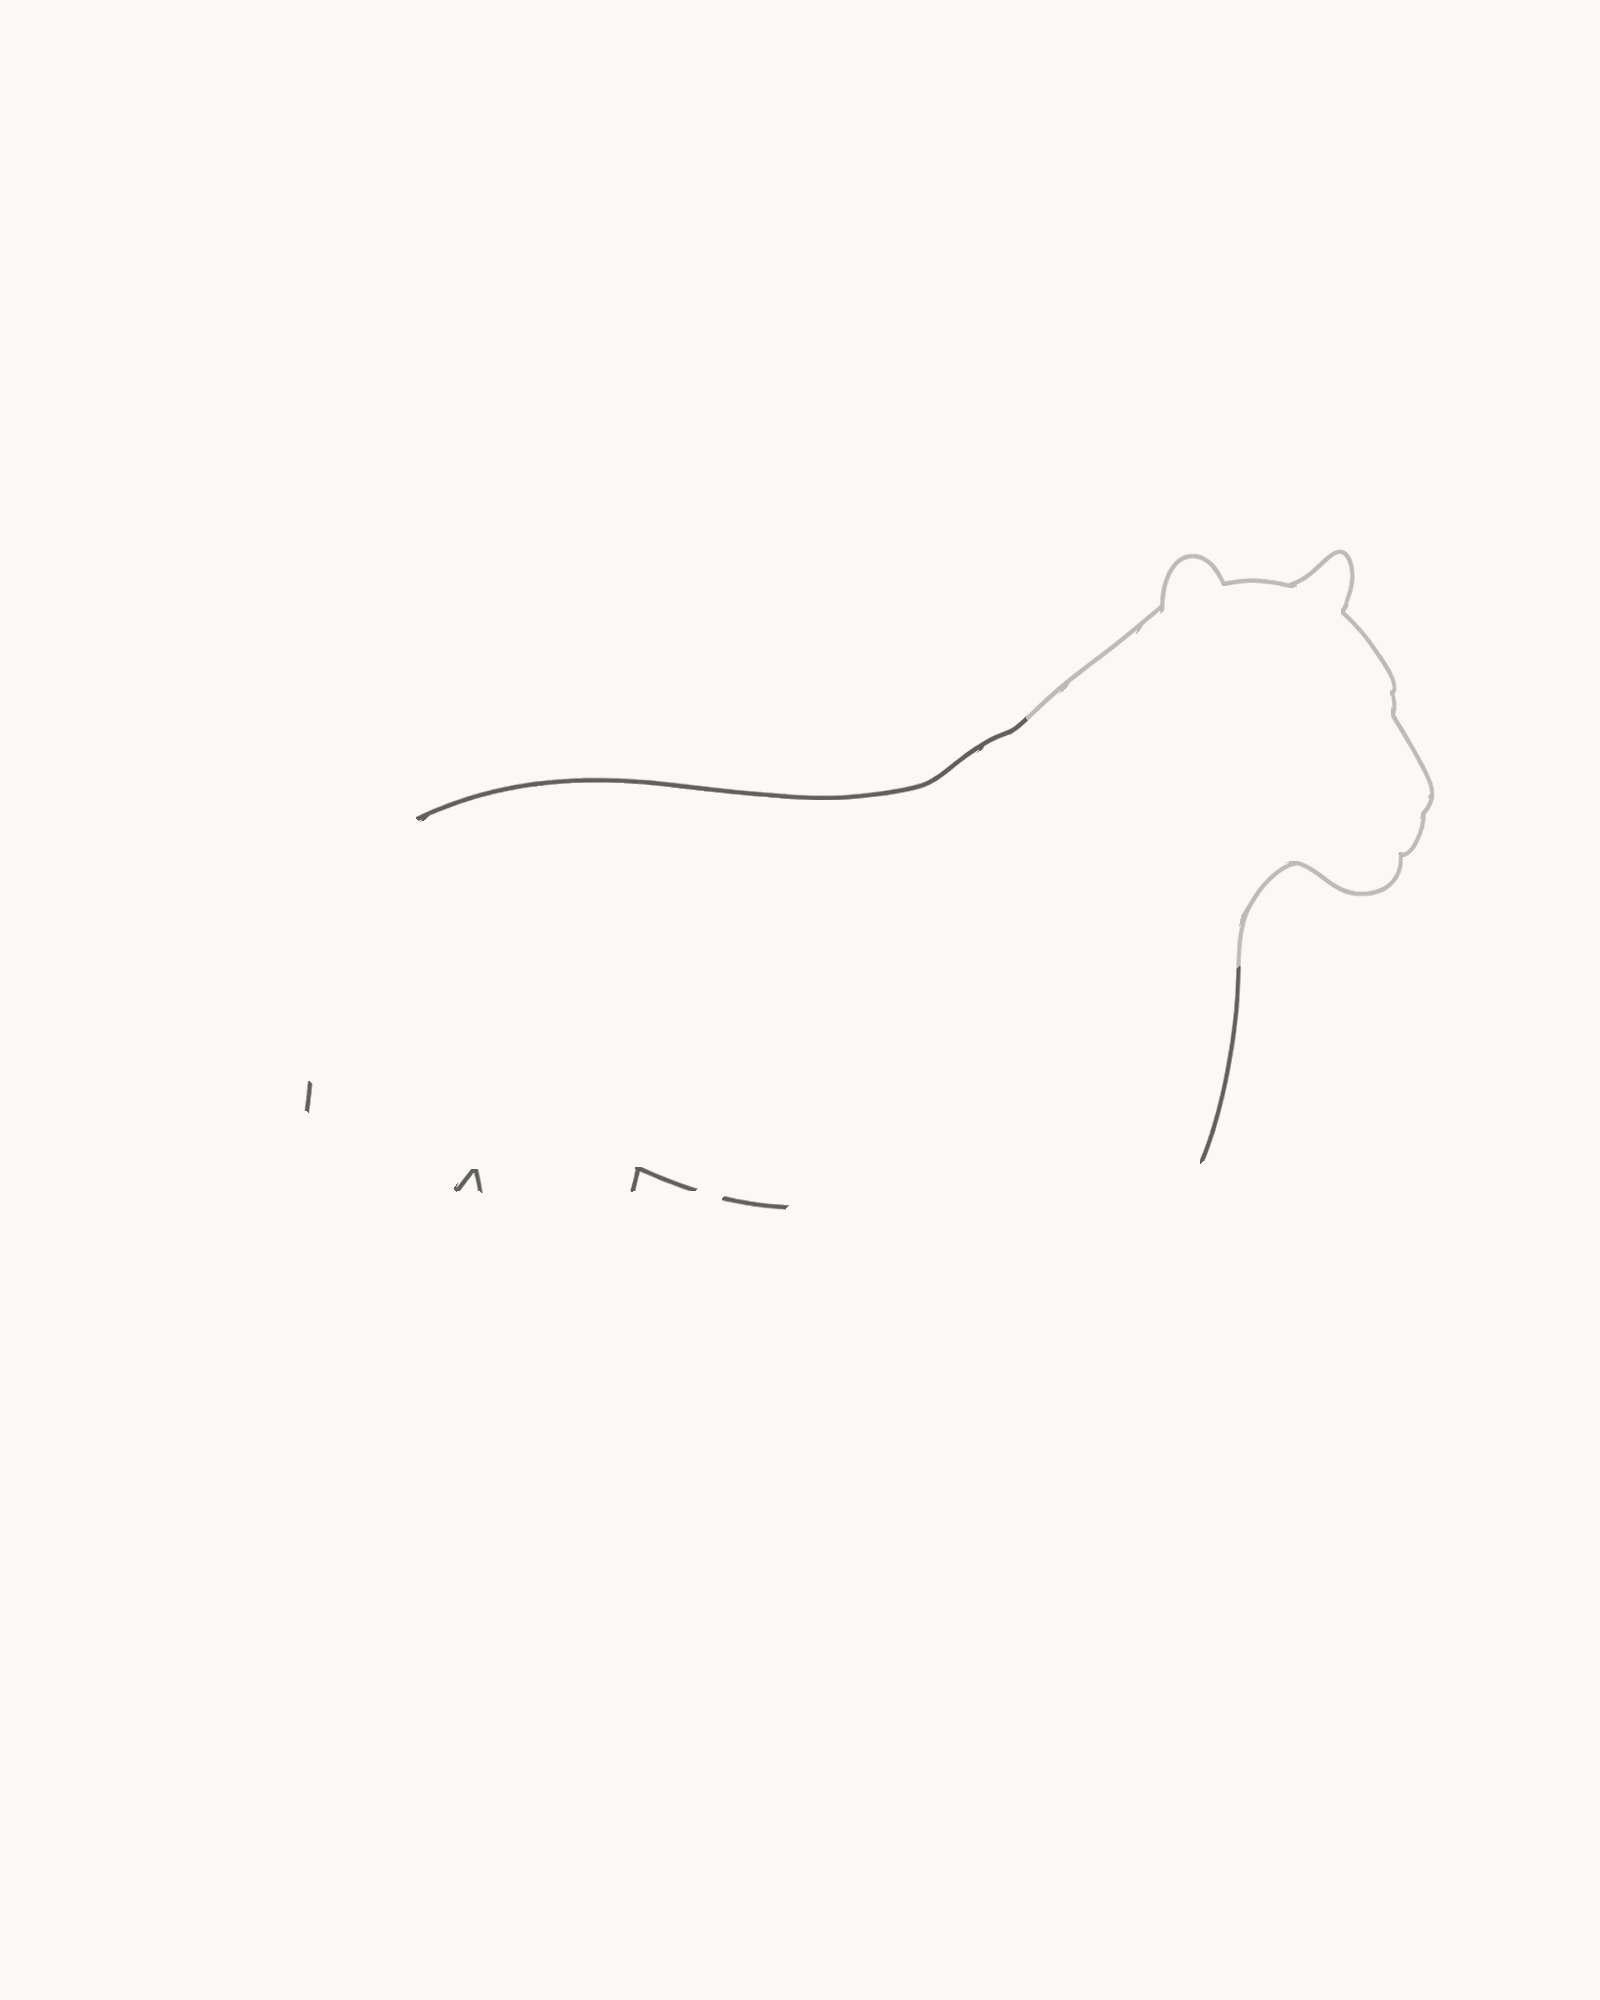
Stage 2 of 8. The upper contour comes first; short lower intervals then preserve distinct attachment openings. - Upper neck and shoulder
- Back
- Rump and upper tail root
- Lower neck and chest
- Foreleg gap, belly, hind-leg gap
- Lower tail root
Build the upper contour first. From the upper neck endpoint, travel through the shoulder, along the gently dipping back and around the rump, stopping at the upper tail-root endpoint. This long run establishes the adult proportion before any leg is drawn.
Now return to the lower neck endpoint and add the underside as short permanent intervals in this order: chest, near-foreleg opening, belly, near-hind-leg opening, then the small rump interval ending at the lower tail root. The blank spaces are planned attachment points, not missing pencil work. Do not close them with a body oval or connect them provisionally; they stay open until the legs and tail meet them.
Look for this before moving on: the shoulder sits slightly higher than the rump, the back from shoulder to rump is about twice the head length, the chest looks deep without a narrow waist, and the short lower intervals leave distinct endpoint pairs for two near legs and the tail.
If it goes wrong: preserve the complete Stage 1 head and whichever torso intervals already fit. Replace only the newest back, chest, belly or rump interval. If a gap was accidentally closed, correct that new interval now; never plan to cover the join with a leg or stripe.
3. Add the two near-side legs and broad paws
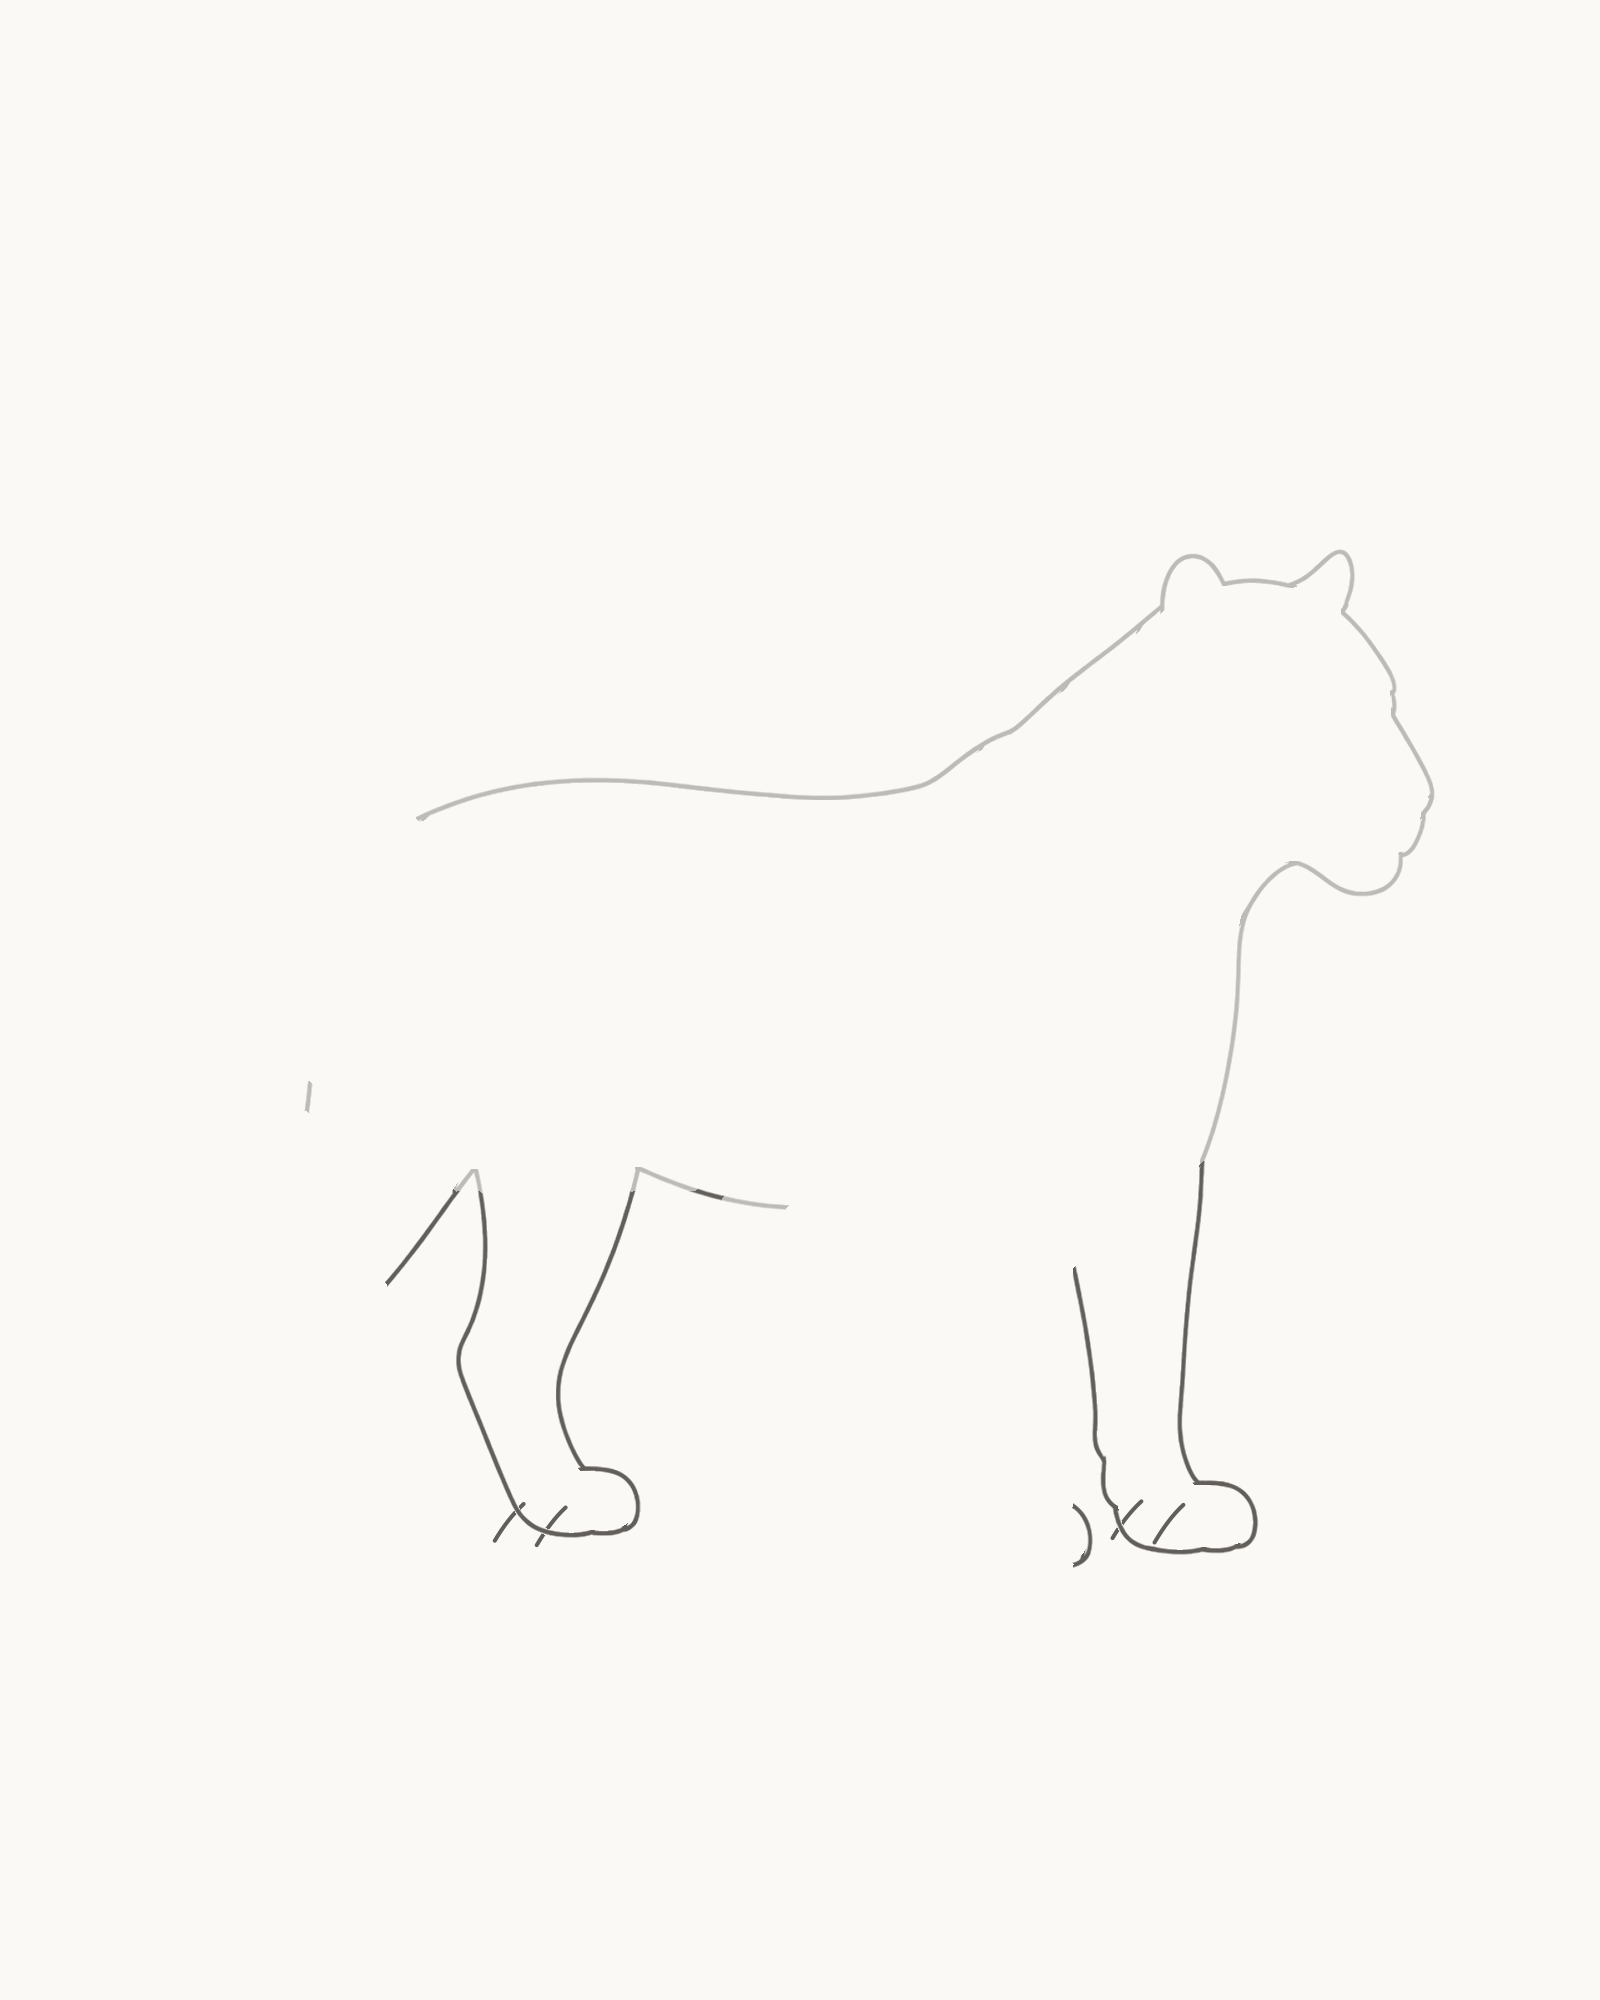
Stage 3 of 8. Two near-side supports bridge their assigned openings and settle on one shared floor. - Near foreleg
- Broad rightmost forepaw
- Bent near hind leg
- Broad hind paw
Use the rightmost chest opening for the near foreleg. Carry its front edge down with a slight curve, round a broad paw on the shared floor and return to the other endpoint. Add two short toe notches inside the paw. This is the main front support and should feel substantial rather than column-thin.
At the hind opening, angle the thigh forward into a visible hock, descend to another broad paw and close the leg at its waiting endpoint. Add two restrained toe notches. The bent hind rhythm should differ clearly from the steadier foreleg.
Look for this before moving on: each leg bridges one complete endpoint pair, the near forepaw is the farthest-right support, the hind leg has a readable change of direction, and both wide paws rest on the same invisible floor.
If it goes wrong: leave the torso and the successful support untouched. Replace only the newest leg between its fixed endpoints, or reshape only its newest paw. Widen a narrow paw sideways without moving its ground level; do not extend the belly across an awkward attachment.
4. Add the two offset far-side legs
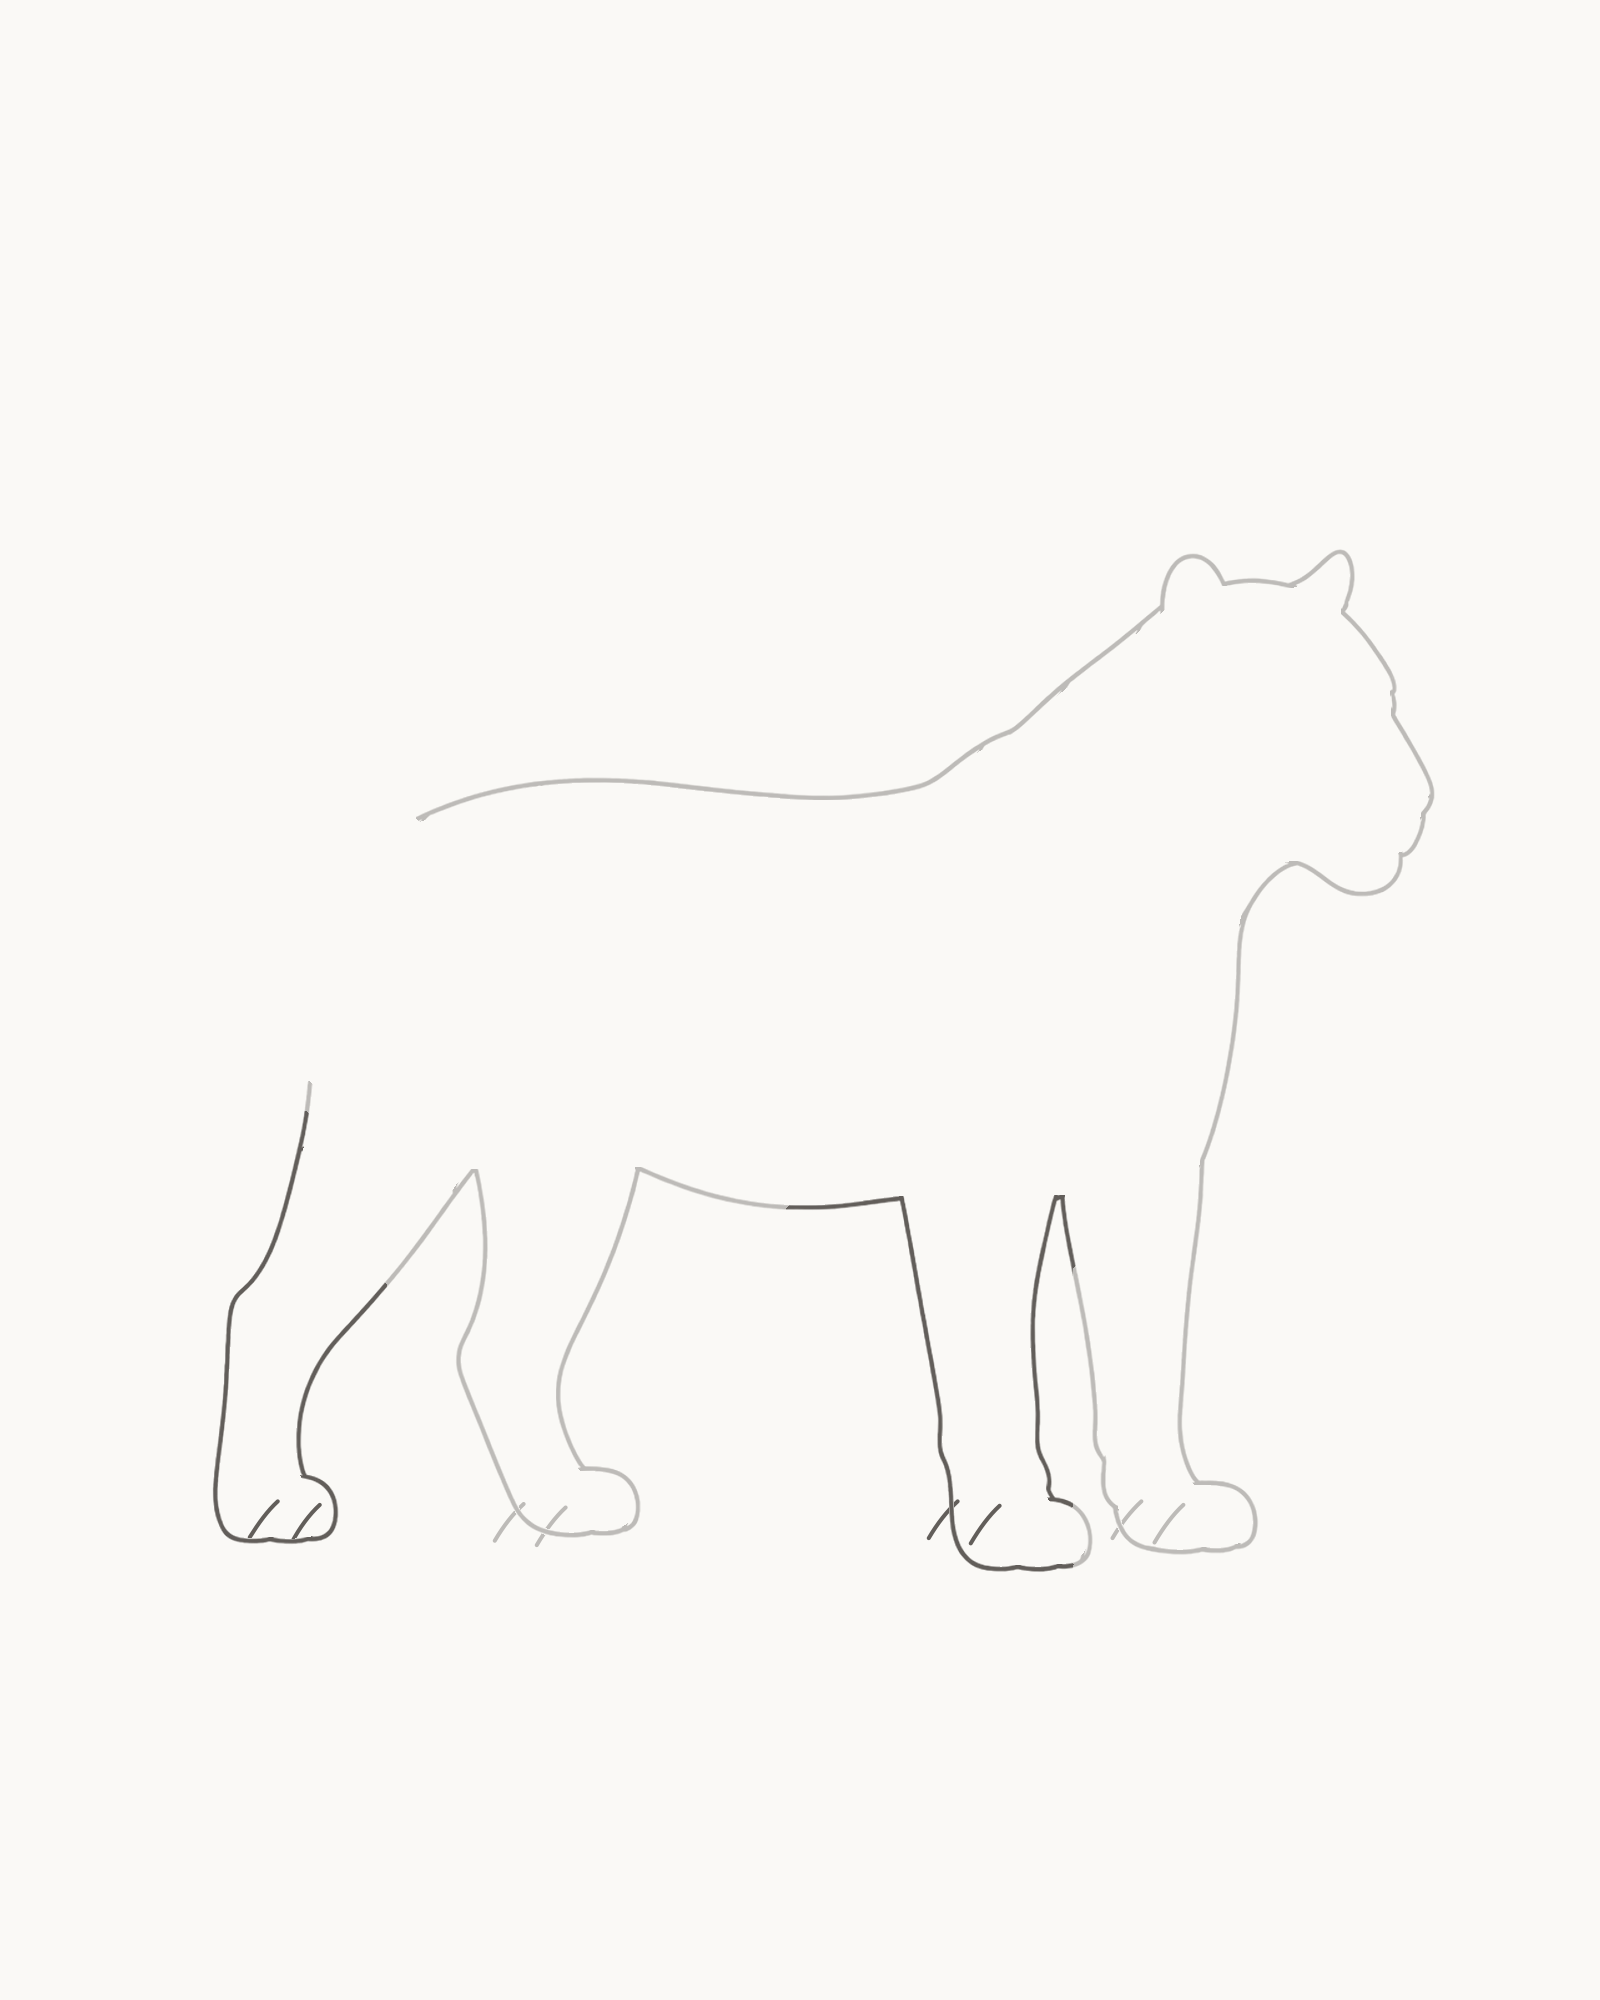
Stage 4 of 8. Visible interior attachments and offset paws keep all four legs individually readable. - Far foreleg inside chest
- Offset forepaw
- Far hind leg inside rump
- Offset hind paw
Add the far foreleg from inside the chest. Let it pass behind the near foreleg and finish at a paw slightly to the left of the near forepaw. Its upper attachment remains visible, which makes the depth clear without changing line opacity.
Next place the far hind leg from inside the hindquarter. Set its paw behind and to the left of the near hind paw. Give both new paws two small toe notches, but change their widths and angles enough that they do not look duplicated.
Look for this before moving on: all four legs can be traced separately from body to paw, the farther pair begins inside the torso and sits offset behind the nearer pair, no tangent creates a fifth leg, and all four paw bottoms share one level.
If it goes wrong: keep the body and both near legs exactly where they are. Replace only the newest far leg, starting again from its interior attachment and aiming for its offset paw position. Correct a tangent by changing the new line, not by shifting an established support.
5. Attach the raised tapering tail
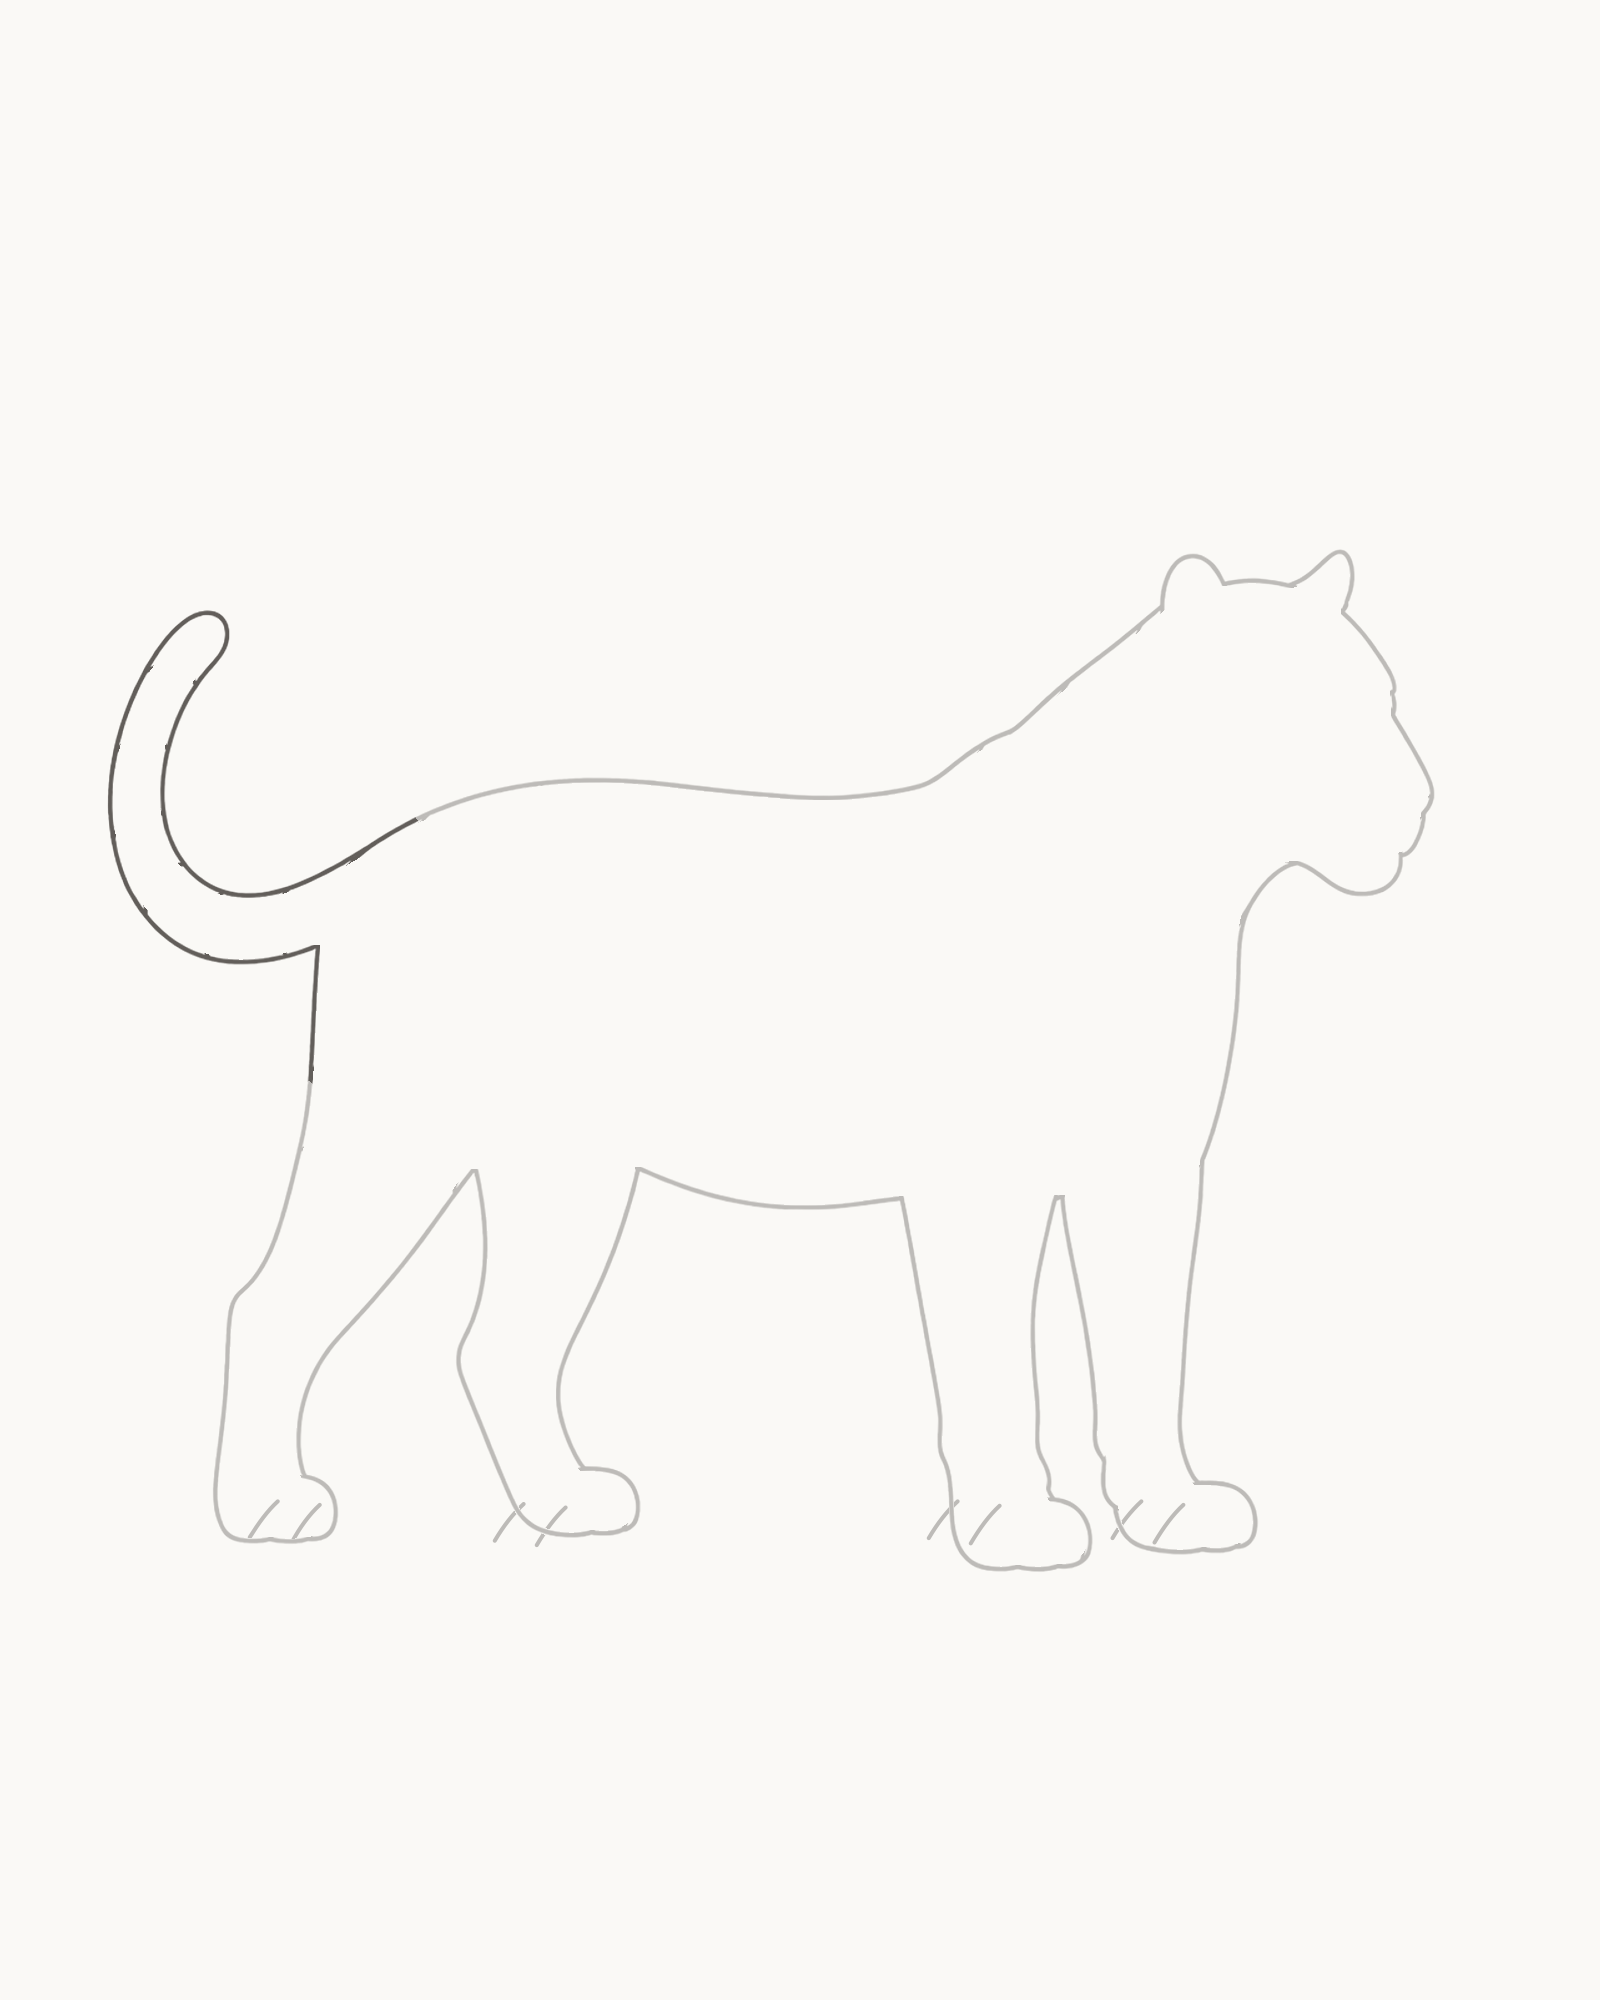
Stage 5 of 8. Two unequal curves join the fixed rump endpoints to one rounded, raised tip. - Upper tail root
- Sweep to one tip
- Lower return curve
- Lower tail root
Start at the upper tail-root endpoint on the rump. Sweep left and gently upward to the rounded tip near x8% / y28%. Return from that same tip with a different curve, narrowing the tail gradually until it meets the lower root endpoint.
The two lines should join the rump cleanly and meet only once at the tip. Avoid parallel sides, a bulb at the base or a perfectly geometric hook. The unequal inner and outer curves make the raised tail feel relaxed.
Look for this before moving on: both tail roots attach without a gap or doubled collar, the tail becomes narrower towards one tip, the tip and left curve clear the frame, and the silhouette is now complete.
If it goes wrong: preserve the torso endpoints and the better tail edge. Replace only the newest curve between one root and the existing tip. Do not move the rump, thicken the base or add a knot to force the lines together.
6. Set the face and calm direction
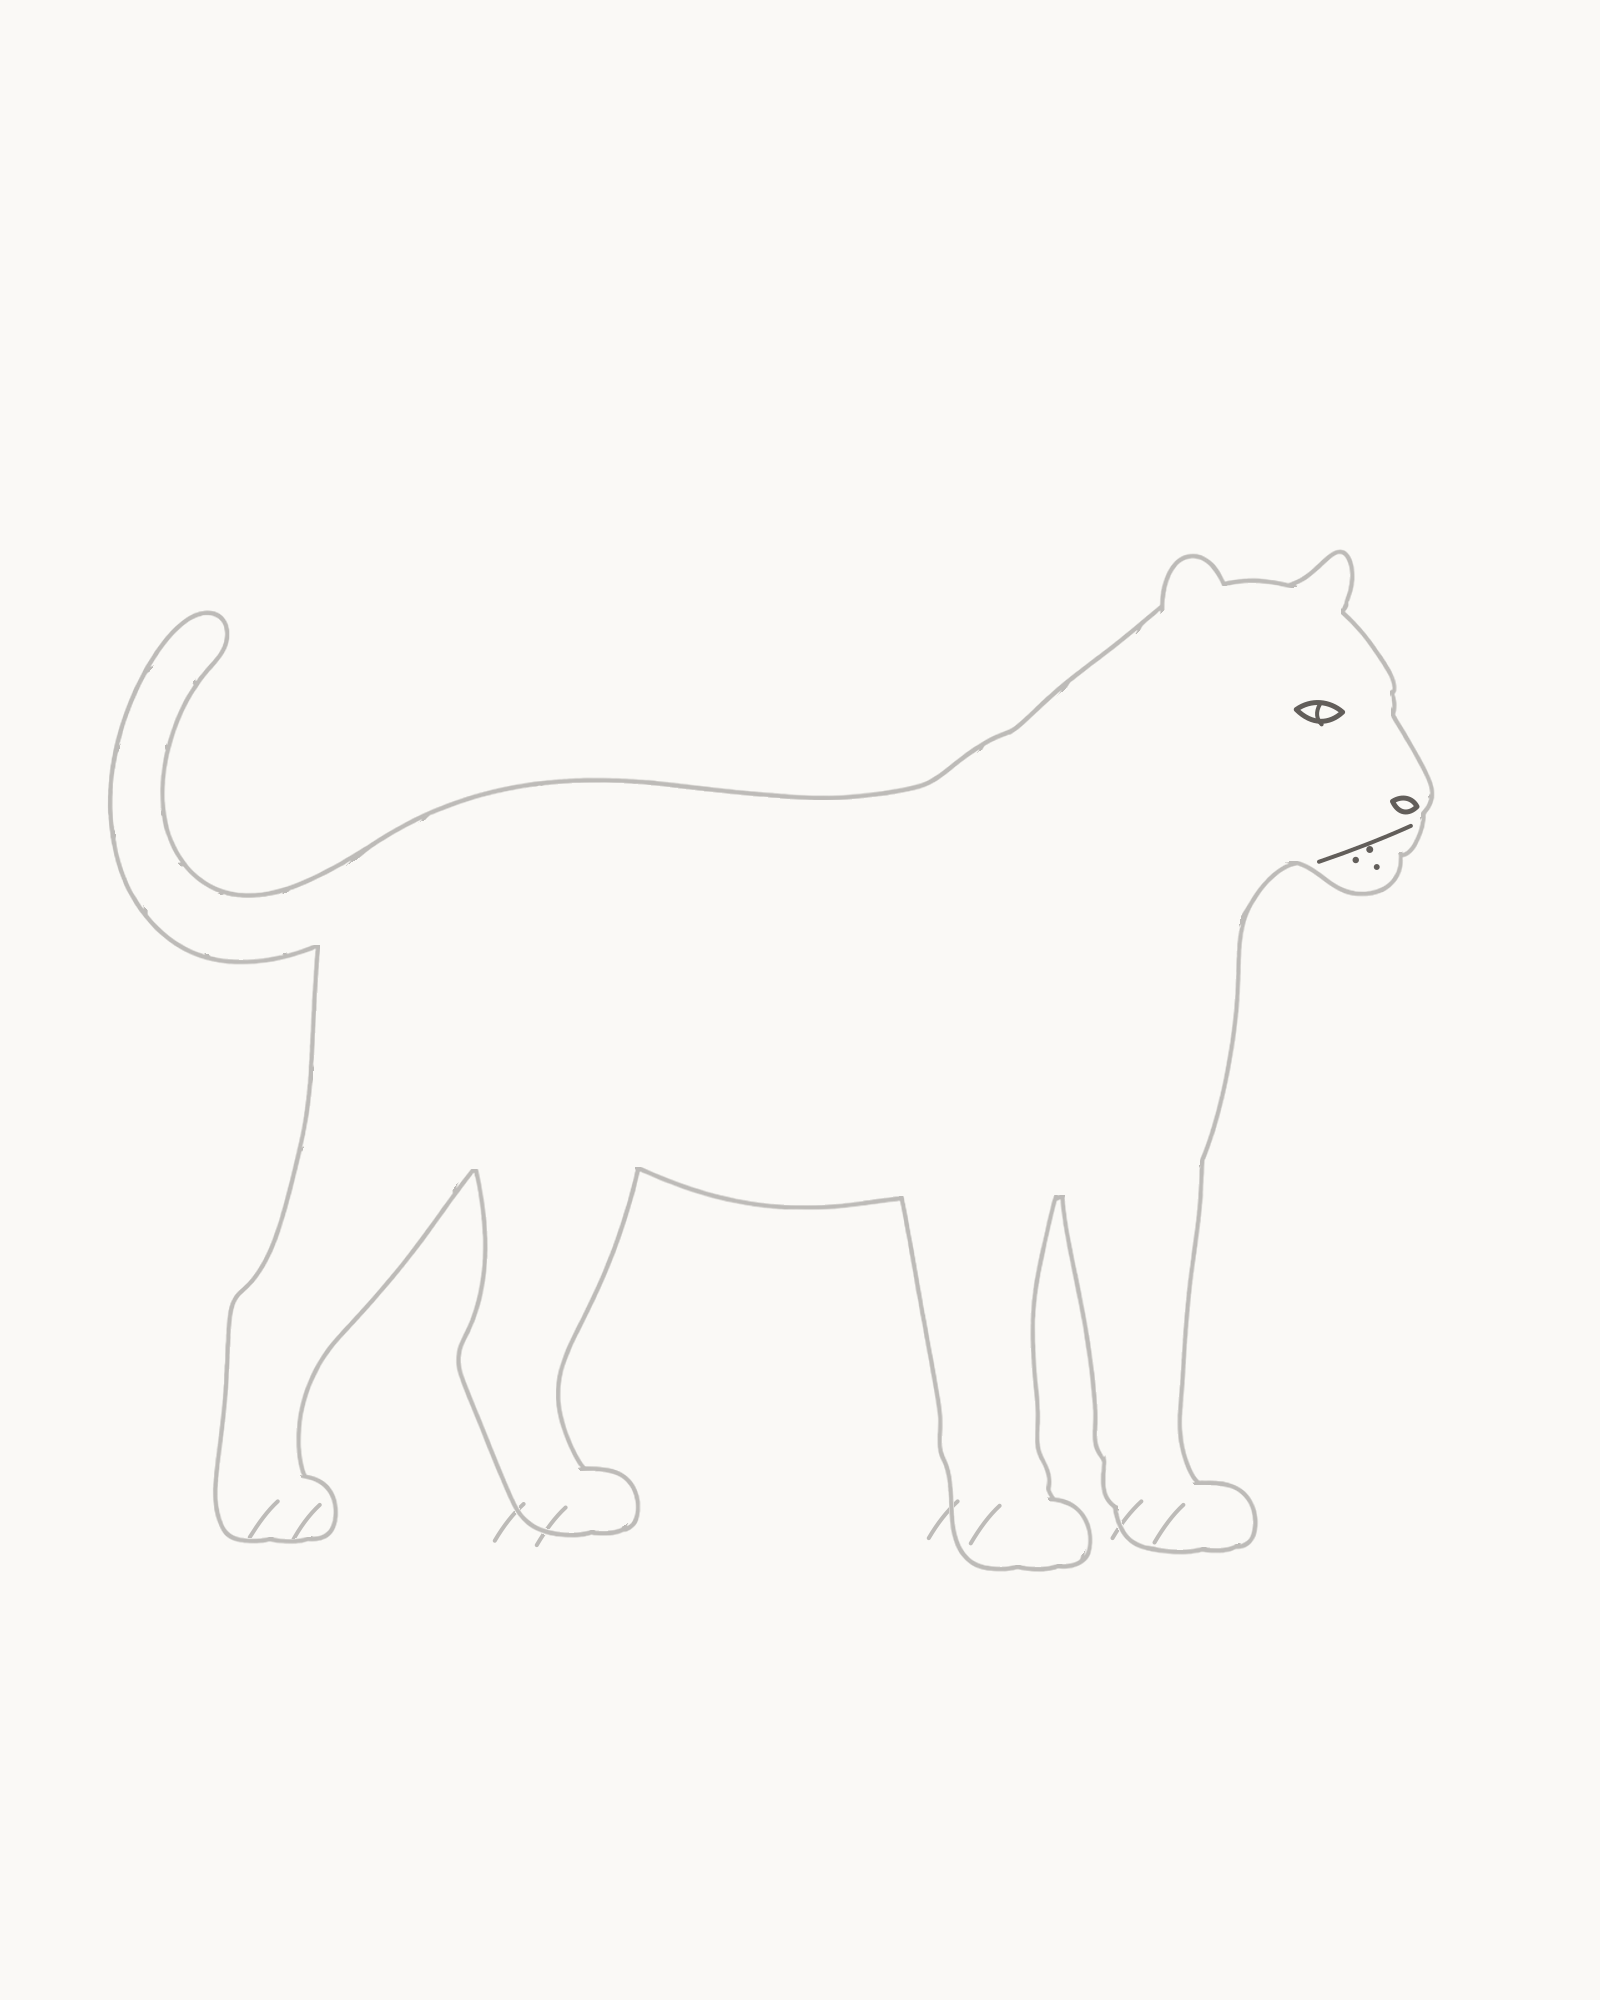
Stage 6 of 8. Four restrained facial details establish the right-facing, calm expression. - One near eye
- Small nose
- Short mouth
- Three dots
Place one small almond-shaped near eye above the head's midpoint. Add the compact nose at the end of the muzzle, then a short closed mouth seam beneath it. Finish with three sparse whisker-root dots on the cheek.
There is no far eye in this almost-profile view. Keep the visible eye and nose subordinate to the head shape. A short mouth is enough to establish the calm expression; teeth, an open jaw or long whisker lines would change the promised result.
Look for this before moving on: one small eye directs the head to the right, the nose and mouth fit comfortably inside the muzzle, the mouth stays closed and neutral, and the three dots remain separate rather than becoming surface texture.
If it goes wrong: do not reshape or retrace the head. Remove only the newest oversized eye, misplaced nose, smiling mouth or crowded dot, then replace it smaller using the brow, muzzle and jaw as nearby landmarks.
7. Add fourteen head-and-torso stripes
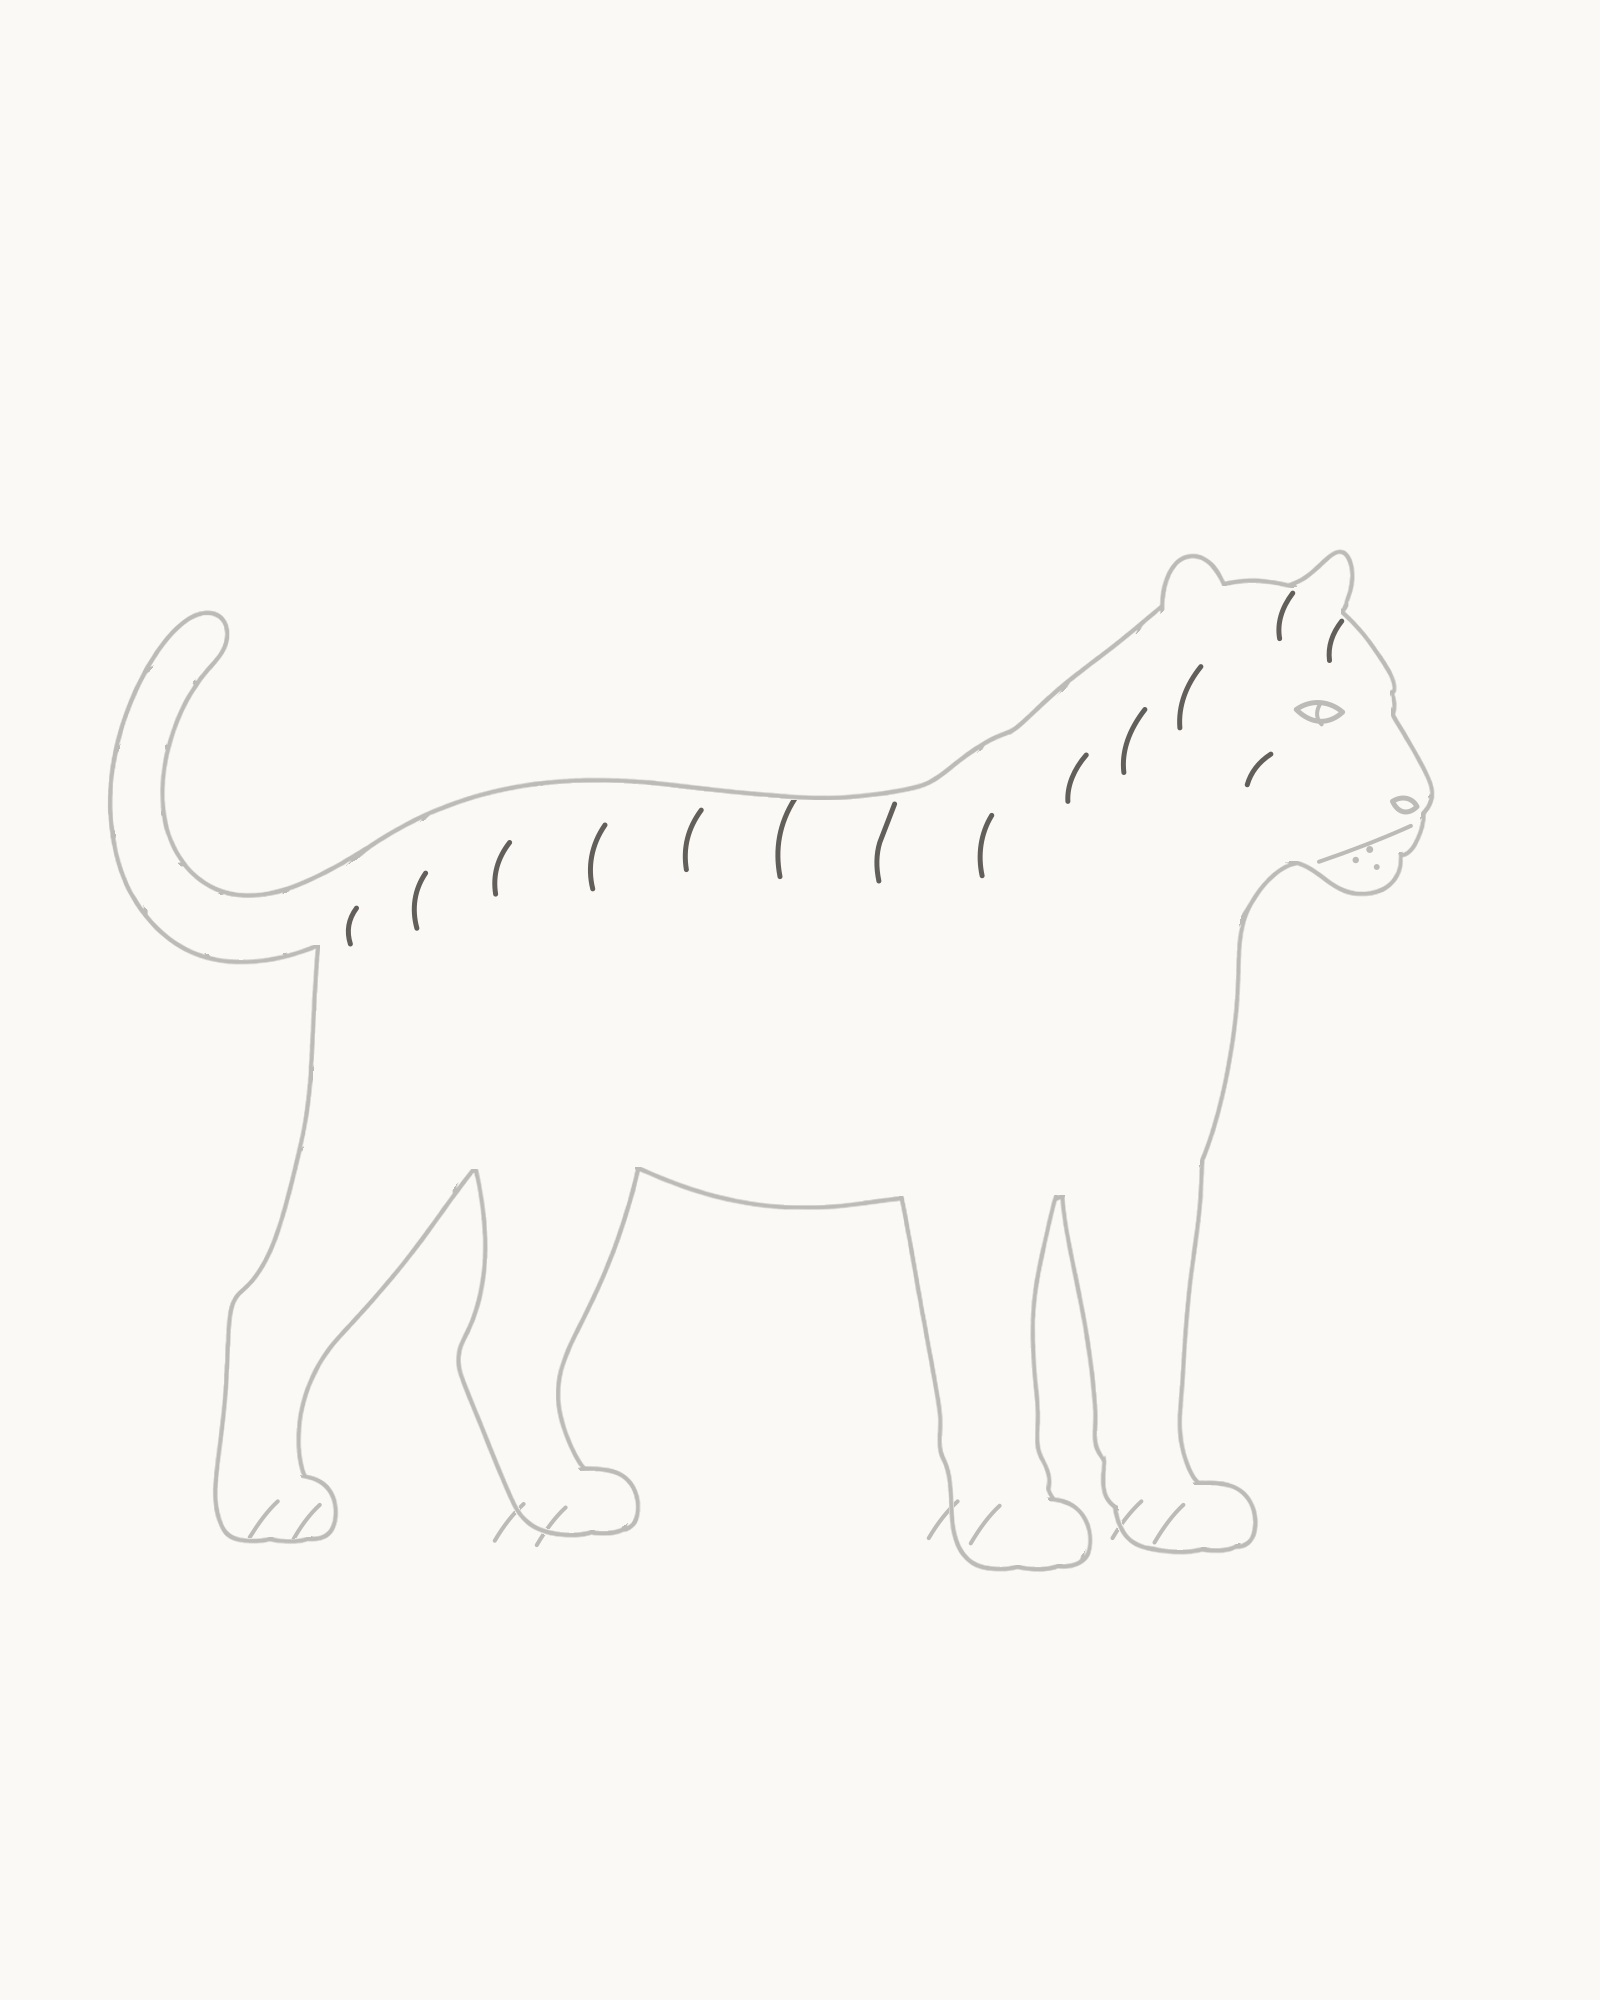
Stage 7 of 8. Four counted groups turn with the form while every attachment remains exposed. - 3 head stripes
- 3 neck and shoulder stripes
- 5 torso stripes
- 3 hindquarter stripes
Add exactly fourteen open stripe marks in four groups: three on the head and cheek, three down the neck and shoulder, five across the torso, and three turning around the hindquarter. Place one group at a time so you can compare the changing direction with the nearby form.
Vary the curves, lengths, angles and spaces. The head marks are shorter; the shoulder marks turn more steeply; the torso marks open out; the last three rotate towards the rump. Each stripe is an unfilled line with open paper around it. None touches the eye, ear, mouth, body outline or a leg attachment.
Look for this before moving on: fourteen marks are individually countable, the 3 + 3 + 5 + 3 grouping follows the head-to-rump flow, no two form a stamped chevron or barcode rhythm, and every earlier junction remains exposed.
If it goes wrong: keep the successful stripes and all established anatomy. Remove only the newest mark that is too long, repeated or close to an edge, then replace it with a different curve that follows its local part of the body. Never use a stripe to hide a weak join.
8. Continue twelve stripes over the legs and tail
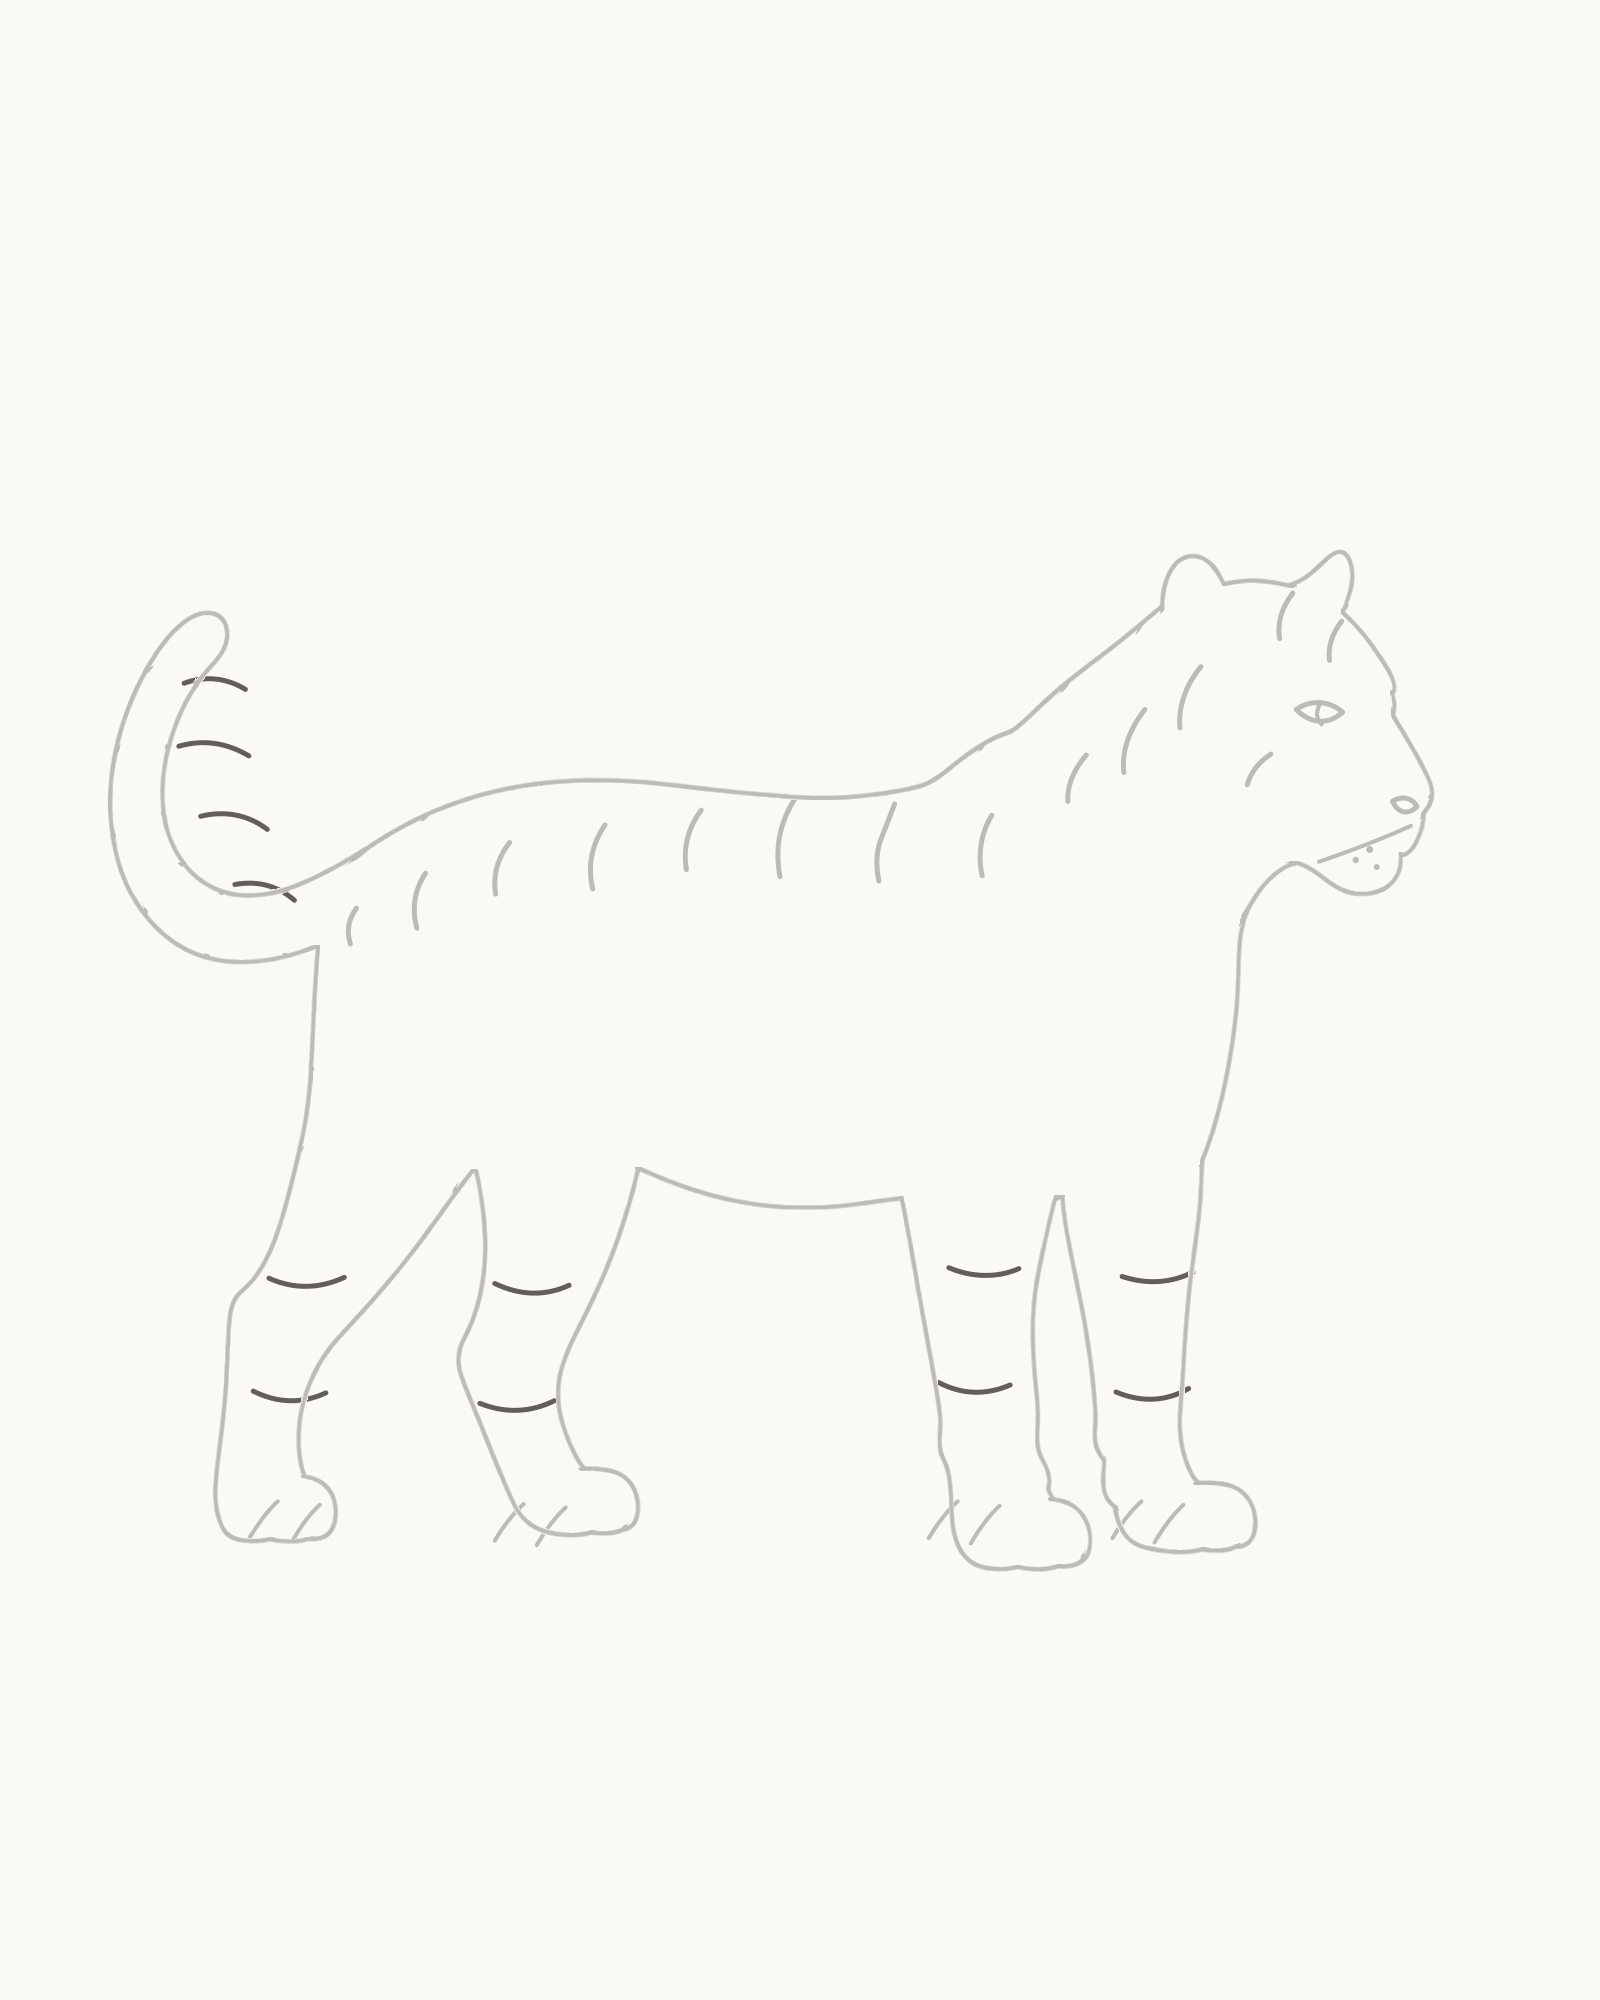
Stage 8 of 8. Twelve final open marks complete the pattern without adding fill or shading. - Two marks on each leg = 8
- Four partial tail rings = 4
- Keep every mark open
Finish with exactly twelve more open marks. Put two curved bands on each of the four legs, making eight. Then add four unequal partial rings to the tail, shortening and tightening them as they approach the tip.
Treat every band as belonging to one appendage. A leg stripe turns around that leg alone and stops before either edge; it does not bridge to the neighbouring support. The tail rings change with the taper. These twelve lines complete the pattern, but they do not add shading, fill or a second finish.
Look for this before moving on: there are two new marks per leg and four on the tail, all twelve remain open, the four legs and their paws are still individually readable, the tail bands reduce towards the tip, and no Stage 1–7 line has changed.
If it goes wrong: replace only the newest band that touches an outline, joins two legs or repeats its neighbour too closely. Keep it shorter and turn it around the local axis. If an older attachment still feels uncertain, leave it visible and address that construction on the next attempt rather than covering it with pattern.


Fix small construction problems
The tiger looks like a cub. Check the head against the long torso. A low wedge, restrained ear size and body length around twice the head length will feel more adult than a round face and short barrel body. Correct only the newest proportion interval.
The back looks flat or the waist pinches. Let the shoulder sit fractionally higher than the rump and keep the chest full. Replace the newest torso interval with a gentle change of height; do not add shading to suggest missing mass.
A leg seems pasted on. Trace it to the two endpoints it was meant to bridge. Rebuild only that new support so both sides meet their assigned body opening cleanly.
The four legs merge together. Compare the paw positions first: far hind, near hind, far fore, near fore should be offset from left to right. Change only the newest far-leg line that creates the tangent.
A paw looks like a hoof. Broaden the newest paw, soften its outside turn and use only two short toe notches. Keep the bottom on the same invisible floor as the other paws.
The tail looks stuck on. Check both root joins and the shared tip. Redraw only the newer tail contour so it narrows continuously between those fixed points; avoid adding a collar at the rump.
The face looks too cute or fierce. Reduce the newest feature. One small near eye, a compact nose and a short closed seam are sufficient; do not add the hidden eye, smile, teeth or heavy brow.
The stripes look mechanical. Remove only the latest repeated mark. Change its length, curvature or spacing, and make sure its direction belongs to the head, ribs, leg or tail beneath it.
Practise a lower tail pose
On a second sheet, repeat Stages 1–6 at half size while keeping the same head, torso and four-leg order. Change only the tail: let its tip settle lower and farther left while preserving two clean root joins and a continuous taper. Add the stripe stages only after the new silhouette reads clearly. This small variation tests whether you can change one gesture without losing the tiger's attachments.
For another four-legged construction, try How to Draw a Horse. How to Draw a Snake offers a simpler exercise in connected contours, while the complete practical collection is available from How to Draw.
Frequently Asked Questions
What is the easiest way to start drawing a tiger?
Place the permanent head first, leaving two open neck endpoints, then use those endpoints to extend the long upper body contour. Starting with the overall direction and adult proportion prevents the eye or stripes from making the head too large.
What basic shapes should I use for a tiger drawing?
This lesson uses retained contours rather than circles and boxes that disappear later. Think in simple relationships instead: a low head wedge, a long shoulder-to-rump arc, short underside intervals with planned gaps, two near supports, two offset far supports and one tapering tail.
How do I make a tiger look adult instead of like a cub?
Keep the head much smaller than the torso, make the neck and shoulder substantial, lengthen the body and use broad weight-bearing paws. Avoid a circular face, oversized paired eyes and a short rounded body.
How can I draw four tiger legs without confusing them?
Finish the two near supports first: the bent hind leg and the rightmost, steadier foreleg. Add the other two from visible interior attachments and offset their paws to the left. Trace each leg from its origin to its own paw before continuing.
Should tiger stripes all point in the same direction?
No. Their direction should change with the form beneath them. Head marks stay compact, shoulder marks turn more steeply, torso marks spread through the ribs, leg bands wrap individual supports and tail rings tighten towards the tip.
Do I need to fill tiger stripes with black pencil?
No. The stripes in this beginner result are open line marks. Leaving them unfilled keeps the body and attachments visible and prevents pattern from becoming shading.
Is a grid required for this tiger lesson?
No. The optional grid and percentage anchors help judge the first head placement, but they stay outside the drawing. You can instead compare the muzzle and neck openings with the paper edges.
Should I erase construction shapes or trace a darker outline at the end?
Neither is part of this sequence. Every displayed mark is intended to remain. Use the eraser only on the newest local error, and keep the final contour at its existing restrained weight rather than retracing the whole tiger.
References
- Animal Diversity Web, Panthera tigris. View source
- Smithsonian's National Zoo, Tiger. View source
- San Diego Zoo, Tiger. View source
More DRAWING Guides

How to Draw a Rose: A Step by Step Guide

How to Draw a Tree: A Step by Step Guide

How to Draw Eyes: A Step by Step Guide

How to Draw Leaves: A Step by Step Guide

How to Draw Autumn Leaves: A Step by Step Guide

How to Draw Flowers: A Step by Step Guide

How to Draw a Lily: A Step by Step Guide

How to Draw a Sunflower: A Step by Step Guide

How to Draw a Tulip: A Step by Step Guide

How to Draw a Hibiscus: A Step by Step Guide

How to Draw a Daisy: A Step by Step Guide
