 by Tom Gurney
Tom Gurney BSc (Hons) is an art history expert with over 20 years experience
Page created on September 3, 2026 / Page updated on September 13, 2026
Email: tomgurney1@gmail.com / Phone: +44 7429 011000
How Head, Ferrule, Crimp and Handle Work as One Tool
A paintbrush is a small assembled system. The working head must carry and release paint; a ferrule must hold that head and connect it to a handle; the handle must balance and transmit movement. Care succeeds when it protects all three. Cleaning only the visible tip while paint hardens at the heel, or leaving the wooden handle submerged while the head rinses, can shorten a brush’s useful life.
Types of Paint Brushes maps round, flat, filbert and other head shapes. This guide examines the parts shared across those shapes, the properties they create and a binder-aware care routine.
At a Glance
- Headtoe, belly and heel describe zones of the fibre bundle, not separate components.
- Ferrule and crimpsecure the bundle and connect it to the handle through a specific construction.
- Handlelength, balance, finish and markings affect use and identification.
- Cleaningmust follow the actual binder and current label rather than one universal solvent rule.
- Diagnosissplaying, heel buildup, loose fibres and movement at the ferrule point to different failures.
Contents
- How Head, Ferrule, Crimp and Handle Work as One Tool
- Head, toe, belly and heel
- Ferrule, crimp and setting
- Handle, balance and identification
- Match cleaning to the binder
- A controlled cleaning sequence
- Solvent and oily-rag safety
- Diagnose wear before replacing
- From loose fibre to finished head
- Filament profile and bundle architecture
- A failure map for diagnosis
- Care records improve repeatability
- Art Materials reference pages
- Watch Paintbrush Anatomy, Construction and Care in Practice
Head, toe, belly and heel
The head or tuft is the bundle of natural hair, bristle, synthetic filament or blend that contacts paint. Trade anatomy divides it into functional zones. The toe is the working end or point; the belly is the fuller central region that may carry liquid; the heel is where the bundle enters the ferrule.[1][2] These zones are not separately attached components, and their boundaries are descriptive rather than standard measurements.
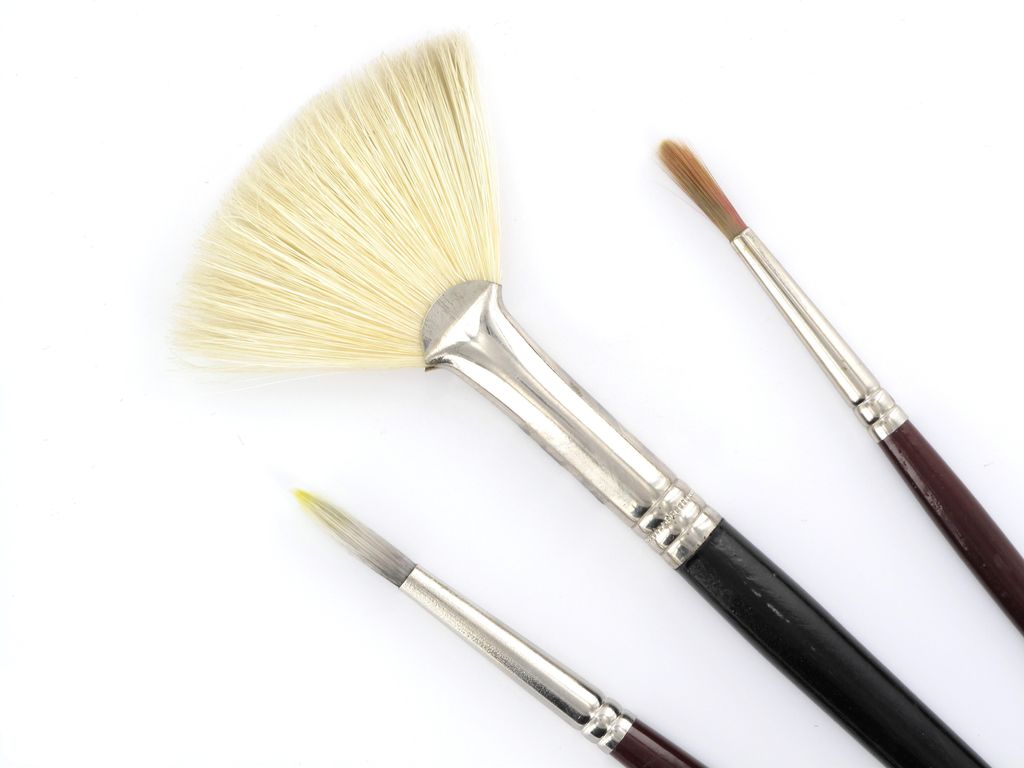
Comparing head profiles makes the anatomy functional: toe, belly and heel change position and behaviour as a fan, flat or pointed bundle is loaded and pressed. Photograph by Creative Tools via Wikimedia Commons, CC BY 2.0; resized without cropping.
Filament diameter, taper, surface, length and mixture affect softness, spring, liquid capacity and release. A bundle assembled from more than one filament thickness can combine carrying capacity with resilience, as current manufacturer specifications demonstrate.[3] Natural origin or synthetic status does not alone determine performance; construction and intended paint system remain necessary information.
Ferrule, crimp and setting
The ferrule is the collar around the heel of the head and the front of the handle. Artist-brush ferrules may be round or flattened to establish head geometry, and manufacturers specify materials such as nickel-plated brass or stainless steel.[3] Inside, the bundle is set and secured; exact adhesives and methods vary.
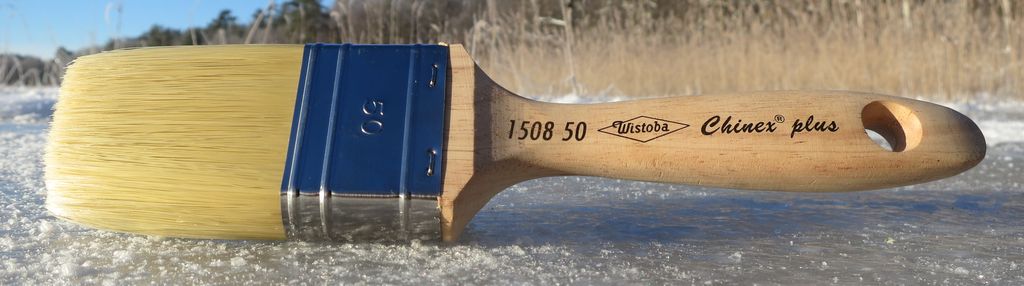
A wide professional brush makes the ferrule’s mechanical role clear: it encloses the set bundle and connects it to the handle. Photograph by R. Henrik Nilsson via Wikimedia Commons, CC BY 4.0; resized without cropping.
The crimp is the compressed area that mechanically grips the handle. A loose ferrule causes wobble and destroys precise feedback even if the head remains intact. Corrosion, swelling wood, failed coating or prolonged liquid exposure can compromise this joint. Do not squeeze, bend or attempt to reglue a valuable brush without understanding its construction.
Paint accumulating inside the heel pushes filaments apart and prevents a round from returning to a point or a flat from forming a clean edge. During work, keep paint primarily in the working bundle rather than forcing it deep against the ferrule.
Handle, balance and identification
Handles can be wood, coated wood or synthetic material. Length and mass influence working distance and balance but do not dictate a medium: a long handle can support arm’s-length canvas work, while a short handle can suit close work, portable boxes or watercolour. Grip position changes leverage more than the marketing category does.
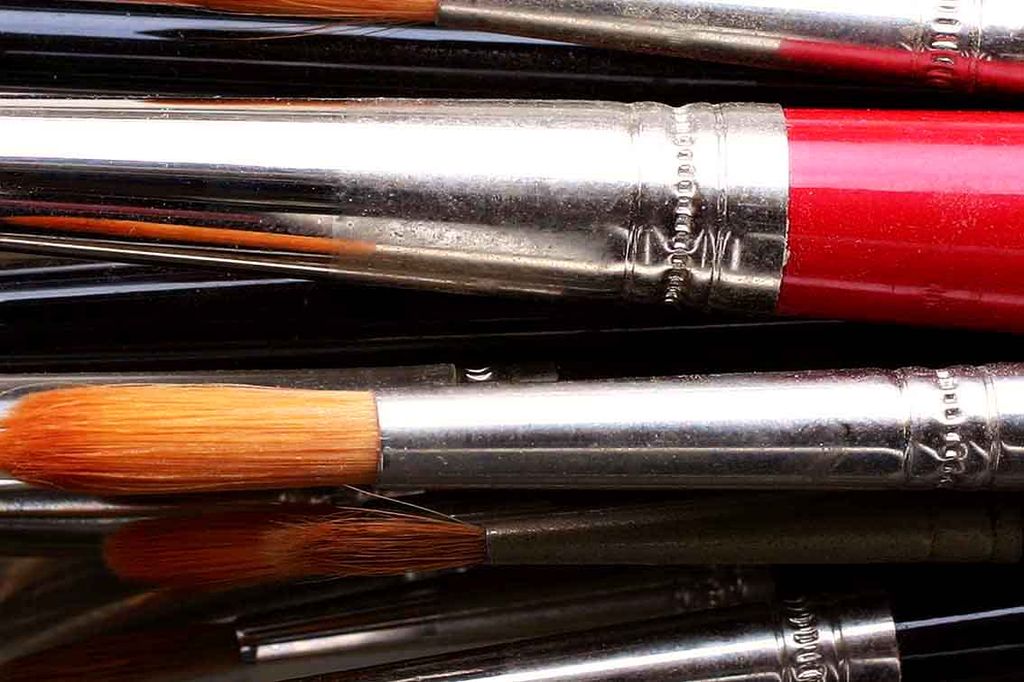
Handles, ferrules and heads can be compared as one tool rather than three isolated parts. Length, finish, balance and printed identification matter alongside head shape. Photograph by Si Griffiths via Wikimedia Commons, CC BY-SA 3.0; resized without cropping.
The handle commonly carries maker, range or series, shape, fibre and size. Numeric brush sizes are not an industry-wide measurement. A number 8 in one series can differ from a number 8 elsewhere. Record measured head width, length and thickness when replacement or repeatable marks matter; current product specifications increasingly provide millimetre bundle width.[3]
Match cleaning to the binder
First remove as much wet paint as practical with the compatible painting process, working from heel toward toe without crushing the head. Then use the cleanup system named by the paint manufacturer. Water-borne watercolour and wet acrylic commonly clean with cool or tepid water and mild soap, but dried acrylic forms a persistent film and should not be allowed to set in the bundle.[4][5]
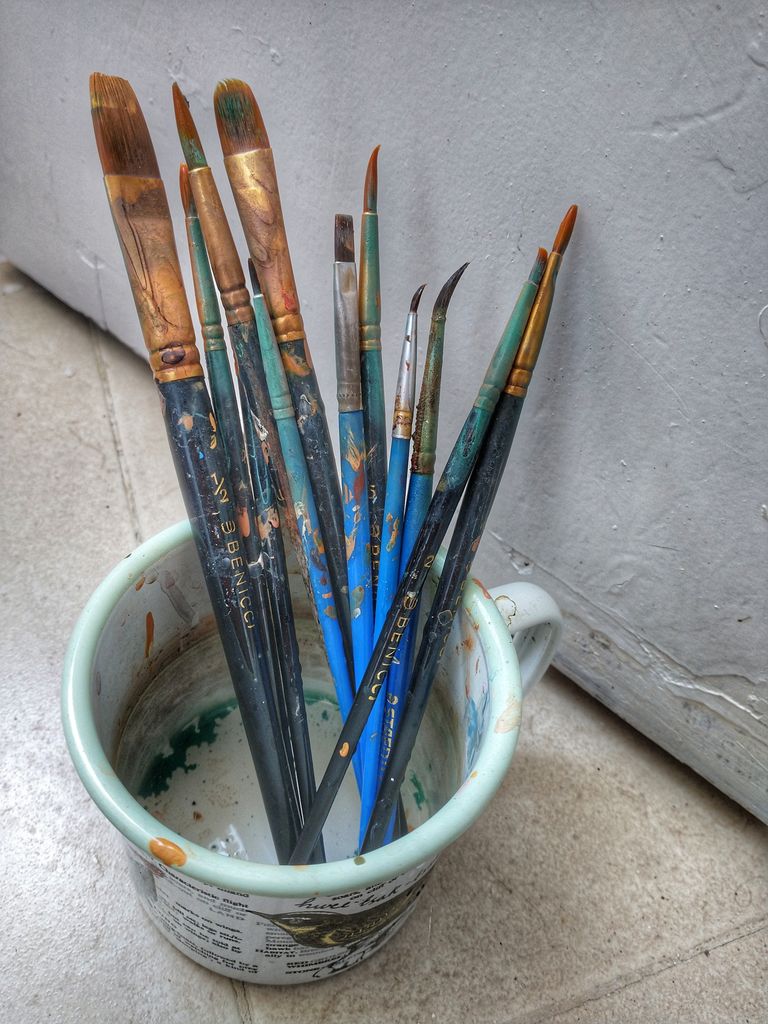
Used brushes show why cleaning must follow the binder and reach the heel without soaking the setting or damaging the ferrule and handle. Photograph by Revital Salomon via Wikimedia Commons, CC BY-SA 4.0; resized without cropping.
Oil, solvent-borne varnish and specialist coatings may require a labelled cleaner. “Solvent” is not one interchangeable substance. Read the product label and safety data sheet, minimise use, provide the required ventilation, prevent skin contact, close containers and follow local waste rules.[6] Never substitute an unverified household chemical or mix cleaners.
Keep cleaning groups separate when residue could be incompatible: watercolour, acrylic, oil, varnish and masking fluid are sensible candidates. Reserve coating brushes for one known material system. Masking fluid and rapidly curing media can ruin a fine brush; use a tool the product maker approves.
A controlled cleaning sequence
- Remove excess material gently before it dries, following the paint label.
- Rinse or clean through the head without stabbing it against a jar bottom or pulling filaments.
- Work compatible mild soap or named cleaner through the belly and heel; repeat until residue is removed.
- Rinse fully. A colour stain can remain without indicating active paint residue.[4][5]
- Press out moisture without twisting, reform the original point or edge and wipe the ferrule and handle.
- Dry with air around the head. Follow the brush maker’s orientation guidance; horizontal drying or head-up drying after thorough wiping are both specified by current makers, so no single posture is universal.
- Store only when completely dry, with the head protected from crushing and enough ventilation for the material.
Do not leave a brush resting on its head in liquid. Avoid soaking above the ferrule: manufacturer guidance warns that liquid can swell and crack a wooden handle.[4] Do not use hot water unless the maker specifies it; heat can alter natural hair, coatings and adhesive.
Solvent and oily-rag safety
Cleanup can be the highest-risk part of a painting session. UK Health and Safety Executive guidance advises checking labels and safety data sheets, considering solvent-free alternatives, controlling vapour through ventilation, avoiding skin cleaning with solvent and not leaving contaminated rags around.[6]
Rags carrying drying oils or solvents are a fire and exposure issue, not ordinary studio litter. Place and dispose of them through the container and local hazardous-waste method required by the product label and local authority. Keep ignition sources away. Do not pour waste solvent into a sink or return dirty cleaner to a product container.
Diagnose wear before replacing
Splaying can come from dried material at the heel, broken or bent filaments, a failed setting or normal wear. A stained head may still perform perfectly. A cracked handle finish is different from a loose ferrule; a blunt toe is different from lost spring. Clean, dry and test a simple stroke before diagnosing failure.
Retire a tool from precision work when it can no longer make its intended edge, but consider relabelling it for texture, grounds or adhesive work if compatible. Keep a record of series and measured dimensions. The most economical brush is not necessarily the cheapest or most prestigious one: it is a known construction kept in a compatible material system and cleaned before residue becomes structural damage.
From loose fibre to finished head
A traditional fine-artist brush may begin with hairs aligned by tapping them into a shaped cup. The bundle is gathered and tied while its working profile is formed, then fitted into a ferrule, bonded and attached to the handle.[7] Industrial processes can weigh, mix, tip, flag or trim synthetic filaments and assemble bundles by machine. Neither route is a complete quality guarantee; alignment, fill, setting and final inspection still determine the usable tool.
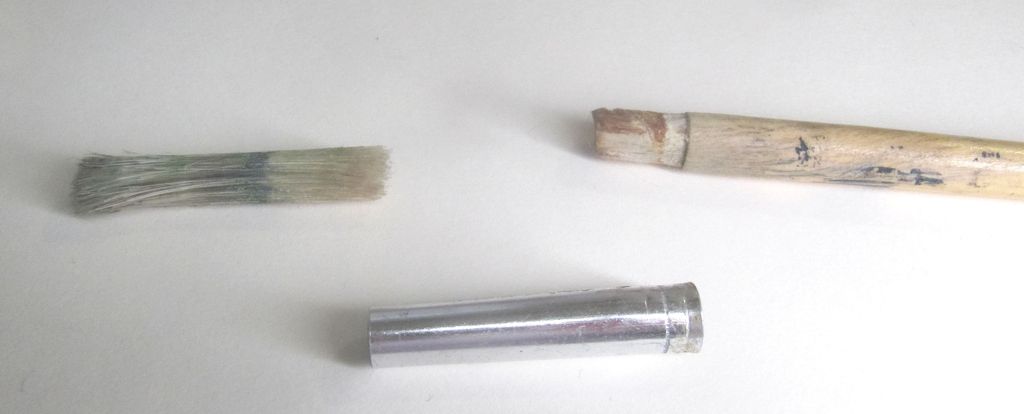
A disassembled brush exposes the construction normally hidden by the ferrule: handle, metal sleeve and set fibre bundle must remain mechanically secure as one tool. Image by Popolon via Wikimedia Commons, CC BY-SA 3.0; resized without cropping.
The part hidden inside the ferrule matters. Filaments extend beyond the visible heel and are locked by adhesive or another setting system. If the internal fill is uneven, the point can divide. If adhesive migrates too far into the working length, the belly becomes artificially stiff. If the bundle is set too shallowly, retention and useful wear length may suffer. These are construction variables, not defects that can be diagnosed from animal-versus-synthetic labels alone.
Brush-industry terminology distinguishes tipping, tapering, flagging, filling, trimming and tuft retention.[8] Those operations alter different things. Tipping shapes a working end; tapering changes length or diameter progression; flagging divides ends; fill describes how much fibre occupies the head; retention measures resistance to pull-out. Artist catalogues do not report all of them, so a careful stroke test remains necessary.
Filament profile and bundle architecture
A cylindrical filament has a near-constant diameter; a tapered one narrows toward its end. Manufacturers may mix diameters, tapers and lengths to combine a point with a reservoir. Crimped or textured synthetic filaments can create space within a bundle, while smooth filaments may release differently. Natural hairs and bristles have their own scales, tapers, curves and split ends, with variation within a species and grade.
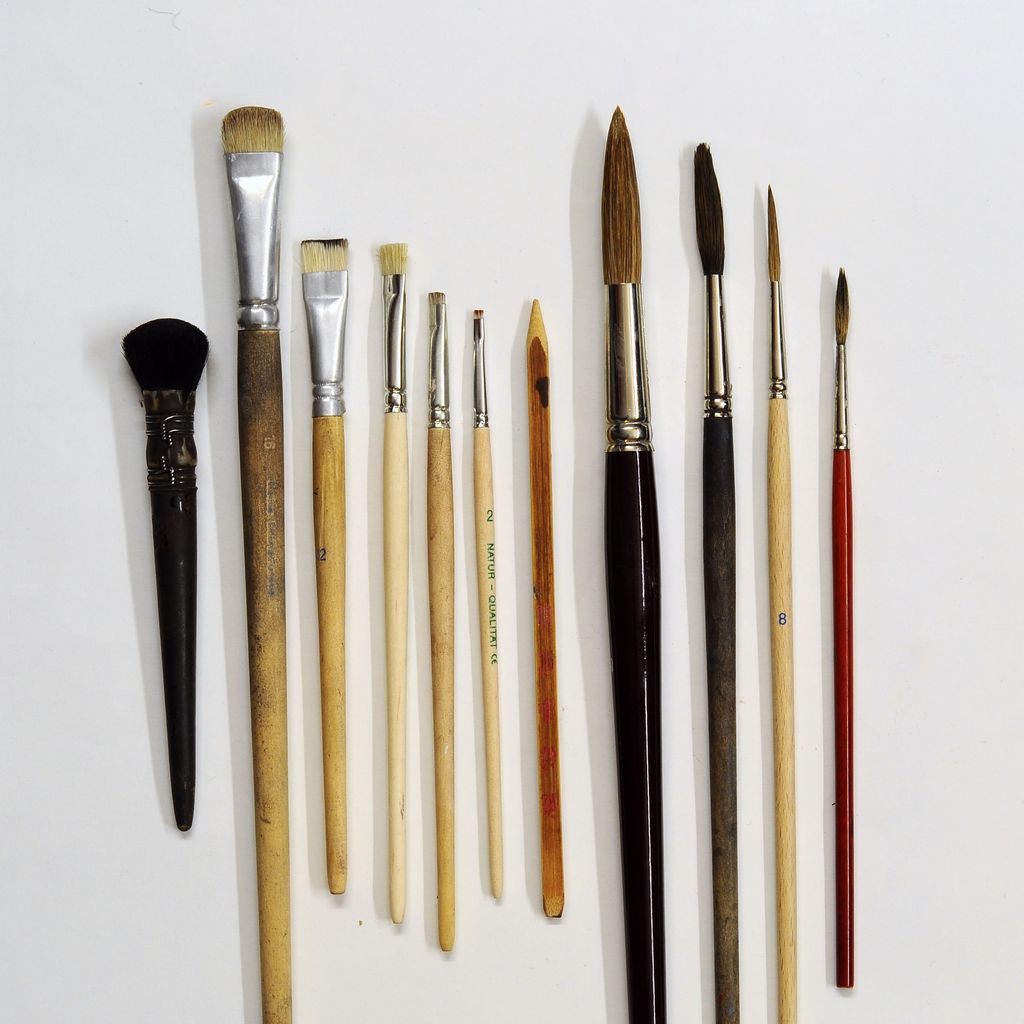
Bundle architecture distributes fibre across pointed, rounded, flat, angled and fan profiles. Cross-section, length, density and spring all contribute to the mark. Photograph by Hans Bernhard (Schnobby) via Wikimedia Commons, CC BY-SA 3.0; resized without cropping.
Capacity is not simply absorption into each filament. Liquid also occupies capillary spaces between fibres. Bundle density, alignment, taper, surface energy and paint viscosity all influence how much is held and how it releases. A large belly can store a wash but can also discharge abruptly if pressure collapses the spaces.
Spring and snap are often used loosely. It is clearer to record what happens: how far the head bends under a repeatable stroke, whether it returns to centre, whether the point reforms after a wash, and whether the edge remains coherent when loaded. Those observations can be compared without pretending they are calibrated industry grades.
A failure map for diagnosis
- Persistent splay: check for dried binder at the heel, bent filaments, a divided internal bundle or excessive mechanical pressure.
- Intermittent shedding: distinguish a few loose manufacturing remnants from continuing pull-out that may indicate setting failure.
- Ferrule wobble: inspect the crimp, handle swelling, cracked coating and corrosion; movement at this joint cannot be corrected by reshaping the head.
- Hooked or curled toe: consider storage pressure, prolonged immersion, heat and the filament’s material response.
- Loss of spring: compare the clean, dry brush with its original role; residue and mechanical fatigue can look similar while wet.
- Handle or lacquer cracks: stop soaking the joint and keep exposed wood clean and dry; damage near the ferrule can admit more liquid.
Do not pull repeatedly on individual hairs as a routine test, force solvent into the handle joint or heat a brush to straighten it. A low-risk diagnosis begins with compatible cleaning, complete drying, visual inspection and a simple stroke on a sacrificial surface.
Care records improve repeatability
For a brush whose mark matters, record date, maker and series, measured head dimensions, paint system, cleaner, drying method and observed change. A quick outline or photograph of the wet and dry profile can reveal gradual wear better than memory. If one head is reassigned from watercolour to masking fluid or from image paint to grounds, label that change so residue does not return to precision work.
Care is therefore not only preservation. It is part of material documentation: it links a visible mark to a known tool condition and prevents a maintenance change from being mistaken for a change in paint.
Watch: Ferrule, Fibre and Brush Care
Look at the ferrule’s structural role, compare fibre types, and see how cleaning affects the complete brush assembly.
How the Humble Ferrule Influenced Art History
See how the metal ferrule changed brush manufacture, shape and the marks artists could make.
Watch on YouTubeFrequently Asked Questions
A typical artist brush combines a shaped fibre or hair head, ferrule or other setting system, crimp or attachment and handle.
They are descriptive zones of the same fibre bundle: the working tip, fuller central capacity and area nearest the ferrule.
Insufficient rinsing can leave binder and pigment near the ferrule, gradually spreading or stiffening the head.
No. Cleaning must match the binder and current product label; many water-based paints use water and suitable soap, while solvent systems require specific ventilation, storage and waste controls.
First diagnose the failure. Persistent splaying, broken fibres, loose setting, damaged ferrule or degraded handle may justify replacement, while correct cleaning or reshaping may resolve minor buildup.
Discussion
Which visible symptom most clearly distinguishes fibre wear from heel buildup or a loose ferrule?
Reader Insights
Head shape alone does not explain capacity, spring, balance or durability.
Use the current label and avoid driving residue into the heel.
A short care log can reveal whether material, handling or construction caused the problem.
Join the Conversation
Share one precise observation or a useful museum example below.
References
- Jackson’s Art. A Guide to Brushes.
- Canson. Selecting paintbrushes for painting with acrylics.
- Royal Talens. Van Gogh Watercolour Brush Series 191.
- Liquitex. Professional Brush — Bright: care FAQ.
- Winsor & Newton. How to care for your watercolour brushes.
- Health and Safety Executive. Solvents.
- da Vinci Künstlerpinselfabrik. Production of Artist Brushes.
- American Brush Manufacturers Association. Brush Lingo.